


Part 1: 43 Final Cut Pro Shortcuts You Need to Know
|
List
|
Command
|
Shortcut | Description | UI Icon |
| 1 |
Open Inspector |
Command+4 | The Inspector - for find detailed video and audio information about your media. You can modify various video, audio and effects parameters for your clips. |
|
| 2 |
Open FCP X Preferences |
Command+ , (comma) | The Preferences window is where you can set various editing, playback and effects options. |
N/A |
| 3 | Show or Hide the Project Library | Command+O | The Project Library is where you can view and access all of the projects on your system. |
|
| 4 | Show or Hide the Timeline Index | Shift+Command+2 | The Timeline Index shows you a list of all of the material that you have in your Timeline. By clicking on any particular item within the Timeline Index, you can jump to that location in the sequence. |
|
| 5 | Show or Hide the Keyword Editor | Command+k | The Keyword Editor for access and add keywords for your clips. |
|
| 6 | Open the Command Editor | Command+Option+k | The Command Editor for customize your keyboard shortcuts and search for FCP X editing commands. |
N/A |
| 7 | Show or Hide the Background Tasks window | Command+9 | The Background Tasks window is where you can check the status of background renders, imports, analyses, transcodes, etc. |
|
| 8 | Show or Hide the Audio Meters | Command+Shift+8 | The Audio Meters allow you to check the db level of your audio for clips in the Timeline or Event Browser. |
N/A |
| 9 |
Show or Hide the Color Board |
Command+6 | The Color Board allows you to manipulate the color, saturation and exposure of your clips. |
N/A |
| 10 | Show or Hide Audio Animation | Control+A | Shows or Hides Audio Animation for selected clip to allow you to keyframe audio. |
N/A |
| 11 | Show or Hide Video Animation | Control+A | Shows or Hides Video Animation for selected clip to allow you to keyframe video effects. |
N/A |
| 12 | Zoom to Fit Zoom In Zoom Out |
Shift+Z Command + Command - |
Zoom to Fit will auto-fit your entire sequence in the Timeline view. Zooming In and Out will incrementally increase or decrease the zoom factor. |
N/A |
| 13 |
Go to Event Browser |
Command+1 Command+2 Command+3 |
For activate the three main windows in FCP X — the Event Browser, the Timeline and the Viewer. |
N/A |
| 14 | Go fwd 1 frame Go back 1 frame Go fwd 10 frames Go back 10 frames |
Right Arrow Left Arrow Shift+Left Arrow Shift+Right Arrow |
Mooving the arrow. |
N/A |
| 15 | Nudge Left Nudge Right Nudge Left 10 frames Nudge Right 10 frames Nudge Up Nudge Down |
, (comma) . (period) Shift+, (comma) Shift+. (period) Option+Up Arrow Option+Down Arrow |
Nudge. |
N/A |
| 16 | Go to next edit Go to previous edit Go to next marker Go to prev. marker |
‘ (apostrophe) ; (semicolon) Control+’ Control+; |
Go to next and previous edit or marker. |
N/A |
| 17 | Play Forward Pause Play Reverse |
J K L |
Press J once to go backwards in real time. Press J again to go 2x speed (backwards), again to go 3x speed, and so on. Press L once to go forwards in real time. Press Lagain to go 2x speed (forwards), again to go 3x speed, and so on. Press K andL together to move backwards in slow motion. Press K andJ together to move forwards in slow motion. |
N/A |
| 18 | Play selection | / (slash) | Plays the selected portion of the clip or timeline. |
N/A |
| 19 | Turn on/off video and audio skimming | S | Turning off video and audio skimming makes the playhead behave like previous versions of FCP, where the playhead did not skim over the footage without clicking the mouse. |
|
| 20 | Turn on/off audio skimming | Shift+S | Turning off audio skimming allows the playhead to navigate through the Timeline soundlessly. |
|
| 21 | Enable/disable snapping | N | Disabling snapping will prevent the playhead from snapping to edit points in the Timeline. |
|
| 22 | Insert Edit | W | The Insert Edit will insert the selected clip at the location of the skimmer or playhead. |
|
| 23 | Overwrite Edit | D | The Overwrite Edit will overwrite the selected clip at the location of the skimmer or playhead. |
N/A |
| 24 | Append Edit | E | The Append Edit will add the selected clip to the end of the storyline. |
|
| 25 | Connect to Primary Storyline | Q | The Connect to Primary Storyline for connect the selected clip to the primary storyline (above or below) at the location of the skimmer or playhead. |
|
| 26 | Video Only Edit Audio Only Edit |
Option+2 Option+3 |
You can choose whether to edit video only or audio only into the Timeline. |
N/A |
| 27 | Mark IN point Mark OUT point |
I O |
Marking IN and OUT points for set the boundaries of the clips that you edit into the Timeline. |
N/A |
| 28 | Delete (Extract) Replace w/ Gap |
Delete Forward Delete |
The Delete key will extract the selection from the Timeline. The Forward Delete key (Fn+Delete on a laptop) will lift the selection and replace it with a gap clip. |
N/A |
| 29 | Select (Arrow) Tool | A | The Select Tool for grab clips and move them around within the magnetic timeline. |
N/A |
| 30 | Trim Tool | T | The Trim Tool for perform rolls, slip edits and slide edits. |
|
| 31 | Position Mode | P | The Position Tool overrides the magnetic timeline and allows you to grab clips and move them around within gaps. |
|
| 32 | Range Selector | R | The Range Selector for select a range that spans a portion of a clip or multiple clips. |
|
| 33 | Blade Tool | B | The Blade Tool allows you to split a selected clip in half. |
N/A |
| 34 | Mark as Favorite Reject Clip | F Delete |
Selecting a clip and pressing the f key will Favorite it, while pressing Delete will Reject it. |
N/A |
| 35 | Add marker Add marker/modify Delete marker |
M |
Adds a marker at the location of the skimmer or playhead. To edit the marker’s text, press m again, or press Option+m to add and modify. |
N/A |
| 36 | Render selection Render all |
Control+R Shift+Control+R |
Render selection for start rendering tasks for a selection in your Timeline; Render all for all rendering tasks. |
N/A |
| 37 | Break Apart Clip Items | Command+Shift+G | Selecting Break Apart Clip Items breaks a clip into its component parts. |
N/A |
| 38 | New Compound Clip | Option+G | If you lasso several clips and select New Compound Clip, the clips will form one compound clip, which you can modify as one. |
N/A |
| 39 | Add Cross Dissolve | Command+T | Adds a cross dissolve at selected transition. |
N/A |
| 40 | Copy Effects Paste Effects |
Command+Opt+C Command+Opt+V |
Allows you to copy and paste the effect parameters from one clip to another. |
N/A |
| 41 | Match Audio Match Color |
Command+Shift+M Command+Opt+M |
Matches sound and color between clips. |
N/A |
| 42 | Import Media Import Files |
Command+I Command+Shift+I |
The Import Media open the Camera Import window, for capture or import media. The Import Files open the Import Files window, for navigate to the desired files for import. |
|
| 43 | Export Movie | Command+E | The Export Movie exports the selected project as a movie file. |
N/A |


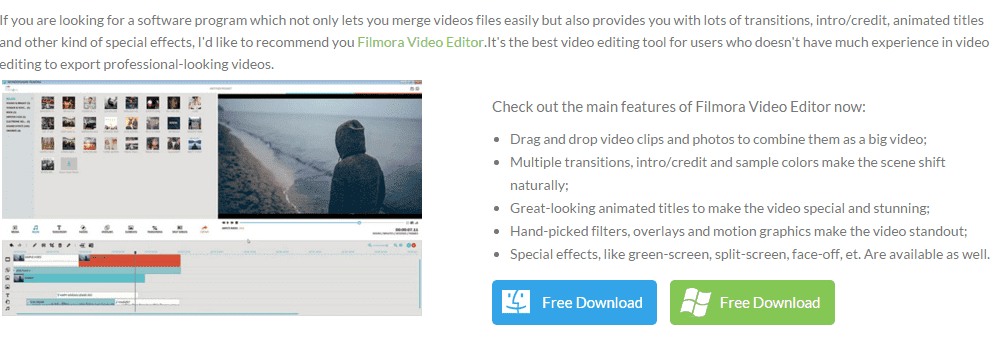
Part 2: Best Alternative to Final Cut Pro - Filmora Video Editor
Product-related questions?
Contact Our Support Team to Get Quick Solution > 


