iPhone
- iPhone Toplists+
- iPhone Tips+
-
- Face ID vs Facial Recognition
- Download Music from iTunes to iPhone 8
- Download Music from iCloud to iPhone 8
- Undo Jailbreak iPhone
- Delete iCloud Backup
- iPhone Messaging
- Software to Get HD Wallpapers
- Forward Voicemail on iPhone
- Black Messages on iPhone
- Delete Photos from iCloud
- Print from iPhone without Airprint
- iPhone Undelete App
- Recover iPad Password
- iPhone Shake to Undo
- iPhone Voicemail to MP3
- Upload Photos to iCloud
- iCloud Backup Full
- iPhone Visual Voicemail
- Best iOS 9 Games
- iPhone Ask for Voicemail Password
- Delete iCloud Account
- Send Voicemail on iPhone
- iPhone Messages Not Sending
- Undo iPhone Update
- Change Voicemail on iPhone
- Undo Passcode on iPhone
- iPad Backup Location
- Leave Voicemail Without Calling
- Voicemail to Text on iPhone
- Backup iTunes Library
- Undo on iPhone
- Access iOS File System
- iPad Email Attachments
- Send SMS from iPad
- iPhone Ringes Before Voicemail
- Seatch Messages on iPhone
- Forgot iCloud Password
- Best 6 Call Forwarding Apps for iPhone

• Filed to: iPhone Recovery • Proven solutions
How to upload photos to iCloud easily and quickly?
People always think iCloud is a iOS tool that allows you to save photos and videos and keep them in sync. Actually after you use iCloud to backup, you will know how easy that is. In this article, I'm going to introduce 2 easy ways on how to upload photos to iCloud quickly.
If you want to know how to restore data from iCloud, click here How to Restore iPhone from iCloud without Resetting?
Tips about how to backup icloud automatically to iPhone are introduced here: iCloud Automatically Backup on iPhone
Part 1: How to Upload Photos to iCloud from iPhone Quickly
With the introduction of iCloud Photo Library it will soon become very easy to upload your photos from your iPhone to iCloud, but as it's still in beta mode many users are choosing to stick to the tried and tested methods for now, before they decide to take the plunge.
To upload photos to iCloud from your iPhone you'll need to use Photo Stream, which is a feature built into the Photos app on your phone. Photo Stream will sync your photos to iCloud whenever your phone is switched on and connected to a wifi network.
Photo Stream allows you to back up photos from the last 30 days and is easy to switch on, in case you haven't yet enabled it:
Step 1: Select 'Settings' in your iPhone's home screen.
Step 2: Scroll down and choose the 'iCloud' option.
Step 3: In the 'iCloud' menu find and select 'Photos'.
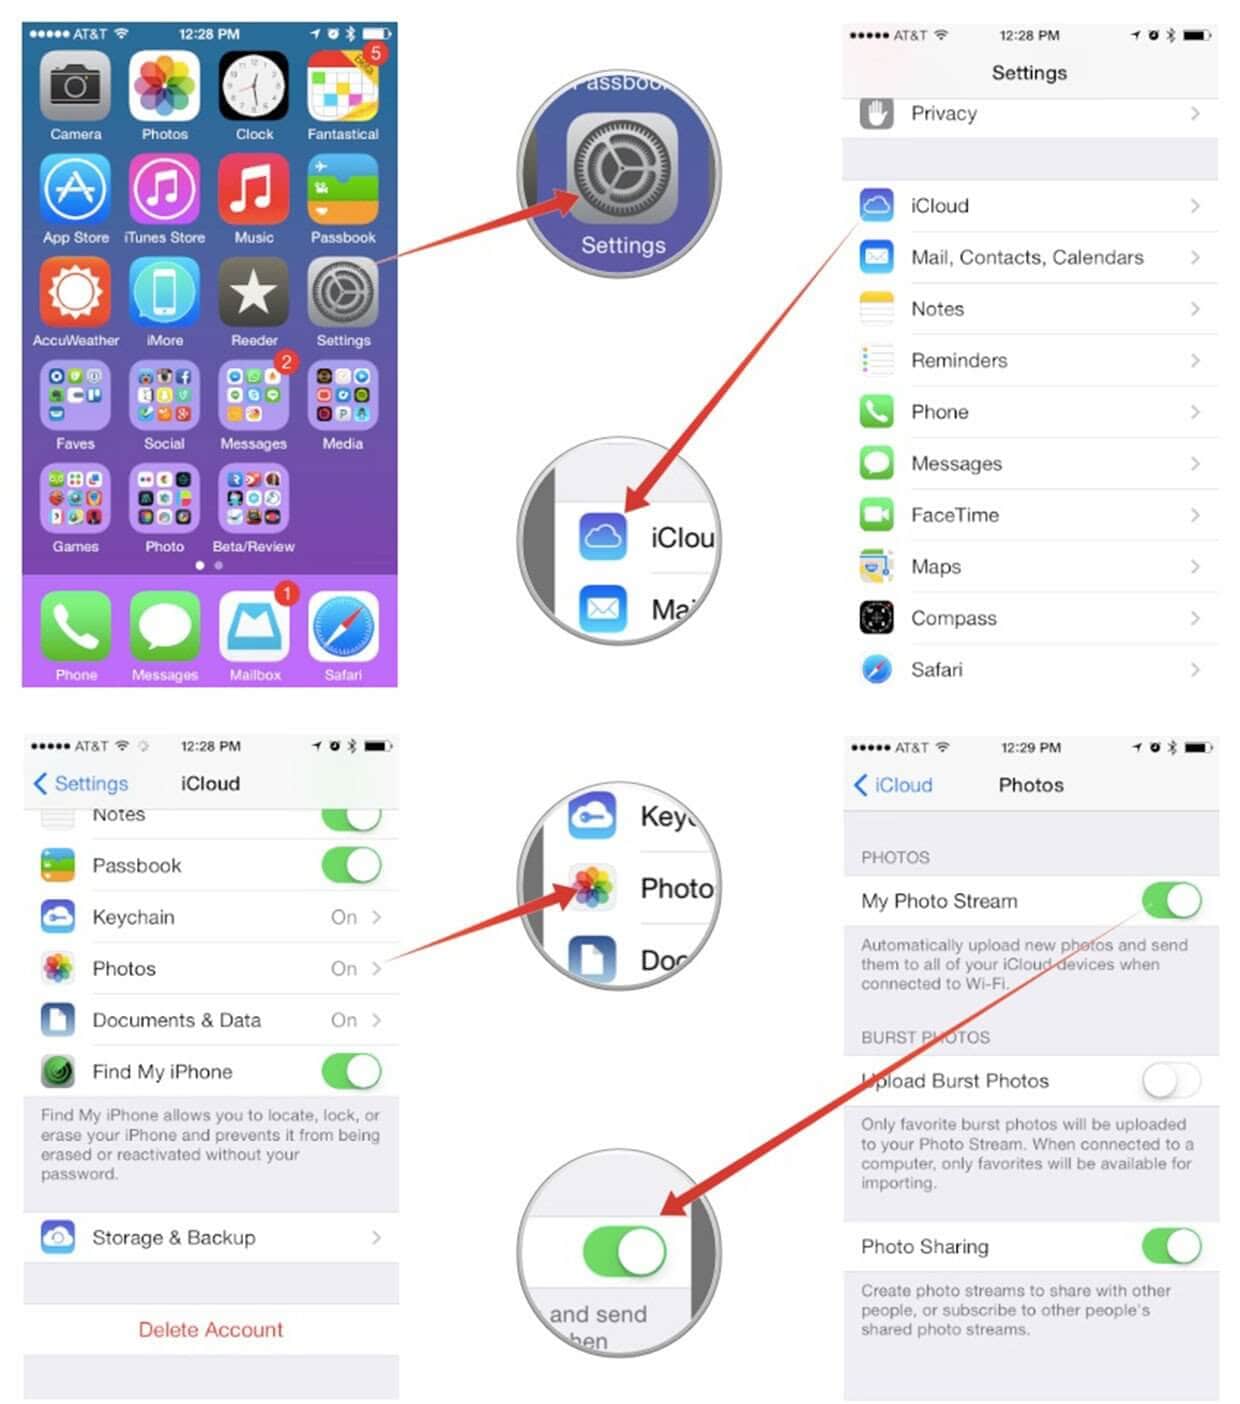
Step 4: Look through the 'Photos' options until you find 'My Photo Stream'. Make sure it's switched on and, if it's currently selected as 'Off', tap the option until it appears as 'On'.
Step 5: The final step, for peace of mind, is to double check iCloud has backed up your photos. To do this you'll need to select the 'Storage and backup' option from the iCloud settings and scroll to the bottom of the page. Once you're there have a look at the date and time of the last backup - if it only displays a time then you know iCloud has already backed up your photos and you're good to go.
However, if it displays a past date then you can click 'Back Up Now' to force a back up and ensure your Photo Stream is correctly backed up in iCloud.
Part 2: How to Upload Photos to iCloud from a Mac
By now you've read how to upload photos to iCloud from your iPhone. However, if you hope to update photos to iCloud on Mac, here is the guides for you!
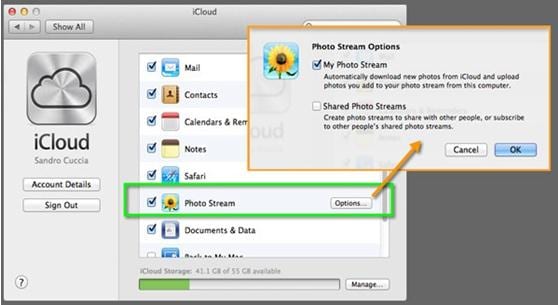
Step 1: Click on System Preferences to bring up the menu.
Step 2: Click on 'iCloud', which you'll find in the third row down.
Step 3: Select the 'Photos' option and ensure that 'My Photo Stream' is selected.
Step 4: The final stage is to check that your photos have been synced with iCloud, so to check that we're going to use iPhoto, though you can also sue Aperture if you have it installed.
Open up iPhoto and check that the 'My Photo Stream' option is turned on. You should see the photo streams displayed down the left hand side of the window, split up by month. That's the whole process about how to upload photos to iCloud on Mac.
Part 3: How does iCloud Store Pictures?
The way iCloud stores pictures has always been a confusing topic, as it's never really been clear how many photos can be stored or for how long. Previously only 1000 photos could be stored for a period of 30 days, though this has changed slightly in recent months.
So, it is suggested to Backup Photos to Computer to avoid overwriting on iCloud.
Photos in My Photo Stream will only be saved for a period of 30 days, so if you want a full backup of the photos and videos in your Camera Roll then you'll need to to set up an iCloud backup, which will back up everything in your Camera Roll and store it in your iCloud storage, so you can access it later on.
So there you have it, I highly recommend dr.fone - Phone Backup (iOS) to help you face this issue. Now you know how to access your photos, how to back your photos up from your iPhone and Mac, hopefully the mysteries of how iCloud stores your photos and how you can access them have been resolved.

dr.fone - Phone Backup (iOS)
Download data from iCloud backup to computer in one click.
- 3 Recovery Modes: Allows to recover data directly from iPhone, extract iTunes backup and download iCloud backup.
- Up to 20 File Types: Recover lost text messages, iMessages, contacts, photos, videos, notes, etc.
- Various Data Loss: Retrieve data lost for deletion, factory settings restore, jailbreak failure, iPhone lost or broken, etc.
- Preview: Lets you read and preview found data before recovery.
- Flexible Recovery: Selectively recover any item you want from iPhone, iTunes and iCloud backup files.
Here are the steps of using dr.fone to directly to backup photos from an iPhone or other iOS devices:
Step 1 Download and install and launch dr.foneon your computer. Plug in the device.
Step 2 Select "Phone Backup" on the home screen.

Step 3 Tap "Backup" to start the process, after scanning the device, you can backup contacts, messages, photos and all kinds of media selectively.
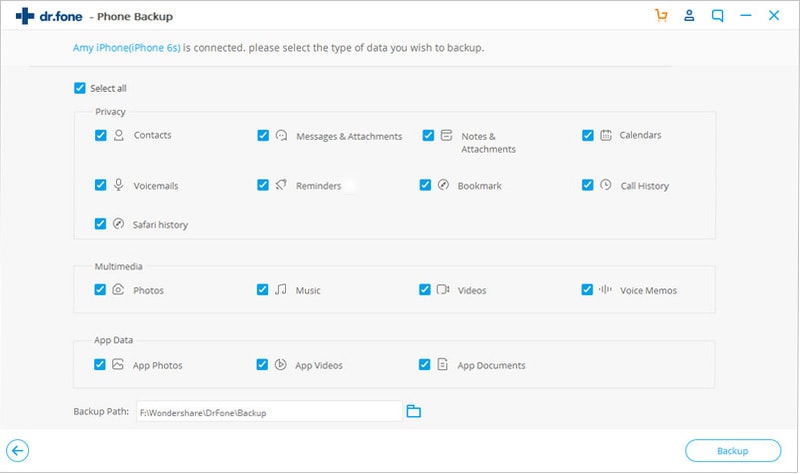
Step 4 The backing up process will take a minute, please wait until the it backup seccessfully.
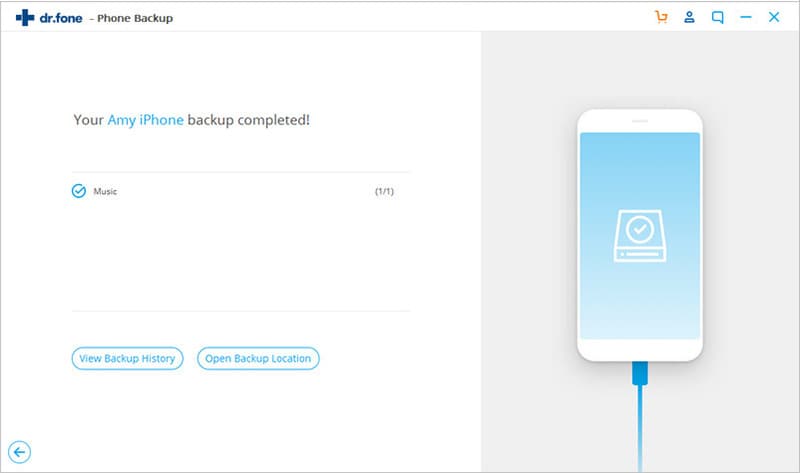
That's it! You have backed up your selected data through this method.
Write in the End
After read this article, you are ready to import and upload photos from your iOS devices to your iCloud library. Great! Tha's one thing you should do - backup your iphone data frequently to save all your photos on cloud.
Elva
staff Editor