


Contents
- Valentine History
-
Keep Memories
- 1. Burn Videos to DVD
- 2. Edit Valentine Videos
- 3. Add Music to Videos
- 4. Merge Valentine Videos
- 5. Make Slideshow
-
Valentine Gifts
-
Valentine Quotes
How prepared are you for this Valentines Day? Break from the old methods and get something entertaining on your big screen this Valentines. A quick way to do so is to burn your killer movies on your Mac to DVD. The first part of this article clearly shows you how to burn movies on Mac OS X while the second part focuses on Windows operating system using powerful software called DVD Creator.
Part 1. How to Burn Valentine Videos To DVD On Mac OS X 10.6 and Later
With Mac platform, you can quickly burn all your selected Valentine videos to DVD and edit them without hassle. Software that will comprehensively do so is DVD Creator. This a great companion for you mac since it can burn videos of any popular format to DVD Folder, ISO File, or DVD Media.

Key Features of DVD Creator
- It supports video formats like MOV, F4V, MPG, MPEG, TS, TRP, TP, DAT, WMV, MKV, ASF MP4, FLV, AVI, VOB, M2TS M4V (without DRM), MTS, 3GP, and 3G2.
- It can manipulate the above mentioned file formats to DVD Disc, ISO file, DVD folder or DVD Media.
- It allows you to personalize and apply basic editing features to your video before burning them.
- It is has in-built DVD creator, that allows you create movies and videos from different web sharing networks like Vimeo, Hulu, Facebook, YouTube Vuze just to name a few.
- It has special templates with attractive themes that allow you to personalize your DVD menu.
- It is also integrated with photo slideshow with great music background to organize your photos.
- It supports Mac OS X 10.5 to latest 10.11 (El Capitan).
How to burn Valentine videos to DVD using DVD Creator for Mac
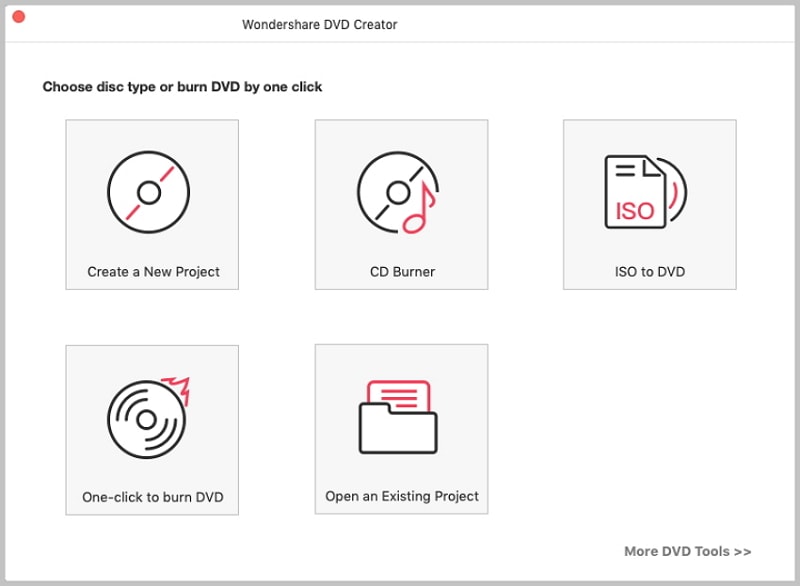
From iSkysoft official website, download iSkysoft DVD creator and install it on your Mac Go to application and double click on the program to open it. Then click on "Create a New Project".
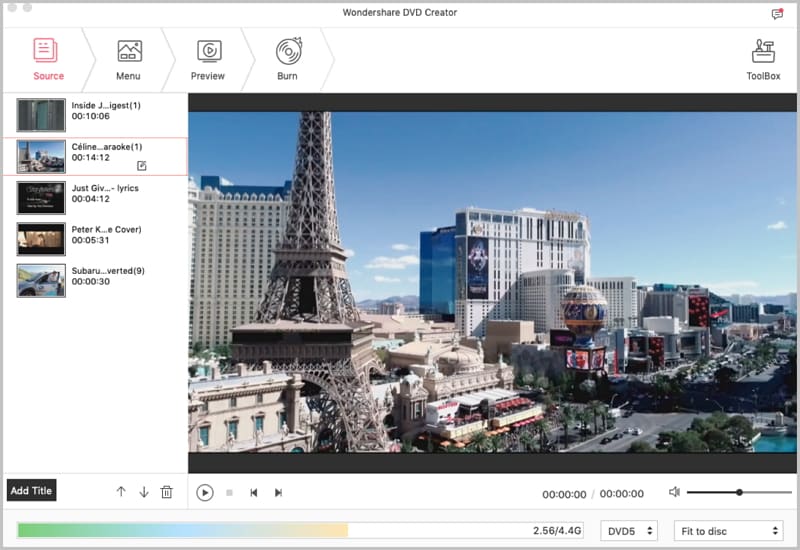
Once you have opened the program, go to your local folder that contains the Valentine videos. Now drag and drop the files to the program window to upload them. On the other hand you can also click on “+” button to import files.
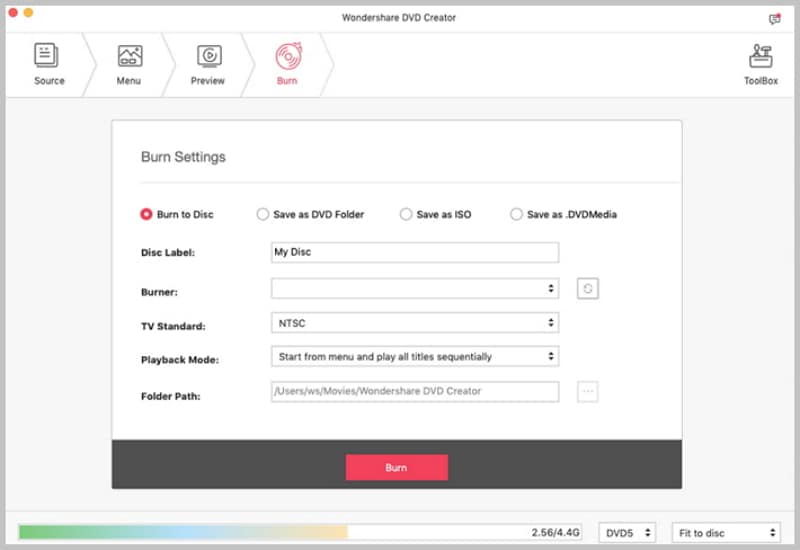
What follows is to select the correct output format. Click on "Burn" icon and select DVD Disc, ISO File DVD Folder or DVD Media. Make any necessary output settings and finally click on "Start" button to burn the Valentine videos to DVD.
Part 2. Easily Burn Valentine Videos to DVD on Windows 10/8/7/XP/Vista
You can also burn your Valentine videos on Windows OS. DVD Creator for Windows software supports Windows OS: Vista, XP, 2002, 2003, NT, 7, 8 and Window 10. It is a quick DVD burner as well as creator. It also lets you customize your DVD menu to make it attractive.
Key Points of DVD Creator for Windows
- Burn videos audios and images to DVD disc, DVD Media, DVD folder and ISO file.
- It supports standard and HD videos such as: MPEG, VOB, DAT, TP, WMV, ASF, DVR-MS, MOD, TOD, HD AVI (VC-1, MPEG-4), MTS, M2TS, TS, TRP (AVHD , VC-1, MPEG-2 HD) and others.
- It is built with a speedy DVD creator that lets you create movies and videos from different sharing networks like YouTube, Facebook, Hulu, Vimeo and others.
- It has appealing DVD menu templates with impressive themes that makes your DVD menu look attractive and well arranged.
- Create slide show motion for your images accompanied by appealing music background.
- Edit and personalize your videos before burning them.
Step-by-step guide to burn Valentine videos to DVD using DVD Creator for Windows
Once you have downloaded the windows version, you can now install and launch it on your computer.
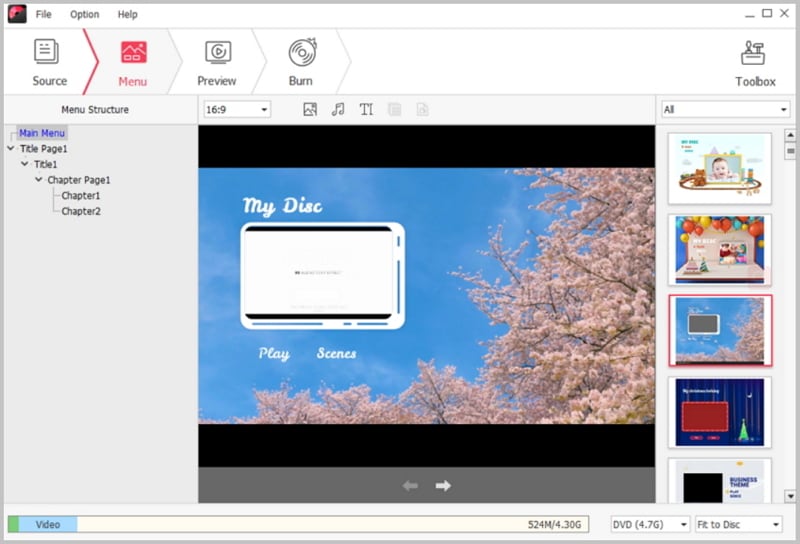
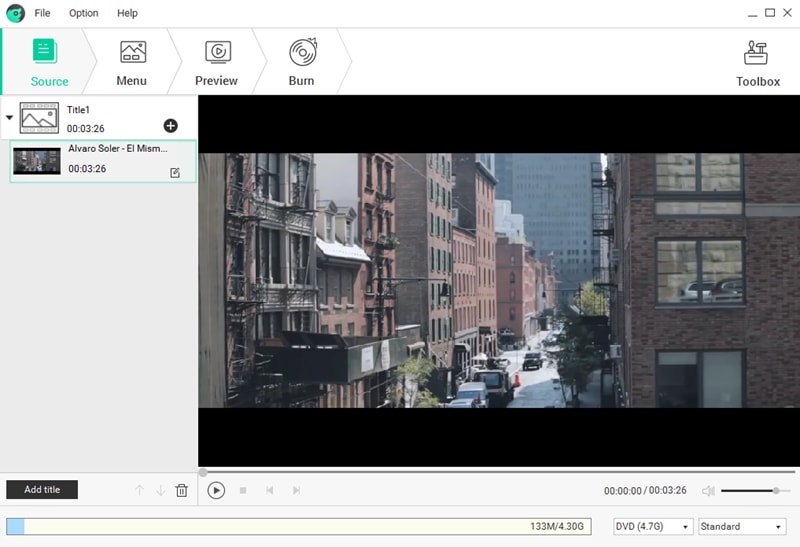
Click on "Import" button at the top left to upload your videos. From there select all the Valentine videos you want to burn on your computer.
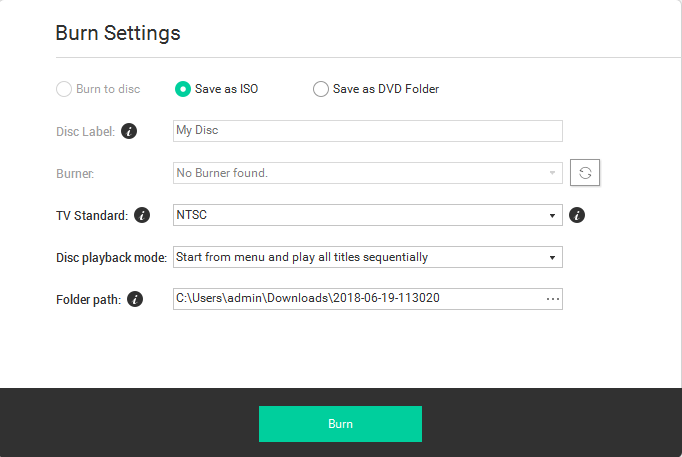
Next you need to specify the DVD output format. Click on "Burn" button. This will prompt you to specify the file format and define location for your DVD. Enter the fields and click on start button once you are done. All your files will be burned to preferred format.


