


Part 1. How to Sync iPhone to Computer
One very good option to sync your iPhone to your computer is to use dr.fone for Mac. Actually dr.fone does for you the entire job transfer smoothly. All your media files like movies and songs, and all your nice photos, they will be on your iPhone and on your Mac. The requirements for using dr.fone are iPhone 7,7 Plus,6, 6 Plus, 5s, 5c, 4s, 4, 3GS, 3G and a computer with OS X El Capitan, Yosemite, Mavericks, Windows 10, Windows 8, etc.
Transfer iPhone/iPad/iPod touch music, videos and photos to Mac and iTunes.
One-click backup to iTunes and manage your songs, videos, and photo albums.
- Copy music from iPhone, iPod, iPad to Mac or iTunes.
- Export videos from iPhone, iPad, iPod to iTunes/Mac.
- Transfer all photos from photo album to Mac or iTunes.
- Copy playlists with rating and play counts to iTunes.
Steps to follow to sync your iPhone to your computer through dr.fone
dr.fone has seperated versions for both Mac and Windows PC. Below we take how to use dr.fone for Mac as an example to show how to sync iPhone to computer on Mac. For windows users, please check out the guide >>
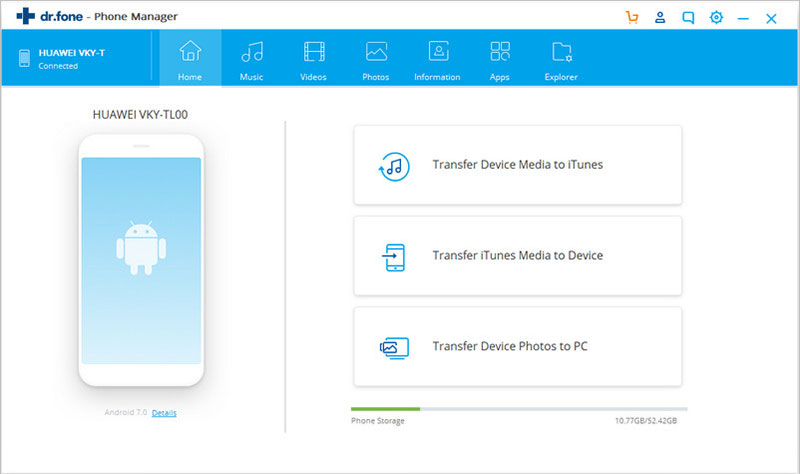
Step 1. Connect your iPhone to Mac
Download the free trial version of dr.fone for Mac and install it on your computer. It works great with almost any Mac. After then, use the digital cable to connect your Mac with your iPhone. If connected successfully, you can see the window like the screenshot below.
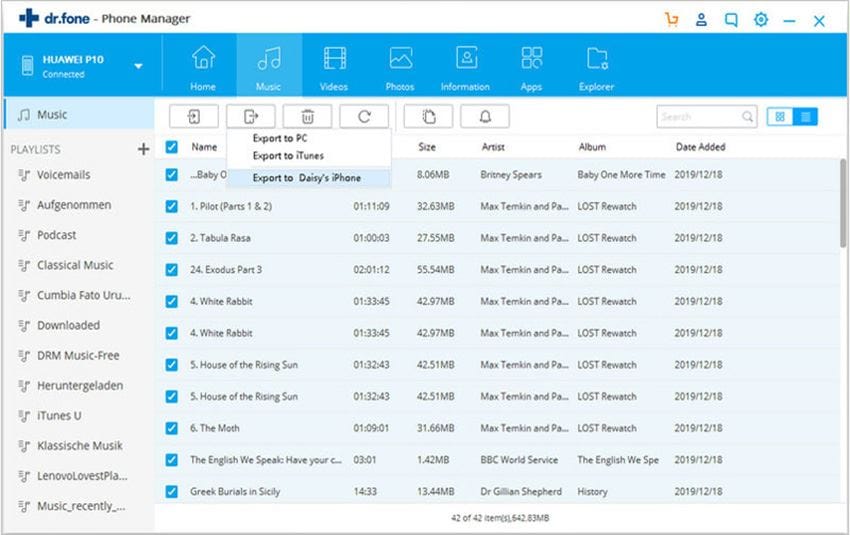
Step 2. Transfer Music Fast
Click Music to navigate to the music management window. From there, you can see with songs and playlists on your iPhone. Select the ones you like and click Export, either export them to your iTunes Library on your Mac or a folder in the local drive.
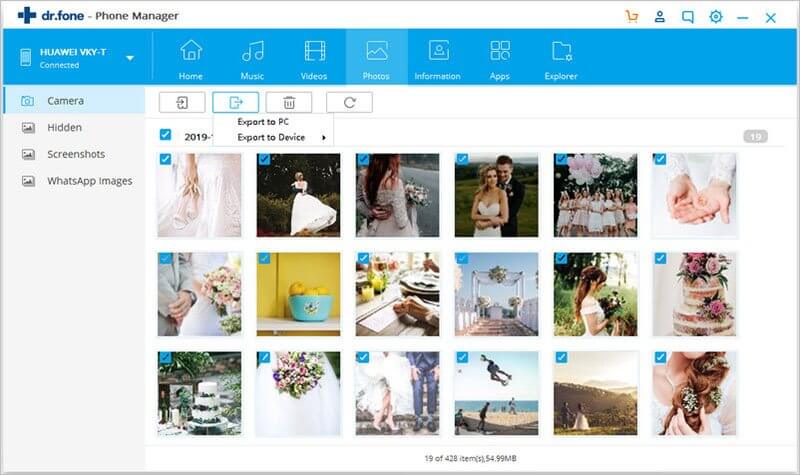
Step 3. Transfer Photos Fast
Photos in Camera Roll, Photo Library and Photo Stream on your iPhone will be displayed in the Photo Management window. From there, you find the needed photo and clic Export to save them to your computer.
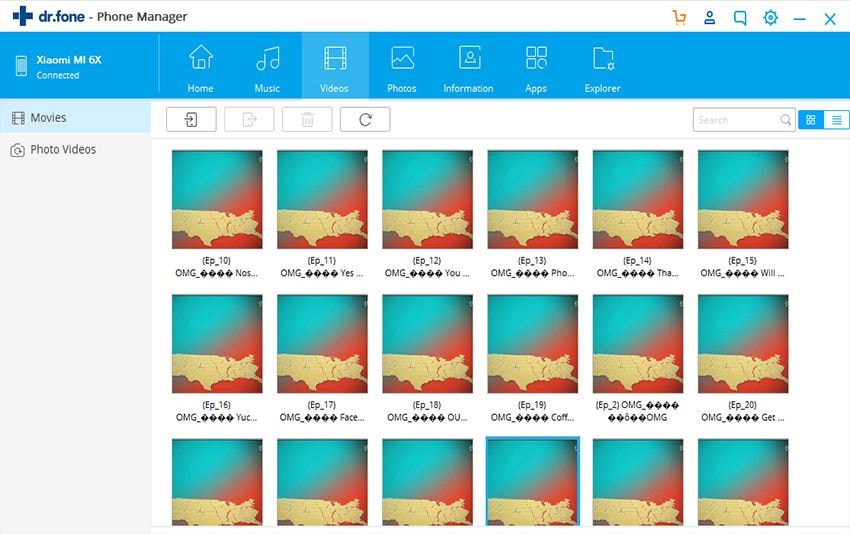
Step 4. Transfer Videos Fast
Videos management window is the place to show all your videos, except shot ones in Camera Roll. Just tick the box before the one you need and click Export the save them on your computer.
Part 2. How to sync computer to iPhone
Sync computer to iPhone via iTunes
You have the possibility to sync your computer to your iPhone via iTunes by using 2 different methods: with USB and over Wi-Fi.
In order to use USB method, all you need to have is an USB cable and the latest version of iTunes. You can sync your data, even your iTunes Store purchases from a computer to an iPhone. If you bought items from the iTunes Store and you have stored them on only your iOS device, you can transfer them to any computer that is authorized with your Apple ID. The easiest way to add past iTunes Store purchases to your iOS device is to re-download them from iTunes in the Cloud. You can see on iTunes 10, for example, that with iCloud, your iTunes Store purchases appear automatically on all your devices.
You can also transfer your purchases from your device to your computer. First thing that you need to have in mind is to be sure that your computer is authorized with the same Apple ID account you used to make the purchases. After you have verified this, you can transfer all your purchases.
One notice related to buying from iTunes Store by using multiple Apple ID accounts: you will need to authorize the computer for each Apple Id account.
To transfer purchases from your device to a computer, just connect your device to the computer and you will see the device icon in iTunes.
Then, go to File menu and choose Devices. Final step is to select Transfer Purchases from "Device". Very easy to do and you shouldn`t have any big issue.
In order to sync over Wi-Fi, you must have the same Wi-Fi connection on all of your devices. If you will use a mobile iDevice, your iPhone must to be connected to a power source also.
Just connect our iPhone to your computer, open iTunes and see your connected iPhone in iTunes menu. Next step is to choose "Sync with this iPhone over Wi-Fi" from the Summary tab.
Final step is to select the content for syncing and click on Sync/Apply.
Pros:
- You can always access your iTunes account, with all your backups and saved items
- Easy to sync with just one USB cable
- Somehow easy to manage purchased items
Cons:
- Always you must have the latest version of iTunes
- Wi-Fi connections troubles
- Issues with recognitions of devices
Sync computer to iPhone via dr.fone
There are several tools to sync your iDevices, and one of them it is the software called dr.fone for Mac. All you need to do it is to download onto your devices.
Actually your entire playlist, with all your media files like songs, photos, movies and other items can be transferred on your iDevice. Just connect your iDevice to your Mac and open dr.fone. You can choose the music files, the photo files or the movies that you need to transfer and click on "Export" tab from menu.
One great thing is that dr.fone has a Media Browser. Thus, you have also the option to use this feature to select the movies, music, or photos to transfer to your iPhone. If you get a pop-up window where is required to convert the media file formats, this means that you try to transfer incompatible media files from your Mac to your new iPhone. You can consider that you are lucky because dr.fone has the feature to convert the music or videos to compatible formats. Just click on the “Convert” button and your files will be transformed into supported formats.
Anyway, you should be very careful at the files formats supported by your device, before to make any transfer. You can read all details in the Manual that comes over with your iDevice.
dr.fone for Mac has different features that can be used to sync the computer to your iPhone, including Smart Export, and even directly Export. Enjoy them all!
Pros:
- Don`t have any bugs on direct Export
- Small capacity required (compared to other software)
- Has the Export to iTunes and Smart Export to iTunes
Cons:
- Sometimes runs slow, but depends on files numbers and sizes
- You should be careful at Smart Export
- Attention on deletions by accident


