


How to change volume in Audacity?
Audacity is a free, open source and cross-platform audio software for multi-track recording and editing. It supports Windows, Mac OS X, GNU/Linux and other operating systems. All these factors help Audacity have gained a great welcome all over the word. So back to the question of "is it possible to adjust volume in Audacity and how to boost it?", the answer is absolutely YES.
In facts,
Audacity has an amplify effect feature which changes the volume of your selected audio and other effect features can change sound in other ways such as tempo, speed, pitch, and bass. So, Audacity can not only help you change volume in audio, but also equalize, decrease, normalize, etc. volume of tracks or recordings without restrictions.
Cool, right?
In this post, you're going to learn how to increase volume in Audacity step by step. And in case of the Audacity might be not working well on your computer due to some unknown reasons, here is also another Audacity alternative software for your reference.
See Also: How to Increase Volume on MP4 Video
Now, let's get started...
- Part 1. How to Increase Volume with Audacity [Quick Tutorial] >
- Part 2. Audacity is not Working? Try Audacity Alternative Tool to Boost Volume [Editor's Pick] >
Part 1. How to Increase Volume with Audacity [Quick Tutorial]
Audacity Increase Volume? Let's Check the Steps
With Audacity, you can record live audio and computer playback, convert tapes and records to digital or CD technology, edit many sound files, edit sound clips, and add effects to sound files.
Now, let's check the detailed steps:
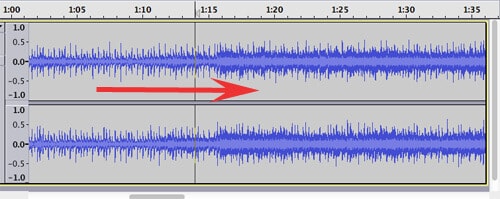
Step 1. In order to increase volume with Audacity, click and drag inside the waveform to select the portion of the audio track.
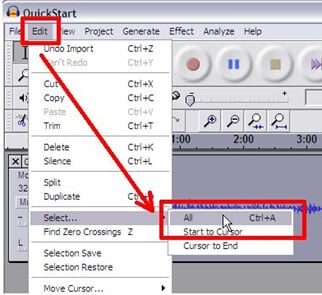
Step 2. To edit the entire track, click Edit > Select > All. Alternatively press CTRL+A to select the entire track.
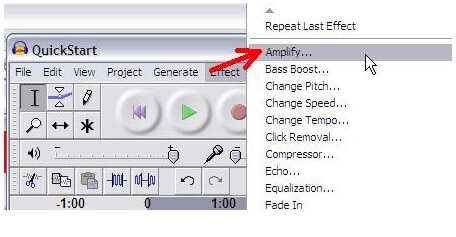
Step 3. Click Effect > Amplify.
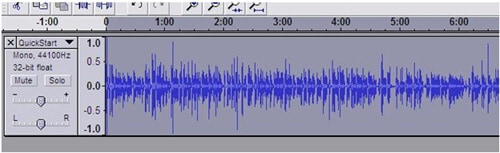
Step 4. Adjust the sound until the highest peaks and lowest valleys of the waveform reach the top and bottom of the window. Do not allow it to go past the edges. Start with small increments of amplification such as 5 or 10 dB.
Obviously, Audacity can only deal with the issues related to audio, so if you wish to increase volume in a video, Audacity has nothing to do. Or sometimes you find the Audacity cannot works well on your computer, then you'll like to find an alternative to Audacity. That's why I also take the Filmora Video Editor in this post.
Part 2. Audacity is not Working? Try Audacity Alternative Tool to Boost Volume [Editor's Pick]
Filmora Video Editor — The Best Audacity Alternative to Increase Volume of the Video
Filmora Video Editor for Windows (or Filmora Video Editor for Mac) is the best Audacity alternative to increase the audio volume in video. It has easy to nevigate interface for creating and editing audio simpler than Audacity. You can not only inscreen the volume, but also edit the audio track per your need.
What's more, this program not only have the full functions in editing audio tracks, but also have the ability to deal with all kinds of video issues. So with it, you can deal with audio and video issues without restrictions.

What Make Filmora Video Editor Outstanding
- Powerful editing ability in audio and video clips, including splitting, joining, mixing, noise removing, etc.
- 200+ free audio or sound effects to help you add background music to a video as you like.
- Multiple audio tracks to create the unique and awesome audio mixer effect without limitations.
- 1000+ special effects to improve the video performance from various aspects.
How to Adjust Volume of Video with Filmora Video Editor - Increase or Decrease?
Step 1: Import Video
Please install and launch Filmora Video Editor on your computer first, choose New Project from the main window. Then click on the Import button to open the Media folder where your video files are saved. Or you can hit the Import Media Files Here icon to import your video to this program as well.

Step 2: Increase or Decrease Video Volume Directly
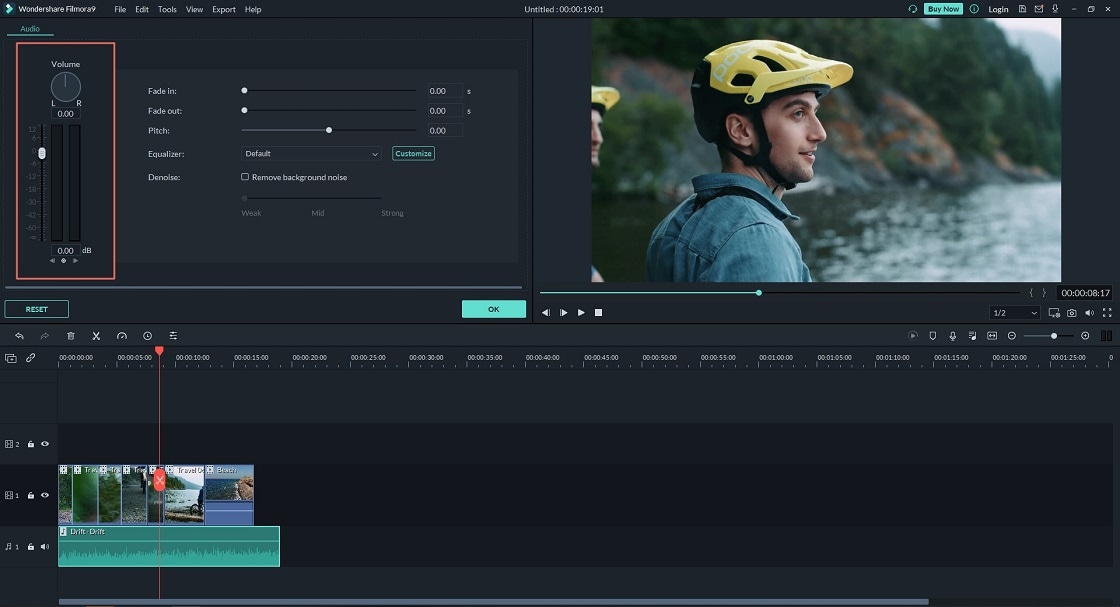
Directly drag and drop your video to the timeline for editing. And double click on the video in timeline to open a new editing panel. Switch the default option from video to audio. Then, you can freely move the slider to increase or decrease video volume as you like.
[Attention] If you have loaded an audio file into the program and drag it to the timeline, then you can also double-click it to open a interface as below. Here, you can set the video volume, fade effect, pitch, equalizer, denoise, etc. according to your own needs.

To create a awesome sound effects or video clip by yourself, you might need to get more resources about audio, video clips, effects packs, etc. then Filmstock comes to here to satisfy all your needs.
Step 3: Export the Video
Click the green Export button at the right of the screen to create it. As you can see, you are able to save your video in any format at will.
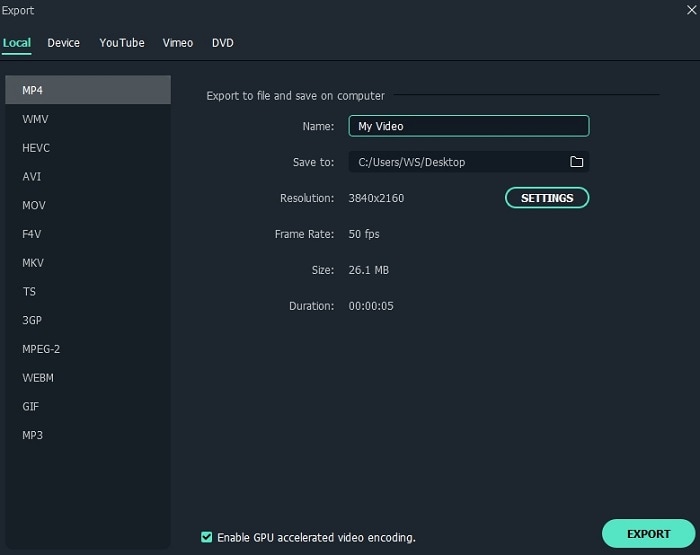
In this way, you can easily reduce or increase volume on MP4 videos or other format videos.
Conclusion
Comparing these two methods, it is obvious to see that it is easier to use Filmora Video Editor to adjust the volume of a video, and Filmora Video Editor software interface is more clear. You only need to click a few buttons to complete increasing volume of your videos.
But we have to admit that Audacity is also doing a great job in audio editing. So, if you only need to edit a audio file, you can take the Audacity into consideration. And if you wish to get a one-stop solution, then Filmora Video Editor will be the top 1 choice.


