


Image stabilization is one important technique that filmmakers use in still and video images to neutralize the effects of blurring. Exposure of the videos to uncontrolled light can cause blurred effect which ends up affecting the quality of final product. That is why the image stabilization technique was discovered to balance for any sharp movements of the camera whenever tilted. It is very much possible to stabilize a video in iMovie and this piece will discuss all that for your sake. You will learn abut the reasons why you should stabilize a video in iMovie and even the alternatives available for your consideration.
- Part 1. The Best Alternative to iMovie to Stabilize Videos
- Part 2. How to Stabilize a Video in iMovie
Part 1. The Best Alternative to iMovie to Stabilize Videos on Mac (10.13 included) - Filmora Video Editor
Filmora Video Editor is one of the best iMovie alternative to stabilize video on Mac (macOS 10.13 High Sierra included) and Windows. It also has some outstanding features that make Filmora Video Editor a force to reckon with in the industry. There are assorted editing tools to use, it performs color correction through adjusting contrast and brightness and there are animated templates as well as faceoff which are good for making green screen without hassle.
Key Features of Filmora Video Editor:
- Ability to produce top-quality videos as it comes with Video Stabilization tools.
- Lots of basic editing tools includes changing video orientation and speed.
- A comprehensive Media Library for easy management of projects.
- Various special effects including split screen, green screen, and face-off features are also available.
How to Stabilize a Video in iMovie
To stabilize shaky video in iMovie will help in coming up with a professional and high quality movie. This tutorial will be of immense value if you are planning to stabilize your video in iMovie. Start by selecting the right video clips for stabilization from the browser. Go to the “file” icon, select “import” and then “movies” and you will have a huge selection of clips to consider. You can optimize the videos to full or original size. Be sure to optimize as per your specific size requirements because your choices might have dire consequences later on.
See the detailed step-by-step guide on how to do stabilization in iMovie
Step 1. Open the iMovie and add your movie project
You will have two options to ponder; stabilize the clips and then add to the project or drag them to the project and stabilize from there. Either of the options will be good so don’t waste time thinking about what to go with. It is always good to have a preview of the videos before beginning on the stabilization process. This step will help you to determine the quality and status of the video as well as whether stabilization is a good choice. Make a good analysis of the clips and effect key adjustments that you may deem necessary. Zooming is one thing that can have adverse effects on the final quality of your stabilized videos and you will have to check on that.
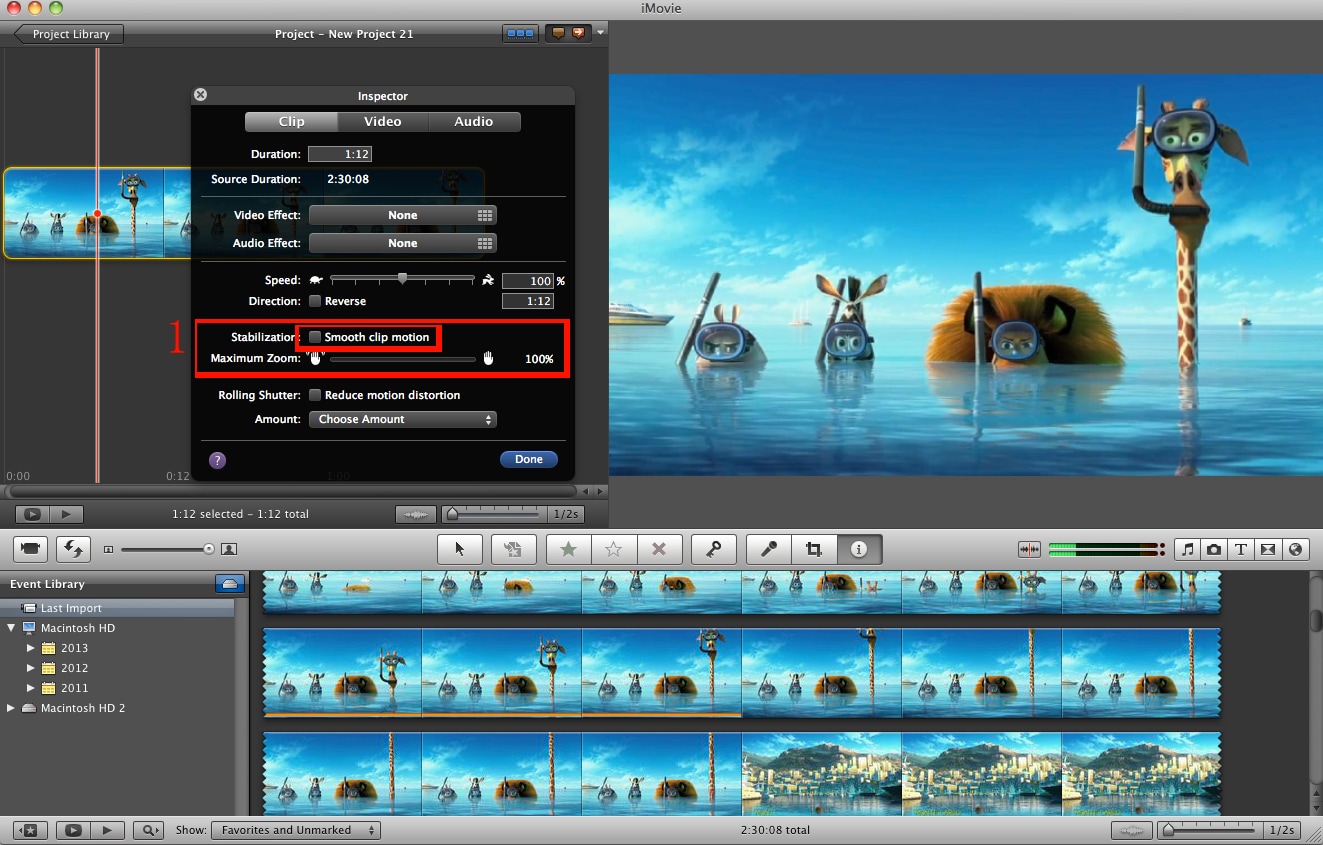
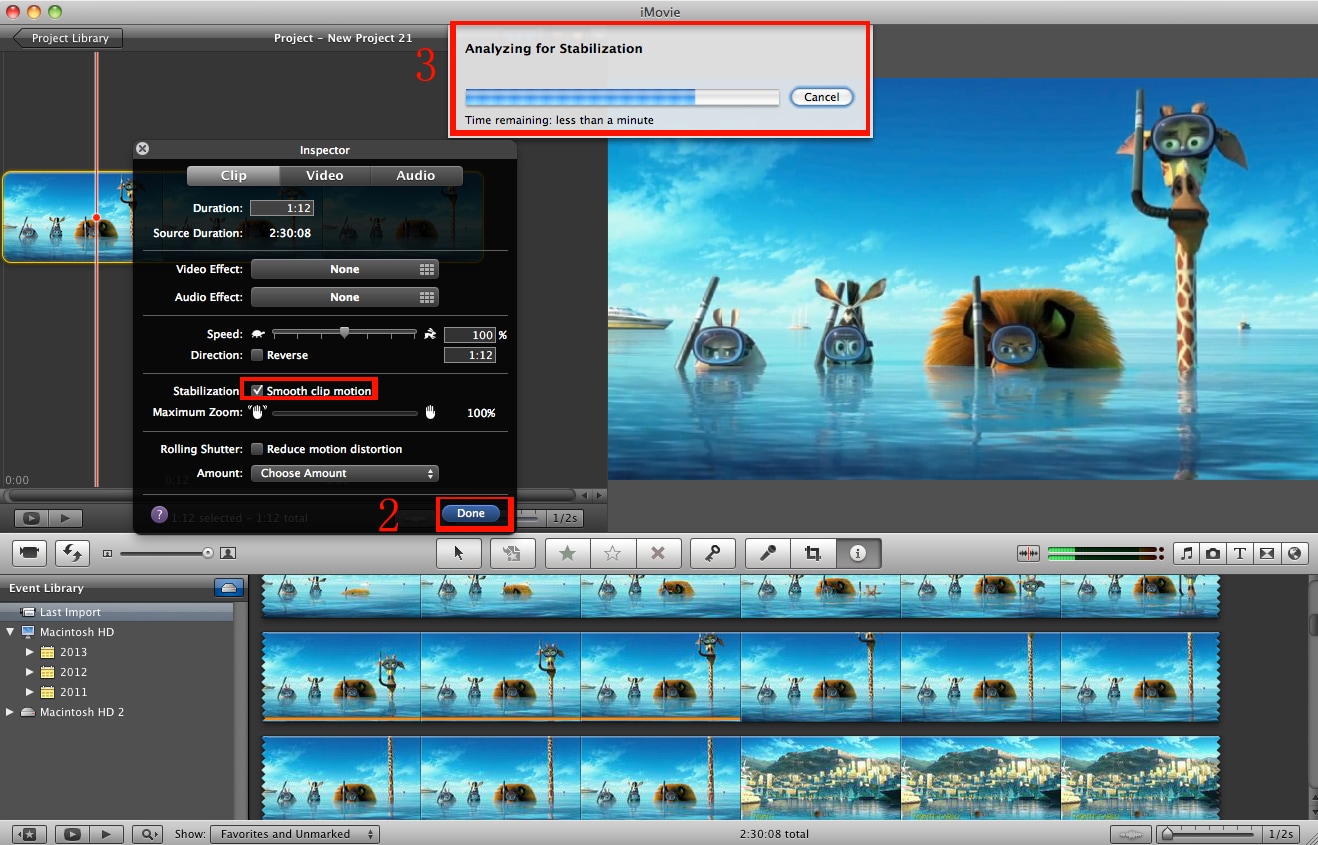
Step 2. Start to do stabilization
At maximum, zoom will degrade the quality of the video so be sure to get a compromise by turning the zoom slider to the left side. You can now set on to stabilize the clips and the period it will take for a single video to stabilize will be dependent on its length. The longer the video the longer the stabilization period and the shorter the video the shorter it will take to stabilize. Once done with stabilizing the videos in iMovie, play them to see what you have achieved and judge if it’s a nice job. Use the project browser to playback the videos if you want the stabilization to appear.
The changes made will not appear if you choose to play your stabilized video on event browser and that is a great caution to apply. If a video is too shaky and cannot be stabilized, there will always be a red line appearing on the video to indicate that. In case it stabilizes, all the parts covered by the red line must be removed for it to play.
Video Tutorial: How to Stabilize a Video in iMovie
Here we would like to teach you about doing stabilization in iMovie for Mac OS X.
