


Can I add transition to video using Adobe Premiere Pro?
Yes! Transitions – moving from one shot to the next – with all kinds of effects can be added to Adobe Premiere Pro in a simple process. Types of transition range from simple cuts from one shot to another, to crossfades, turning pages, Star Wars style circle-wipes and many, many more professional style transitions – whatever you need for your video. You can choose from single and doubled-sided transitions and apply them as you need to create a wide variety of transitions.
Part 1. How to Add Transitions in Adobe Premiere Pro
Transitions between two clips:
The standard transition is a doubled-sided transition, which is what we'll start with. This type of transition applies one transition between two clips and is the most common type of transition.
Step 1. Go to the Effects panel and and look for the Video Transitions bin.
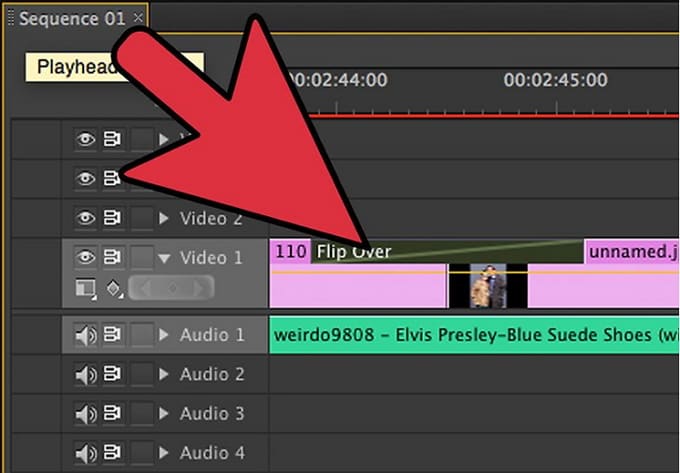
Step 2. To put a transition between two clips, they need to have no space between them and be on the same track. Drag your chosen transition to the cut line between the clips and release the mouse button when the Center At Cut icon appears.
Step 3. At this point there may be a dialog box with the options for this Transition, if so specify what you need and preview the sequence to check that it looks okay.
Single-sided transitions:
Single-sided transitions give you a bit more control, allowing you to apply different transitions at the end of one clip and the start of the next.
Step 1. Go to the Effects panel and and look for the Video Transitions bin.
Step 2. Ctrl-drag (Windows) or Cmd-Drag (Mac) your chosen clip in the Timeline, releasing the mouse when you see either the End at Cut or Start at Cut icon (whichever it is you need).
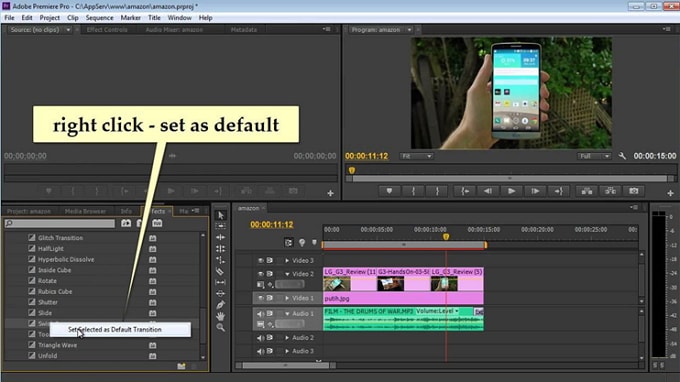
Default transitions:
You can also set a default transition, so that all your clips automatically transition from one to the other other in a consistent way.
Part 2. 10 Free Cool Premiere Pro Transitions Make Your Video Attractive
Transitions are used in Premiere Pro and other video editing tools to provide a smooth blend when switching from one scene to another. They basically help make your videos more attractive. There are thousands or even more, templates out there and it may be difficult to choose one to use in your project. Even though the best template of someone depends on the nature of their projects, we tried to curate a list of 10 of the best premier pro transitions and transitions presets to use in your projects.
1. Smooth zoom Transition preset

This transition is built on top of Premier Pro’s Smooth Transitions Zoom effects. The transition preset supports both 1080p and 4K videos. It comes with several options to choose from including ZoomINOUT, ZoomOUTIN etc.
2. Orange83

Orange83 is a template that combines different transitions into one pack. It includes transitions such as Smooth slide, Spine, Wipe, and Sam Kolder's zoom.
3. Transition Designer Free Wipe
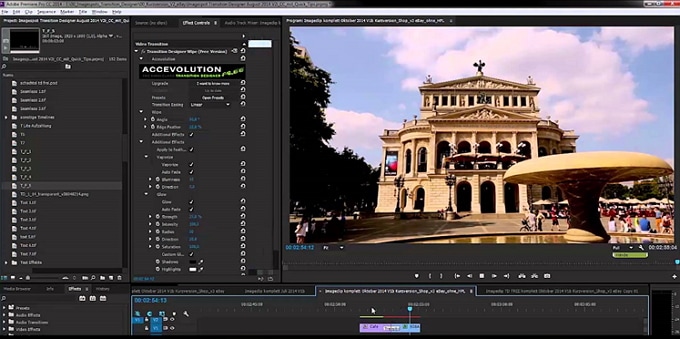
The wipe transition is one of the most used transition in video editing. This package builds on top of premier pro's default wipe adding even more features.
4. Action Wipe Presets
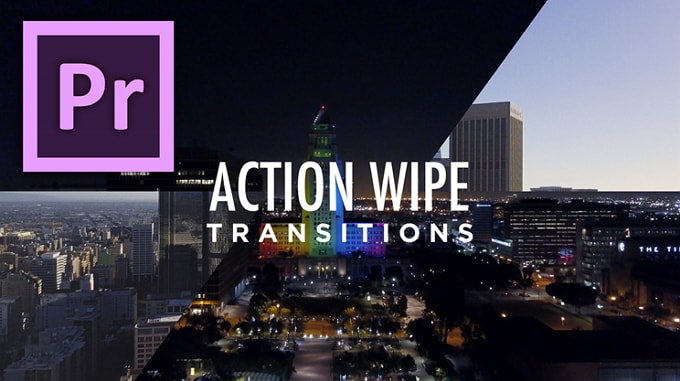
This is another package that provides wipe transition on our list. Choosing between this and the others is a matter of taste but just as the name suggests, this preset is really action packed.
5. Light Free

The light leak is a term used to describe a situation when light trickles through the back of the camera and exposing the film. This is usually a bad thing but you can use the light leak style in-between scenes in your videos. This can be done using this package.
6. Luma fade

Luma fade is one of the internet's "dopest" transitions and if you spend some time in the video-rich streets of the internet e.g. YouTube, you will easily come across one or you have already. This transition was popularized by filmmaker Sam Kolder and is very easy to pull off using this template.
7. Swish transitions

There are quite a few Swish transitions on the internet. These transitions create videos that are quite unique and dynamic. Here is one of the best packages that offer swish transitions seamlessly.
8. Text Transition presets
There are many text transition presets including Liquid text, Jiggle text, and text bounce etc. However, the one we loved the most is the text-transition preset. This one includes multiple distortions, glitch, and light leak present. Put it directly, this one is a jack of all trades when it comes to text transitions.
9. Blur transitions

This is probably the best adobe premiere pro transitions to use for video titles and logos. It features eye-catching blue effects and supports up to 4K and full HD videos.
10. Travel Film Transition Pack preset

This is a pack of 4 transitions including Luma fade, quick zoom, smooth spin, and smooth warm transitions. These transitions are some of the most popular ones by premier pro users hence, just as the name suggests, this pack may be the only pack you need for your projects
Read More:
• 10 Awesome Video Effects in Adobe Premiere
• Adobe Premiere Pro Rotate Video Not Working? Fixed!
• How to Speed Up Video By Using Adobe Premiere
• How to Crop Video in Adobe Premiere Pro
Part 3. How to Fix Adobe Premiere Pro Transitions Not Working
Adobe Premiere Pro is a professional video editing software, in fact, it is considered an advanced level video editing software and is not recommended for beginners. Due to this, it comes with some technicalities including having quite a steep learning curve and higher chances of users encountering problems when working with it. With transitions, just like most of its features, this isn't any different and beginners will frequently fall into pitfalls and have headaches. We decided to sample some of the most common issues in premier pro where Transitions are not working and this is what we found.
1. Default transitions not working
To make it easy to apply common transitions, you will frequently make use of default transitions in premier pro. However, there have been issues noted by beginners. For example, if you are coming from movie maker, you'd expect this to be as simple as applying a cut on a scene change then pressing Ctrl+D to apply the default transition. With Premiere Pro, this might be a little different and using this "usual" method may fail.
For default transition to work in premiere pro, you need to give the transition handles. A handle is essentially some "free frames", that is, frames in the clip that are empty and are not used. The choice of the length of the handle is variable and depends on the length of the transition and length of the clips being joined but usually a second would work fine.
2. Transition working fine until you render the sequence
There have been situations especially in previous versions of Premiere Pro, where some transitions, for example, Cross-Dissolve seems to work fine during the preview but disappear completely after you render the sequence. This has been found to be solved by placing a single frame of 99% opacity on your clip.
3. Fade transitions not smooth
Some fade transitions may be applied to the video successfully but produce a rugged transition. Furthermore, users have noted that the transitions are even more clunky when they are uploaded to YouTube. The solution to this is having a correct bitrate. Experienced users have recommended using a bit rate of around 20Mb/s for YouTube HD in .
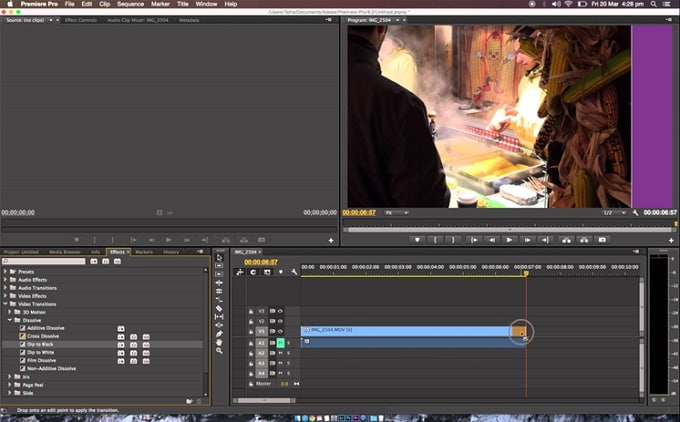
4. Dip to black not applying on other transitions
Dip to black is a form of a fadeout transition and can also be applied on other transitions so that they fade out. With premier pro, however, you may encounter situations where you have set the default transition as a dip to black but when you select several clips and apply default transition, some of their transitions don't get a dip to black applied to them and you have to manually drag dip to black to those ones.
Again, the solution to this is having handles that are space between clips that is free. There are several methods to get this handle but one is to trim 15frames from the end of the first clip and the beginning of the second for a 1-second transition.
5. Applying transitions in the middle of pictures not working
With premier pro, you can apply a transition between two photos which is really easy but may give you a headache especially where there are gaps in between photos. To solve this, make sure you zoom all the way to make sure there are no gaps between applying the transitions.
You may have noticed the Adobe premiere may really stress you and has got a lot of intricacies. Note that this is just a small subset of the number of problems out there. This is why we try to recommend a friendlier video editor, especially for beginners. The best choice is Filmora Video Editor because of the vast number of features it provides while still being easy to use for beginners. If you choose to stick with adobe premiere pro, however, a general rule of thumb for all transitions is that for them to work correctly between two clips, you always have to trim back the clips before adding.
Part 4. How to Add Transitions with Filmora Video Editor
Filmora Video Editor for Windows (or Filmora Video Editor for Mac) is the software you are looking for to replace Adobe Premiere Pro. It lets you add transitions to videos easily, also it provides you many other functions and effects. I'd like to recommend Filmora Video Editor to you, it is one of the best video editing tool for users who doesnot have musch experience in video editing to export professional-looking videos.

Why Choose This Alternative to Premiere Pro Transitions:
- It provides lots of transitions, intro/credit, animated titles and other kind of special effects.
- Drag and drop video clips and photos to combine them as a big video.
- High-picked filters, overlays and motion graphics make the video standout.
- Green screen, split screen, face off featuers are available as well
Easy Steps to Add Transitions with Filmora Video Editor
Step 1. Download and install Filmora Video Editor
Filmora video editor is free to download. Download file and run it to install just the normal way you would do any other software.
The first step to adding transitions on Filmora Video Editor is launching it in full feature mode then creating a new project. Do this by opening the program and selecting "Full feature mode" in the launch page. After launching, click on File > New Project.

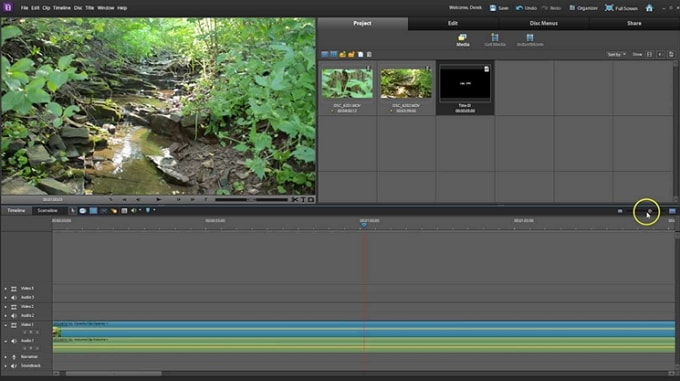
Step 2. Add files you want to add transitions
Click on "Import media files here" icon. This action will open a dialog where you can select the clips you want to add transitions to. Filmora Video Editor even supports selecting music and music files to add on to your clips.
After you have imported your media files, drag the two clips you want to start working with to the timeline pane at the bottom.

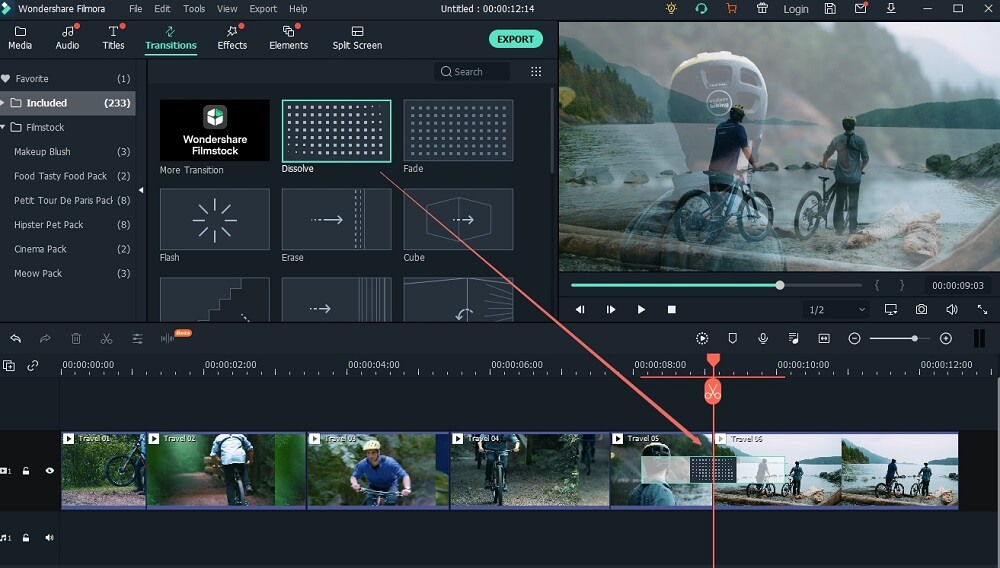
Step 3. Add transitions to video
Filmora Video Editor is packed with hundreds of transitions for you to take advantage of and take your videos to the next level. Accessing these transitions is by clicking the transitions tab which will open all the transitions grouped into categories basic, 3D, warp, slideshow, speed blur and more. Select one of these tabs and select your transition of choice then drag it and drop it between the two video clips you want to create a transition for.
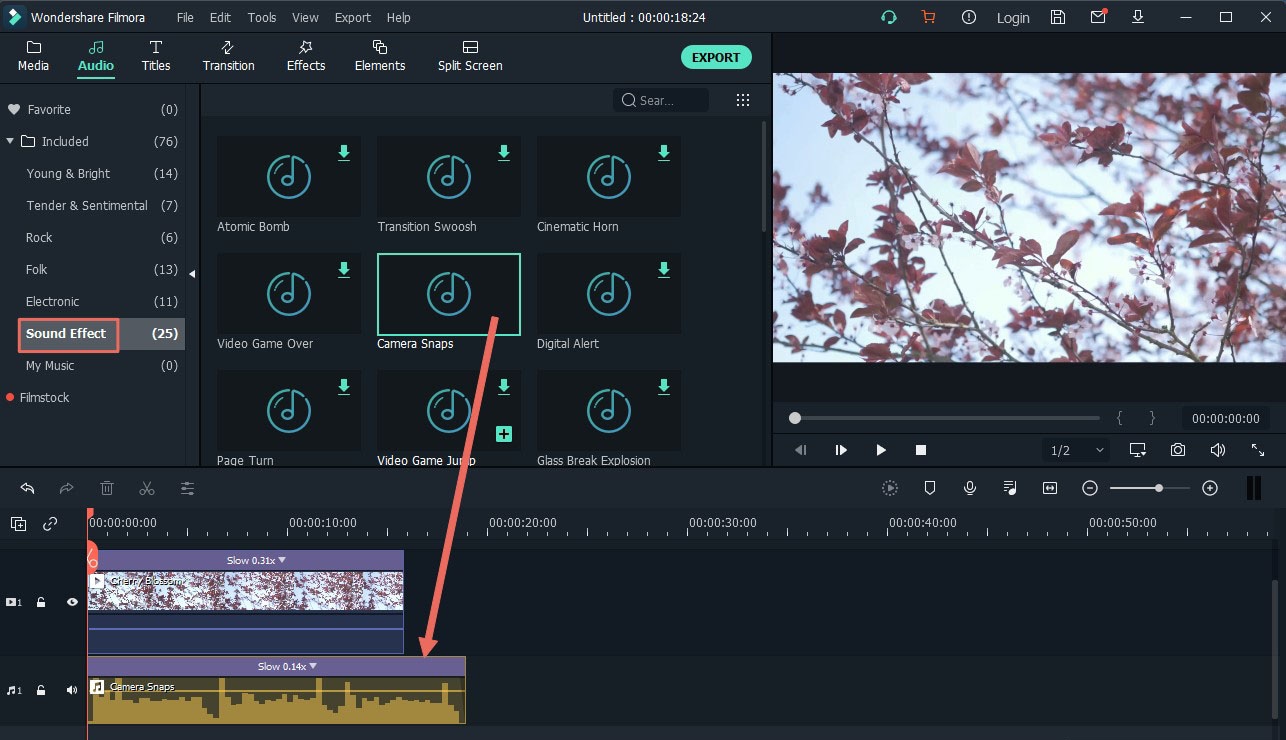
In order to make your video more attractive, you can choose to add a background music to your video. To add taste to your music even more. Click on the music tab and select your music of choice then drag it to the timeline pane labeled with "Music" icon
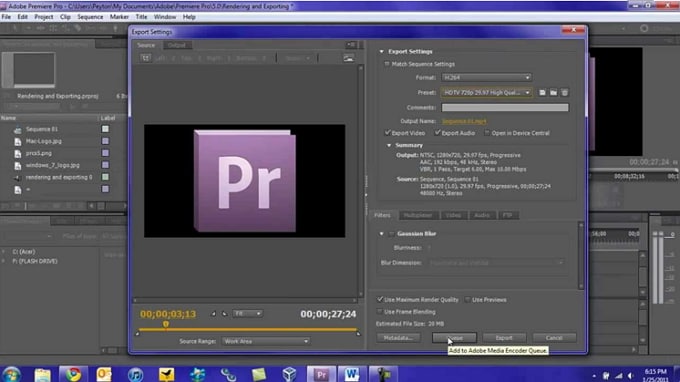
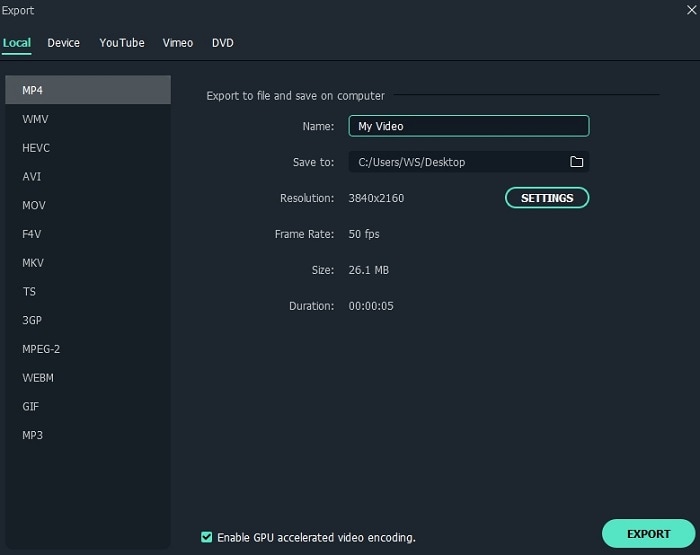
Step 4. 6. Export video with transition
Filmora Video Editor allows you to export to different video formats and can even export directly to your devices and to Youtube and other social media. To access the export options. Select Export > Create video menu item. As you can see in the screenshot below, I chose "Mp4" as the export option and I can edit the video name and location. Note that you may need to be logged in to proceed so please do so.
Conclusion
Transitions add to the appeal of the video and have been popular even in past versions of the adobe premiere pro. However, using Adobe premiere pro has many pitfalls for beginners. Thankfully, Filmora Video Editor also has support for transitions and is more user-friendly.


