


- How do I save an iMovie project on Mac?
- Is is possible to save an unfinished iMovie project for completion later?
As we know, importing, exporting, saving and editing movies in iMovie can be tedious but the real hustle comes when saving the finished projects. Not that it is complicated or difficult to save iMovie projects, it is that very few people understand the right storage procedures and options available.
So,
In this article, you will learn how to save unfinished or finished iMovie projects under different situations. You can pick up the right tutorial to save your iMovie projects for completion later.
Now, let's get started...
- Part 1. Saving Unfinished iMovie Projects
- Part 2. Saving Finished iMovie Projects
- Part 3. Best iMovie Alternative to Edit and Save Videos on Mac [Optional]
How to Save Unfinished iMovie Projects?
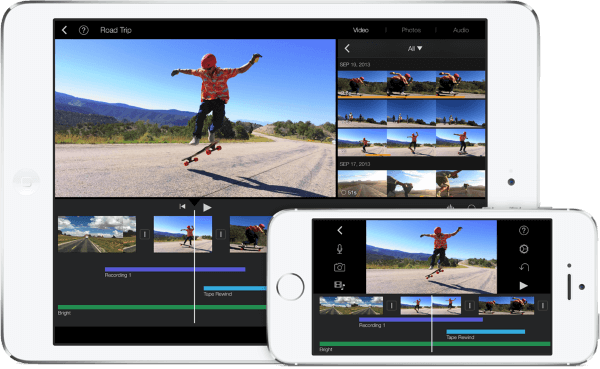
Did you know how to save iMovie project on Mac? It might be known to you but some uninformed users usually close down the whole project in case of an emergency and will start afresh the next time they return. If that is you, this article will make a good read because you will be made aware that saving options for both finished and unfinished iMovie projects are available. It is upon your wisdom to know what is right for consideration and what is not. For those who are always keen to details, they must have noticed that the iMovie menu does not have a "save" option.
That is not an oversight but it's for the reason that all changes are saved automatically as you continue working on your video. Once the video file has been exported, you will find it impossible making any changes so be sure everything is done before clicking on the "export" button.
You have no further reason to start scratching your head if you are halfway your iMovie project but there is something more important that you must attend to. Choose any of these options to save the project until you return.
Num.1
You will have to close the iMovie so that other folders on the system are visible. Your focus will be traded on the "finder" folder which is to be found on the bottom part of the screen from the right side. Click on it to open then you can double-click on the folder named "movies" and you will have free access to the "iMovie events" and "iMovie projects" folders. Move the two folders to the flash drive with a simple drag and drop. You will get a notification that the projects have been successfully saved to the drive.
When you have returned to continue working on your saved projects, it will be easy retrieving them as long as you use a computer installed with the iMovie program. You will have to open the storage device where they were saved, drag the folders and drop them back to the "movies" folder. You will find them easily once the iMovie has been launched.
Num.2
The second way to save an unfinished iMovie project is to a removable drive. This will be good in case you suspect that the next time you return to continue working on the files, it will not be on the same computer system. Start by having the removable drive plugged in to your computer and the iMovie should be open. When at the iMovie window, go to the "file" icon and click for the dropdown options to show up. One of the options will be "open library" and placing your cursor there will reveal other options to click "new".
The new library should be given a name of your liking after which you can navigate through the drop down button to search for your drive. Once you have found the icon for your removable drive, click on it and press "save" to create the new library. Go back and choose the old library and then drag and drop the unfinished project to the new library of your removable drive. The project will save automatically and you can have it opened in a different computer system that has iMovie installed.
How to Save Finished iMovie Projects Easily?
The other option for saving your iMovie projects is when they are finished. The procedures might be different but you will not miss out on a few similarities. However, you will be strongly advised to continuously save your project because the iMovie can develop hitches or the computer shuts down unexpectedly.
Num.1
Right at the iMovie menu bar, you will be able to see the "file" icon which will be the first step when saving your already finished project. When you scroll down, the "save project" icon will be seen and you should click on it. The project will save automatically to your system ready for exporting to the right device. Always make sure that you have saved the project in a folder that you will not have hard time navigating through. It should be in a folder that you can access easily and preferably with limited clicks.
Num.2
The iMovie saves any project being worked on automatically in the hard drive. From there, it is easy accessing the files whenever you need them since there is a "movies" folder where the finished videos are deposited. Inside the folder, you will get two locations that have all the necessary data concerning your iMovie project. "iMovie projects" is a folder with information about the timeline and all video effects available while "iMovie events" folder has raw videos and any other media material that is required for the project to succeed.
The two folders must be saved regardless of the computer system that you are using. This is because losing them will be tantamount to losing very critical data for your iMovie project. With this, you can have the option of having the finished iMovie project saved to external USB drive with a large capacity, a network drive or external FireWire drive.
Num.3
The third way of saving finished iMovie project will be a bit tedious but it will cost you nothing for being patient enough. The basic steps to follow will start with visiting the "share" button which you will get at the toolbar. From there, choose "export using QuickTime" or "export movie" as any of the two will do the trick for you. Provide the project with a name that you deem befitting and then select "save".
The video will be saved to the desktop and from that point; it will be just clicking and dragging the video to the internal or external drive. It has to be the exact one that you have chosen so makes sure you are decisive enough. It should not consume a lot of your time unless you bring about unnecessary complications.
By and large, those are the main ways to use in saving both finished and unfinished iMovie projects. You must be in a position of determining which option is for the unfinished and which is for the finished projects. Using the wrong saving option for the right iMovie projects will attract frustrations to your side.
As a reminder, you have to continue saving your project after every edit even though the iMovie mostly does that automatically. You cannot have an excuse that the iMovie is doing it then later to find that nothing had been saved. It is your project and you will have to take full responsibility in ensuring it is flawless and the experience is topnotch.
Looking for iMovie Alternative? Try Filmora Video Editor to Edit and Save Videos on Mac
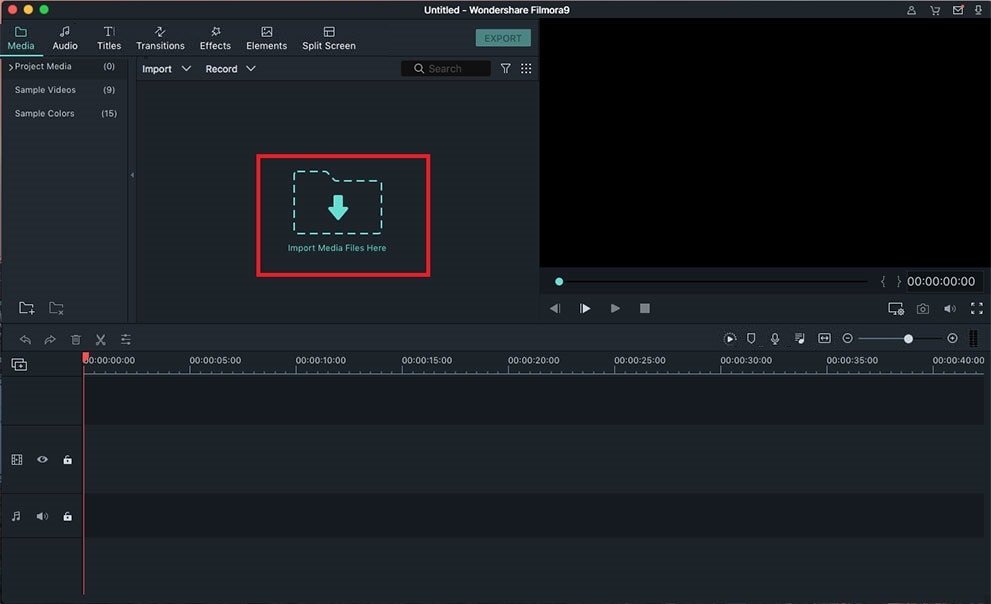
If you feel the above tutorials to save iMove project are troublesome or want to find a better way to edit and save video on MacBook (like me), then, you can take a free trial on the Filmora Video Editor for Mac (or Filmora Video Editor for Windows).
This program works well as one of the best iMove alternative software and gains a nice reputation on the Internet. You can easily use its basic and advanced editing tools to edit your videos and then save your video in local or upload to the site or devices. This alternative to iMovie allows you to save the project in your local disk with 1 simple click.
Key Features of Filmora Video Editor
- Multiple handy video editing tools to crop, trim, rotate, split and join videos.
- Personalize your video with PIP, motion graphics, filters, overlay and more.
- Apply title, text, intro/credit, green screen, split screen and 300+ new effects to your video.
- Directly upload video to YouTube, Vimeo, or convert to other formats. Or save the project file in the local disk for later editing.
To get started, you can choose to start a new project by selecting "New Project" in the program, or if this is not the first time for you to use the program, you can directly choose the right project program and open it for editing.
Let's suppose that you're never using the Filmora Video Editor before, then, please follow the below steps to edit your video and save your project.
Step 1. Import Video files
Launch Filmora Video Editor on your PC then click on "Import" followed by "Import Media Files" button to open file explorer window, choose your target video file and click "Open" button on the bottom right corner of the latter window. To select several video files at-a-go, press and hold "Ctrl" button on the PC keyboard and now click on these video files.
Step 2. Edit Video Files
Prior to editing, drag these video files from the User’s Album and drop on the video track in the timeline.
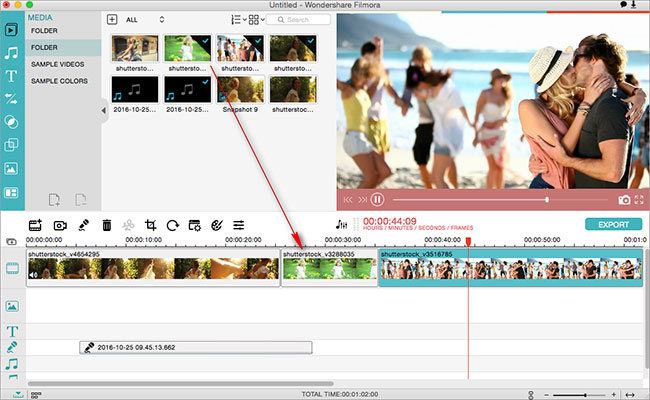
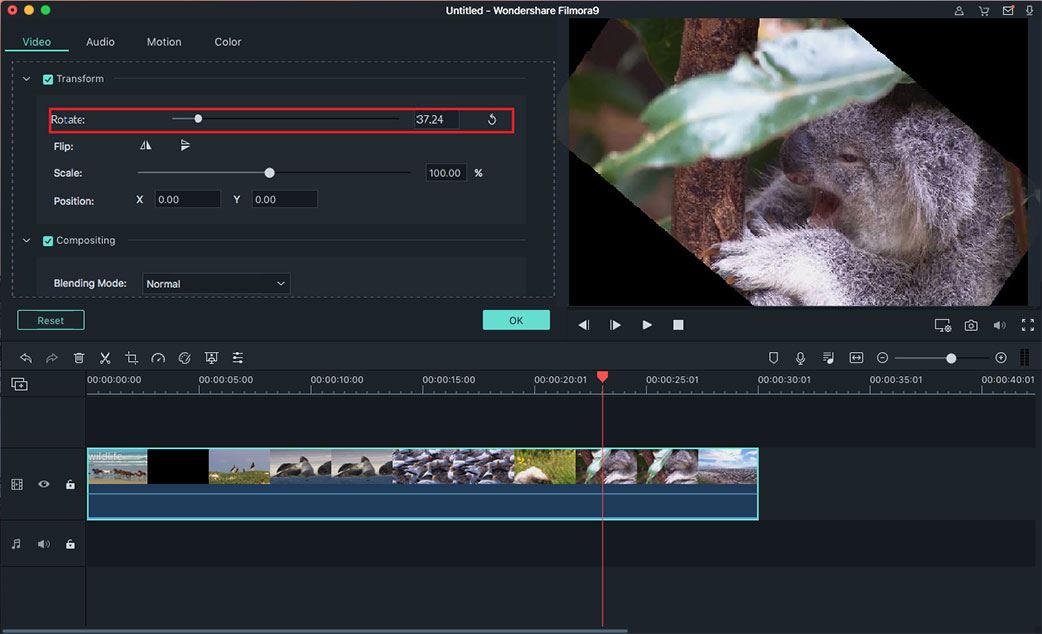
To rotate or flip a video clip, double tap the video in the timeline where an editing panel will appear in place of your User's Album. On the top of this panel, click on the four buttons to either rotate or flip your video while checking each action outcome in the preview window. When you have attained your need to click "Return" button.
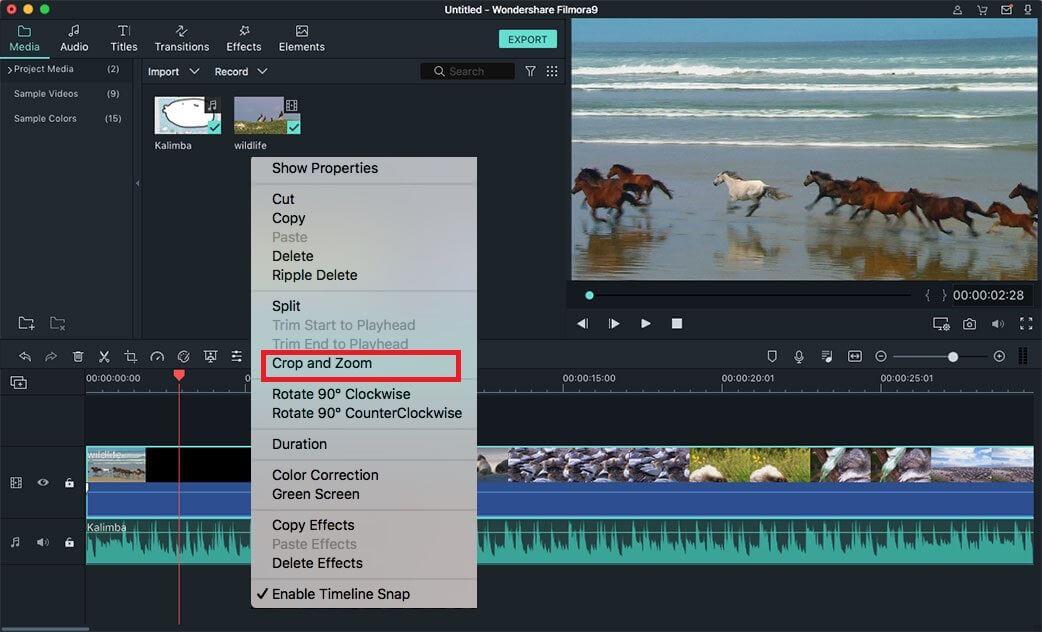
To crop your video clip right click and choose crop and zoom, a pop-up window will be displayed where you will stretch and drag the rectangle on the preview window to have your desired frame area.
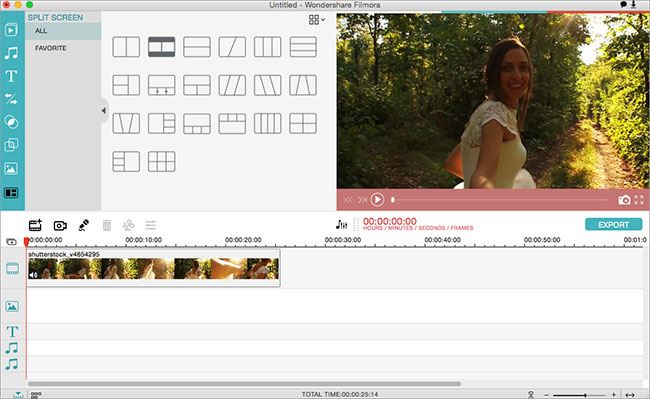
You can continue to perform more edits like split screen, adding overlays, adjusting video speed with more others depending on your need.
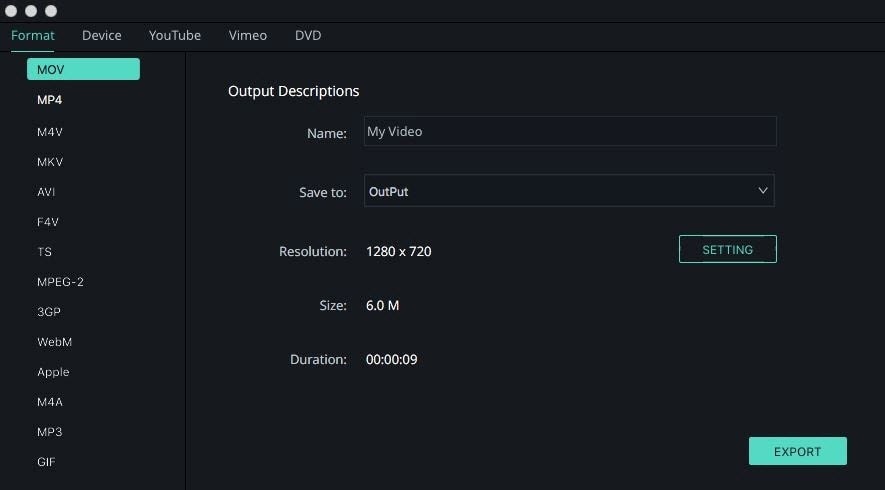
Step 3. Export edited video file
When you have finished editing your video, click on "Export" button located at the top left of the main window where an export window will be displayed. On the output panel, you can choose different way to save and share your edited videos.
[Attention]
If the video is not finished or you want to save the project file for further editing, you can directly press "Ctrl + S" to save the project file on your local disk completely.
Sounds great? Click the below icon to have a free trial now.
