Mac Data Recovery
- Mac Data Recovery+
-
- Undo Empty Trash Mac (macOS Mojave Supported)
- Recover Overwritten Files on Mac
- Recover Lost Data on Mac after Upgrading to macOS Mojave
- How to Show Hidden Files on Mac
- Top 10 Mac Data Recovery Software Reviews
- How to Recover Deleted Files on Mac
- Recover Deleted Files on Mac Without Software
- How to Delete Partition on Mac
- Mac Hard Drive Recovery
- Top 6 Ways to Recover Deleted Photos on Mac
- Word Not Responding on Mac? Fixed Now!
- Recover Files from Recycle Bin or Trash Folder on Mac
- 5 Best Methods to Recover Deleted Word Files on Mac
- Effective Solutions for “Desktop Files Disappeared on Mac”
- Recover Overwritten Files on Mac
- Apple Email Recovery
- Free Mac Data Recovery+
- Mac Repair and Restore+
-
- Format FAT32 and NTFS Drives on Mac
- All You Need to Know about MAC Recovery Mode
- A Detailed Guide on Mac Repair [2019]
- How to Perform Internet Recovery on Mac
- How to Restore MacBook Pro?
- How to Restore Mac to Factory Settings?
- How to Restore Mac from Time Machine? [2019]
- How to Restore Mac and Get All of Your Files Back
- How to Boot Mac into Recovery Mode?
- How to Restore MacBook Air Safely Without Loosing Data
- How to Securely Do a System Restore on Mac
- How to Restore iMac without Data Loss
- Best Mac Recovery Partition App
- Best Way to Perform Disk Recovery on Mac
- The Best Mac USB Recovery Tool

• Filed to: Mac Recovery • Proven solutions
"After upgrading to Mojave iCloud Drive was activated and uploading my private files to the cloud?! Obviously I turned it off. Now my contents of my desktop and documents folder are all gone. Optimise Mac Storage and "Desktop & Documents Folders" was NOT activated before I started the upgrade. Is there a way to get my files back?"
Upgrading your Mac OS without taking necessary precautions like backups may result in loss of crucial data, images and files. Have you ever lost data after the last Mac update? Or have you accidentally deleted files on Mac which is updated to macOS 10.14 Mojave?
Don't panic! You can recover lost data on macOS 10.14 Mojave yourself. These types of problems can be resolved with help of Mac data recovery software. Now, because since macOS High Sierra system, Mac users are not allowed to access to built-in system drive from any apps, all Mac data recovery software in the market will ask Mac OS 10.13 users to disable SIP (System Integrity Protection) on Mac firstly before recovery. It is an easy option, we here can give you detailed steps to complete data recovery.


Panic sets in the minute when you see some of your crucial data missing from your system after an OS update, don't worry! Recoverit (IS) for Mac is there to rescue! It allows a user to get back all the lost data such as images, videos, music and other documents that have been deleted due to a software update. It is one of the best software in the market that caters to all the needs of the user. It is high-efficiency software that can recover all your lost data in the quickest way possible.

Recoverit (IS) for Mac
Why Choose This MacOS High Sierra/Mojave Data Recovery Software:
- The procedure to recover is just a series of few clicks to prompt to scan your device and recover the data.
- People can preview the recovered data before deciding whether to recover
- It provides with "Quick Scan" and "Deep Scan" modes, either save your time or look deep to the Mac for lost data.
- The product of a reputable institution and up-to-date with technology.
Guidelines to Recover Lost Data on macOS High Sierra/Mojave:
It is essential that when data loss occurs one should stop using the device to prevent further data loss, don't save anything to the device as it can over-write the data on the disk. And Mac OS 10.13/10.14 users must disable SIP on Mac firstly before you start to recover lost data. It is an easy operation on Mac, please follow these steps.
Step 1 Firstly, go to reboot the Mac and press "Command + R" keys simultaneously after you hear the startup chime, then you will boot OS X into "Recovery Mode".

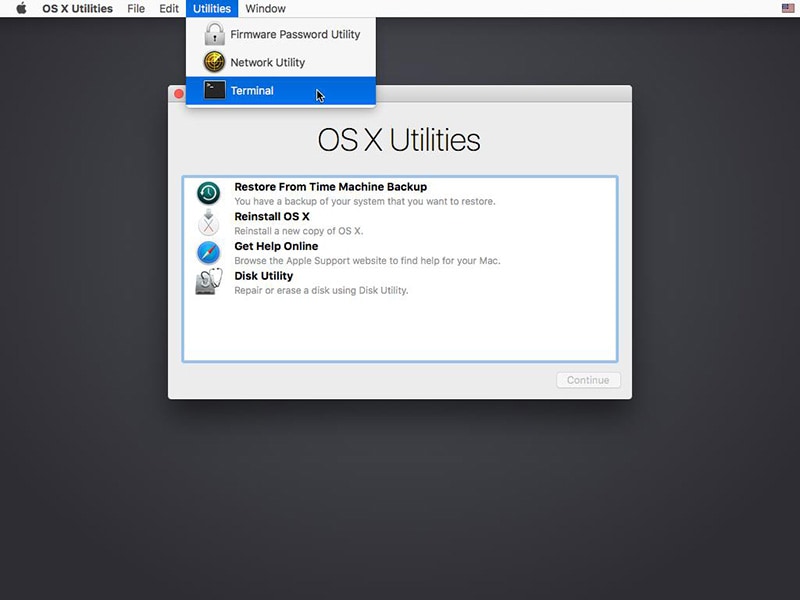
Step 2 Then you will get the "OS X Utilities" window, you need to press the "Utilities" menu at the top of the window, and choose "Terminal" option from the drop down box.
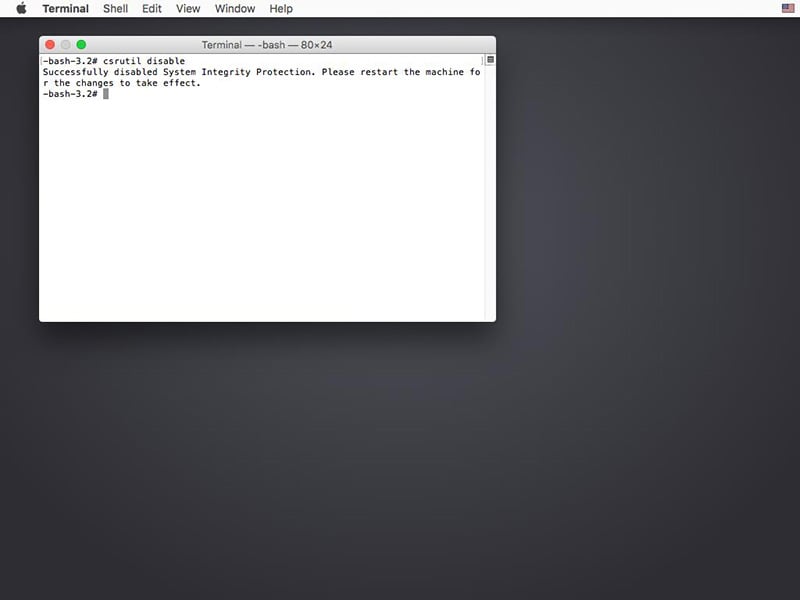
Step 3 Now you are in the "Terminal" window, type in "csrutil disable" and press "Enter", you will get the information that you have successfully disabled System Integrity Protection, then restart your Mac to start to recover lost data from macOS High Sierra.
Tips: We recommend you write download "csrutil disable" on paper because you can not copy these words in recovery mode. Or you can take a photo of the image below in case of you can not remember "csrutil disable".
Note: If your Mac system is from 10.12~10.6, you can start from "Step 4" directly and you do not need to disable SIP on Mac.
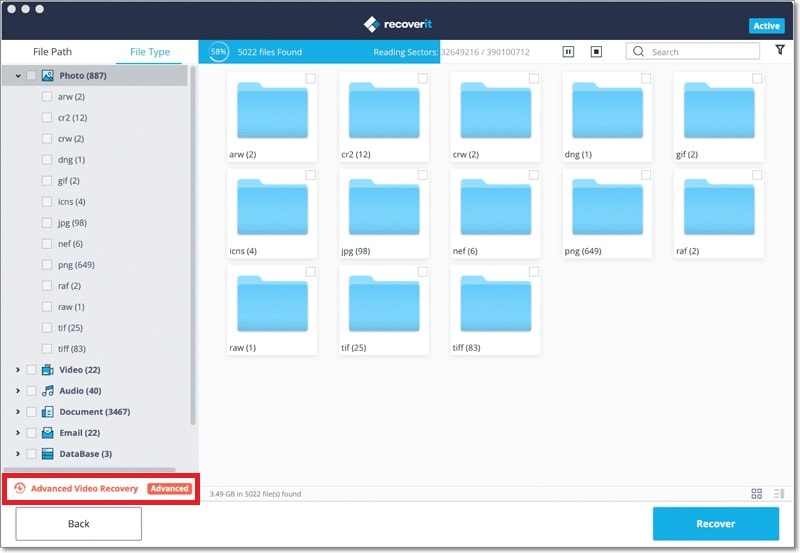
Step 4 Download and click on the file to start your installation process. After installation, it opens up this dialogue box. In the window of the program, click selects the file types which you want to recover.

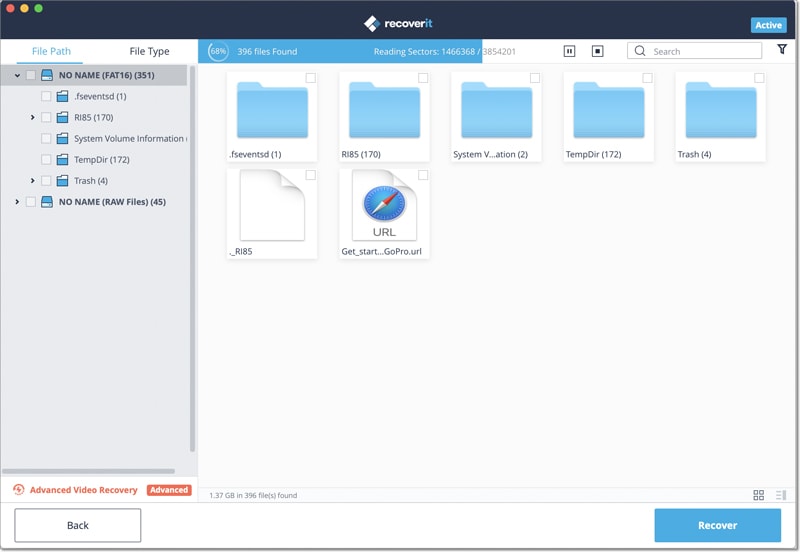
Step 5 This opens up another dialogue box displaying all the drives in your computer. Then select the drive from which you want to recover your data.

Step 6 It only takes a few seconds to finish the quick scan process. One can view the files in "Tree View" or "File View". This option allows you to click the preview the data that you want to recover.
Optional: You can enable a deep scan if you can't find the lost data that you are looking for, this might take time, but it will retreat a lot more data, as it is a more detailed scan.
Step 7 After the scanning process, you just need to select the data and click "Recover" button to complete the data recovery process. Follow these steps you can easily recover lost data from Mac OS 10.13 system with iSkysoft Data Recovery for Mac.

Can't Miss:
Once you recovered the lost data on Mac, please remember to turn on the SIP(System Integrity Protection) for your Mac security. Reboot your Mac - in the "Terminal" window, type in "csrutil enable" and press "Enter", then restart your Mac again. That's it.
Elva
staff Editor