
• Filed to: Mac Tutorials
There is hardly a better way of sharing your ideas in written word than printing to PDF document, but more often to print to PDF requires some tips and tricks to put you through the printing process without giving you headaches. You can, however, learn how to print to PDF on Mac, Linux and Windows with PDFelement Pro easily just by following few simple steps.
Part 1: Top 3 Free Ways to Print to PDF on Mac (macOS 10.15 Catalina)
There are several virtual printers which can help you print to PDF files on your Mac OS X (macOS 10.15 Catalina included). There are no download fees required, so all of these PDF software are free and easy installable.
#1: PDFelement Pro for Mac – The Best PDF Solution
PDFelement Pro allows you to print to PDF from existing PDF, images, Webpages, text files and more as easy as a breeze. Simply open the webpage, image or file with this virtual PDF printer, then you can directly save it as PDF format. You also can import multiple files and save them into a single PDF file. What's more, this program comes with many functional PDF editing tools so you can make any changes on your PDF documents.
Why Choose This PDF Editor:
- Print existing PDF, HTML, Text, Emails to PDF directly.
- Easily add or delete texts, images, links, watermarks and more in PDF.
- Convert PDF file to Microsoft Word preserving the original layout.
- Combine or split PDF. Insert, extract, rotate or crop PDF pages.
- Annotate PDF with various annotation tools. Fill out PDF forms.
- OCR scanned PDF for easily editing and converting.
Steps for Printing to PDF on Mac
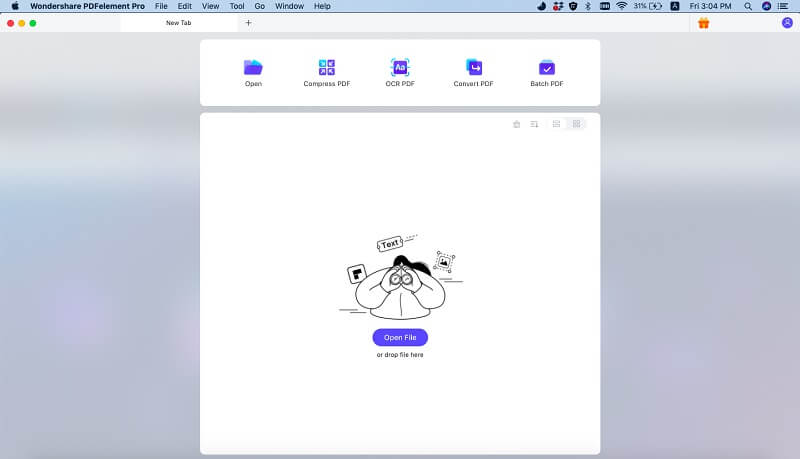
Step 1. Open the File You Want to Print to PDF
First, launch the PDF editor. In the main interface, click on the "Open File" button to select the file you need to print to PDF format.
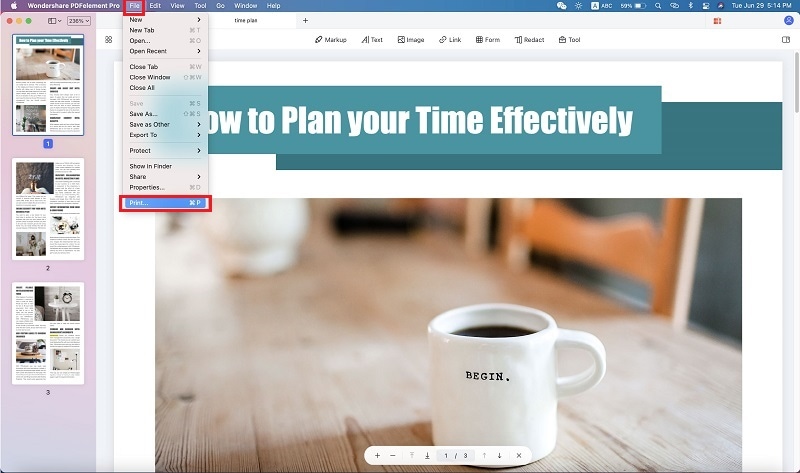
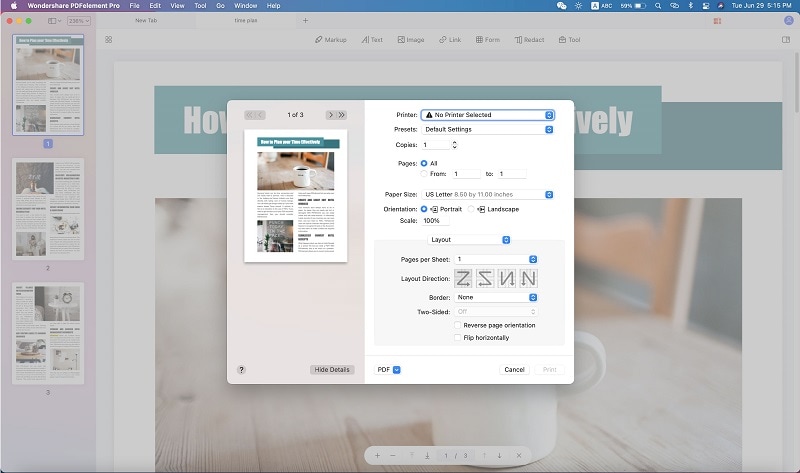
Step 2. Print the File to PDF
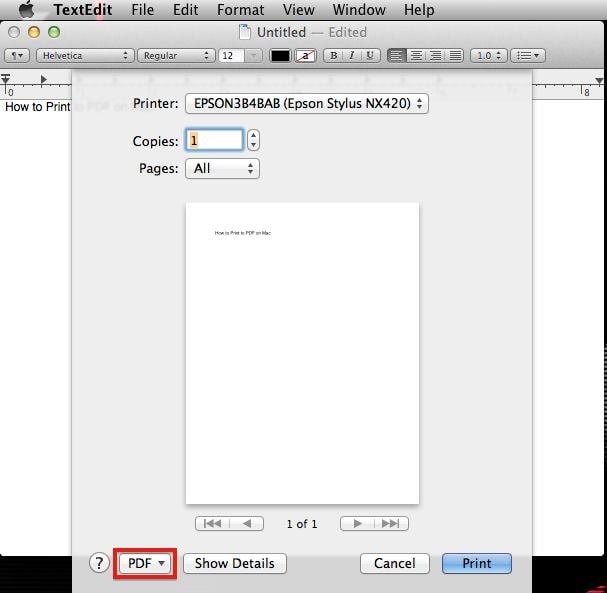
Now go to the "File" menu and click on the "Print" option. In the pop-up window, select PDFelement Pro as the printer, and customize the page, and then set the output format as "PDF". Lastly, click on the "Print" button to print to PDF.
#2: Directly Print to PDF on Mac OS (macOS 10.15 Catalina included)
Having your Mac OS X updated to versions later than 10.6.8. should help you get your PDF files printed with no additional troubles. Updated versions of Mac OS system have built-in PDF print and convert features which comes with standard update packages, so you just have to click a few times and your PDFs will be ready for printing process. You can update your Mac OS to latest versions with PDF printing features by downloading free operative system updates on Mac App Store, all free of fees.
Steps for Printing PDF Files on Mac
Mac OS X is a great threat to competitors when it comes to printing PDF, because it already has built-in PDF features. Few Mac versions with exception of Mac Tiger, has built-in option inside Mac operative system, so you can run PDF printing without having to install PDF printer software by following some simple steps.
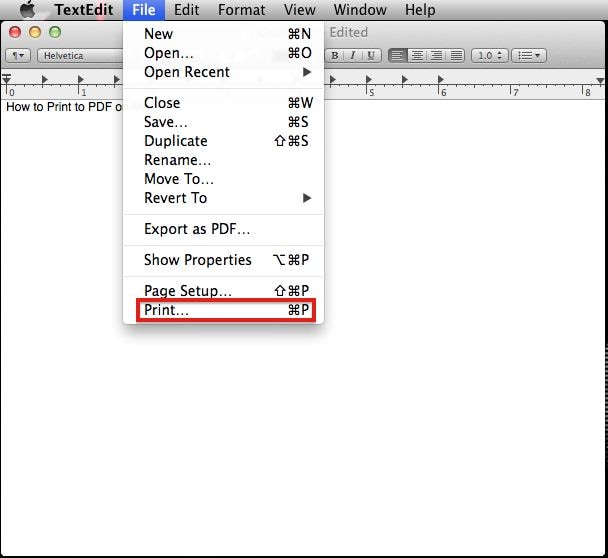
Step 1. Opening and choosing files
Choose the documents or files you want to print in PDF, using your Mac application you have previously downloaded and installed. Once you have chosen your document, open the File drop-down menu and chose Print.
Step 2. Convert and print to PDF
Once you hit the Print button, print options will appear, so you just need to choose to Save to PDF, choose your file destination, and your file is already converted and ready to be printed.
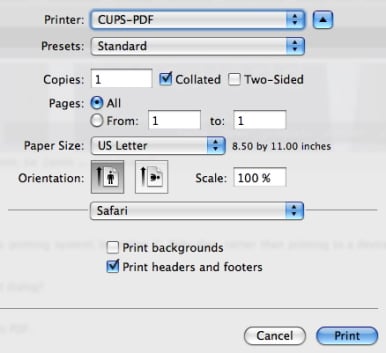
#3: CUPS-PDF – Free Virtual Printer for Mac OS X
This virtual printer is genuinely designed for converting PDF files and documents on Mac OS X, but it also has features of printer software, making the process of PDF printing a lot faster and easier. CUPS stands out because of its advanced built-in features, which allows you to reduce the time needed for choosing and printing PDF without having to go through picking out the printing type, dealing with dialog box and choosing the file location every time you print your saved files. By making CUPS your default virtual printer, you can just create a shortcut command and manage your PDF printing from Mac OS X desktop.
Part 2: How to Print to PDF on Widows, Vista and XP
Printing PDF files might be a little harder in Windows, Vista and XP operative systems than it would appear to be on Mac, but you can definitely download some virtual PDF printer software, which could help you convert and print your PDFs easy and fast. PDF is a lot more economic in saving your paper, and as a big plus, your files are organized better, so here are few tricks and tips on how to install virtual PDF printer software and print to PDF on Windows 7, Windows 8, Vista and XP.
Method 1: Print to PDF on Vista with CutePDF
CutePDF is one great printer app, which should help you get your files ready to be properly printed in PDF format. It is available for free download, but even though it works on 64-bit Vista version, and which most products don't, it can't be installed unattended, so here are some tips on how to install and start using your CutePDF and print your PDF files on Vista.
Steps on Printing PDF on Vista
Step 1: Installing ghostscript
This part of CutePDF installation is very important, for this is the script which will later convert your files into PDF. Installation is simple and easy.

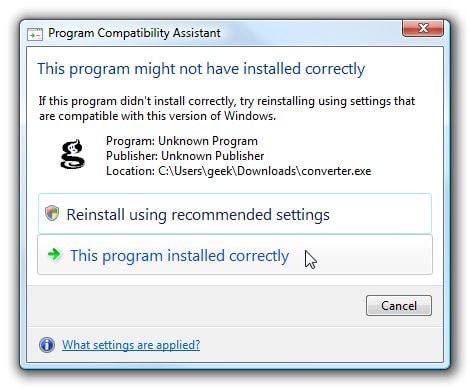
Step 2: Program installation
When you are done installing ghostscript, pop-up window should appear claiming that you might not installed the program properly, then you just need to click on the statement “This program installed correctly”.
Step 3: Finishing installation
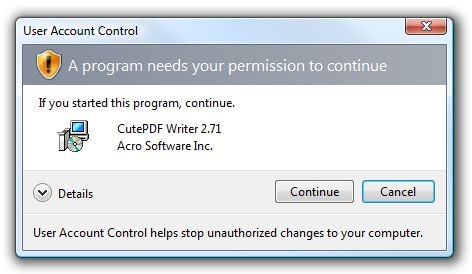
Installation should run smoothly and as simple as it is, after you are done with it, you can restart your computer and start printing. In case problem occurs during installation, you should turn off the Account User Control and restart your computer. After you finish installation, make sure you have enabled your AUC again, and start printing your PDFs.
Step 4: Printing PDF
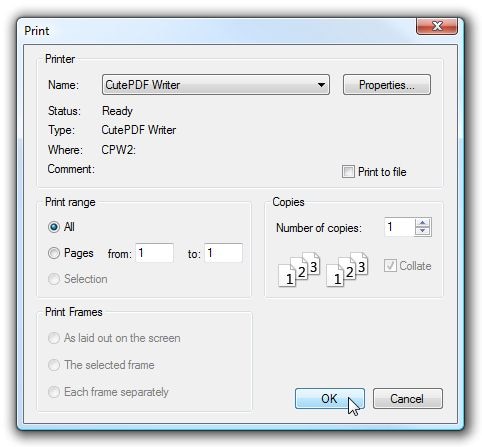
Choose the file you want to print and convert, then choose the printer called “Cute PDF writer” to be placed under Printer Name. Choose the number of pages you want to print and click OK. Your PDF printing should now start without problems.
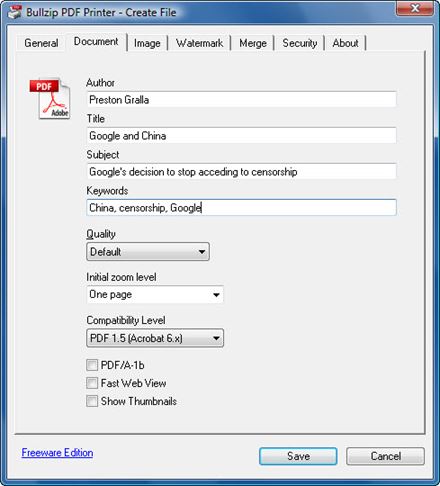
Method 2: Print to PDF with BullZip
BullZip is a free PDF printer that works on Windows 7 and 8, Vista and XP operative system. You can download BullZip PDF printer for free, and begin installation easy and without doing anything more than few clicks. BullZip virtual printer can be used by ten different users, and has to offer a great number of useful PDF printing features. It has user-friendly interface, passwords to protect your PDF files and documents, supports multiple outputs and is easy to use. You can print and convert any almost any Windows file to PDF and print it easily in just few steps. Printing to PDF is simple, so basically you will be lead by BullZip app itself.
Method 3: Print to PDF Online Instantly
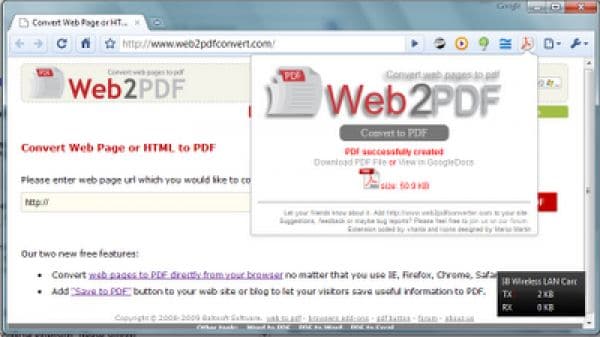
Unfortunately, unlike Mac OS, Windows operative systems don't have PDF built in, so it might take more than just two steps to get your PDF printed. If you dislike downloading, installing and setting up various software and apps, then Web2PDF will be your favorite free PDF converter. There is no need for PDF converters on Mac, you can simply choose the PDF type as an available built-in system option, but if you run on Windows operative system, you will need to convert your files manually before printing.
Part 3: How to Print to PDF on Ubuntu (Linux)
Ubuntu is not so easily manageable as Windows and Mac operative programs, so if you are not particularly tech sawy, you should avoid having Linux as your operative system. Also, you will have to put an effort into converting and printing your files to PDF, since Ubuntu, just like Windows, don't have PDF built-in. But as for every other operative system, there are several great virtual printers also designed for printing PDF in Ubuntu Linux.
Method 1: Print to PDF in Linux Ubuntu with CUPS-PDF
CUPS works great on any Linux program, including Ubuntu, helping you generate your PDF files. This app uses ghostscripts for translating files you choose into PDF, so you can later choose the PDF file type for printing. You can download CUPS-PDF for free, install it and set it up fast and easy, step-by-step.
Step 1. Getting started with setting up
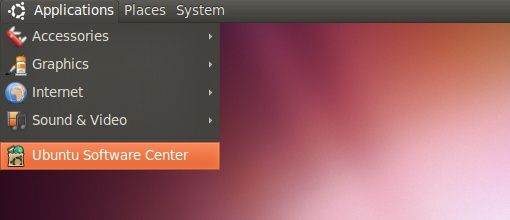
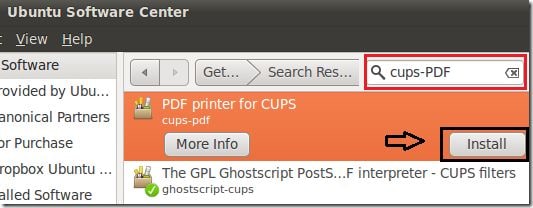
To get started, you first need to find Ubuntu Software Center in Application menu, like given on the screenshot.
Step 2. Installation of CUPS
Next, you need to search for CUPS-PDF in the upper right corner, and start installation. Software installing is easy and fast, so you are already half way to print in PDF.
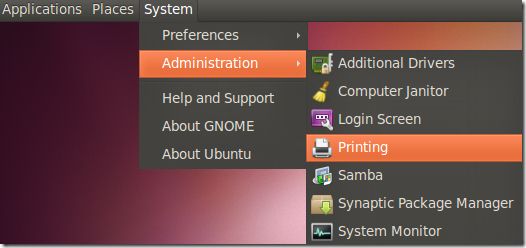
Step 3. Settings and Printing PDF
Go to the System menu, then next to Administration, and choose Printing, so you can set up preferences.
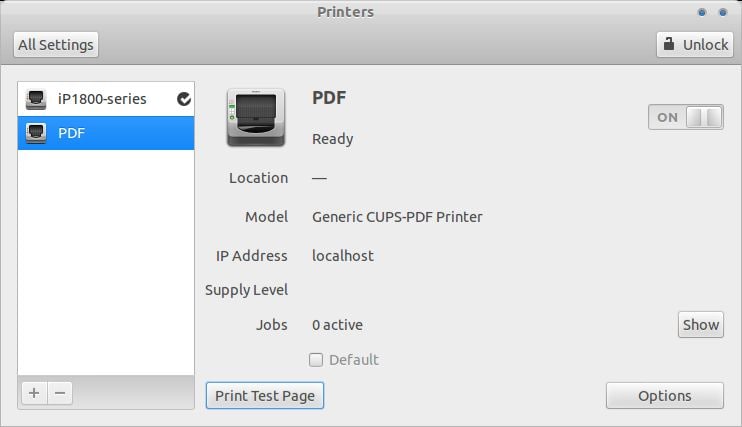
If you did everything right and step-by-step, according to the instructions, then the printer symbol, called PDF, should appear. That means that your files are ready to be printed in PDF and your Linux Ubuntu is all set for future PDF prints.
Method 2: Create Ubuntu PDF Virtual Printer
Creating your own virtual printer by manipulating your operative system carries some amenities with it along the way. Ubuntu has option which allows you to program and make PDF printing possible without having to download virtual printer app. You can do it all by yourself, inside the system itself, by following few simple steps.
Step 1. Creating your PDF printing options
First, you need to open the terminal and type in the commands: sudo apt-get install cups-pdf.
Step 2. Choosing PDF file type
When the installation is completed, you can move on further by System Settings and choosing Printer option. If everything went well with the installation, there should be a printer symbol called PDF.
Step 3. Printing your files to PDF
You are now able to print your files in PDF format in Linux Ubuntu, without downloads previously needed. Printing location is set in Home-User-PDF by default, but you can change it any time if you want to.

Ivan Cook
chief Editor