


How do I edit video files?
For most people, when they tried to edit a video by themselves, they'll find it is not a simple task because an awesome video always require a professional video editing software and technical skills in video editing. So if you're a beginner in video editing, you'll feel it is overwhelming at first, but when you become proficient, you'll also realize that video editing is not so hard as you imagin before. And during the process, finding a professional yet easy to use video editing software as your assistant can help you save lots of time.
Even though tools like Adobe Premiere Pro, After Effects, etc. have been marked as the best video editing tools and they are also welcomed and popular in film or video professionals. But I have to say, these tools are not user-friendly to a beginner in video editing. Because it is always too complicated and the price is a little bit higher if your budget is not enough. But, don't worry, here I'd like to recommend an easy to use yet professional video editor for your reference - Filmora Video Editor.
if you want to know more about the video editing program for professionals, you can click here.
Filmora Video Editor - Edit Videos without Losing Quality

Filmora Video Editor or Filmora Video Editor for Mac has the same functions of Adobe Pr and AE, but it is easier to use than the Adobe video editing software. And it combines the Pr and AE into one tool, so that you can directly use Filmora Video Editor to cut, split or trim video clips as you like, and also use it to add cinemated movie title, intro, filters and transitions as you like. Cool, right?
Key features:
- Different Modes: Have both Easy Mode and Full Feature Mode. The Easy Mode is designed for users who want to edit informal videos while the advanced Full Feature Mode offers all the high-level features.
- Creative Features: Filmora brings a range of creative features such as the capability to add overlays and filters to enhance the appearance of your videos. The program also allows you to add titles, text, transition and motion elements.
- File Format Support: the software supports nearly all the available videos, image and video formats. Moreover, it offers support for GIF files and 4K resolution videos. Also, the program allows you to import images and clips from Facebook, Twitter and other social media channels.
- Basic Video Editing Features: The app includes the different basic features that you would expect in a video editing app such as speed control, noise removal, framing preview, and color tuning, to mention but a few.
- Advanced Features: In addition to the basic features, the app also offers advanced features such as audio mixer and picture-in-picture support.
How to Edit A Video with Filmora Video Editor from Beginners to Professionals?
First of all, you can take a look at the below video tutorial to learn how to edit a video systematically.
Or, you can go to the specific area to learn the detailed steps one by one.
- - Import Video, Photo or Audio Files to Media Library
- - Select & Delete Clips in the Media Library
- - Add Video to the TimeLine for Editing
- - Delete Video Clips from Timeline
- - Trim Video Clips
- - Split Video Clips and Scene Detection
- - Rotate Video Clips
- - Crop Video Clips
- - Join Video Clips
- - Enhance Video Clips
- - Resize Videos
- - Add Watermark or Logo to the Video
- - Add Effects to the Video
Preparation:
To get started, you need to download and install Filmora Video Editor on your Windows or Mac computer, then launch it and choose your needed editing size and mode. Here, we choose "16:9" and "Full Feature Mode" to enjoy the full function.

1. Import Video, Audio, and Photos to Media Library
There are 3 different ways to load your source files into the media library:
- Click "Import Media Files Here" to select and upload videos from your local disk to the program;
- Hit "Import" option and choose a way from its drop-down list to load media files;
- Directly drag and drop your target files into the program.

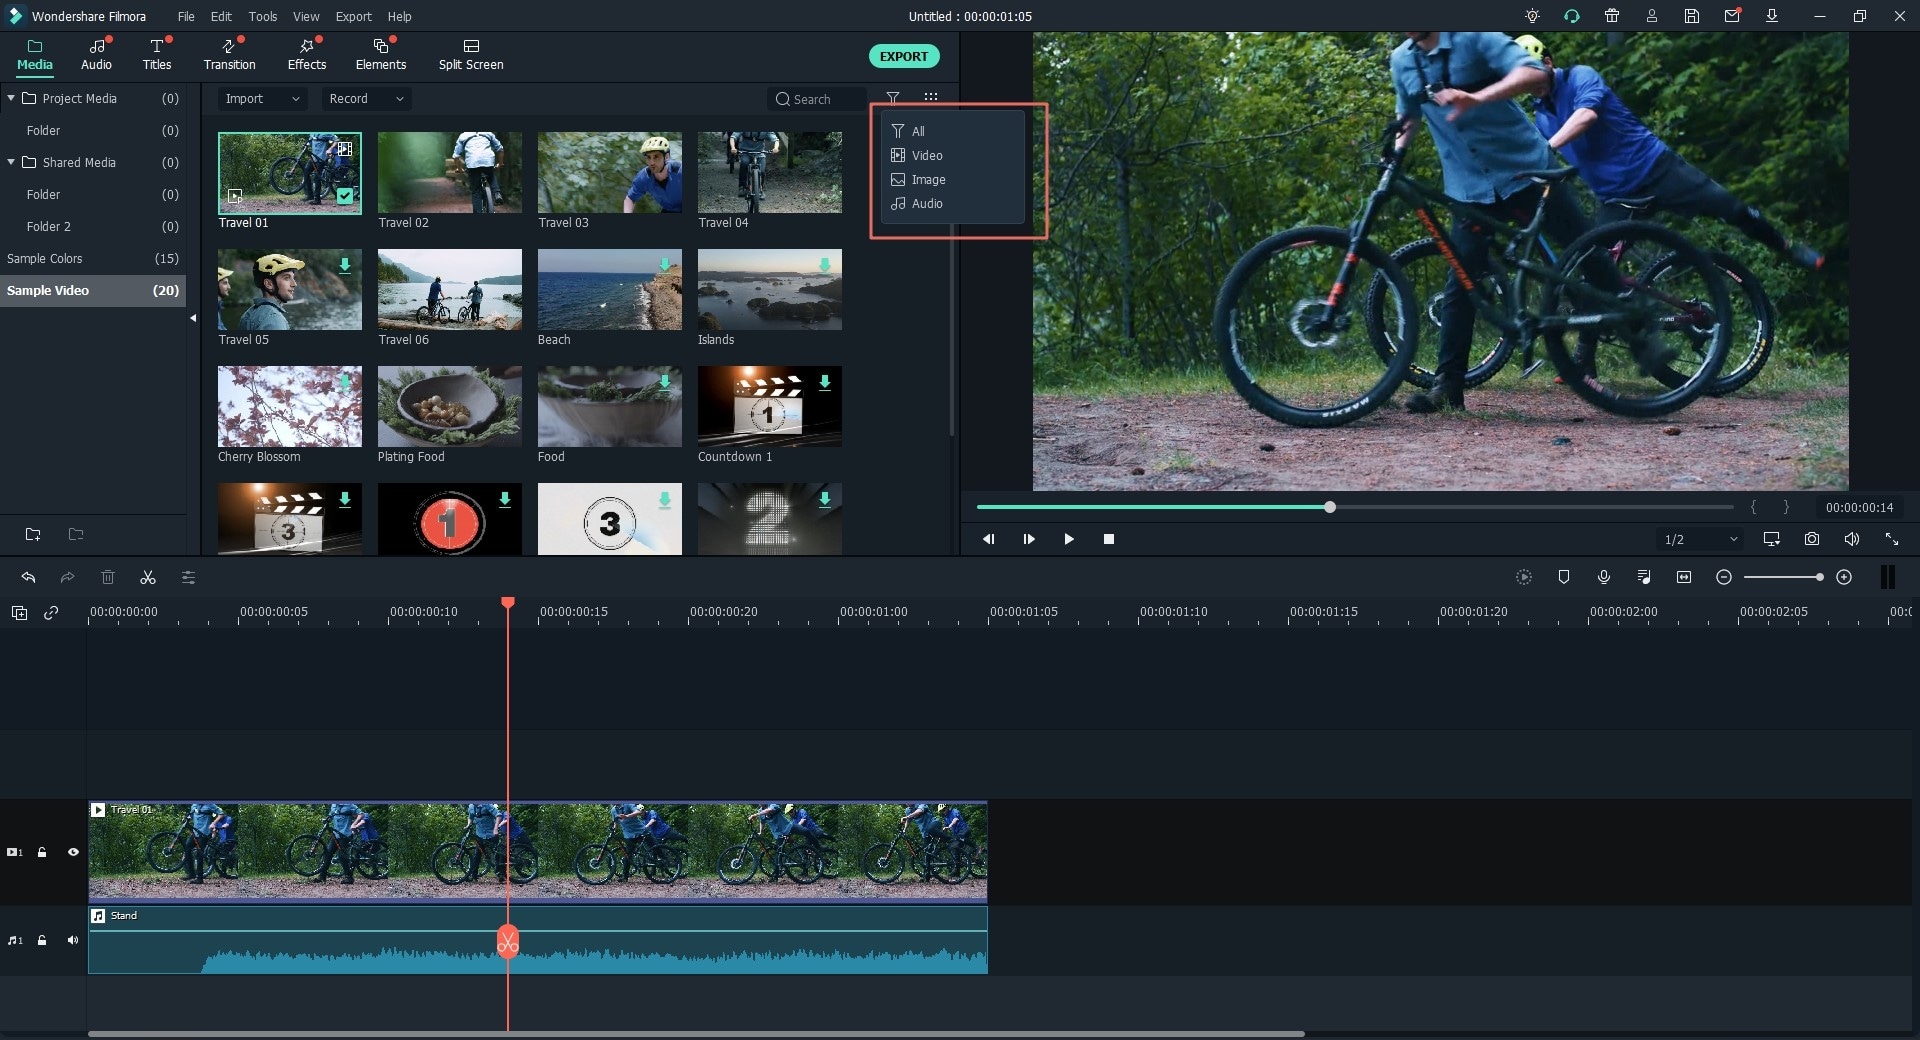
2. Select & Delete Clips in the Media Library
- Select clips in the media library: Click a thumbnail to select one media file; Press and hold "Ctrl" button, and click the thumbnail you want to select multiple medial files; Click the first thumbnail you need, and press and hold "Shift" button, then click on the last thumbnail to choose a batch of meida files.
- Deleted Clips: Right click the video in the media library, and choose "Delete".
You can also use the searching bar to find, filter and locate your target media files easily.
3. Add Videos to Timeline
- Move your mouse icon to the video you wish to add to timeline, and hit "+" icon to the default video timeline.
- Directly drag and drop the target video to the timeline as you like. (At present, you have two video track can use in the program).
- Right click the video in the media library, and choose "Add to Project". Here, you can also choose "Apply to oPIP" option to perform an advanced editing "Picture in Picture".
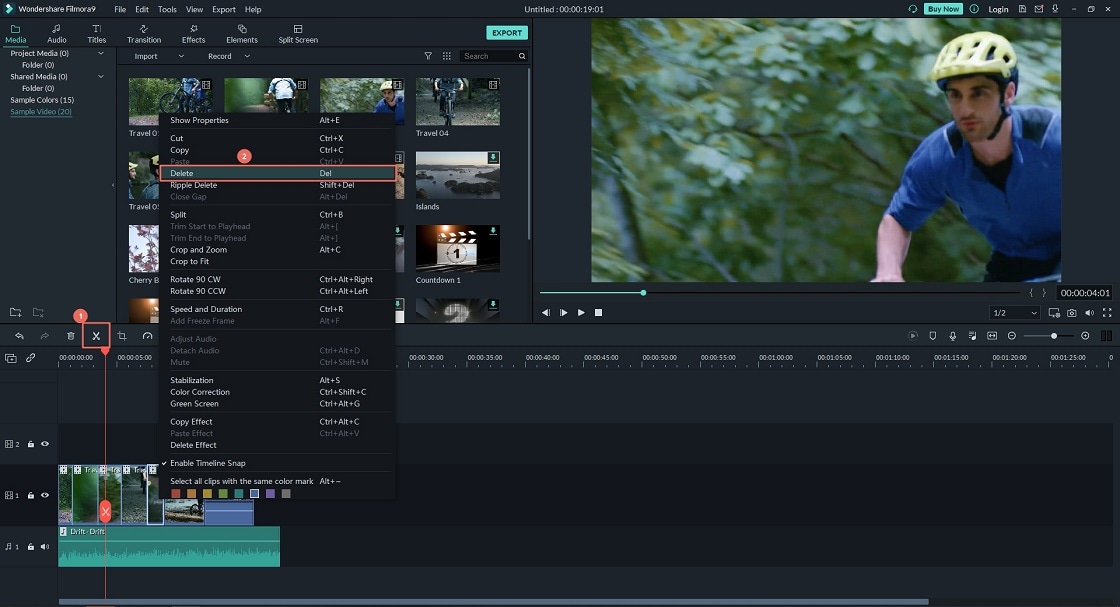
4. Delete Video Clips from Timeline
- Right-click on the video in the timeline, and click on "Delete" option to perform the order.
- Click your target video clip in the timeline, and hit the trash icon to delete the video.
5. Trim Video Clips
- If you wish to trim the video from the beginning or the end of the video, then you only need to hang your mouse at the beginning or the end of the video, and drag the slide forward or backward to cut the video directly.
- If you want to trim any clips in the video, then you need drag the slide to the beginning and the end of the clip you don't want, and press the scissor icon to split the video first. Then select the splitted part, and press "Delete" icon to remove it.
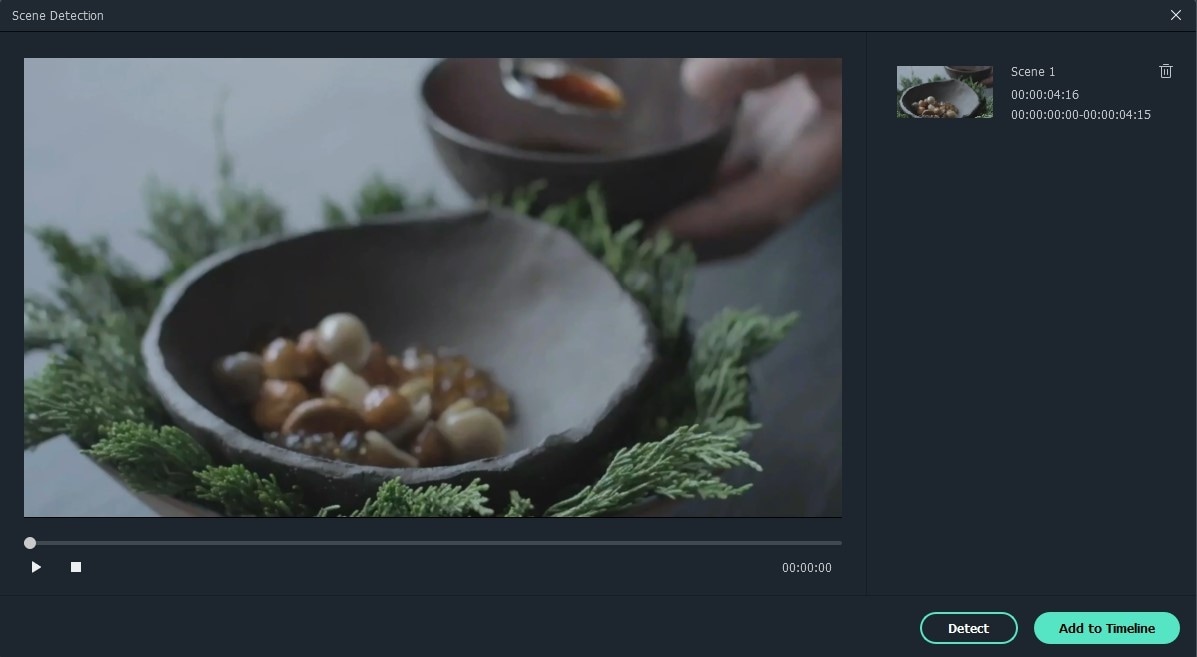
6. Split Video Clips and Scene Detection
- Drag the slide to the postion you want to split, right-click and choose "Split" option. Or directly press "Ctrl+B" to split your video as you like.
- If you want to split video by using Scene Detection, you need to right click on the video file in the media library, and select the "Scene Detection" option.
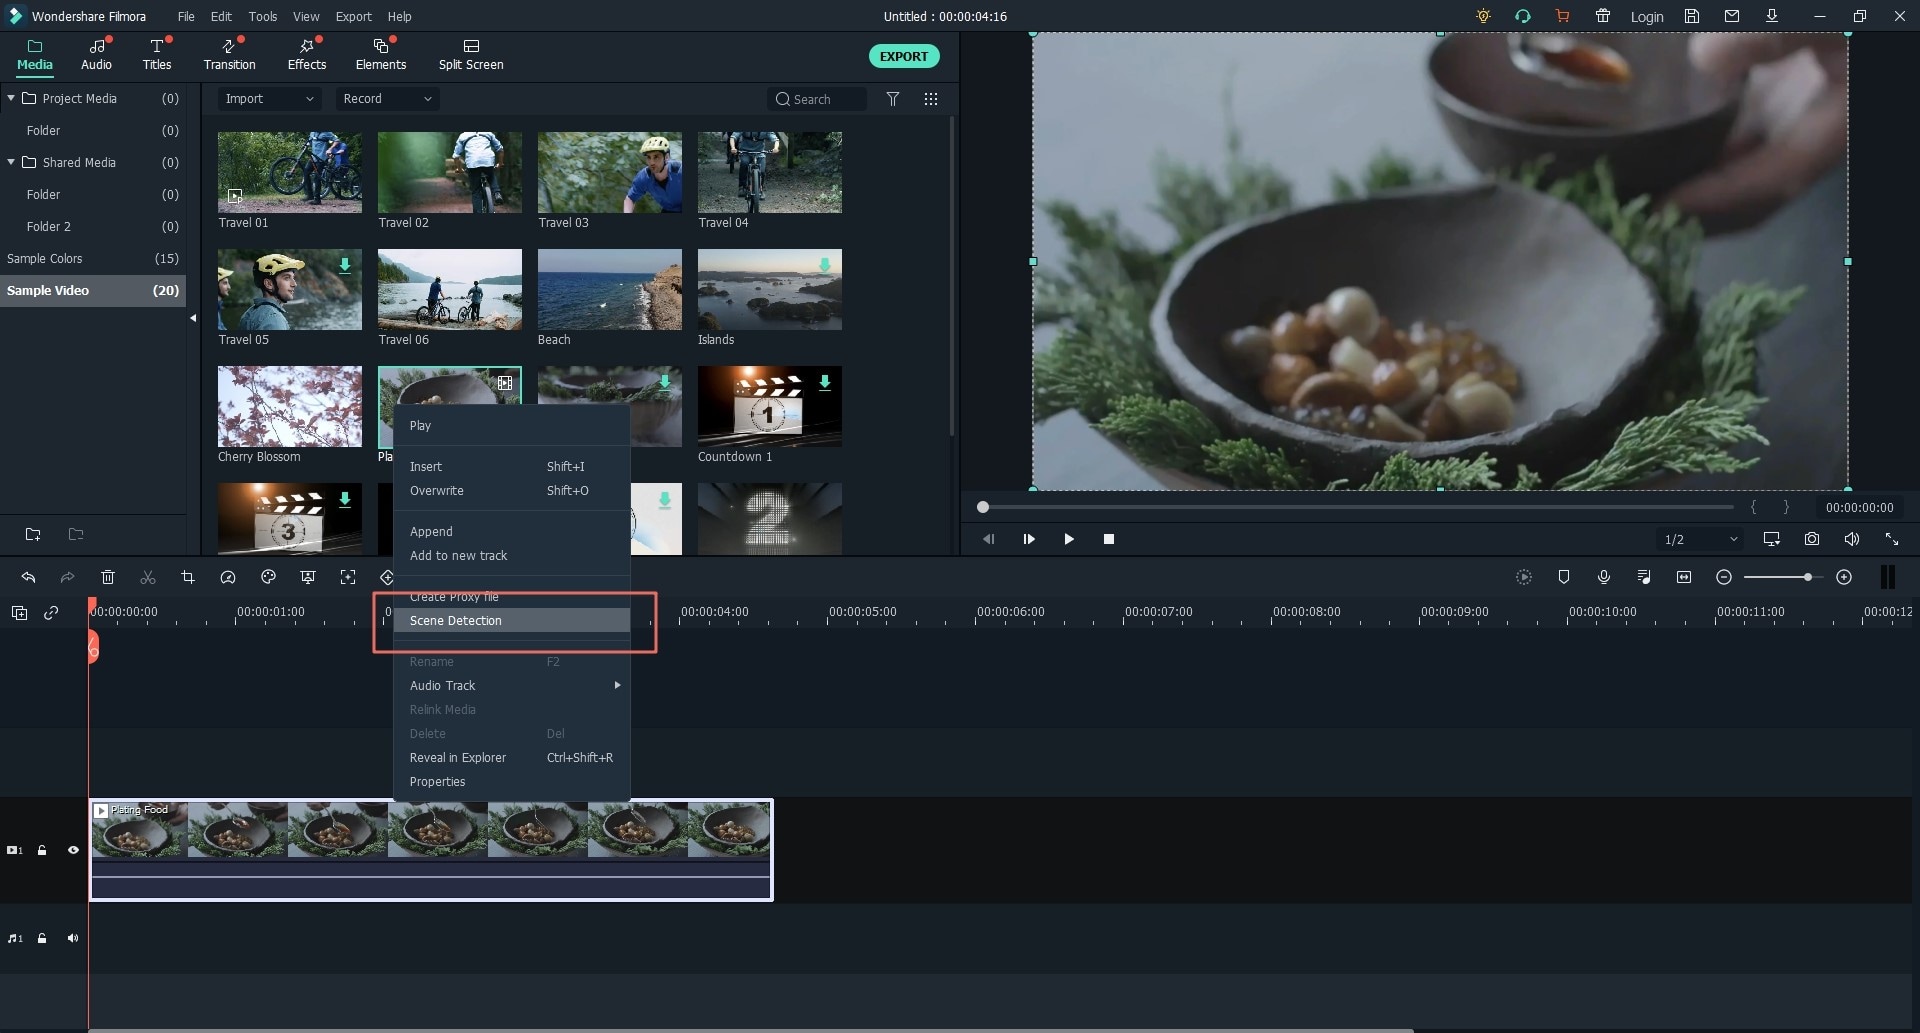
In the pop-up window, click "Detect" button to detect the scenes, and when it is finished, you can simply select the unwanted scene and press "Delete" button to remove the clip.
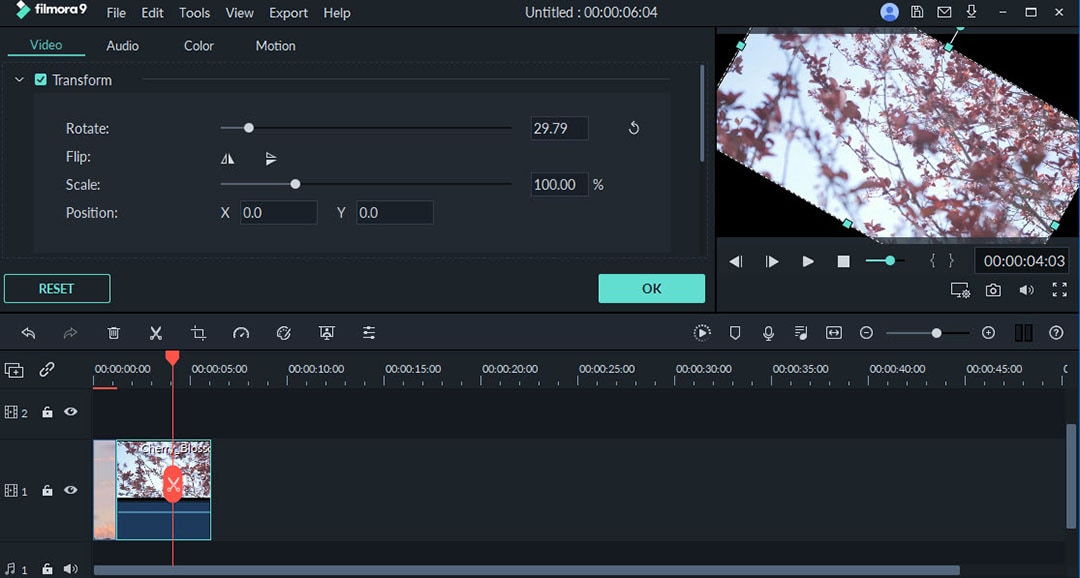
7. Rotate Video Clips
- Double click the clip in the Timeline to open the video editing panel.
- Here are four buttons in the "Rotate" menu. Choose the direction you wish to rotate the video.
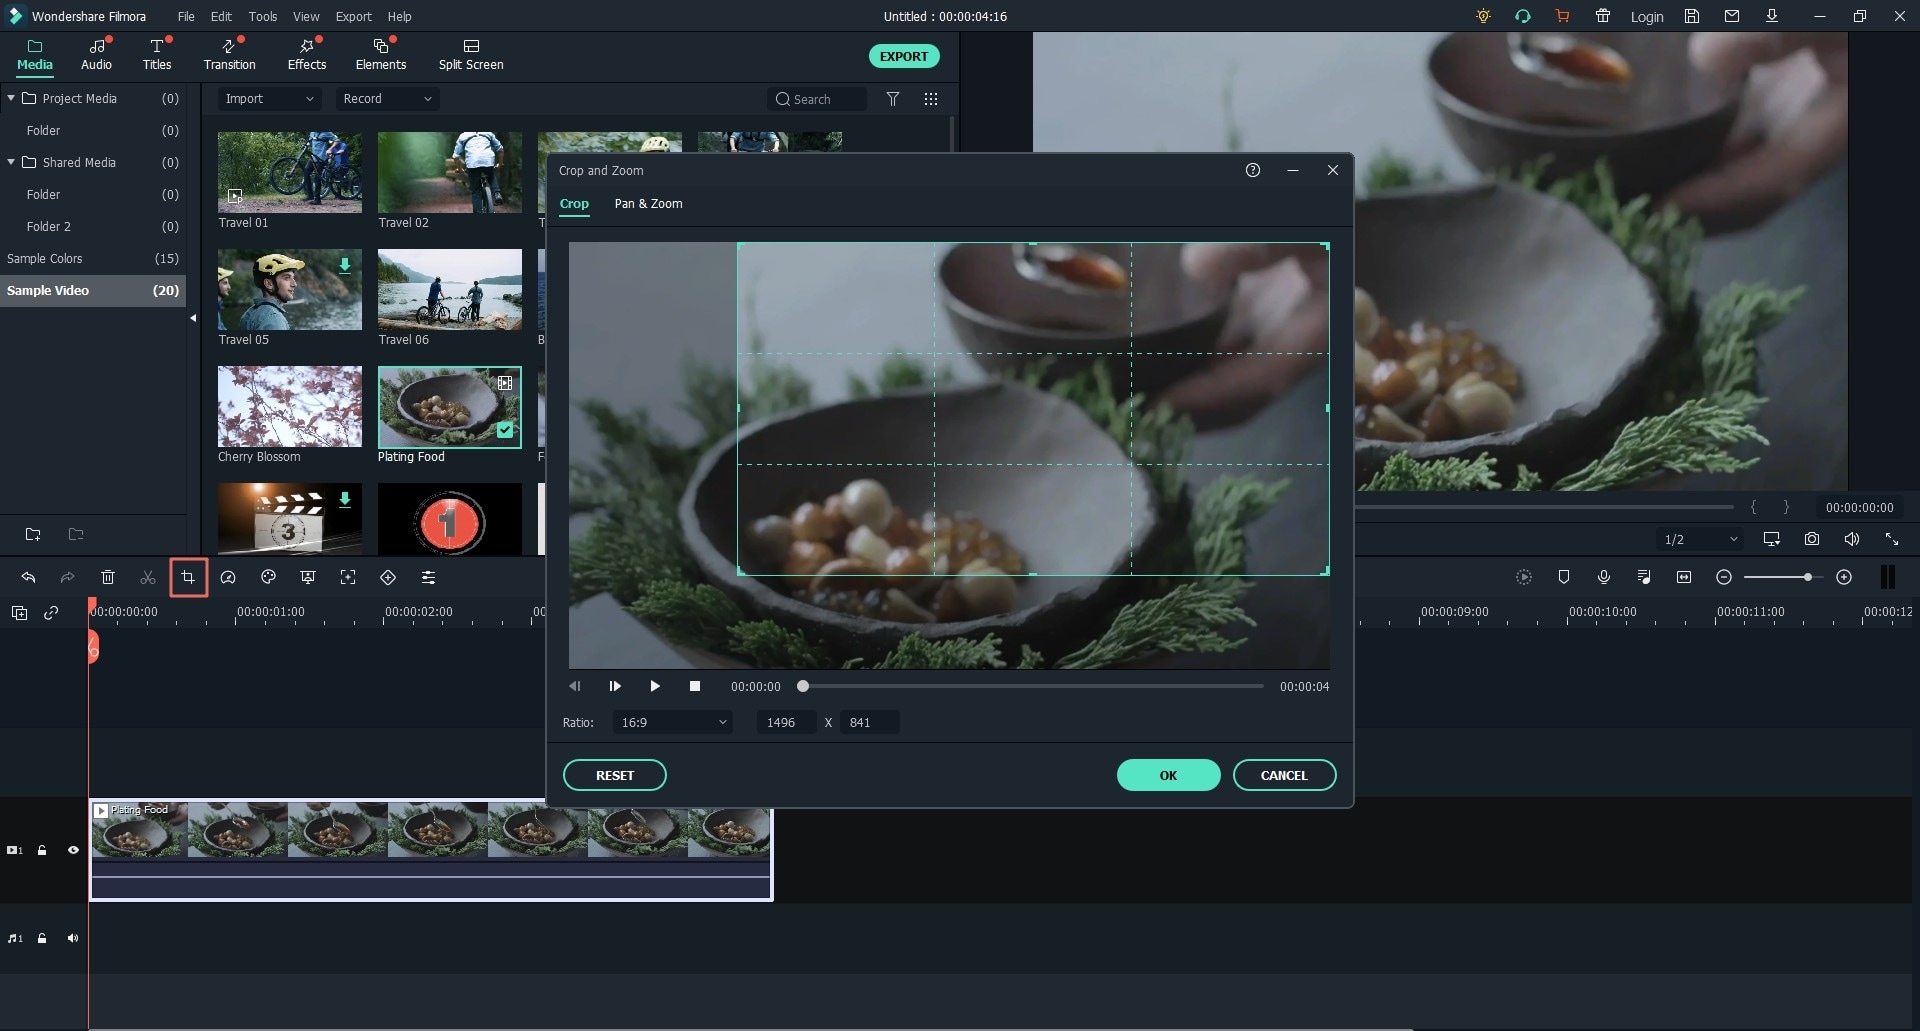
8. Crop Video Clips
- Right click on the video clip you wish to crop in the Timeline.
- Choose "Crop and Zoom" option.
- Check the frame and click "OK".
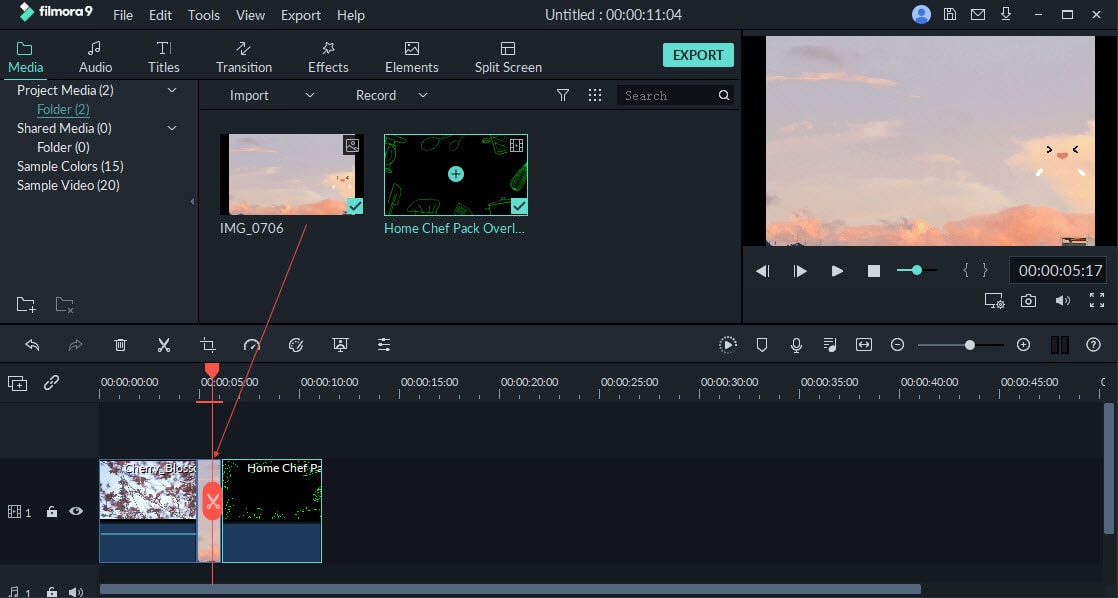
9. Join or Combine Video Clips
- Drag all video clips you want to combine into the timeline accordingly.
- Click "Export" to output the video file.
10. Enhance Video Clips
- Double click the video clip in the Timeline to open the video setting panel. Here, you can drag the sliders to adjust the video's brightness, saturation, contrast, hue and tint. Here, you can also apply a 3D LUT to your video.
- If you don't want to edit the video manually, you can check the option of "Auto Enhance" to enhance video clips automatically.
- Drag the sliders to change the video playback speed as you like.
11. Resize Videos
- Cut part of the video that you don't need;
- Click "Export" to lower the parameters like resolution, frame rate, and bit rate.
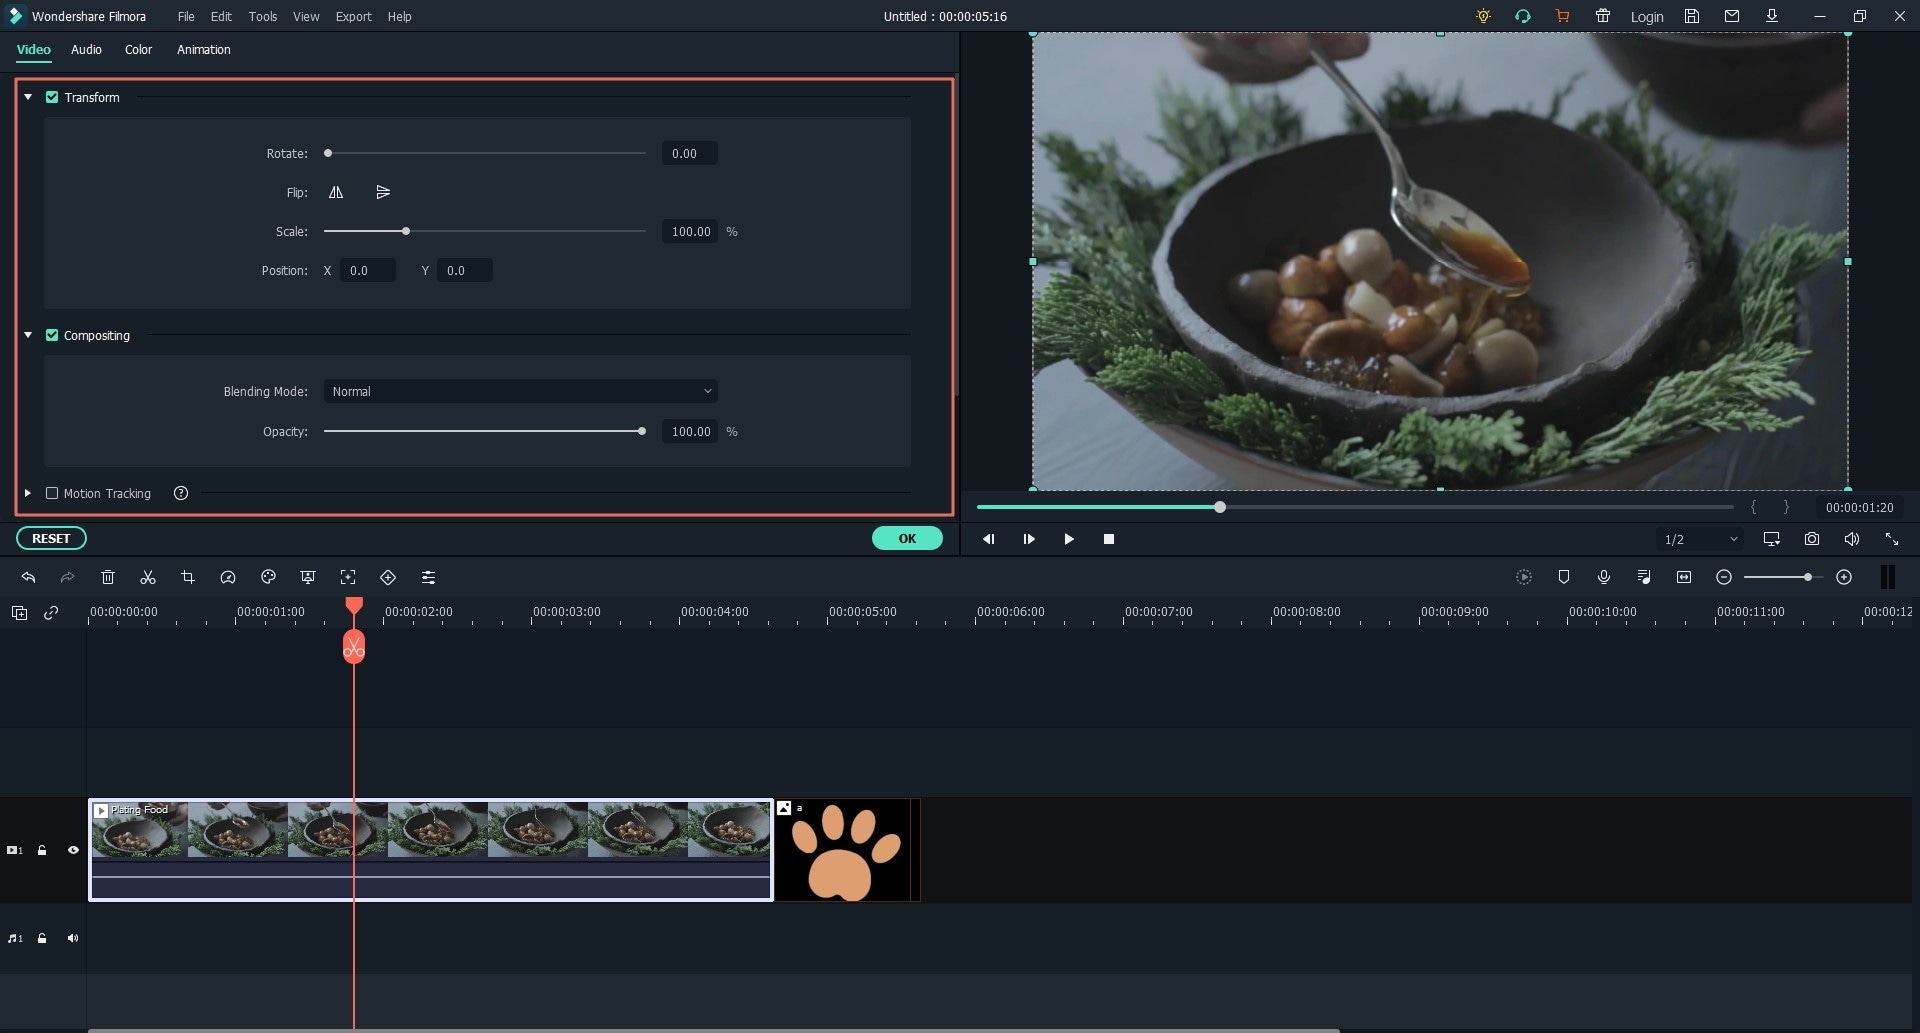
12. Add Watermark or Logo to the Video
- Load both video and watermark image to the media library, then drag them to the video track and PIP track respectively.
- Adjust the size of the image by dragging the small circles around the frame. Here, you can also move the image to the position you wish to add a watermark.
- Change the duration of the watermark or logo to the same length as the video.
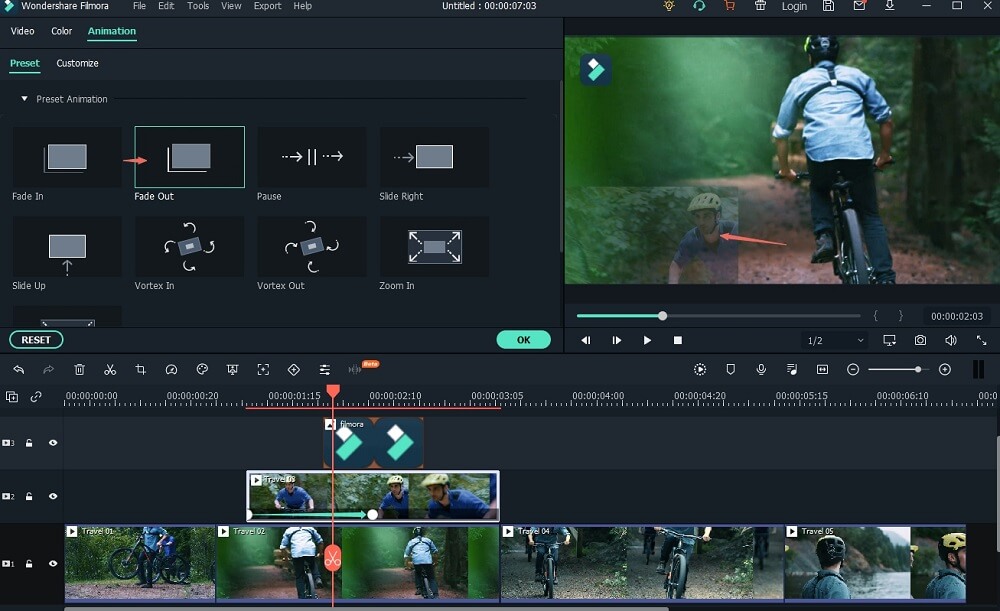
13. Add Effects to the Video
- When you have done the above settings, now you can add special effects to your video.
- Directly use the built-in filter, overlay, transition or title effects to enrich your video clip.
- If you wish to perform some local effects to your video, you need to import them to your media library first, then drag and drop the effects to the right track.
Finished! Now, Export and Share Your Video
If you have finished your editing process, you can click "Export" button, and here you can choose a way to export your video files.

Final Thought
In this post, I have listed 13 different editing tips with Filmora Video Editor, do you got them?
In fact, Filmora Video Editor can help you do more editings and create a video with more effects than we listed above. You can click the below icon to download and try it by yourself. Or you can go to its full tutorial to learn all functions of this powerful software.


