iTunes Data Recovery: Selectively Recover iPhone's Data from iTunes Backup

Feb 29, 2024 • Filed to: Data Recovery Solutions • Proven solutions
- Part 1: iTunes Data Recovery: extract the iTunes backup file to recover data
- Part 2: iPhone data recovery: scan the iPhone/iPad/iPod touch to recover data
- Part 3: iCloud data recovery: scan the iCloud to recover data
Part 1: iTunes Data Recovery: extract the iTunes backup file to recover data
Dr.Fone - iPhone Data Recovery provides you with three kinds of recovery mode: directly recover data from iOS devices(newly supported iOS9), recover data from iTunes backup files and iCloud backup files. It works for almost all iPhone(including iPhone SE/6/6 Plus/6s/6s Plus/5s/5c/5/4/4s), iPad (including iPad Pro, iPad Air and iPad mini) and iPod touch 5, iPod touch 4.
Dr.Fone - iPhone Data Recovery
Extract iTunes backup file easily & flexibly.
- Recover photos, videos, contacts, messages, notes, call logs, and more from iTunes backup.
- Compatible with latest iOS devices.
- Preview and selectively recover what you want from iPhone, iTunes and iCloud backup.
- Export and print what you want from the iTunes backup to your computer.


Steps to selectively recover iPhone's data from iTunes
Next,let's take Dr.Fone, the iTunes data recovery for Windows as an example. Let's check the steps now.
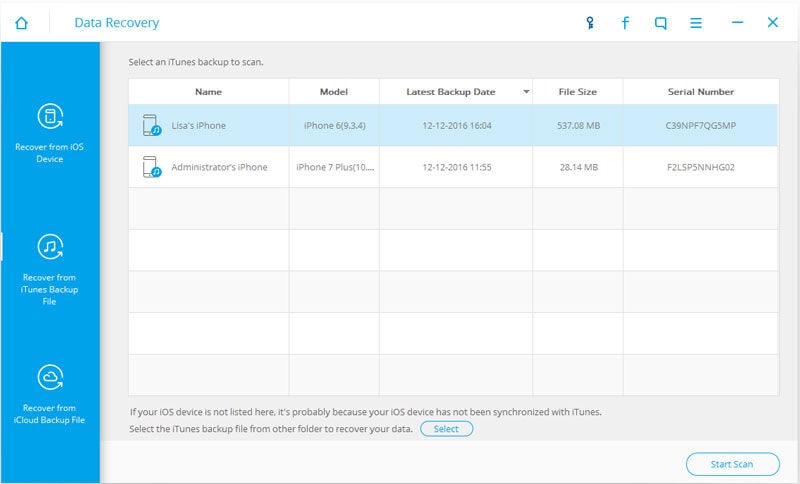
Step 1. Extract iTunes backup
After running the program on your computer, switch to the other recovery mode: Recover from iTunes Backup File. Then all your iTunes backup files will be found and listed in front of you. Choose the one you want to extract and click on the Start Scan button.
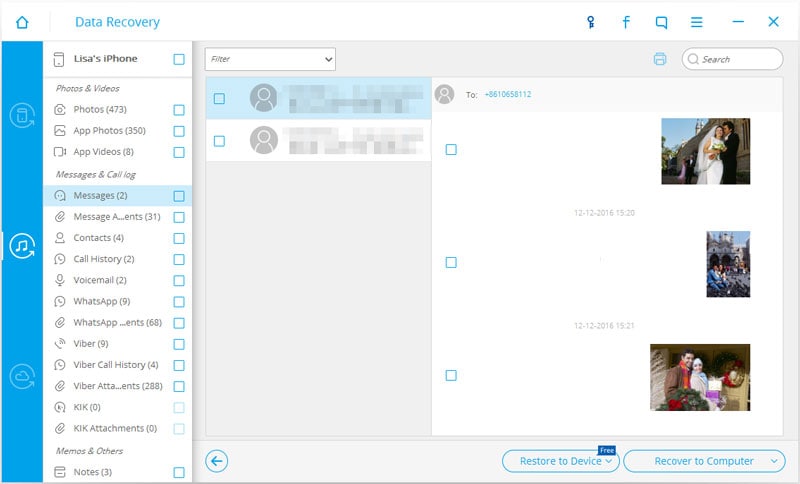
Step 2. Preview and recover data from the iTunes backup file
Unlike restoring data from iTunes backup, you can selectively preview and recover data from iTunes backup. After the scan, preview and tick the items you want in the scan result. Then save them on your computer by clicking on the Recover button.
Part 2: iPhone data recovery: scan the iPhone/iPad/iPod touch to recover data
Note: If you have not backed up your data to iTunes before, this tool can't directly scan the deleted media file like video, music especially when you are using iPhone 5 and later. other types of file including messages, call history, remider, etc can be restored.
Steps to selectively recover data from iPhone
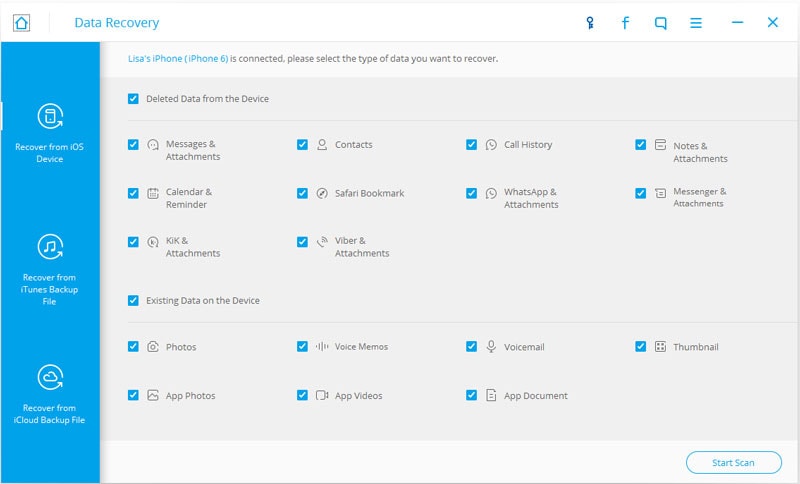
Step 1. Run the program and connect your iPhone to the computer
Recovering data directly from your iPhone, it's the new feature provided by Dr.Fone. You can't find this function in the previous iTunes Data Recovery software. When you run the software and connect your device to the computer, you'll see different windows according to the model of your deivce.
Step 2. Start scanning your iPhone
You can start scanning your device by clicking on the Start Scan button shown on the primary window.
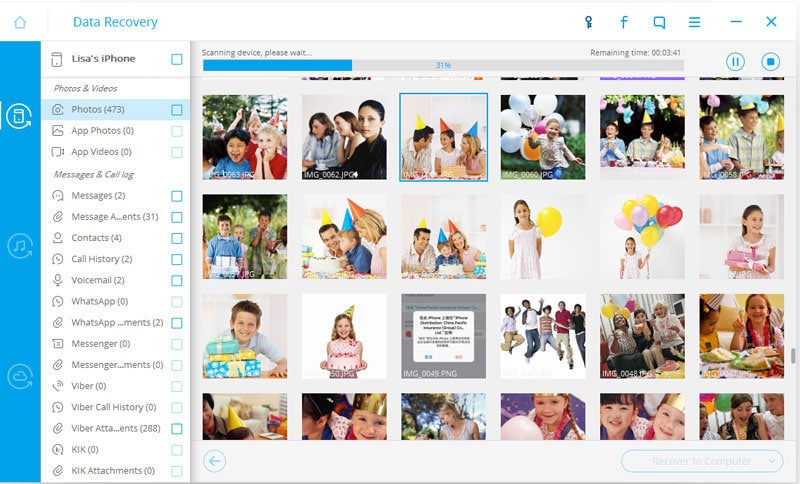
Step 3. Preview and recover data on your iPhone
The scan will take you a little while. After that, the program will present you a scan result as follows, where all data found on your device are displayed in categories. You can preview and check them one by one, and selectively recover any item you want to your computer.

Part 3: iCloud data recovery: scan the iCloud to recover data
Steps to selectively recover data from iCloud
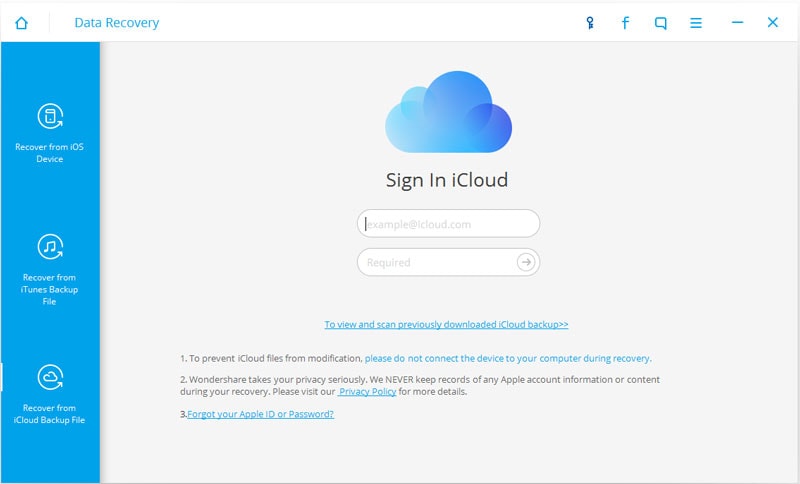
Step 1. Sign In iCloud
Launch Dr.Fone and select the recovery mode of "Recover from iCloud Backup Files" on the main window of Dr.Fone. Enter your iCloud account and password to login.
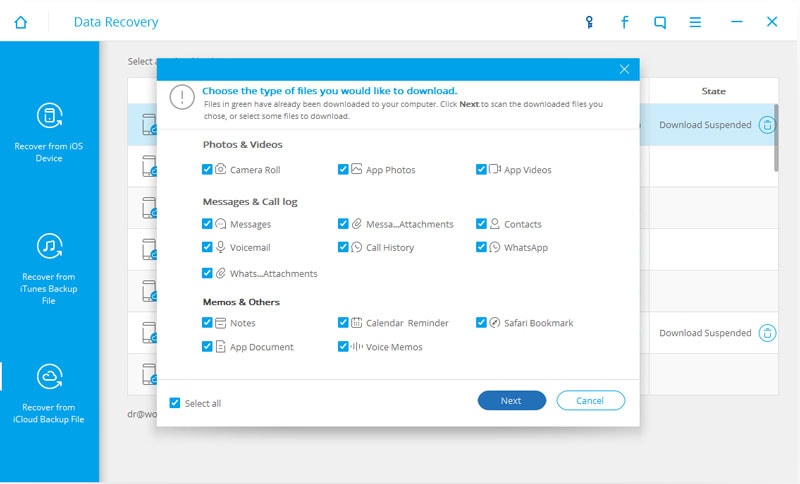
Step 2. Scan iCloud backup files
Select the file types you'd like to recover, and click on the button "Scan" to scan iCloud backup files you have storage & backup on your iCloud account.
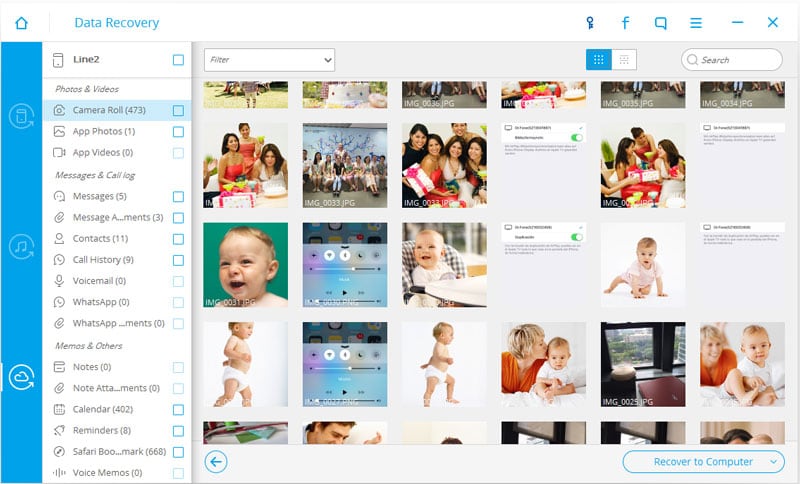
Step 3. Selectively recover data from iCloud backup file
After the scanning process, it will pop up a new window like below, you can select and recover your files to your PC computer.


iPhone Recovery
- Deleted Data Recover
- 1. Recover HEIC Photos on iPhone
- 2. Recover Deleted Calendar Event
- 3. Retrieve iPhone Deleted Reminders
- 4. Retrieve iPhone Deleted Voicemail
- 5. Recover iPhone Deleted Photos
- 6. Recover iPhone Deleted Note
- 7. Recover Call History from iPhone
- 8. Recover iPhone Deleted Contacts
- 9. Recover iPhone Voice Memos
- 10. Recover Deleted iOS Files
- iPhone Passwords Recover
- 1. Retrieve iPhone Email Password
- 2. See iPhone Saved Password
- 3. Access iPhone Password
- 4. Get iPhone Password Back
- 5. iPhone Passcode Requriement Pops
- 6. Find iPhone Wi-Fi Password
- iPhone WhatsApp Recover
- 1. Recover WhatsApp Messages Apps
- 2. Recover Deleted WhatsApp Messages
- 3. Recover WhatsApp Messages Online
- 4. Retrieve Deleted WhatsApp
- Recover from Stolen iPhone
- Recover from Broken iPhone
- 1. Recover Data from Broken iPhone
- 2. Water Damaged iPhone Data Recovery
- 3. Recover Data from Dead iPhone
- iPhone Recovery Tips
- 1. GT Recovery Undelete Restore
- 2. Recover Data from Memory Card
- 3. Recover iPhone Lost Data
- 4. Recycle Bin on iPhone
- 5. Recover Data on iPhone in Recover Mode
- 6. Recover Data from iPhone in DFU Mode
- 7. iTunes Data Recovery
- 8. Recover iPhone Data Without iTunes
- iPhone Recovery Tools
- ● Manage/transfer/recover data
- ● Unlock screen/activate/FRP lock
- ● Fix most iOS and Android issues
- Recover Now Recover Now Recover Now
Selena Lee
chief Editor