Data Recovery Tips
- Data Recovery Tips+
-
- Best Hard Disk Bad Sector Removal Software
- Recover Overwritten Files on Windows/Mac
- Fix the Error "Windows has recovered from an unexpected shutdown"
- Recover Recycle Bin on Windows 10/8/7/XP
- Recover 0 Byte Files in Windows 10/8/7
- Recover Snapchat Email Address and Password
- Top 3 Data Recovery Hardware
- Top 7 Linux Data Recovery Software
- Recover Deleted Files from Network Drive
- Recover Files from My Passport External Hard Drive
- Top 5 Windows Password Recovery Tools
- Hard Drive Password Recovery and Data Recovery

• Filed to: Data Recovery Tips • Proven solutions
Summary: Recovering a deleted files from Windows or Mac computer or other hard drive is generally possible because these deleted files is not deleted permanently. But if the data is overwritten by new data, do you know how to get the overwritten files back on Windows or Mac? This post is going to guide all of you to recover overwritten files on Windows and Mac computer in different ways.
Data losing is a common phenomenon in the digital life, and thanks to the data recovery software on the Internet, data losing is not a dead trouble like the past days because we all know that deleted files on Windows or Mac computer only means the occupied location is avaliable now. The deleted files will be "hidden" until be overwritten. Then, most users will think that the overwritten files is deleted permanently, right? Actually, the facts is not going in the way that you imagine.
If you have accidentally overwritten an important file or folder with a new one, actually you still have a chance to recvoer Word, Excel, PPT or other types of files that was overwritten. Amazing, right? In this post, we'll show you 3 different ways to restore overwritten files from Windows or Mac computer. You can try them one by one to rescue files that was replaced by accident.
Now, let's check the details:
Part 1. How to Recover Overwritten Files on Windows/Mac with the Easiest Method?

Recoverit (IS) is a unique, comprehensive and the most complete data recovery tool for Windows users (Mac users can get the Mac version). The program comes with an extremely simple and user-friendly interface that allows everyone to operate it with ease, including the non-tech users with less knowledge on computers. Once you install it on your PC, you can use the "Quick Scan" or "Deep Scan" mode to scan your PC deeply and recover overwritten files. The software is safe and risk-free to use since it only scans your device and can't change or remove anything. Also you may have noticed that there are many windows users have been attacked by WannaCry virus and asked for ransom to get back the deleted files these days. Before you do anything, maybe you can try Recoverit (IS) at first.

Recoverit (IS)
Why Choose This Overwritten File Recovery Software:
- Recoverit (IS) recovers all kinds of files, including lost, resized, damaged, corrupted, formatted and deleted data.
- The program is designed with four excellent modes for recovering data. It offers flexible recovery settings as well as full-time preview ability of the found data.
- You can use the program to recover data from PC/Laptop's drive, memory cards, external disk, USB flash and more.
- Users can pause or stop scanning at any time, save recent scanning results for future use, search lost files with names after scanning, and do so much more.
Step-by-Step Guide to Recover Overwritten Files on Windows
Below is the detailed steps of recovering overwritten files using Recoverit (IS) software:
Step 1. Download and Launch the Program
Download and launch this Overwritten File Recovery software on your PC or Mac.
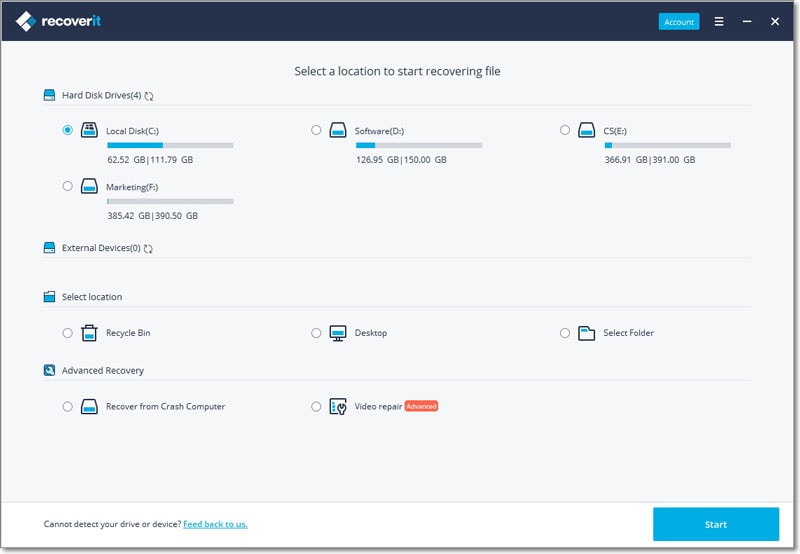
Step 2. Select the Disk for Scanning
There are lots of disks for your option. Just select the disk that your overwritten files located, and hit "Start" to scan for lost files.
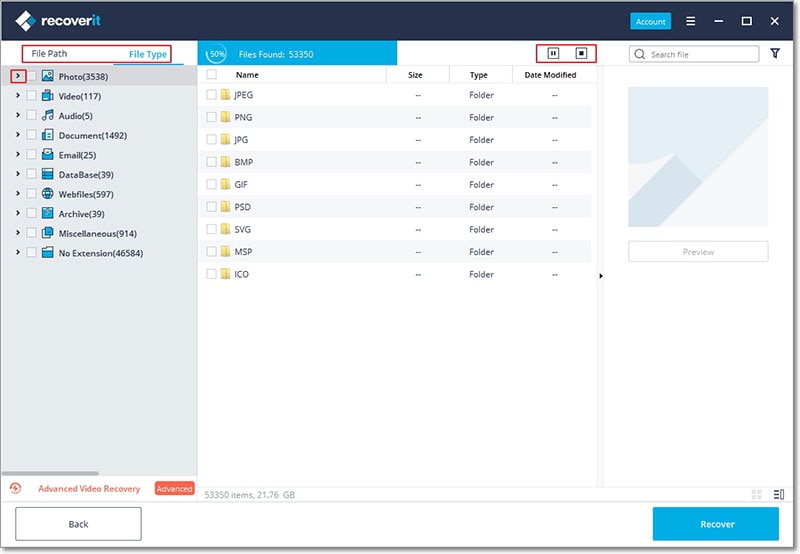
The scanning process with "Deep Scan" mode takes longer time compared to other recovery modes, but it's always effective. You'll be able to see the scan progress, the number of files found, the remaining scan time, and the Pause/Stop/Save Scan buttons, which are all displayed on the screen.
Step 3. Recover Overwritten Files on Windows
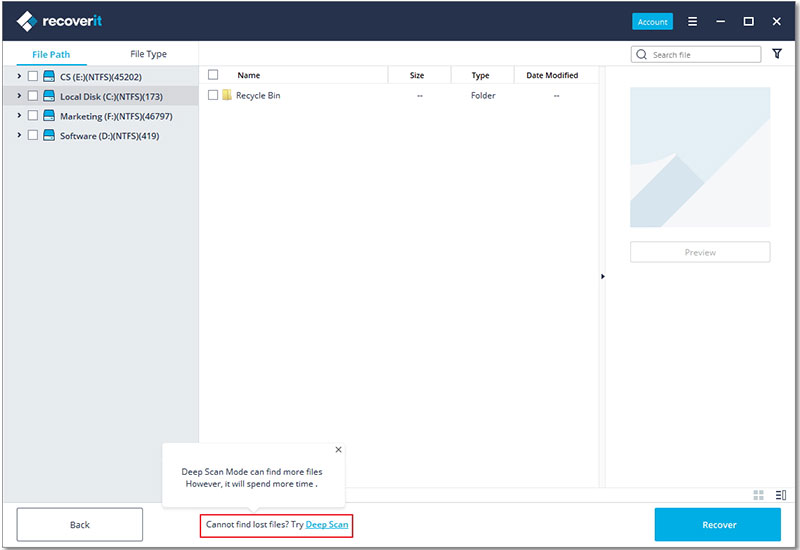
When the scanning process is complete, check the specific files that you would like to recover and then click the "Recover" button to save them to another drive on your PC or external storage media.
[Warning] Since the data has been overwritten and the situation is more complex than others, so we cannot guarantee that the method can help you retrieve 100% overwritten files. Thus, please download the free trail version and ensure your lost files can be found. Then you can get the full version and restore the found files to a safe place.
Part 2. How to Recover Overwritten Files on Windows using Previous Versions?
You can easily retrieve overwritten files and folders manually, based on your Windows version. Windows 7, 8 and 10 comes with unique functions that save previous versions of users files and folders as a safety net. In case you experience problems with the original files or folders, you can still access and restore the previous versions.
Step-by-Step Guide to Recover Overwritten Files on Windows Manually
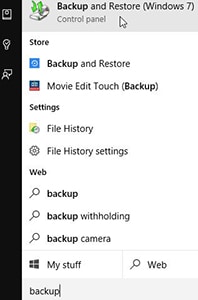
Step 1. Access the "Backup and Restore" Tab
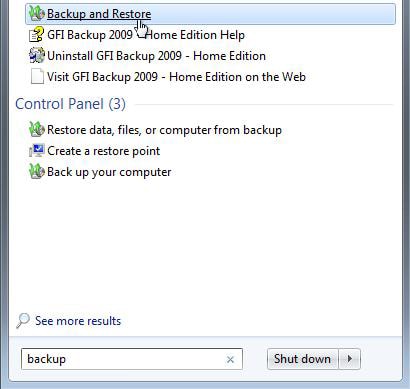
If you are using Windows 10, open the "Start" menu or press the Windows Key + S buttons to open the Cortana keyboard search, type "backup" and then choose "Backup and Restore (Windows 7)" option.
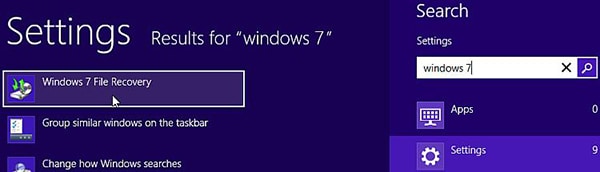
In Windows 8, open the "Settings" search by pressing the Windows Key + W buttons, type "windows 7" and then click "Windows 7 File Recovery".
For Windows 7 users, open the "Start" menu by pressing the Windows Key on your keyboard, type "backup" and then select "Backup and Restore" option.
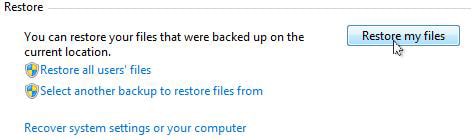
Step 2. Open the Files/Folders Restoration Window
Click the "Restore my files" option in "Restore" section if you want to restore your personal files/folders. Select the "Restore all user's files" button to recover other user's files. Click the "Select another backup to restore files from" to restore files from a different backup.
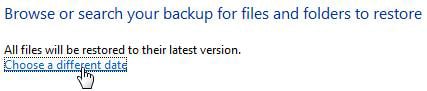
Step 3. Select a Backup by Date to Restore Files and Folders
All files/folders to be restored are always displayed from the latest backup. However, if you want to restore data from an older backup click the "Choose a different date" option.
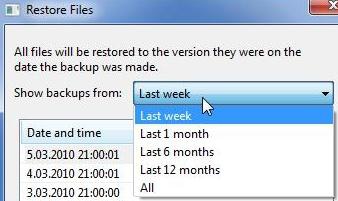
In the "Restore Files" window, select a time frame to display older backups from the "Show backups from" box.
Select the backup date you would like to use and click on the "OK" button.
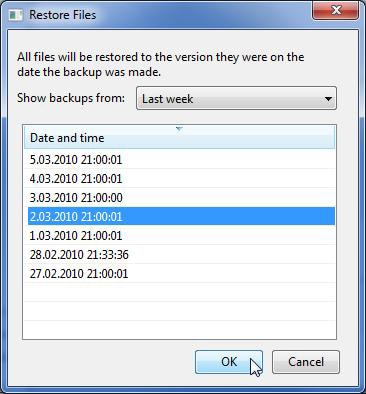
Note: The "Browse" or "Search your backup for files and folders to restore" window shows the selected date and time.

Step 4. Select Files and Folders to Restore
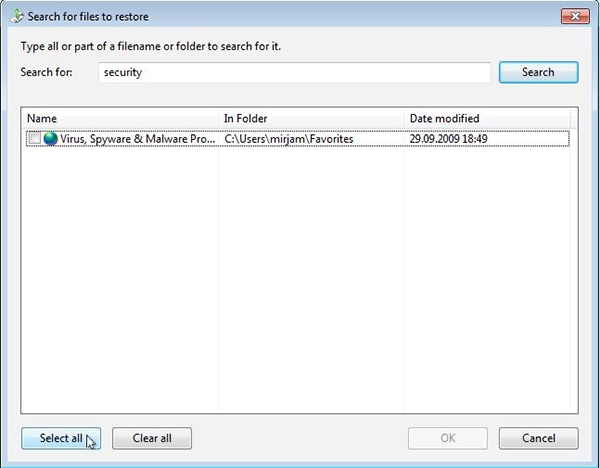
If you can't remember where the files and folders you want to restore were saved, click "Search". Type keywords in the "Search for" field and click the "Search" button. If the search results display the files you want to restore, click the specific file or use the "Select all" button and then click the "OK" button to add the items to the list of files/folders to be restored.
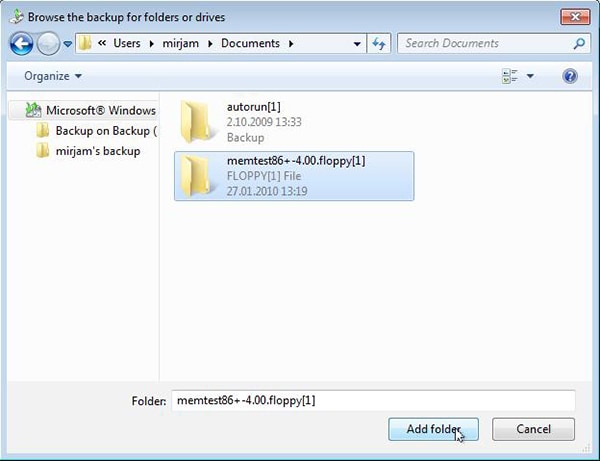
Alternatively, you can also find the files/folders to restore by yourself. Click the "Browse for files" or "Browse for folders" button. In the "Browse the backup for windows files" window, find and select the files you would like to restore and click the "Add Files" button. In the "Browse the Backup for folders or drivers" window, click the "Add Folder" button to add the selected folders to the list of items to be restored. The root folder of the latest backup opens first. Simply double click the hard drive with the folder to be recovered.
Your videos, music, photos, and other files are located saved in drive C. Find the exact folder you want to restore, click it once and click the "Add folder" button. You can remove individual files/folders from the list by just clicking on them and then selecting the "Remove" button. "Remove all" button clears the whole list. If you feel that the list of files and folders to be restored is complete, click the "Next" button.
Step 5. Restore Files/Folders
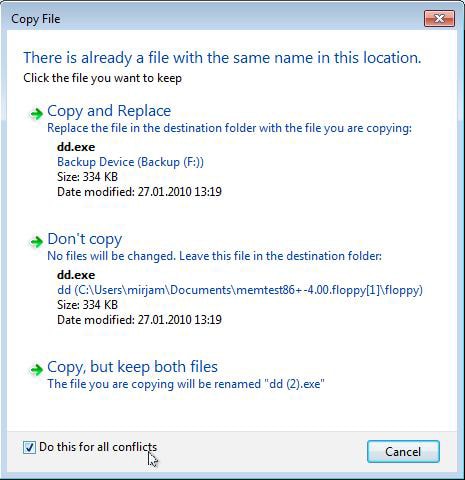
Select the "In the original location" option to restore the items to the folders they were previously. If there are files or folders with the same name, you’ll be asked whether you would like to overwrite the files/folders. Click the "Restore" button. "Copy File" prompts opens if the files with the same name already exist. Click "Copy and Replace" to overwrite the existing files/folders, "Don't copy" to keep the existing file or "Copy, but keep both files" to compare both files. To use the same answer for all the "Copy file" prompt questions, check the "Do this for all conflict" box before you can select your preferred option. Click the "Finish" if all your files/folders have been restored.
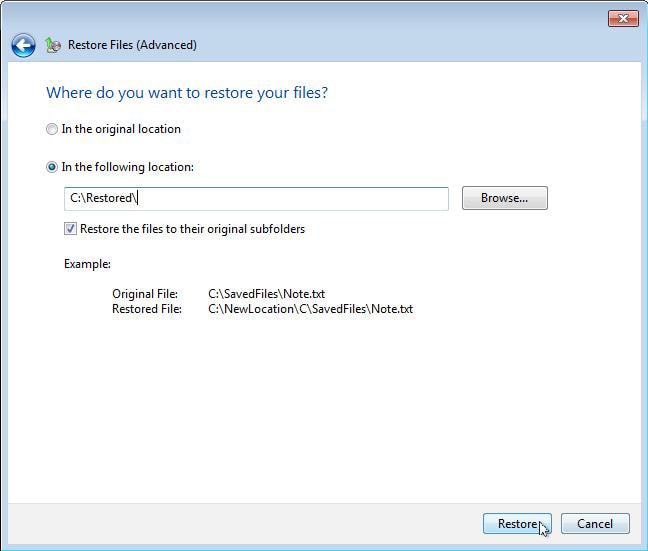
Restore Items to Alternate Location. Select "In the following location" and check the "Restore the files to their original sub-folders" to recreate the whole folder in an alternate location. Example, you can select C:\Restored as an alternate location. If you restore a file named Test.txt from the "Documents" folder, a whole folder tree will be created, (C:\Restored\C\Users\
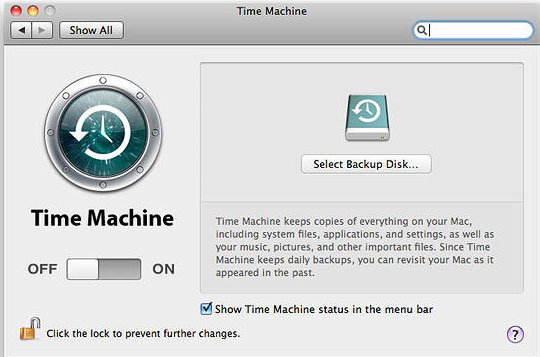
Part 3. How to Restore Replaced Files Mac from Time Machine?
Just like the function of Windows previous version, Time Machine is the built-in backup feature that allows Mac users to backup files on Mac. But you should be noticed that, it can only be utilized when you have an external hard drive here and you must configure it properly.
When the external hard drive is set and the Time Machine is available, all files on your Mac will have a copy in the external hard drive, then you can recover overwritten files Mac from the external hard drive easily.
Note: Please remember to backup your files regularly and your hard drive in the working condition.
Write in the End
There are 3 different ways to recover overwritten files on Windows or Mac computer.
Which method are you ready to try first?
If you're looking for the simplest and quickest way to retrieve files that was overwritten or replaced, Recoverit (IS) (Windows/Mac) could be the ideal option for you.
Elva
staff Editor