


One of the ways to keep your private data on your phone private is to delete history on phone. Data such as browsing history should be removed to remain private but also so as to optimize the device's performance. This type of data often accumulates a lot of junk files on our devices that can take up too much storage space and cause the device to be slow and sluggish. In this article we are going to look at how you can get rid of this data safely for both Android and iPhone.
Part 1. How to Delete Search History on Phone
It may not seem like your search history takes up too much space but if you use your device to search the internet a lot, you may be accumulating cache and junk files and not even be aware that you’re doing it. It is therefore vital that you clean out your search history from time to time to eliminate these files.
Clear Search History on Android
Step-By-Step Guide to Clear Search History on Android
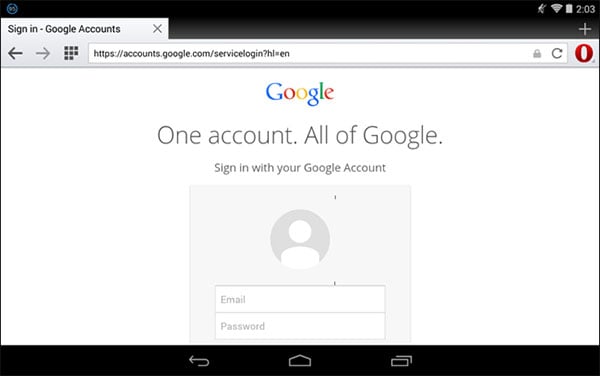
Step 1. Begin by logging in to your Google account. This is required if you are going to be clearing multiple search items which is what we want to do.
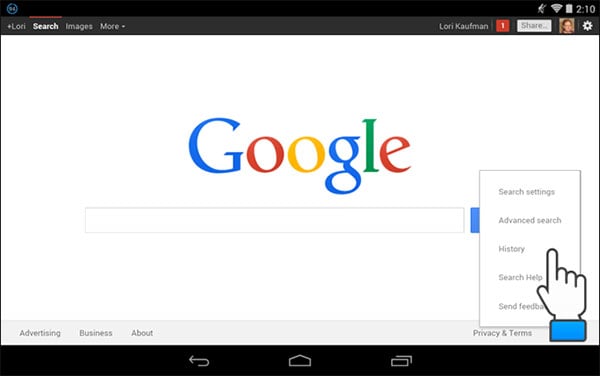
Step 2. In the lower right corner of the browser window touch "Settings" and then touch "History" in the popup menu.
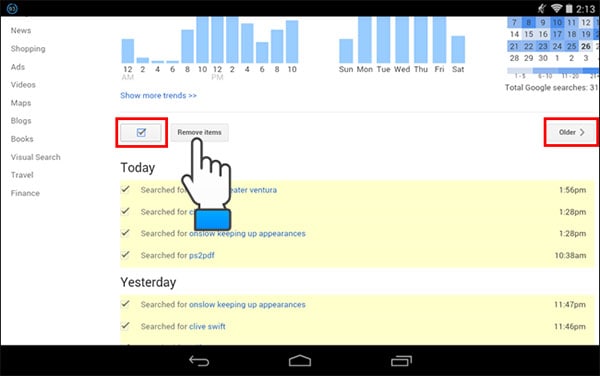
Step 3. You will see all of the search items you have used listed by day. Above the list, you will see a "Check-Box" button. Touch the check box to remove all the items in the current page. If you want to go back further, touch the "Older" option and then delete items in the same way.
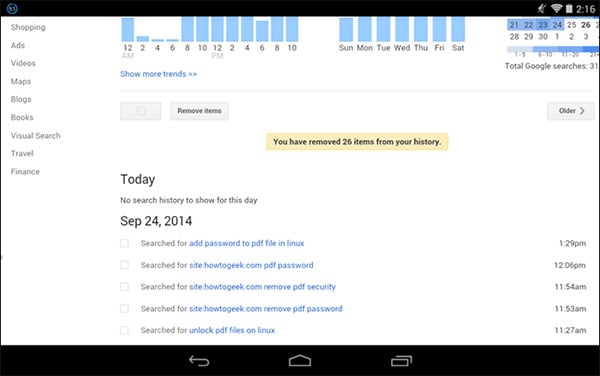
Step 4. You will then see a message on the history screen displaying the number of items you have deleted from your history.
Clear Search History on iPhone
Step-By-Step Guide to Clear Search History on iPhone
Step 1. If you were using Safari, close the app. Then go to Settings and scroll down to find Safari.
Step 2. Tap on "Clear History".
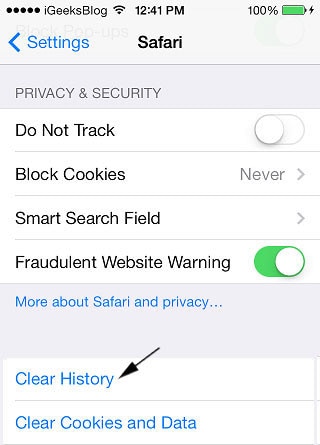
This will essentially clear up all the history including the search history that is stored in Safari.
Part 2. How to Delete Browsing History on Phone
Deleting your browsing history is another action that you should routinely conduct on your device to keep the device operating normally. The easiest and quickest way to delete browsing history on your iPhone is to use dr.fone (Mac) - Data Eraser (IS) (or dr.fone - Data Eraser (IS)). This program is specifically designed to help erase data from iOS device and its features ensure that it does that perfectly.
Key Features of dr.fone - Data Eraser (IS):
- The program is ideal for securing private data on your iOS device. This is because it will permanently and completely erase private data such as browsing history, accounts, banking information, emails and other private data.
- It can also be used to scan your device for junk files and then erase these files as a way to speed up the device and create more storage space.
- All files erased using this program are 100% unrecoverable making it the ideal choice if you want to sell or recycle the device.
- It is very easy to use. All actions are performed quickly and in very simple steps as we shall see below.
- It is compatible with all iOS devices.
Step-By-Step Guide to Delete Browsing History on iPhone
Step 1. Download and install the program in to your Mac. Launch the program after a successful install and then connect your iPhone to the computer via USB cables. The program should detect the iPhone and display information about the device in the main interface.
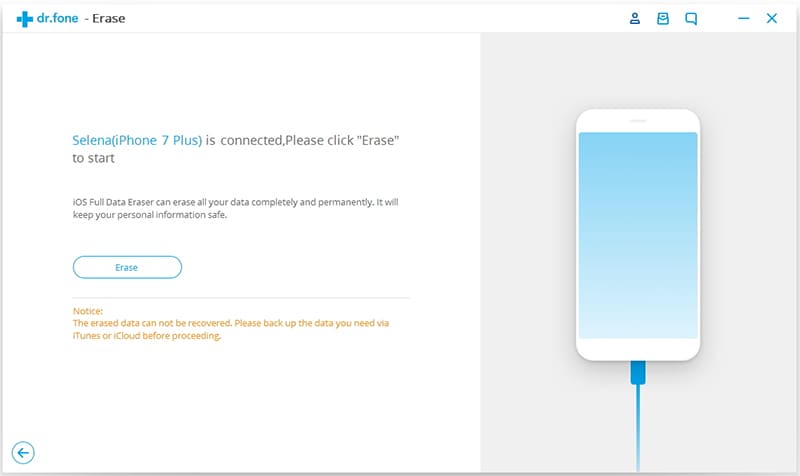
Step 2. In the left column, you will see a number of options. Choose "Erase Private Data" and you will see the types of files you can erase.
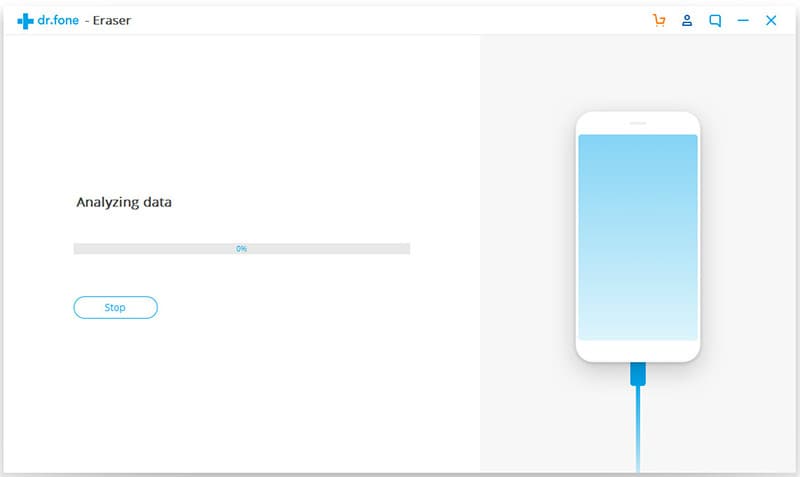
Step 3. Click "Start" to allow the program to begin an analysis of the device. If you want to you can stop that analysis at any time by clicking on "Stop" next to the progress bar.
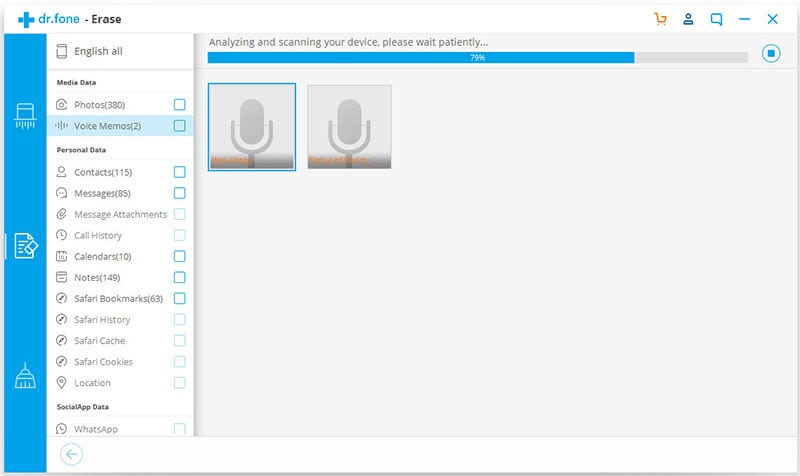
Step 4. Once the scan is complete, all of the data on your device will be displayed in the resultant window.
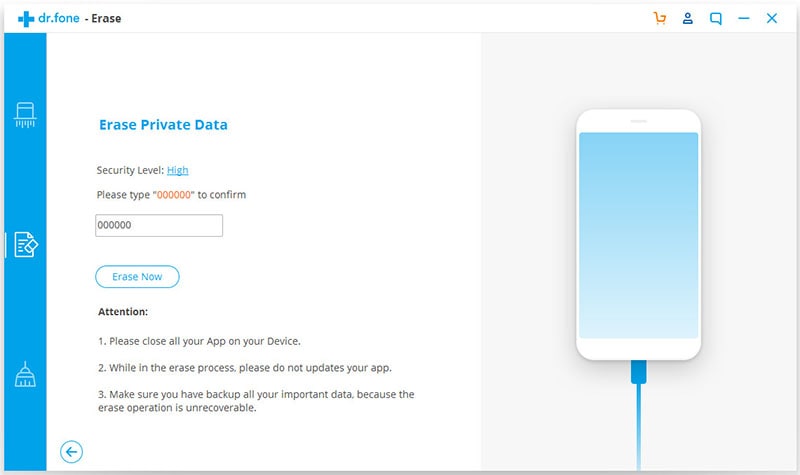
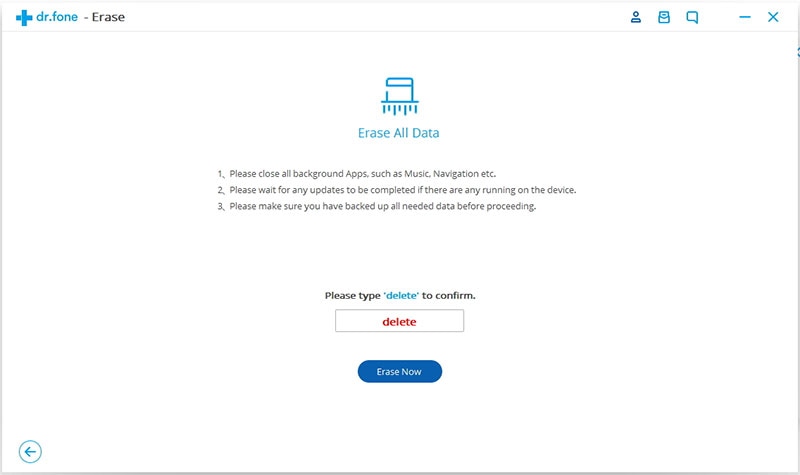
Step 5. Check the files you want to erase. Since we want to erase browsing history, select Safari Browsing history and then click "Erase Now" to delete them. A popup window will appear. Type in the word "delete" in the popup window to confirm this action and then click on "Erase Now" to complete.
Step-By-Step Guide to Delete Browsing History on Android
To clear the browsing history on your Android device, follow this very simple steps. This tutorial is using the Google Chrome browser but these steps can be replicated in an almost similar way on any browser you use.
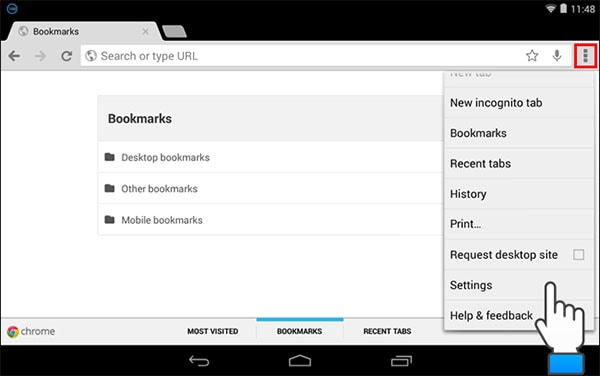
Step 1. Open the chrome browser on your device and then touch the menu button. This is usually represented as three dots in a vertical bar. From the options provided in the popup menu choose "Settings".
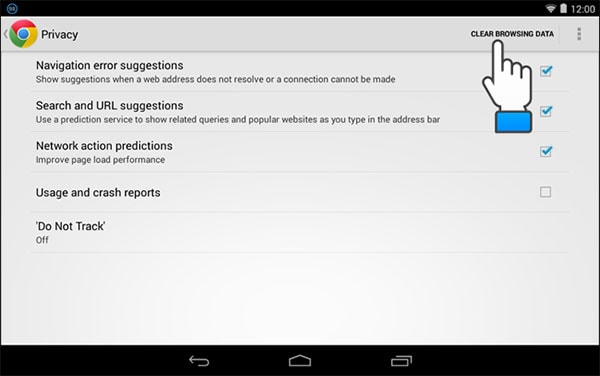
Step 2. Once on the settings screen, you should again see a number of options. Under the Advanced section, choose "Privacy".

Step 3. Within the privacy screen touch "CLEAR BROWSING DATA" located on the title bar.
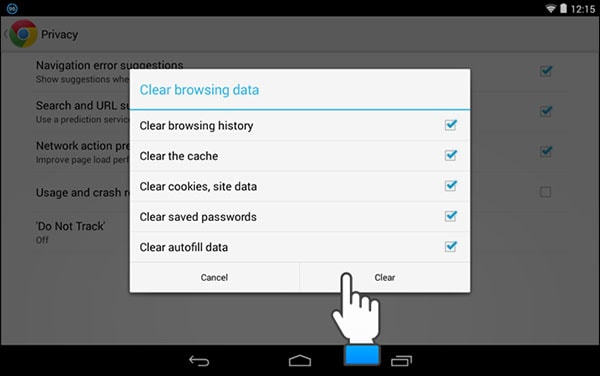
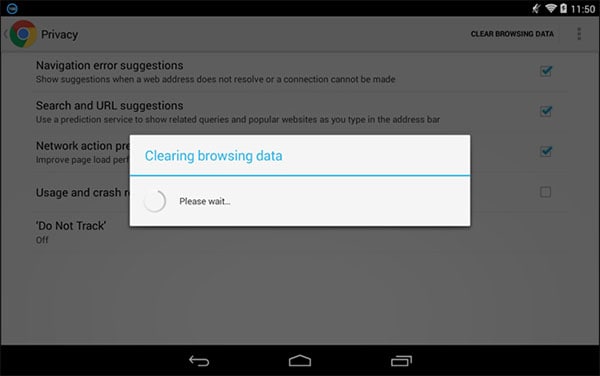
Step 4. A dialogue box will appear. Check the box next to all the items you would like to erase and then tap "Clear".
Part 3. How to Delete YouTube History on Phone
Clearing your YouTube history is another way to keep the device clean and also keep this data out of prying eyes.
Delete YouTube History on Android
Step-By-Step Guide to Clear YouTube History on Android
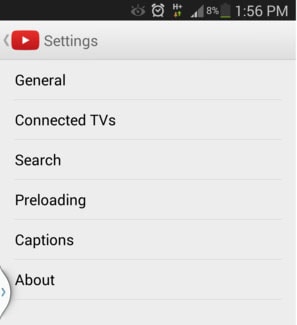
Step 1. Open the YouTube app from your home screen and tap on "Menu". You should see a number of options. Tap on "Search".
Step 2. Tap on the "Clear search history" and the tap on "OK" to complete the process.
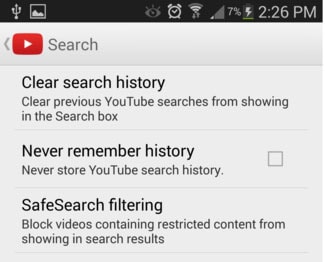
You can stop the app from saving your search history by checking the box next to "Never remember history".
Delete YouTube History on iPhone
Step-By-Step Guide to Clear YouTube History on iPhone
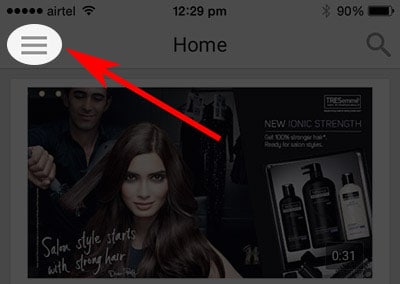
Step 1. Launch the YouTube app on the device and then log in with your Gmail account if you aren't already logged in. Tap on the menu icon on the left side of the window.
Step 2. A screen will open with several options. One of these options is the "History" option with an hourglass icon.

Step 3. Tap on this "History" option and you will see all of the YouTube videos you have watched. You should also see a trash icon on the right corner.

Step 4. Tap on the trash icon and a dialogue box will appear asking you whether you want to clear history. Since this is what we want to do, tap on "Clear History".
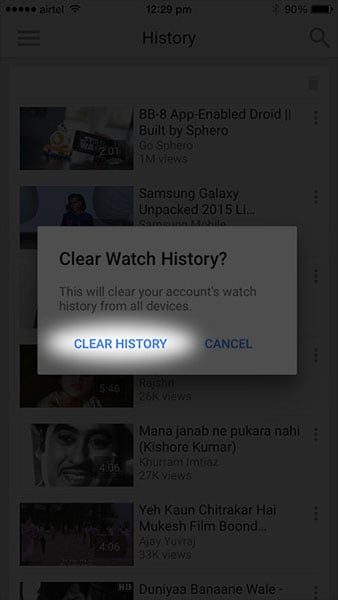
All the videos will be deleted from the list and you will have in effect cleared your YouTube history.


