


A zoom into eye effect is a close-up video that allows you to transfer to the next video clip from an eye. It's a cool effect used by many travel vloggers and musicians to give a more cinematic look to their videos. Sam Kolder, a famous Canadian travel and lifestyle Vlogger, uses this amazing Eye through Zoom effect to take his video editing to the next level. This cool video effect is becoming popular and has become a staple of modern music videos, TV shows, and big-budget films. If you're a Vlogger and want to add this stunning effect to give a boost to your videography. We are here to help you out in this pursuit.
You might be thinking that it requires extensive skills to add Zoom into Eye Effect. The good news for you is that you can add this stunning effect to your music/travel video using the best video editing software, Filmora. In this handy guide, we'll unveil how to create eye zoom transition with Filmora.
Once you have gone through our guide, you’ll add a zoom through eye effect to your video projects without any hassle. It requires a little masking and image editing. You have to use the crop option to zoom through the eyes and create this stunning zoom through eye transition in Filmora.
Step-by-Step Guide on Creating an Eye Zoom Effect with Filmora Video Editor
Filmora Video Editor is the best video editing software to add zoom through eye effect in many travel videos. This effect is similar to the zoom effect, but the only difference is that the zoom-in eye takes you into the video of another scene.
Prerequisite: If you haven't downloaded Filmora on your system, we recommend you try it for free now. Now, let's unveil how to create eye zoom transition with Filmora to uplift the vibe of your video.
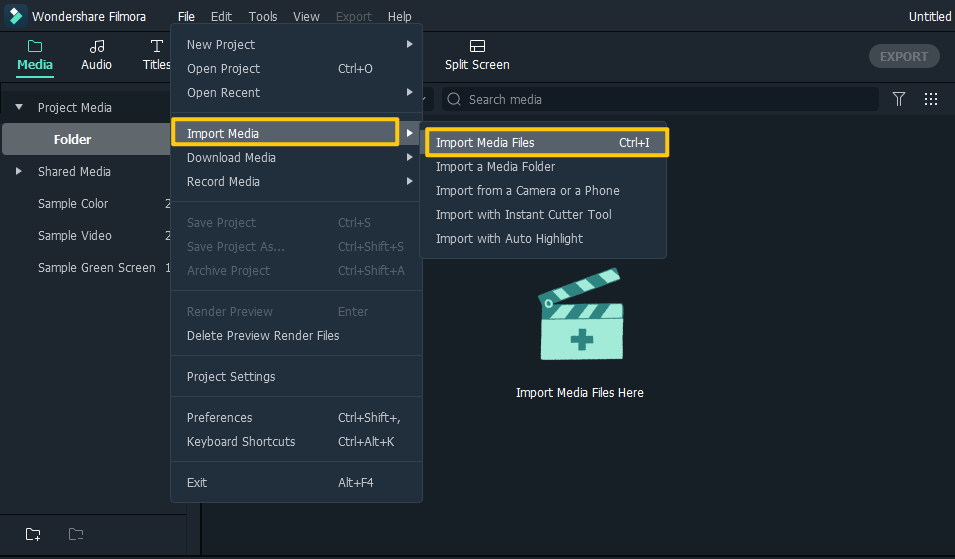
Step 1. Open Filmora and Import Videos
Once you've downloaded Filmora, open it and import the clips into the media library.
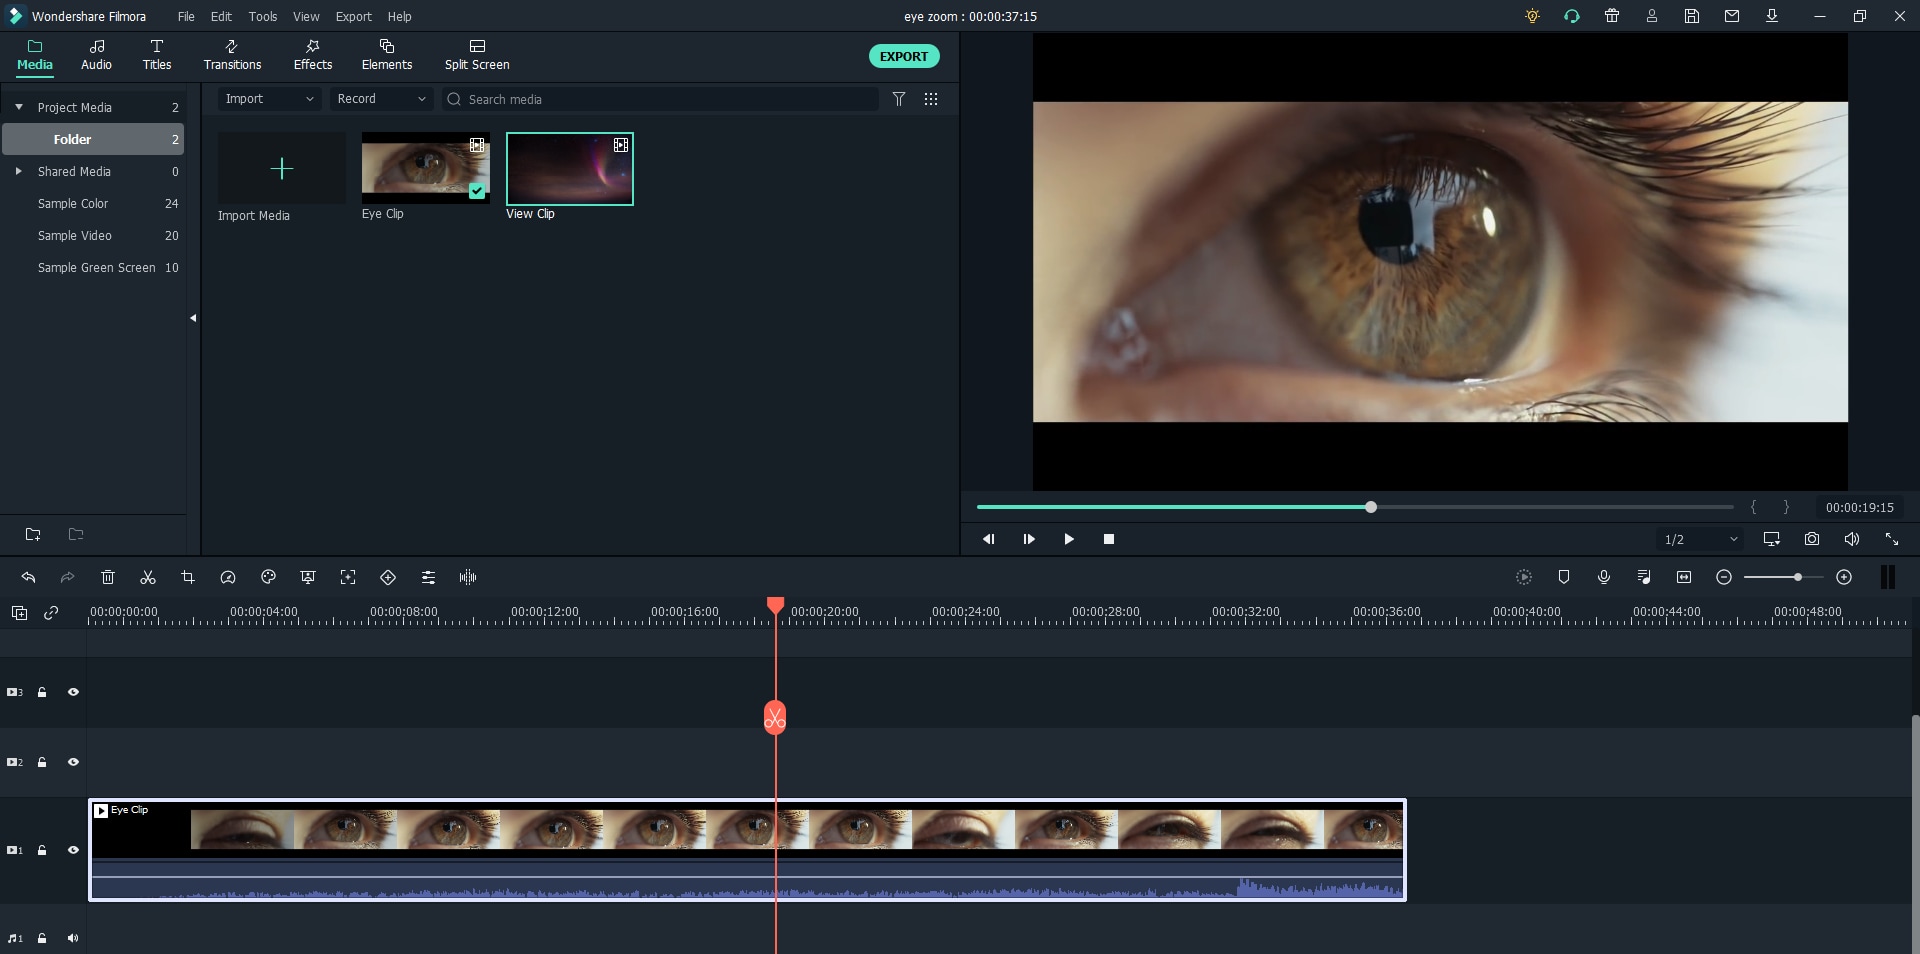
You need two videos to apply zoom into eye effect to your travel/music video. The first video should be the scene you want your audience see after zooming in a character's eye, we call it the "Eye Clip". In the second video, capture the character in a way that the eyes are visible, we call it the "View Clip". Make sure to capture high-quality video, because when you apply the transition effect, you will need to zoom in and crop the video and it might decrease the video quality.
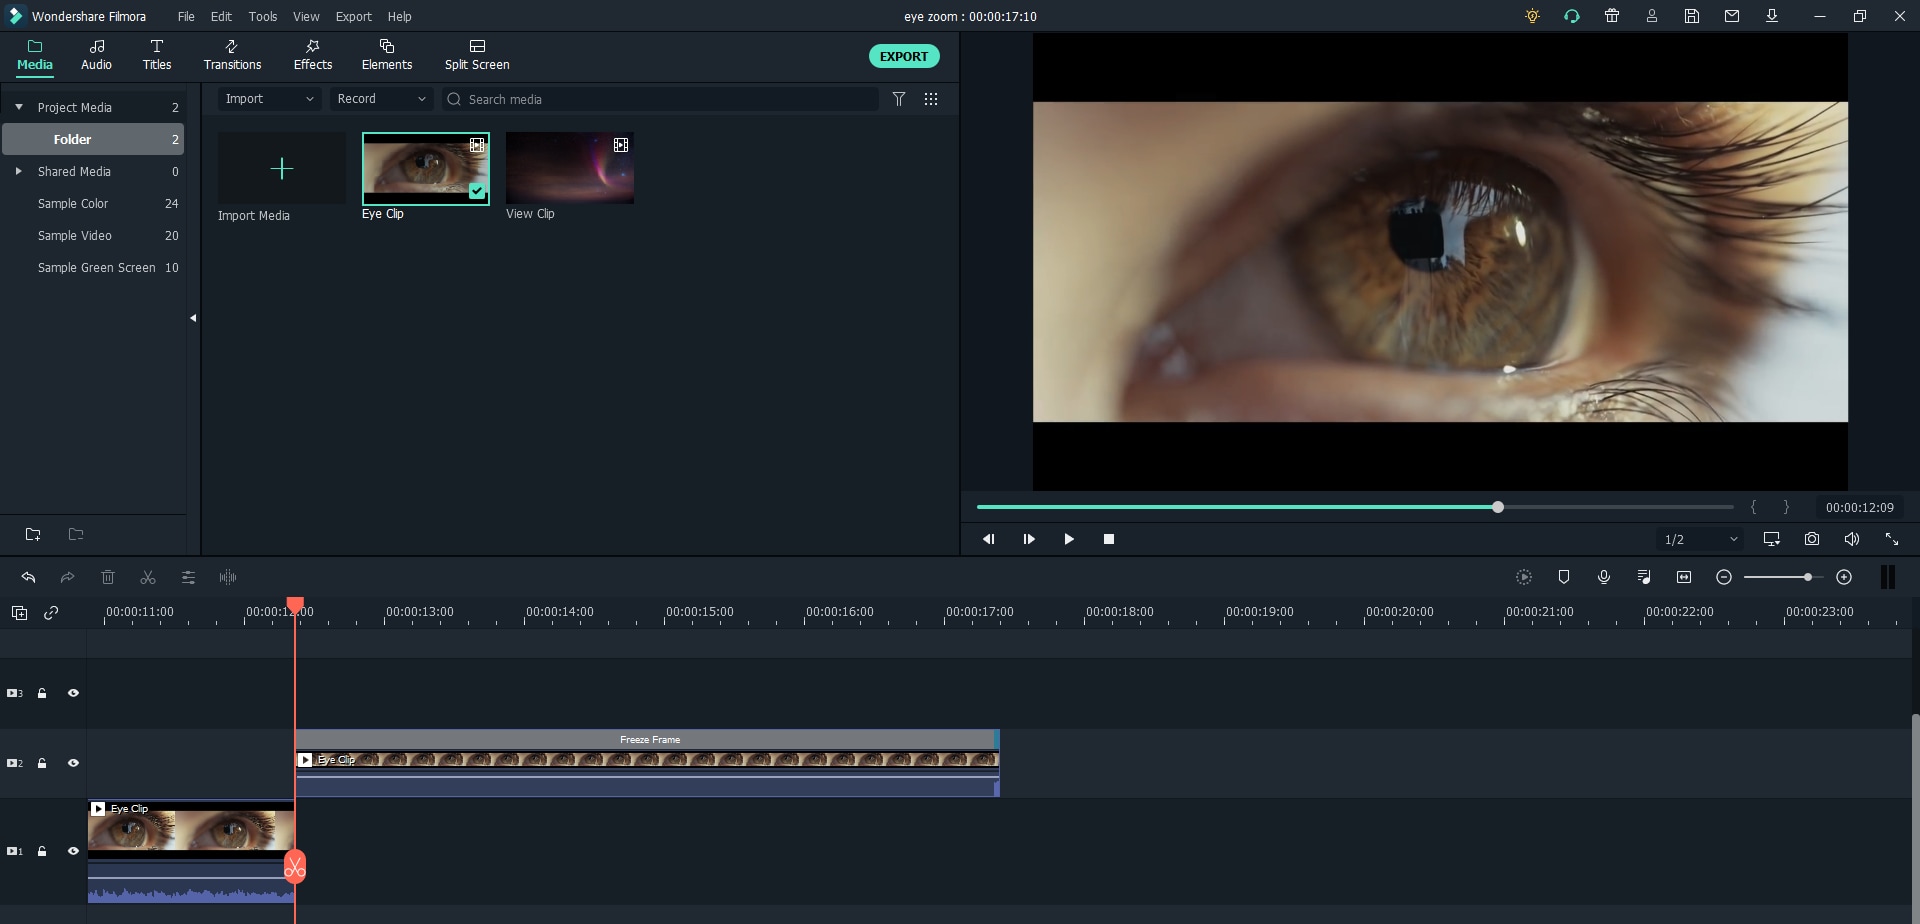
Step 2. Add the Video to the Timeline
Then, drag and drop the Eye Clip to the timeline.
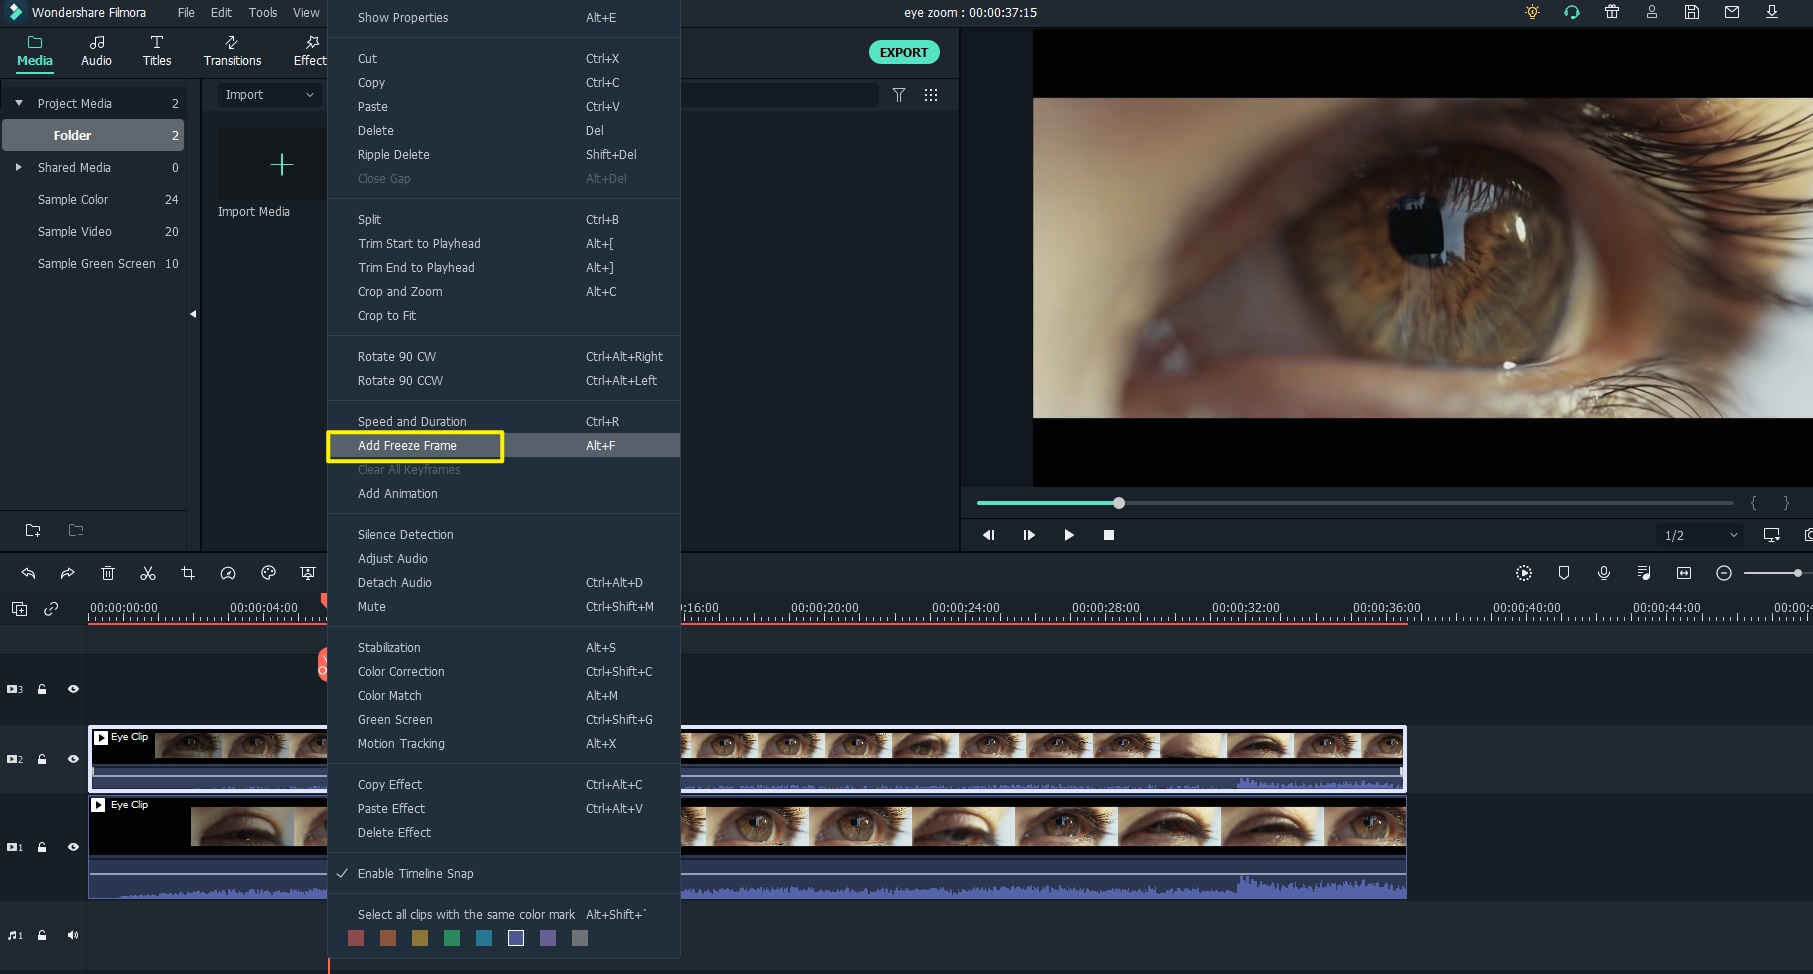
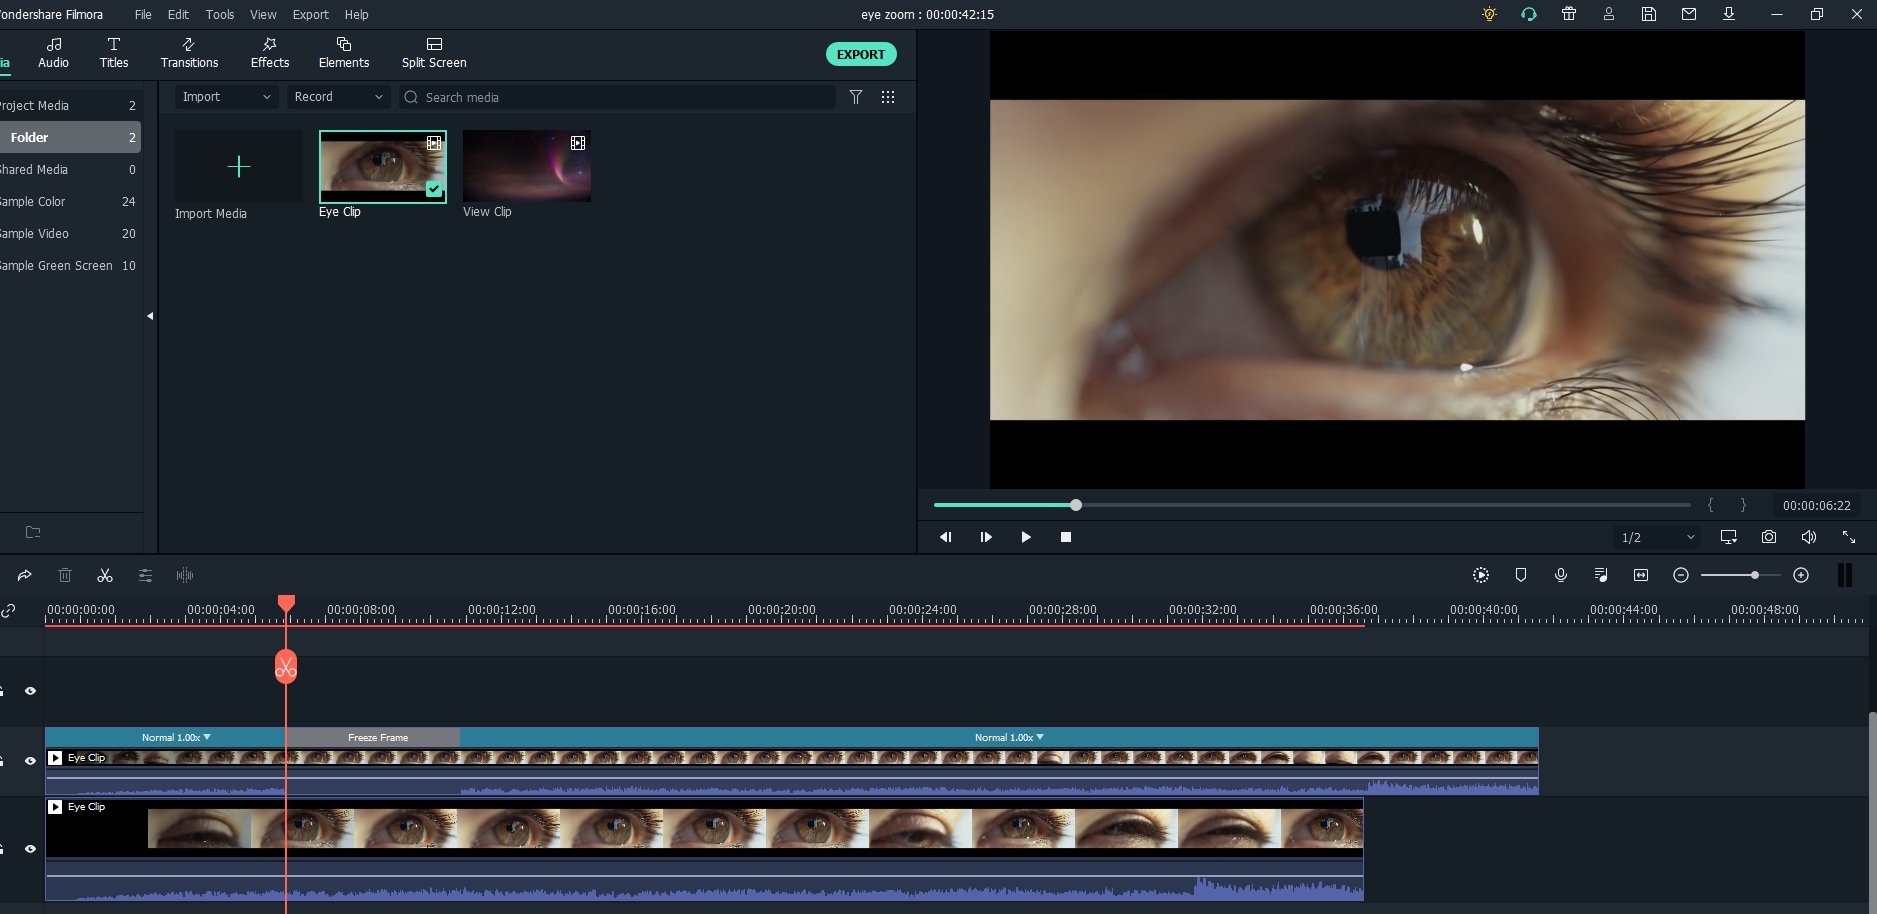
Step 3: Add Freeze Video Frame
Click on the Eye Clip and press copy. Paste it above the clip. Stop the video where the eye opens completely. Right-click on the top video clip and select the add freeze frame.
Now, this is what you can on your timeline.
Step 4. Trim the video
The next step is to trim the two videos by dragging their left and right sides. Trim the video on the first video track at where the Freeze Frame starts, then trim the video on the second video track and leave only the freeze frame
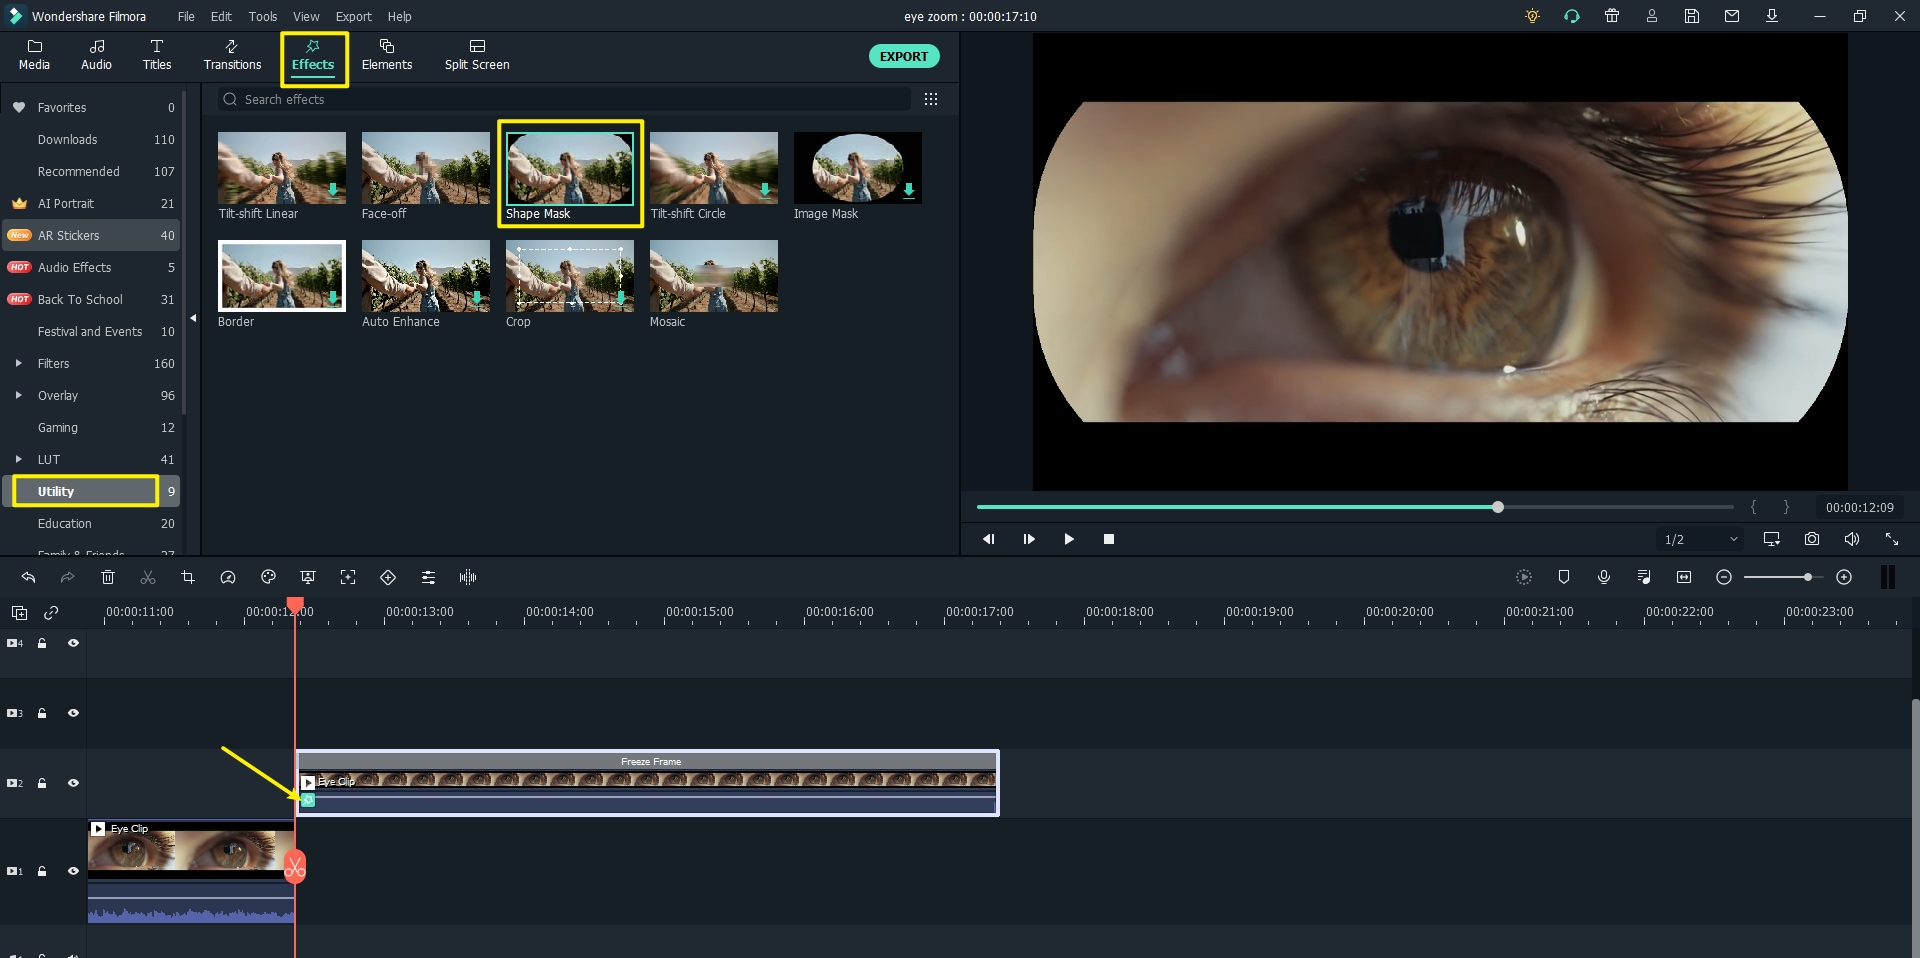
Step 5. Add Mask to the Iris
Now, we need to appy mask to the iris. Go find the "Shape Mask" under "Effect" -- "Utility", and drag it to the timeline above the Freeze Frame clip.
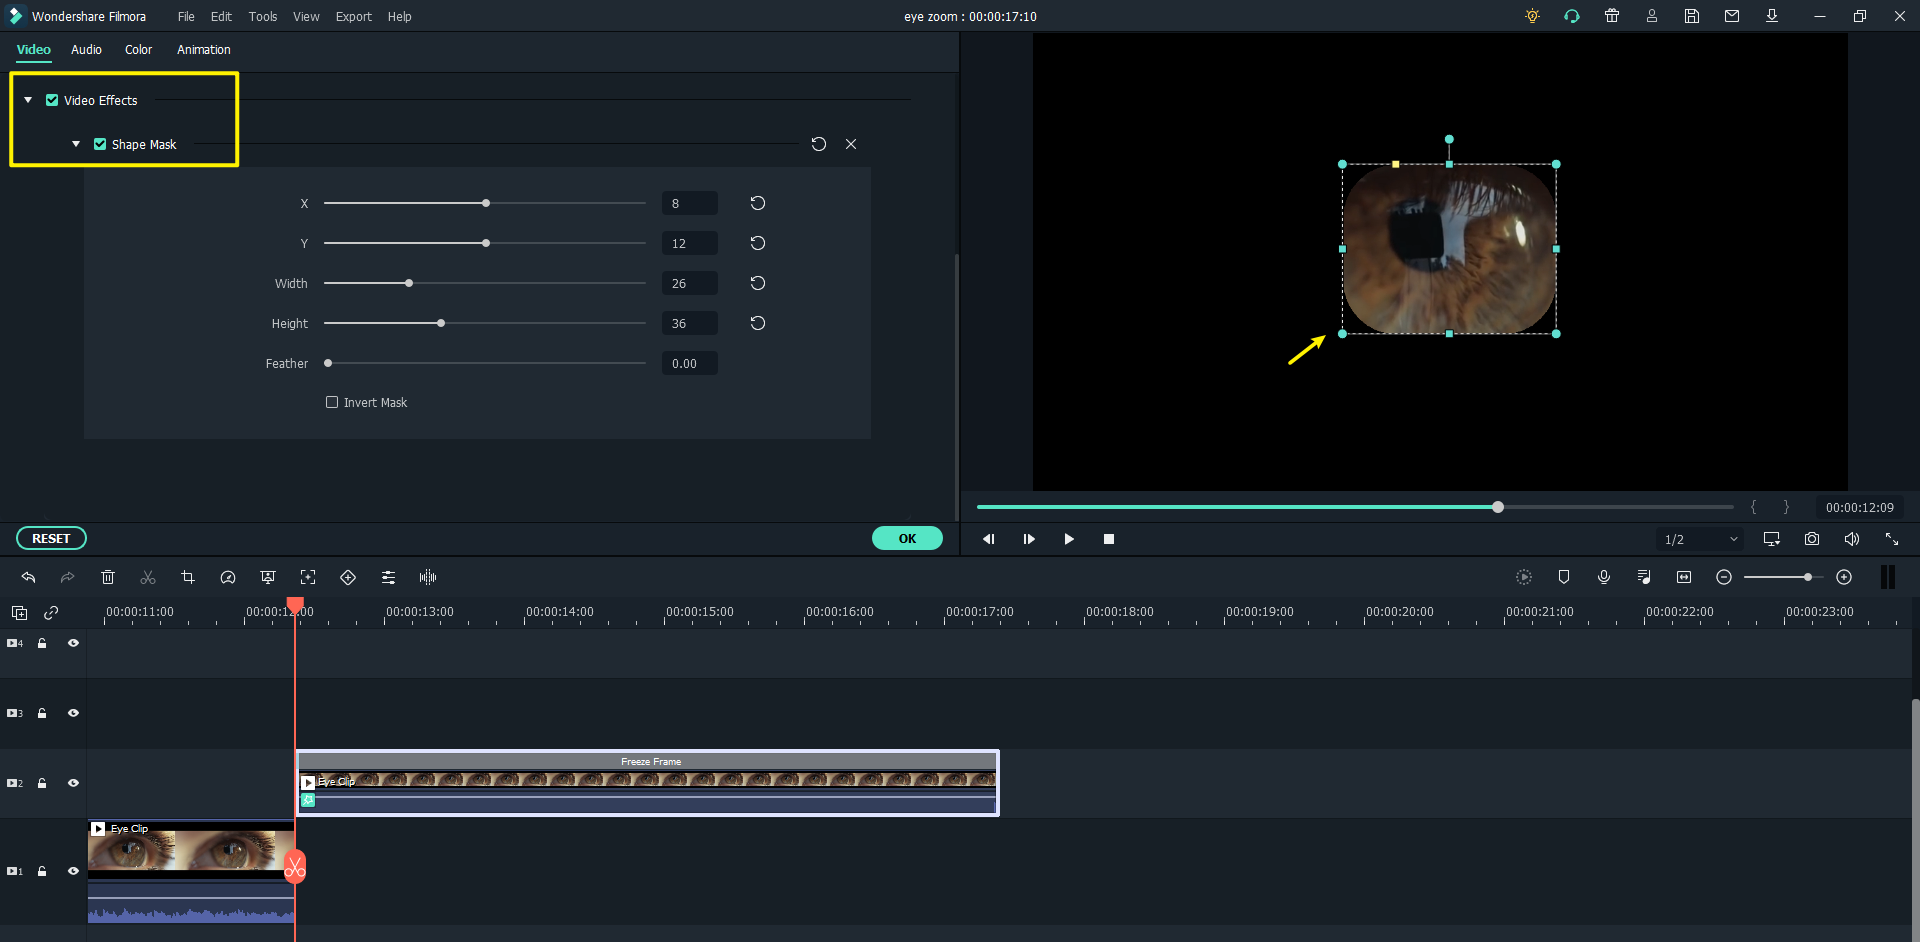
To adjust the shape mask, double click on the freeze video clip. Adjust the mask to show only the iris section of the eye.
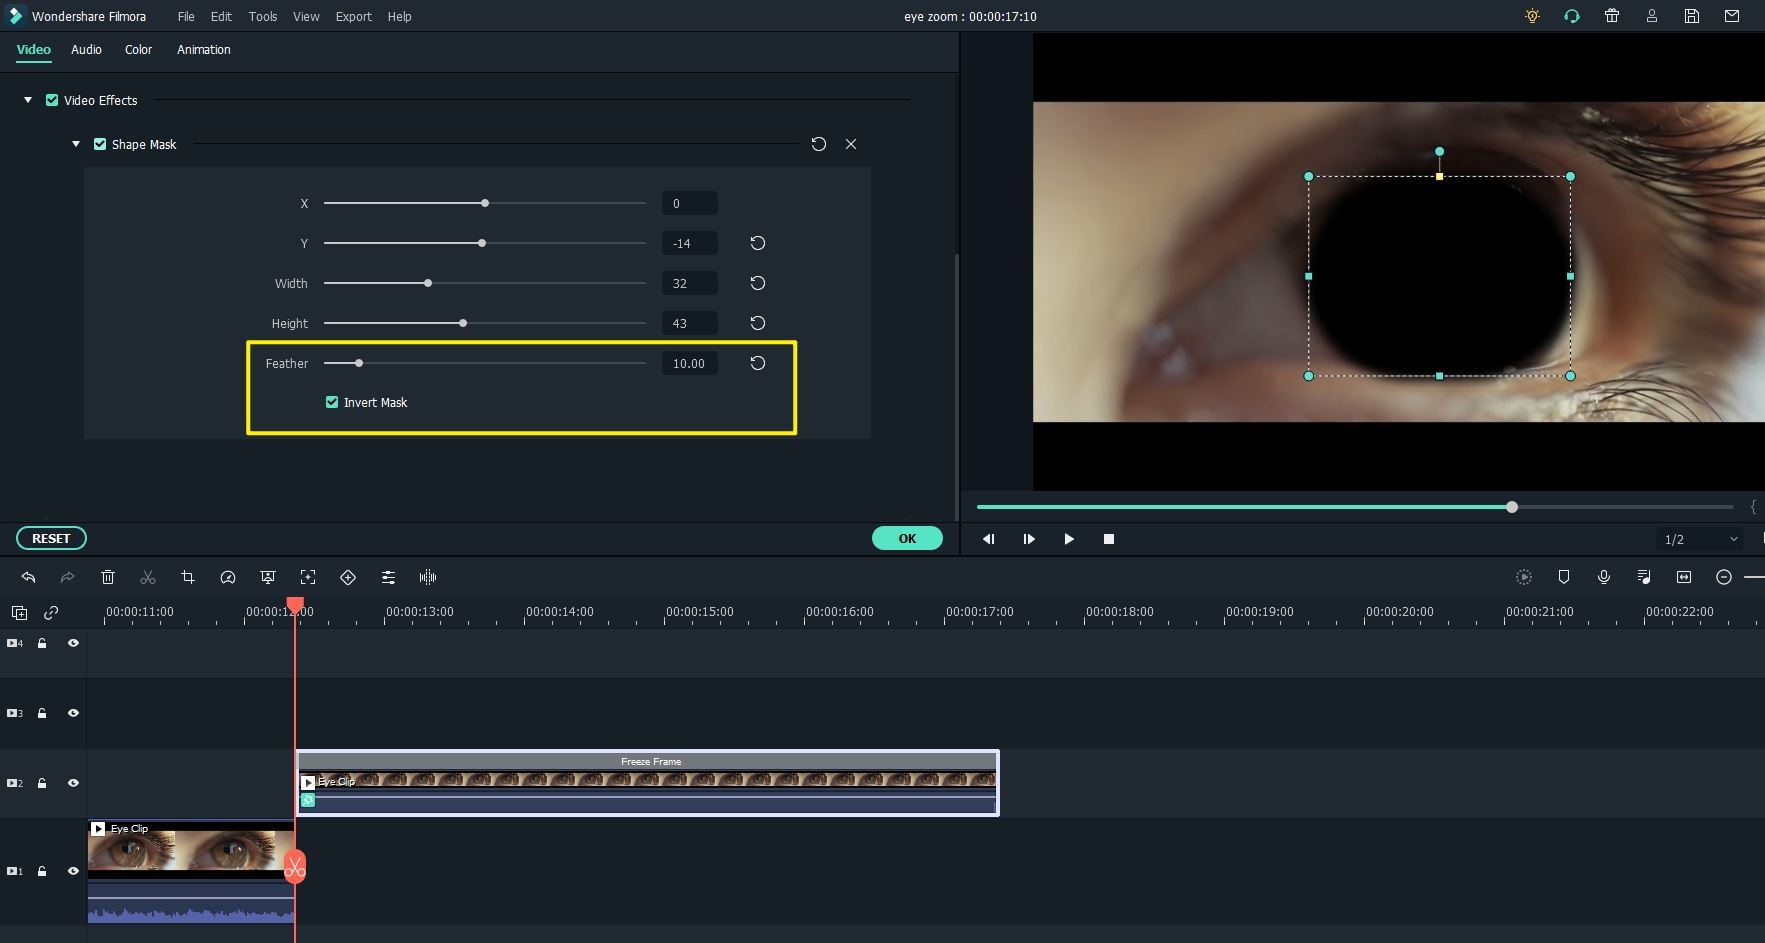
Then, click on the Invert Mask and set the feature value to 10.
Step 6. Add View Clip to the timeline
Drag and drop the View Clip to the timeline just below the freeze frame clip. The view will play where you have adjusted the mask.

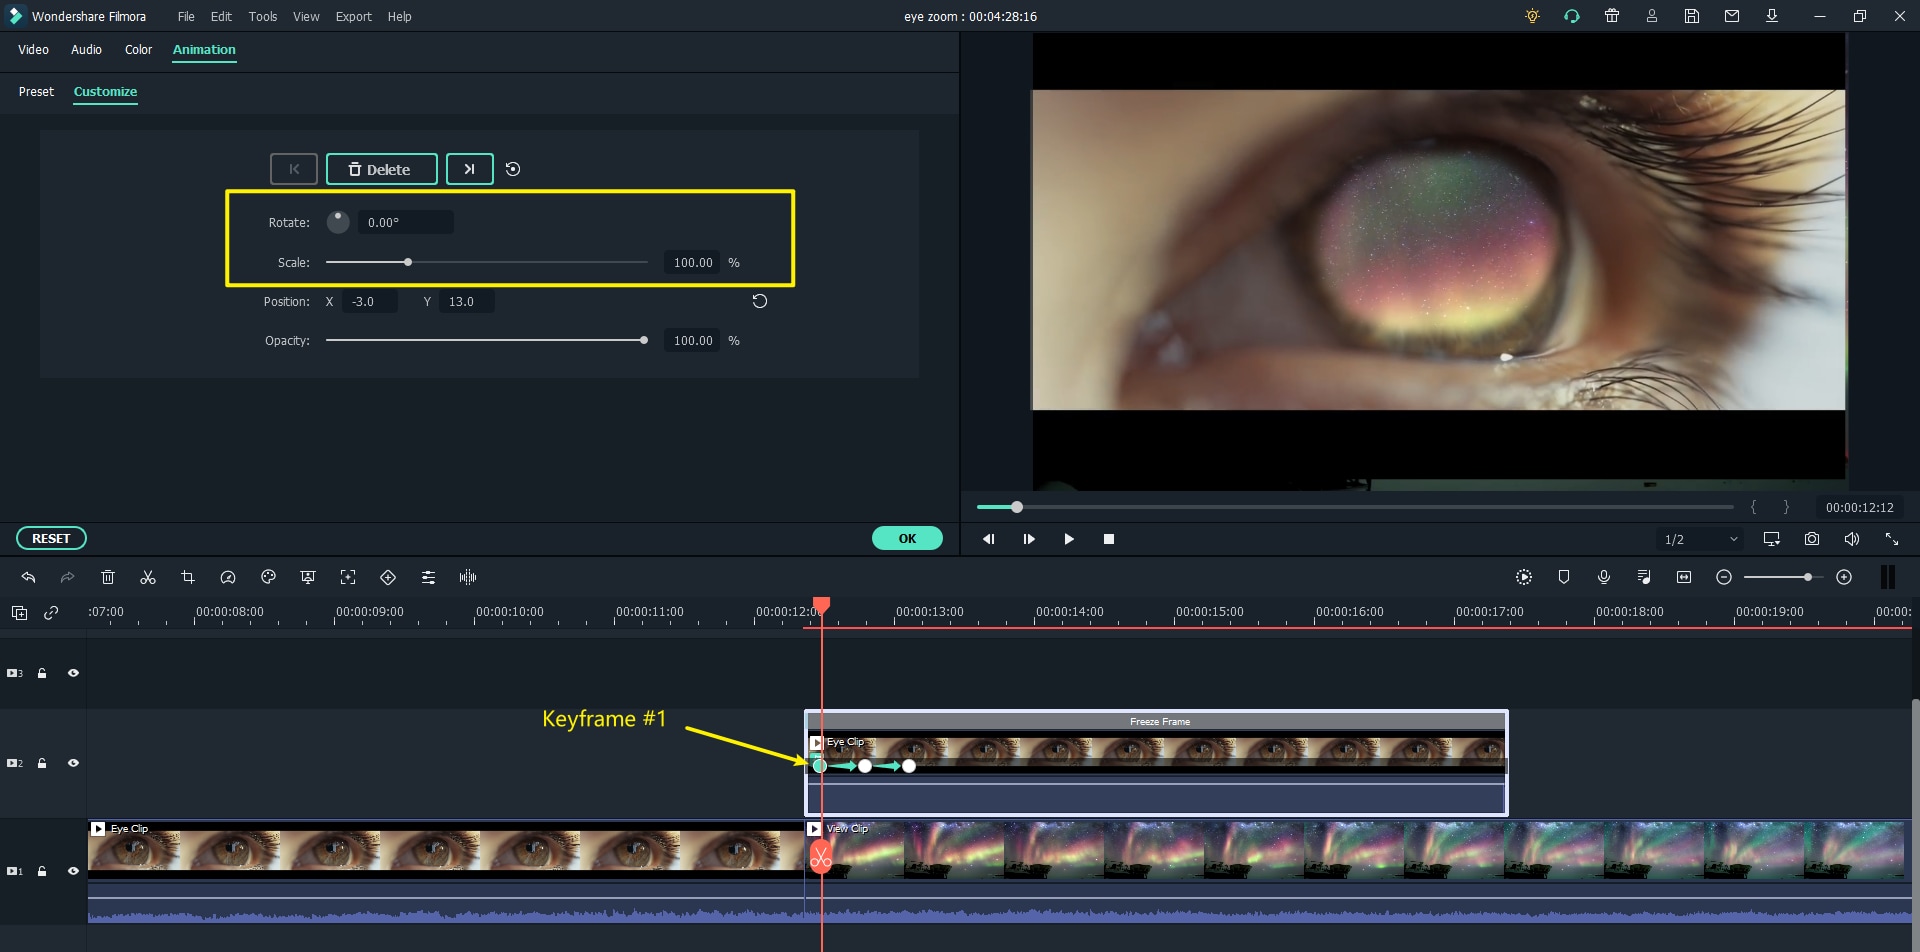
Step 7: Add Keyframe
Adding keyframe to video allows adding movement to the video clips. Filmora allows you to add keyframe to your videos with few simple steps. Double click on the freeze frame clip to activate the settings window. Go to the Animation tab and click on the customize button to check the keyframe settings. To add a keyframe at the start of the freeze-frame, click on Add. Now, add the first keyframe at the start of the freeze frame.
Then, move the play head to add the second keyframe. We recommend you change the Rotate and Scale of the second frame to 20 and 160 to add movement to this effect.

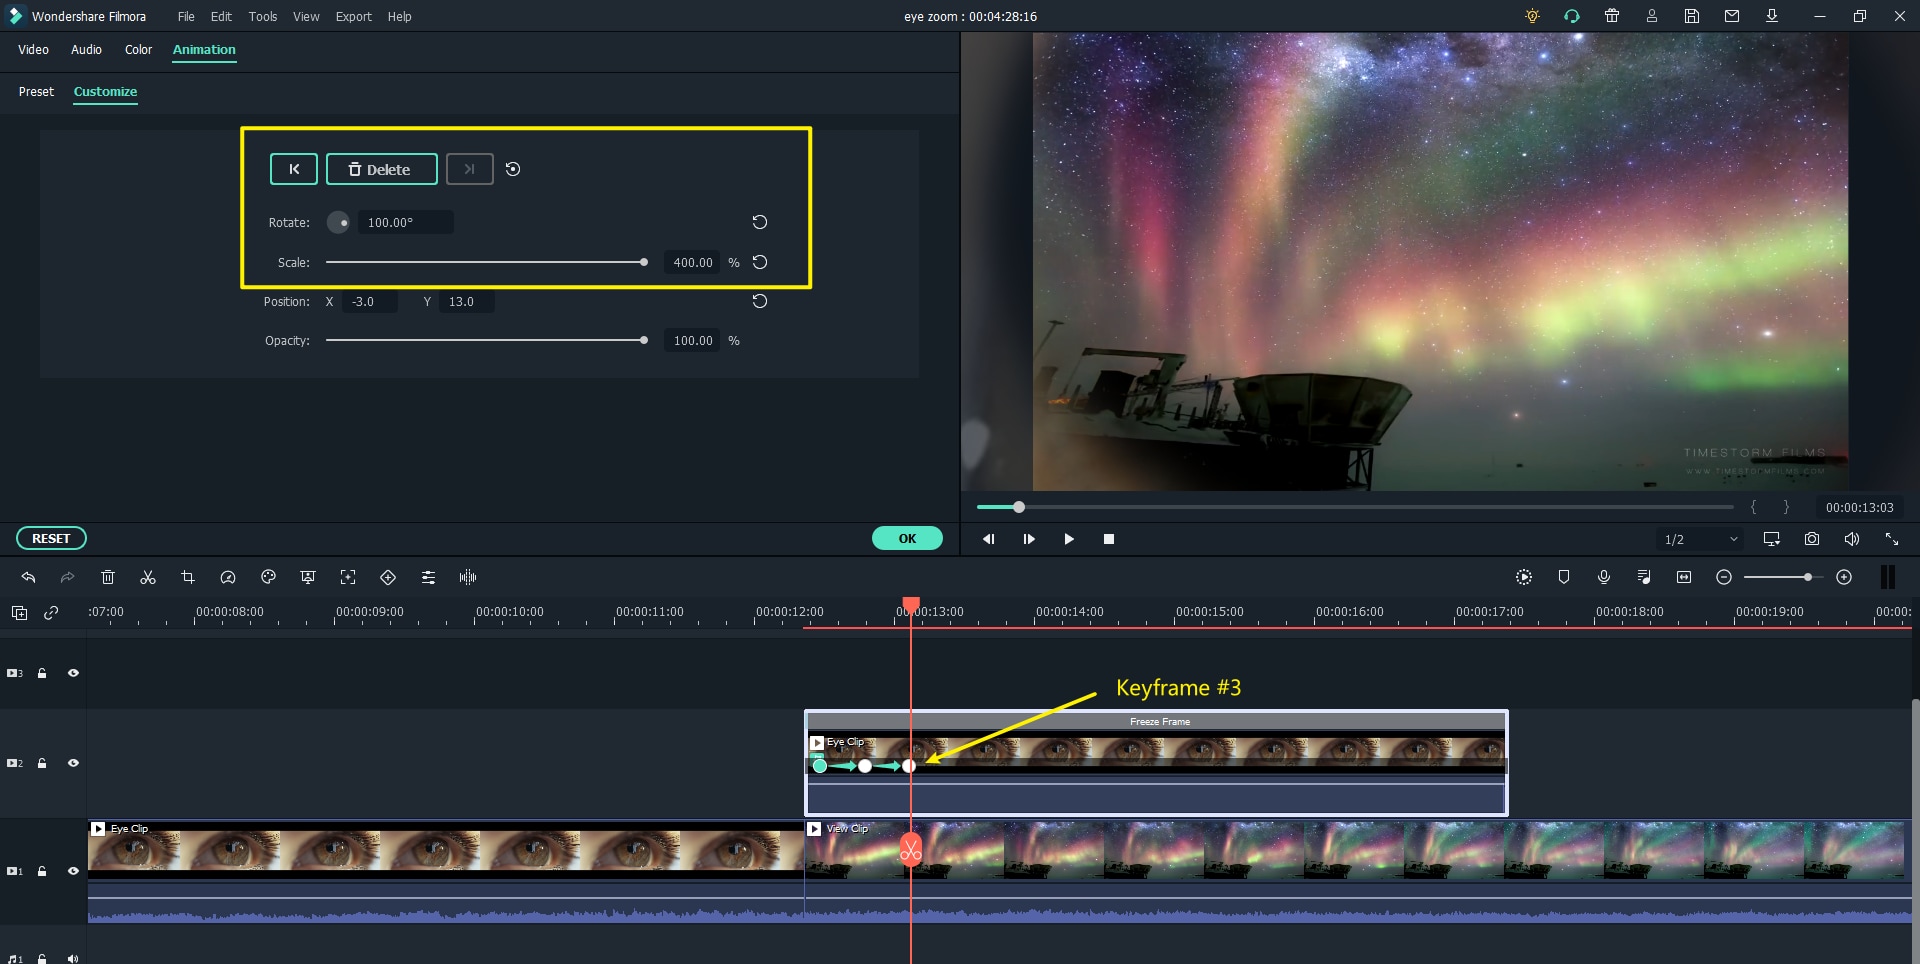
As for the third keyframe, we recommend set the rotation (100) and scale (400) until the iris occupies the whole frame
Step 8: Export the Final Video
Congratulations! You have done with the eye zoom transition video. Export the video and upload it to engage more audience with this cool effect.
Conclusion
As a vlogger or musician, you can create a zoom into eye effect even if you're a beginner. We recommend you use Filmora and follow our eye zoom transition tutorial to add this stunning effect to your videos. Use Filmora and add more appeal to your travel/music videos through zoom into eye effect.
Key Features
- Best video editing software for beginner and semi-professional, that comes with powerful editing skills like trimming, splitting, rotating, editing, etc.
- Advanced video effects like kens burn effect, glitch effect, green screen, audio mixercan also be found and applied to your video within few clicks.
- 500+ free special video effects to customize and create an awesome movie by yourself.
- 1000+ standalone effects downloading resources to make videos in all kinds of styles.
- Record voice in real-time: you can have you voices recorded in realtime and instantly add them to the video files.


