If you have considered selling your iPhone after buying a new one or perhaps, handing it over as a gift to someone special, it would be in your best interest to clear out iPhone completely. This means getting rid of all data including emails, banking information, logins among other downloads for security reasons. Basically, such info may end up in the wrong hands and in the process, lead to unexpected damage. Here are tips for you on how to clear iPhone easily and completely.
Part 1: How to Clear an iPhone Completely
To achieve this, you will need a reliable and effective tool that will not only wipe off all data, but do so without any chances of recovery. If you are in the quest for a quality data eraser, your safest bet lies in the dr.fone (Mac) - Data Eraser (IS) (or dr.fone - Data Eraser (IS)). The software allows its users to delete absolutely every trace of data from the device. It is one of the most user-friendly programs around with a plethora of great features and modes to help you get the most out of every experience. Let’s delve on some of the key features of the program, before looking at how to clear an iPhone completely.
Key Features of dr.fone - Data Eraser (IS):
- It gets rid of all junk files that may be running in the background hence speeding up your device for optimum functionality.
- It allows users to delete all data including browse history, photos, contacts, account info among others.
- It erases all data from the device and iTunes library completely and even goes the extra mile in deleting previously deleted data.
- Erases both jailbreak and non-jailbreak devices. And fully support iPhone 6S and iPhone 6S Plus.
Step-by-Step Guide on How to Clear an iPhone
Step 1 Download and Run the Data Eraser
You will first have to download the iSkysoft program online, prior to installing and running it on your Mac. Once installed, connect your iPhone device to your Mac or PC using a USB cable. The program will confirm connection by indicating its name at the top of your screen.
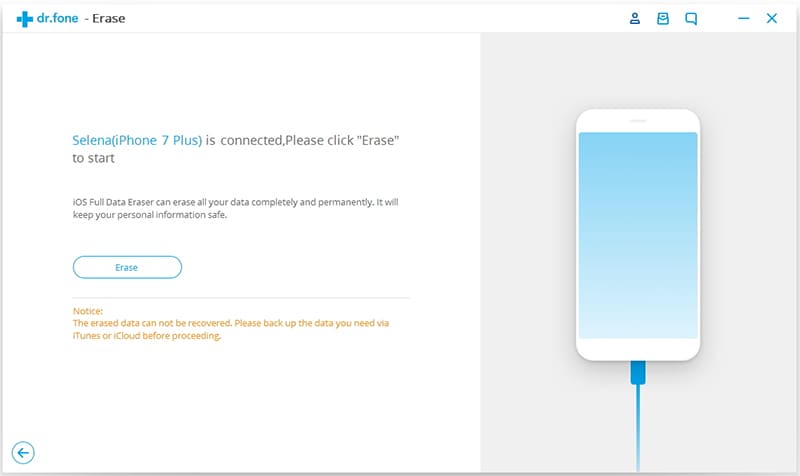
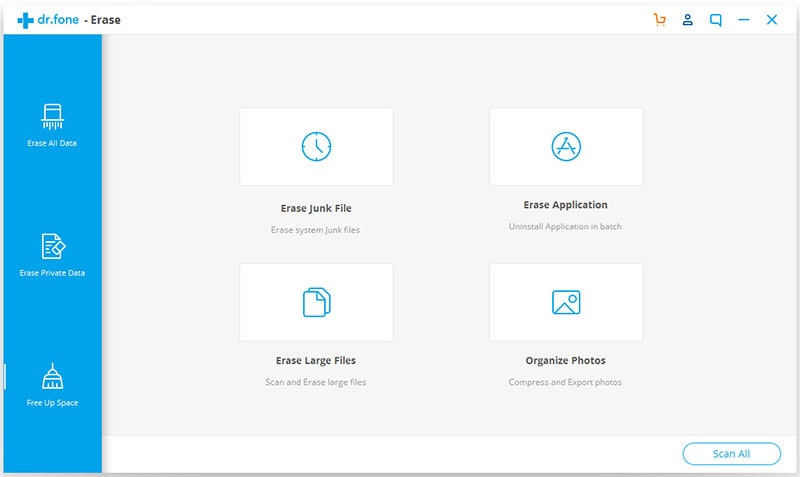
Step 2 Choose Your Desired Data Erasr Mode
Proceed to select the "Erase All Data" option on the program's interface on your Mac. This will allow you to clear everything on iPhone.
Step 3 Start Clearing iPhone
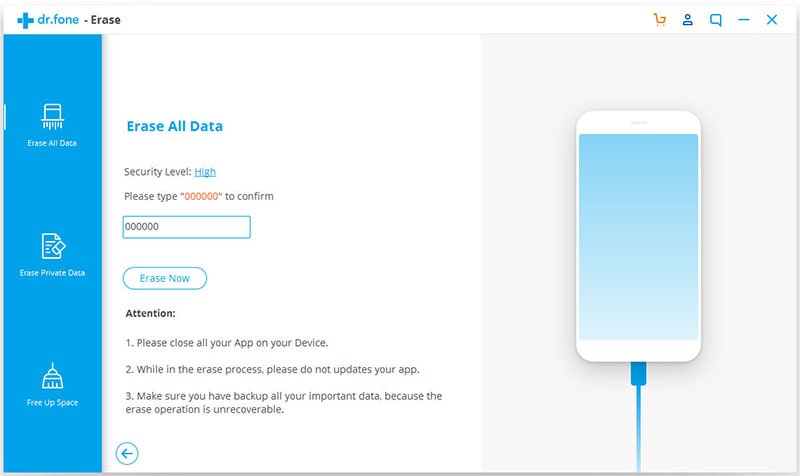
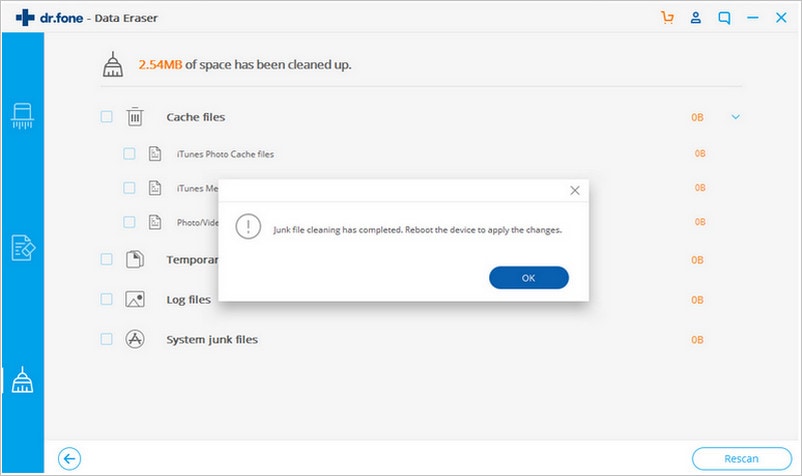
Click "Erase Now" to move to the erasing process. The program will begin scanning all files on your device, prior to erasing all data detected in the process. Upon completion, a pop-up window asking you to type "delete" to confirm deletion. Just type the word and click "Erase Now" to start the iPhone clear process.

Part 2: How to Clear Junk Files to Speed Up Your iPhone
dr.fone (Mac) - Data Eraser (IS) (or dr.fone - Data Eraser (IS)) is not limited to just clearing all data on iPhone and you can use it to enhance the functionality of your iPhone. If your device keeps hanging every now and then, or perhaps slower than it should be, chances are that there are junk files running in the background. Deleting these files will go a long way in boosting your device’s speeds and what better way to do this than using the iSkysoft program? Let’s have a look at how to clear iPhone junk files using the program.
Step-by-Step Guide on How to Clear iPhones Junk Files
Step 1 Select the "Delete Junk Files" Mode
Once you have downloaded and installed the program, run the dr.fone - Data Eraser (IS) and connect iPhone to your Mac or PC. On the interface, you will see the "Express Cleanup" option on the left side of your screen. Click on it.
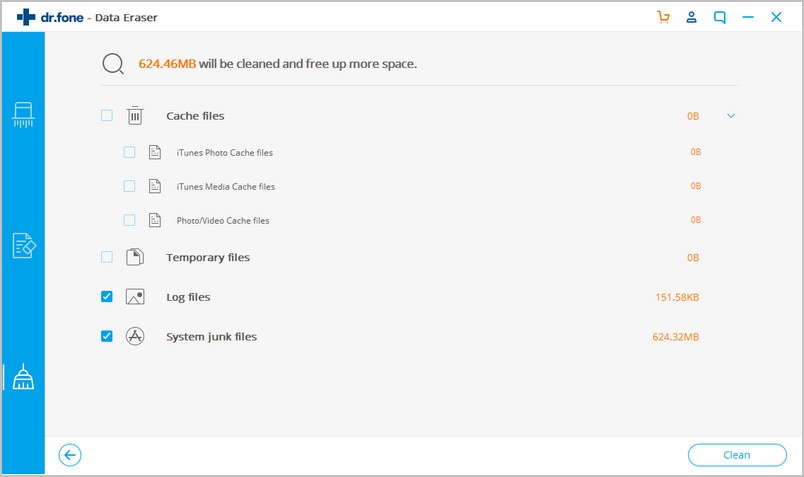
Step 2 Scan Junk Files on iPhone
At the bottom right of the interface, click "Start Scan" to begin scanning for junk files. Upon completion, the junk files will be displayed alongside the amount of space they occupy on your device.
Part 3: How to Clear Documents and Data from iPhone
What is Documents and Data on iPhone?
As it has been mentioned before the documents and data is the most mysterious part of the iPhone for some users and therefore it cannot be understood with ease. However to make it simple it is advised to all the users to read this part completely. The documents and the data is not a generic term as the origin can be from various resources. It includes stock apps, third party apps and the normal functionality that is performed over the iPhone. Stock apps mean the ones which cannot be deleted and are built into the firmware. The third party apps are those downloaded from the App store and can be deleted without much hassle.
The Other Resources
There are a lot of other resources that contribute towards the documents and data accumulation. One of the most notorious apps in this regard is the message app. The attachments as well as the text that is transferred by this app leads to a memory issues as it leads to documents and data being full.
The iCloud and the attachments that are embedded within also fill in the documents and data section and hence they lead to the issues that are related to memory. The next part of the tutorial leads to the fact that how a user can delete the documents and data with ease. It also leads to the results that are awesome and allow the user to remain in line with the requirements of the data deletion.
Step-by-Step Guide on How to Clear Documents and Data from iPhone
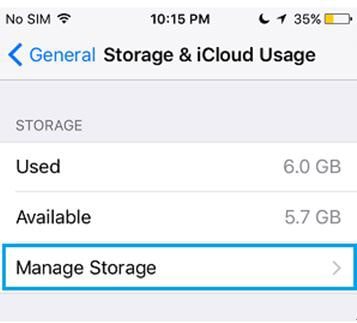
Step 1. The path that is to be followed is Settings > General > Storage and iCloud Usage.
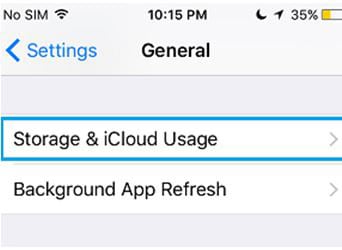
Step 2. Tap on "Manage Storage" to proceed further in this regard.
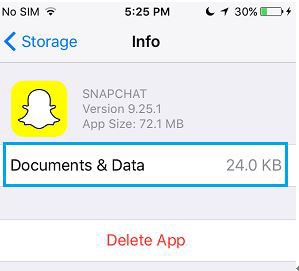
Step 3. On the next screen the user will get the list of all the apps that are using the documents and data to their fullest. The user needs to tap each app one by one and click on "Delete App".
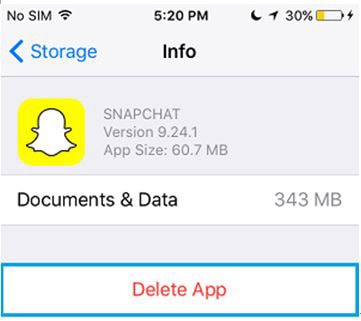
Step 4. Once done the app is then to be reinstalled from the app store to finish the process in full. The user can see significant change in the documents and data size. This also completes the process in full.