


Now and then, your address book may get cluttered with contacts you don’t need any longer. Or perhaps, you may wish to dispose your iPhone. If you would like to sell, recycle or donate your device, you may can erase contacts on iPhone. Erasing all contacts iPhone at the same time can be characterized by an effort to the point of exhaustion since Apple’s software only allows you to erase just a single contact at a time. Even so, there are easy ways to erase iPhone contacts. Here, I will take you through the top 5 ways on how to erase contacts on iPhone giving you a step–by–step guide.
Part 1: How to Erase All Contacts on iPhone in 1 Click
Many people are not aware that erased contacts on iPhone are recoverable. Erasing only gets rid of the pathway to the contact but is still recoverable with data recovery tools. dr.fone (Mac) - Data Eraser (IS) (or dr.fone - Data Eraser (IS)) ensures that your contacts are permanently deleted.
Key Features of dr.fone - Data Eraser (IS) for Mac or Windows
- Uses the United States Military method of doing away with data.
- Cleans up your iPhone device by removing unnecessary background processes and junk files to ensure optimal speed.
- Three different modes to erase files and data permanently.
- Remove apps you wish.
Steps for How to Erase All Contacts on iPhone
Step 1: Launch the Data Erase program
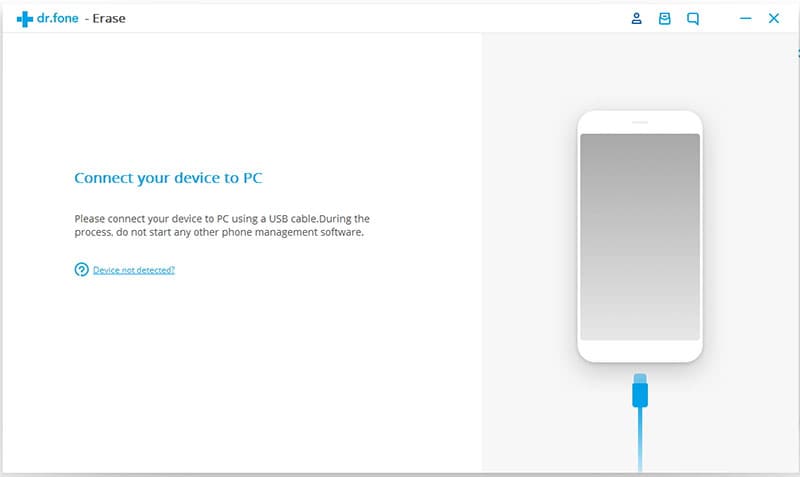
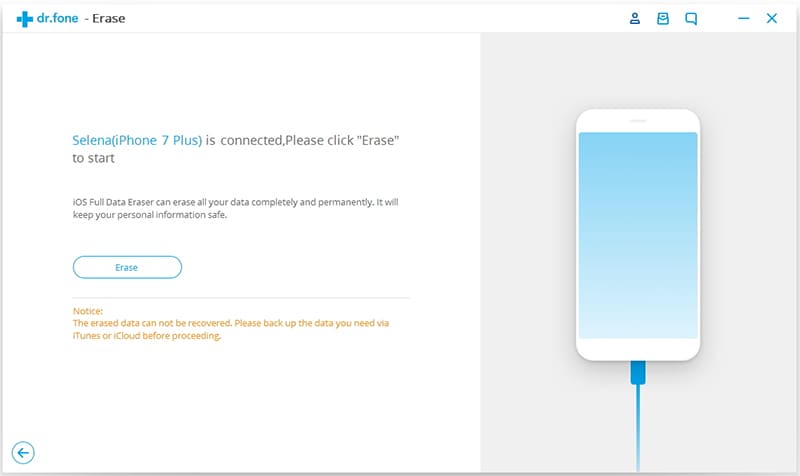
First, you can download and install dr.fone (Mac) - Data Eraser (IS) on your Mac device. Then launch the program. After that, you can use a USB data cable to connect your iPhone to your computer.
Step 2: Choose "Erase All Data" mode
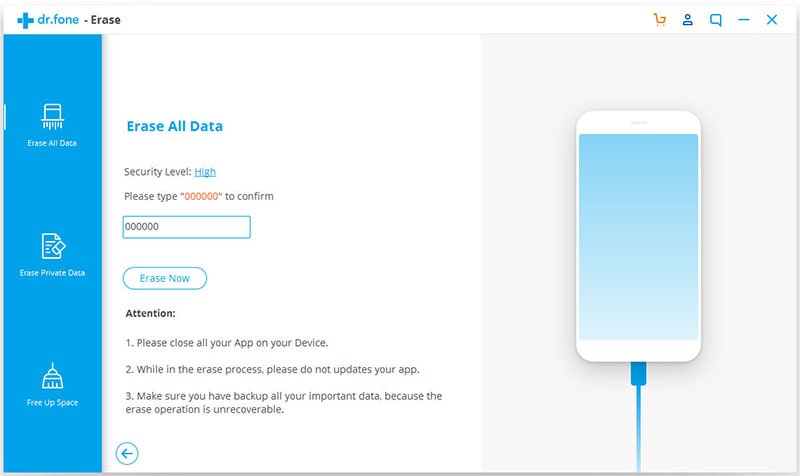
Next, you can click on "Erase All Data" in the sidebar on the left, and then click "Erase Now" to open the erase window. open the erase windows.

Step 3: Type "delete" and click "Erase Now" button start erasing all contacts from iPhone
Finally, type "delete" in the box to confirm erasure. After that, click on the "Erase Now" button. In the window, you will notice that the process of removing all data from your iPhone begins. Once the deletion is successfully completed, you will see in the window of the program, “Completed, All Data on Your Device has Been Erased”. Then click on the “Done” button to finish. This erases all the data on your iPhone completely.
Part 2: How to Erase Contacts on iPhone with Contacts Apps
Steps for How to Erase Contacts on iPhone with Contacts Apps
Step 1: Open the contacts app
First, you can go to contacts app on your iPhone and open it. It is usually located on your home screen.

Step 2: Mark the contact you wish to erase
Next, you can scroll through your contacts list to locate the contact you wish to erase. After that, you can alternatively use the search bar on the top of your screen and type the contact you want to delete for quick navigation. This method allows you to erase just a single contact at a time.
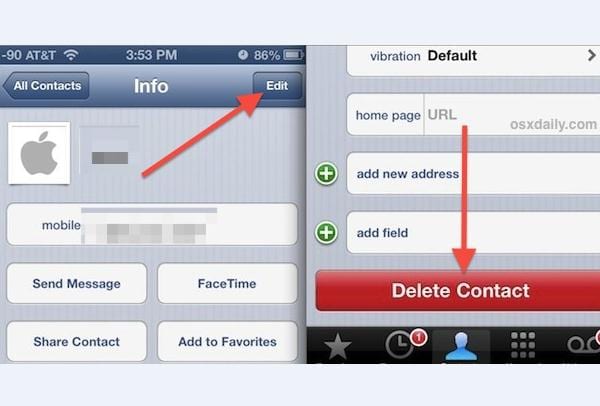
Step 3: Wipe the contact from your iPhone
After you have found the contact, tap to open the details. This will display all the information attached to that contact. At the upper corner, tap the “Edit” button. It will change the edit mode. Then scroll through the contact page. At the bottom, you will see “Delete Contact” button and double tap to confirm deletion. This will delete the contact from your iPhone.
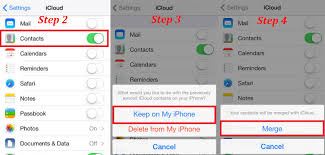
Part 3: How to Erase All iCloud Contacts on iPhone
Steps for How to Erase All iCloud Contacts on iPhone
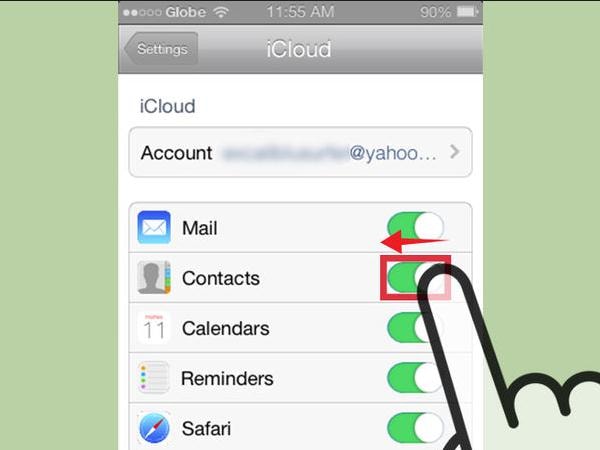
Step 1: Open iCloud and click “Contacts” button
First, you can from your desktop browser to open iCloud and the click on the “Contacts” button.
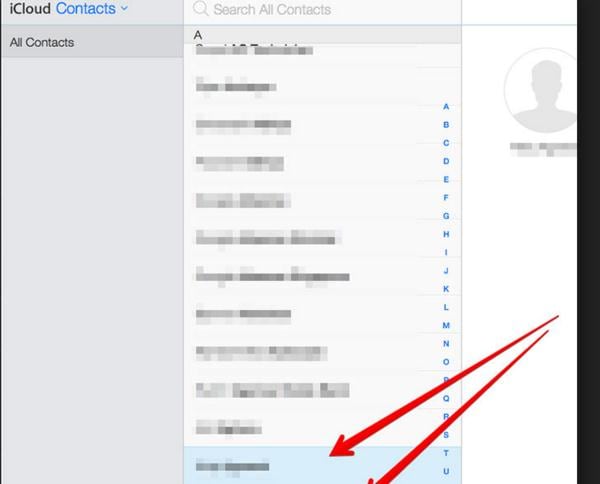
Step 2: Select multiple contacts within iCloud
Next, to select multiple contacts within iCloud and hold down the Ctrl Key or the command key for Mac users while clicking on the contacts you wish to delete.
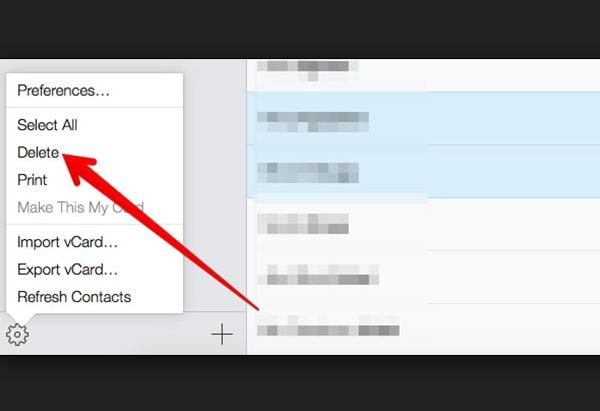
Step 3: Click "Delete" button to erase all iCloud contacts on iPhone
Once you are done selecting the contacts, release the Ctrl Key or the command key. Your selected contacts will still remain selected. You will notice that there is no edit option or delete icon anymore. At the bottom left corner of your window, there is a little gear icon. If you click on it, “Actions” menu will pop up. Go to the “Delete” button on this actions menu and confirm erasure.
When you have erased the contacts, iCloud will sync with your iPhone address book to make the same erasure.
Part 4: How to Erase Contacts on iPhone with Address Book and iTunes
Steps for How to Erase Contacts on iPhone with Address Book and iTunes
Step 1: Locate the contacts you wish to delete
If you have synchronized your contacts with Mac or Outlook on your desktop, you can erase them through your address book on the PC. Scroll through your list to locate the contacts you wish to delete. You can use the Ctrl key for PC or the command key for Mac to select several contacts which are not close to each other. For contacts that are next to each other, you can use the shift key to select multiple contacts.

Step 2: Select "Delete Contact" to mark contacts you want to erase
For Mac, click the edit button on the address book. When the menu appears, you can simply press the delete key from your keyboard or select the “Delete Card” button. On PC, click the “Actions” from the window of your contacts list then click “Menu”. Proceed to select “Delete Contact”.
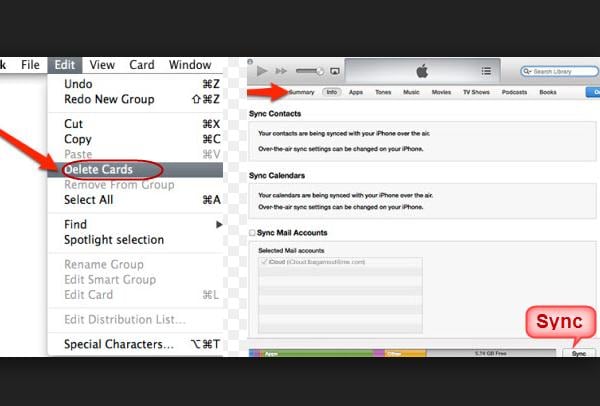
Step 3: Click "Sync" button to sync iPhone with iTunes and remove iPhone contacts
If you are not synchronizing wirelessly, you can connect your iPhone to your computer using the USB cable. Once you have plugged your iPhone, open the iTunes and select your iPhone from the top right of the iTunes window.
Go to the info tab at the top and click "Sync" button. In the window below that, select “All Contacts”. Go down to the bottom right of the window and click “Apply” button to sync your iPhone with iTunes. Then you can remove the contacts you erased in your address book from the Contacts App on your iPhone.
Part 5: How to Erase Contacts on iPhone Using Groups
Steps for How to Erase Contacts on iPhone Using Groups
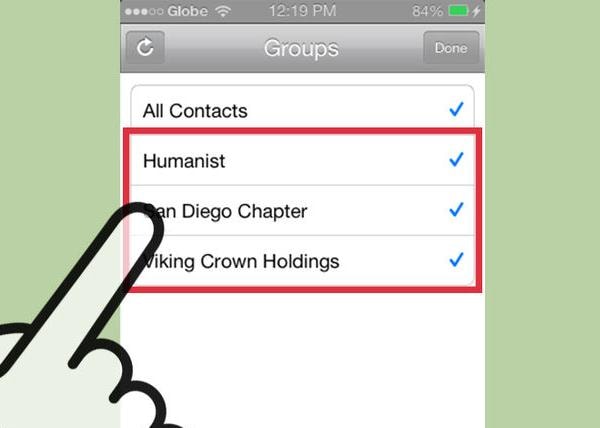
Step 1: Separate entire categories of contacts from your list
You may have created different groups for your family, friends, and colleagues among others. This way, you can separate entire categories of contacts from your list.
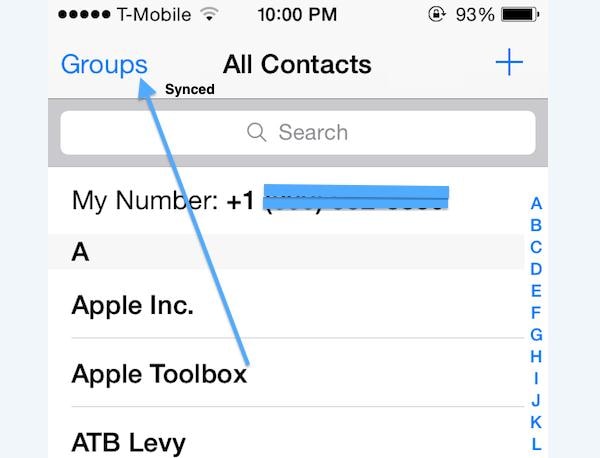
Step 2: Tap the "Groups" icon and select the group you may wish to hide
To manage these categories, tap the “Groups” icon from the contacts window at the top left. Select the group you may wish to hide from the list by tapping to uncheck. When they are unchecked, they will be hidden from the list of your contacts. When they are checked, they will be visible from your contacts list.
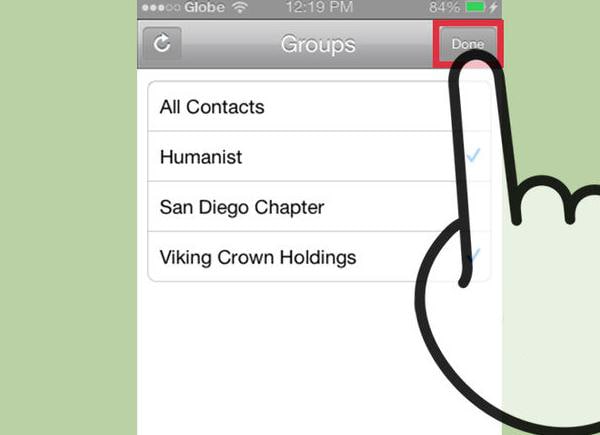
Step 3: Tap "Done" icon when you have finished
Tap on the “Done” icon when you have finished. Now, the list of your contacts will only display the groups you choose.


