


There are countless reasons for the need to erase history on iPhone. While we hope that we’ll never be in a situation where this is a huge problem, we may want to eliminate some uncomfortable information or clear a phone for another user. Many people make the mistake of trying to do this without the use of intervening software. In this case, it is essential to be able to erase search history. iPhones have Safari, Chrome, and Opera that are saved directly on the iPhone and it is necessary to erase it in a way that it cannot be recovered. A simpler method of erasing data is not safe as the information can still be recovered by anyone with some technical savvy.
How to Erase History on iPhone in 4 Steps
There are four steps involved in order erase iPhone history by using dr.fone (Mac) - Data Eraser (IS) (or dr.fone - Data Eraser (IS)) can be the best solution since they are made for Apple products and will manage the task effectively. It is important to find out how to erase history on iPhones permanently using the "Erase Private Data" mode of the software.
Why Choose dr.fone - Data Eraser (IS) to Erase History on iPhone
If you are selling your phone, giving it away, or merely giving yourself a fresh start; it is important that you use reliable methods to make sure that nothing has been left behind. Don’t trust your all-important personal data and identity to be at risk by trying to manage this critical process without the proper methods, software, and compatibility. Make sure that you use a product that is designed specifically erase history iPhone users must keep safe.
Step-by-step on How to Erase History on iPhone
Step 1: Backing up the data that you want to preserve
The first step always involves backing up the data that you want to preserve. Many people make the mistake of assuming that the proper data will be successfully eliminated without any technical problems. However, it is always important to hedge your bets and back up the information you need to maintain on your iPhone.
Since the data will be permanently lost when you use dr.fone - Data Eraser (IS) for Mac/Windows, you must use iTunes or iCloud to back up the information that you want to preserve.
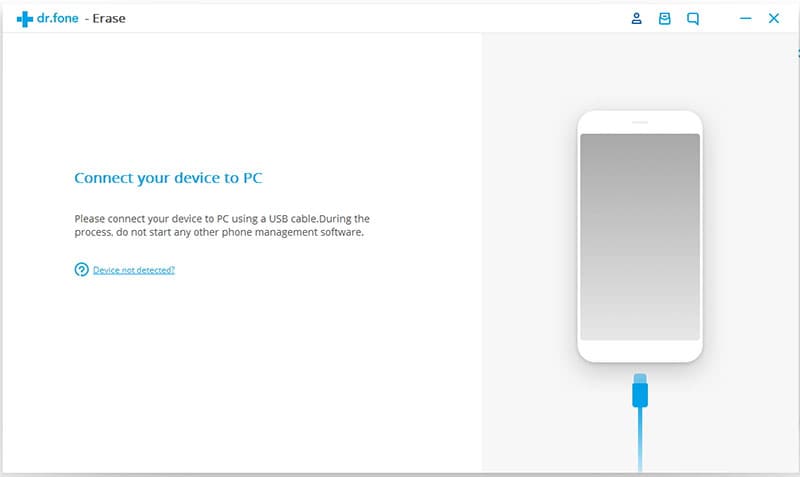
Step 2: Download and install the dr.fone - Data Eraser (IS) program
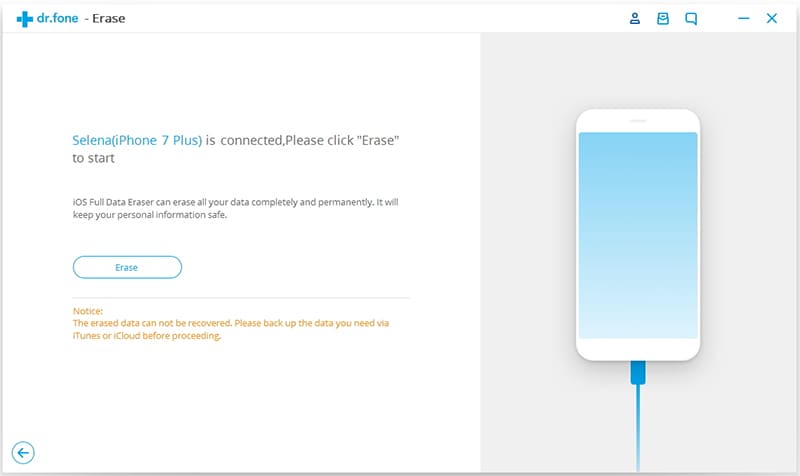
Download and install the program. Launch the program and connect your iPhone to your computer with a USB cable and bringing up the phone on the software. You will see a box with your named phone represented and a bar that contains your options on the side.
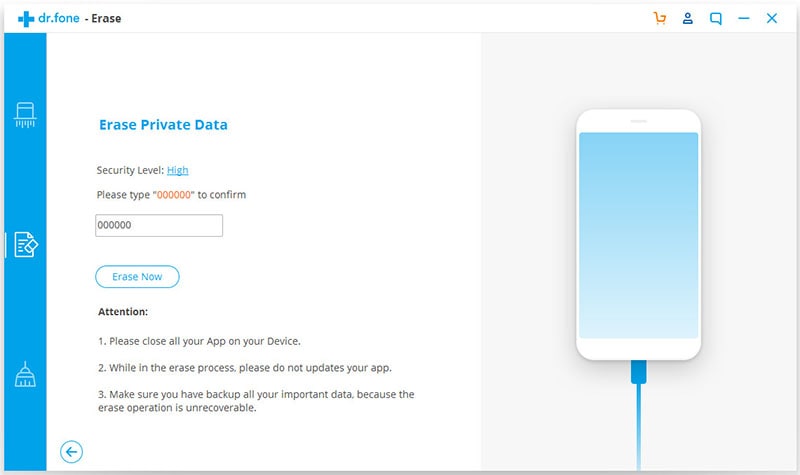
Step 3: Click "Erase Private Data" to wipe the data you want to remove
Use the left side bar to erase your personal data by clicking the option entitled "Erase Private Data". The program will start scanning your iPhone data. This will remove things such as call history, contacts, mail, calendar notes and reminders, Facetime data, messages, voice notes, bookmarks, photos, and videos.
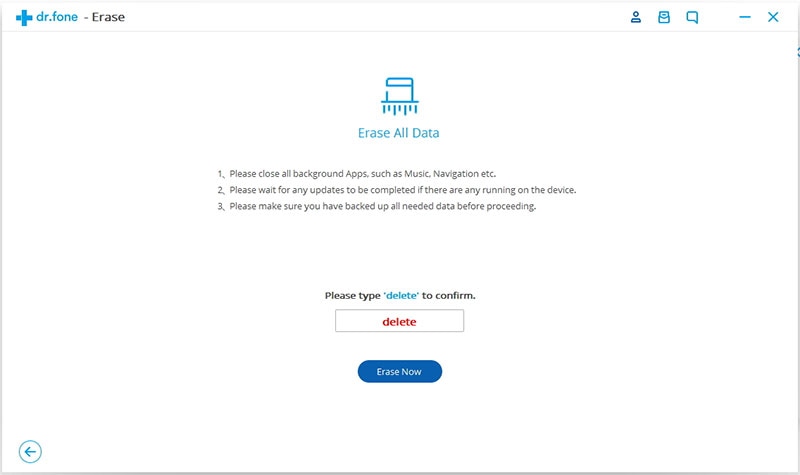
Step 4: Start erasing history on iPhone
After the scanning, you will see all the private data list. Check the one you want to remove and click "Erase Now". And then enter "delete" as requirement to confirm your deletion. And then click "Erase Now" to start erasing iPhone history.


