With the coming of iPhone 8, many users got its possession and have come up with the confusion of transferring photos to iPhone 8. And we can assure you that you have come to the right place for clearing this question. For all those users who are in the same doubt, this article will tell you 5 different ways through which you can easily transfer photos to iPhone 8 or iPhone X. Don’t worry if you have your photos in your computer, we are going to list its tutorial as well.
Part 1: Transfer Photo to iPhone 8 or iPhone X from Computer
To transfer photos to iPhone 8 in the most efficient way, we recommend you to use dr.fone for Mac (for Windows) which is a complete phone manager tool helping the users in managing their devices in different ways. It is a tool that gives benefit of a free trial to the users and comes with Windows and Mac versions. The users can move a number of contents from their device or from computer to other devices. Let’s put a glance on the features of this impressive tool.

- The software helps the users to transfer videos, photos, music, contacts and many other contents.
- dr.fone is able to transfer contents between iOS devices and Android devices.
- You can also backup and export data with dr.fone.
- The contacts can easily be managed with dr.fone like de-duplicating or adding/removing new contacts.
- The software also offers some other facilities like rooting of Android devices or converting photos to GIFs.
- You can also directly send messages from computer using dr.fone if your Android gives inconvenience to access.
Guides for How to Transfer Photos to iPhone 8 from PC
Step 1. Launch dr.fone
The first required thing is to download and install the software. Now, launch it and connect your iPhone 8 with the computer. Now, you will observe a navigation bar and a “Photos” icon on it. Select it and then in the left panel, choose “Photo Library”.
Step 2. Transfer Photos to iPhone 8
Another thing you need to notice is the “Add” button which is right below the navigation bar. Click it and select “Add File” or Add Folder” in order to add photos. For the first option, you are allowed to select one or various photos with the help of “Shift” or “Ctrl” key. If you choose “Add Folder”, just select “Open” and transfer the selected photos. You will receive a pop-up window on your PC screen. Browse your photos one by one and hit “Open”. This way, your photos will be transferred successfully to iPhone 8.
Part 2: Transfer Photo to iPhone 8 from Old Phones
Step 1. Open dr.fone
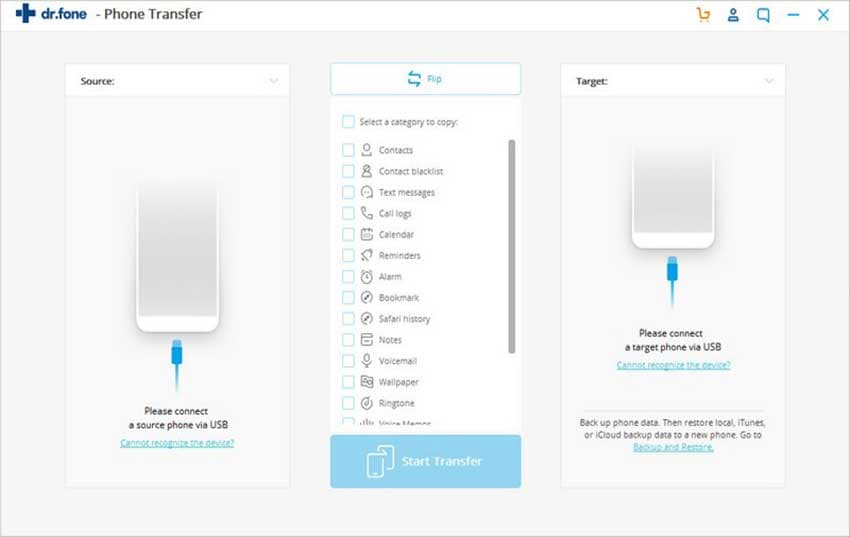
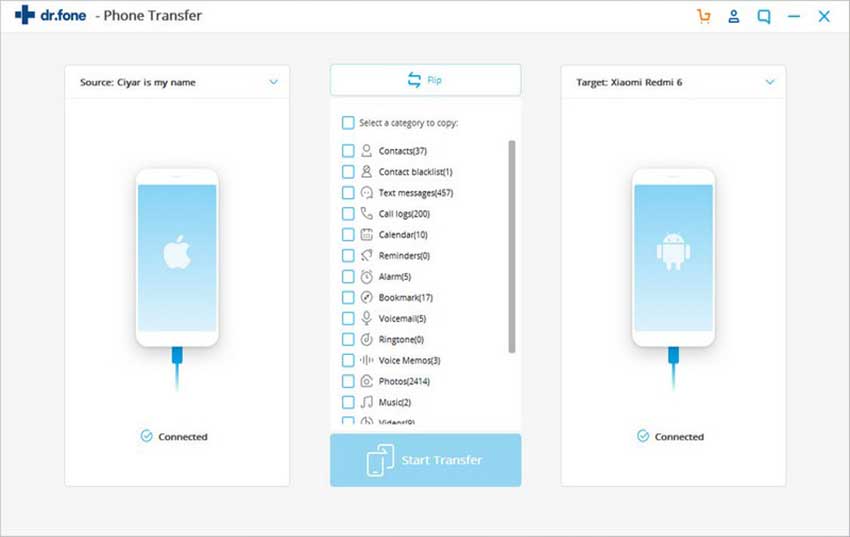
Start with launching the software on your PC and then plug your iPhone 8 and the old device from which you want to get the photos. Choose the main device (old one) as the source device. And afterwards, hit on “Phone to Phone Transfer”.
Step 2. Target Device SelectionTarget Device Selection
Now, from the next interface, use the drop-down icon below the picture of the device and select the target device. Then click on “Next” button
Step 3. Transfer Photos to iPhone 8
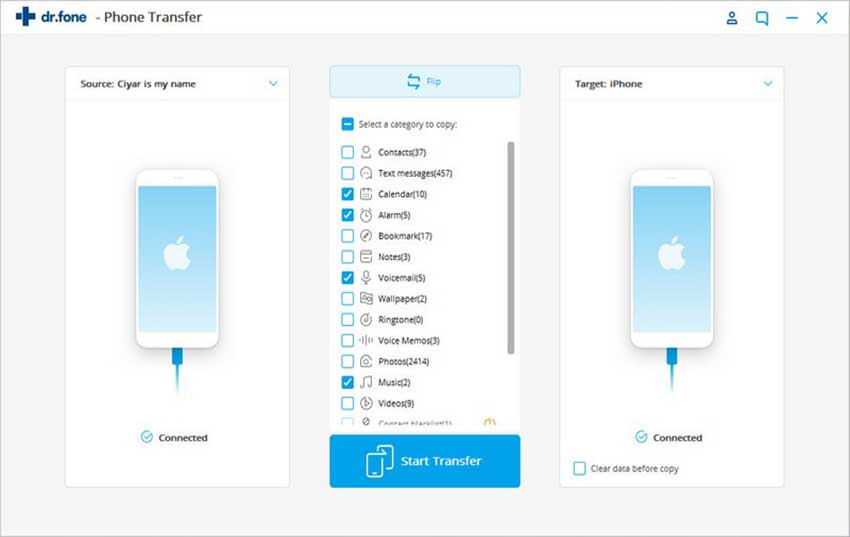
The next screen will bring your contents from the source device. All of them will be selected by default. You need to select “Photos” with the purpose of adding it. Subsequently, click on “Delete contents on target device then transfer” and then hit on “Transfer”. Wait until completion, hit on “OK”.
Part 3: Transfer Photo to iPhone 8 Using Google Photos
Google Photos, launched in May 2015, a cloud storage service hosted by Google that lets you upload your photos and videos to the cloud and that too, without any additional cost. It is surprisingly the most used method to backup photos and videos with the users’ base of 500 million users and counting. Moreover, on an average, 1.2 billion photos are uploaded everyday on the cloud storage service. Google allows its users to upload unlimited photos and videos to the service until it’s under the 15 GB of free storage space allocated to you. But if you require more, you would have to pay a nominal monthly fee for more storage space.
Step 1: Uploading Photos to Google Photos: Grab your old iPhone and follow the instructions below:
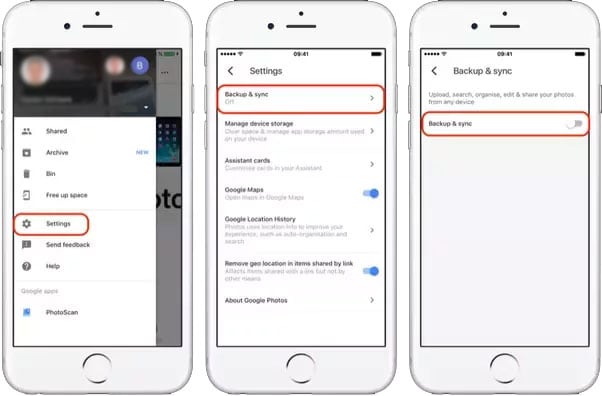
- Launch the Google Photos app and hit on “3 horizontal lines” located near search bar.
- Now, click on “Settings” and then push on “Backup & Sync”.
- Lastly, toggle on the slider next to “Backup and Sync”. All your photos will then be uploaded to your Google Photos account in a while.
Step 2. Transfering Photos to iPhone 8:
- Now, on your new iPhone 8, download and install the Google Photos app.
- Launch the Google Photos app and then select the pictures you would like to download to the camera roll of your iPhone 8.
- Next, hit on the Share icon (comprising of a box and a arrow facing upwards). Lastly, push the “Save n Images” button.

Note: This method requires an active and a stable internet connection for successfully transferring photos to iPhone 8.
Part 4: Transfer Photo to iPhone 8 Using iCloud Photo Sharing
iCloud Photo Sharing nothing but the new name for what was renowned as Apple's Photo Streams. With this feature, Apple users can easily create the sharing streams and then share the desired photos between the iDevices which have enabled iCloud Photo Sharing (important) in them.
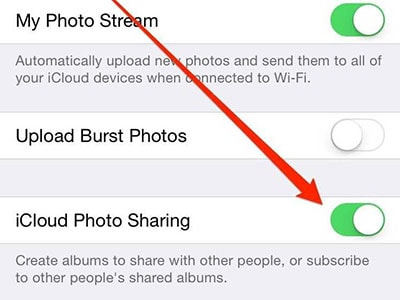
Step 1: To begin, you need to ensure that your friends and you have enabled iCloud Photo Sharing. For this, head to “Settings and tap “iCloud”. Lastly, tap on “iCloud Photo Sharing” toggle button to turn it on.
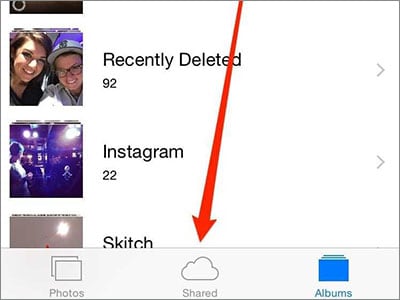
Step 2: Proceed to the “Photos” application and go for the “Shared” option.
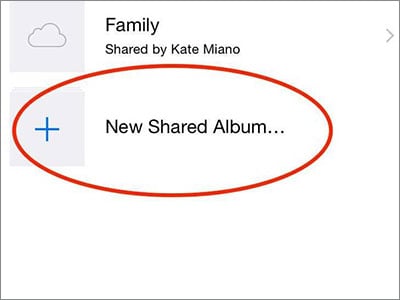
Step 3: Now, in the folder of shared albums, you will observe a “+” sign with “New Shared Album”. Just click on it.
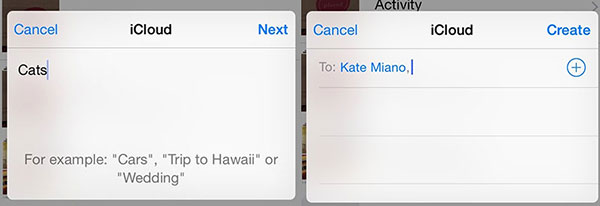
Step 4: After this, enter a suitable name for the album and hit on “Next”. Subsequently, enter the names of your friends with whom you want to share the album.
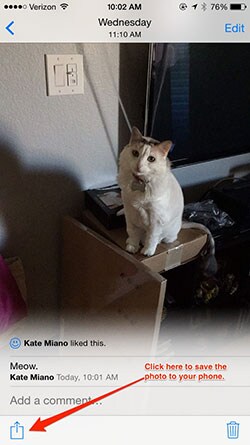
Step 5: Lastly, open the Shared Album in the receiver’s iPhone and locate the file you wish to save to your camera roll. Now, hit the “ ” to save the picture to save the picture.
Part 5: Transfer Photo to iPhone 8 Using AirDrop
AirDrop is a yet another service by Apple which helps the users send and receive photos instantly. It is a wireless method which means there will be no need of any USB cables. The devices of both the users need to be connected with same Wi-Fi connection. Here is the step guide to transfer photos to iPhone 8 using AirDrop.
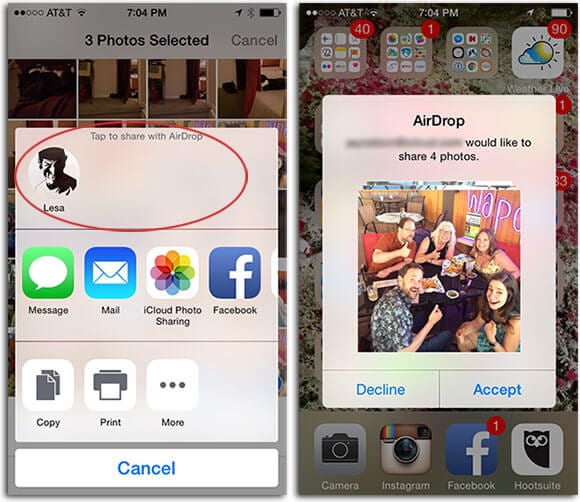
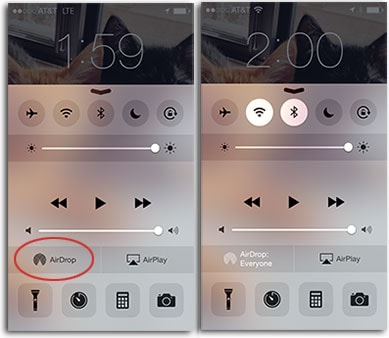
Step 1: Firstly, make sure both the devices’ AirDrop feature is turned on. For this, swipe upwards and enter the Control Center to tap “AirDrop”.
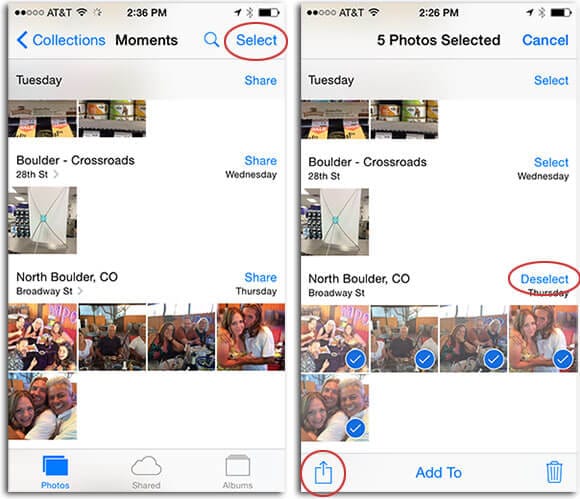
Step 2: Open photos on the source device and select the photos you want to transfer. Once the items get selected, tap on the export icon and then “AirDrop”.
Step 3: Now, pick out the name of the device (from the nearby devices) you want to send the photos to. When select, take iPhone 8 and you will observe the photo with the options of “Accept” and “Decline”. Select “Accept” and your photos will be transferred to iPhone 8 instantly.