


Got some great pictures on your iPhone and want to transfer them to your Mac, so you can view them on the big screen or seriously edit them in iPhoto or Photoshop? If so, you're in the right place. Below we provide 4 ways to transfer photos from iPhone to Mac, so you can quickly and easily back up photos, recover lost photos deleted from your Mac, or edit your iPhone photos on Mac, etc.
- Solution 1. Copy Photos from iPhone to Mac via dr.fone (Best Option)
- Solution 2. Transfer iPhone Camera Roll Photos with iPhoto
- Solution 3. Transfer iPhone Camera Roll Photos with Preview
- Solution 4. Transfer iPhone Camera Roll Photos with Image Capture
- Part 5. Choose the Right Solution: Comparison of the 4 Solutions
- Part 6. Troubleshooting for Transferring iPhone Photos to Mac
Solution 1: Transfer Photos from ANY iPhone to ANY Mac (Best Option)
Transferring photos from iPhone to Mac is easy. So many tools are available. Why dr.fone for Mac is the best option? The answer is very simple: it lets you get photos off your iPhone to any Mac without the risk of erasing the existing files on your iPhone. And it's able to copy any photo, including photos taken with your iPhone, synced from iTunes, downloaded from the Internet, and more from iPhone to Mac. Besides, it's the best iTunes companion, which helps to get songs and playlists directly from your iPhone to your iTunes Library without any duplicate - which iTunes can't do. Now, see how to use dr.fone to transfer photos from iPhone to Mac.
Note: dr.fone for Mac is kept updated all the time. Now the newest version fully supports MacOS Sierra and iOS 11, and the latest iPhone 8/X.
Sync Photo Library, Camera Roll or non Camera Roll Photos from iPhone to Mac
Step 1: Launch dr.fone
Install iPhone photos to Mac transfer. Connect iPhone with your Mac, and your iPhone information will be shown on the main interface.
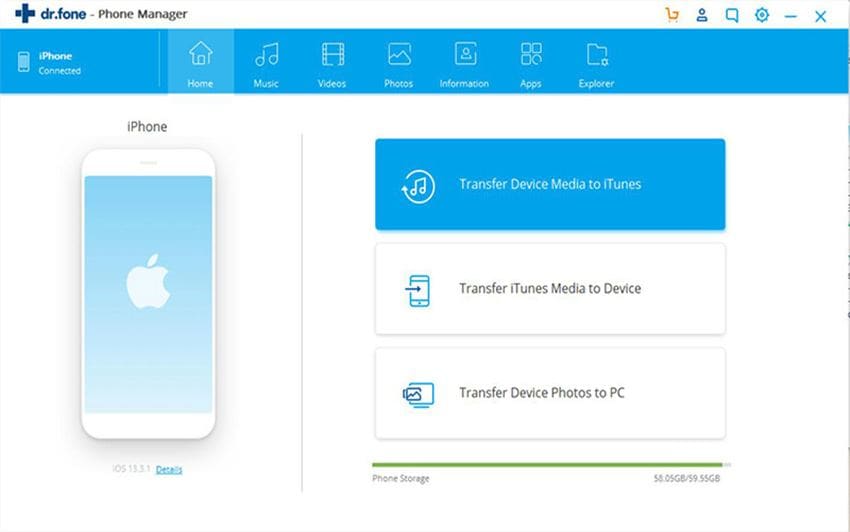
Option 1: Backup All Photos from iPhone to Mac
You can see the option "Backup Photos to Mac" option in the main windows. Click it, then all photos on your iPhone, including photos in Camera Roll, Photo Library, Photo Stream, and more will be saved to your Mac. In the newly popped up window, find a folder on your Mac to save these backed up photos.
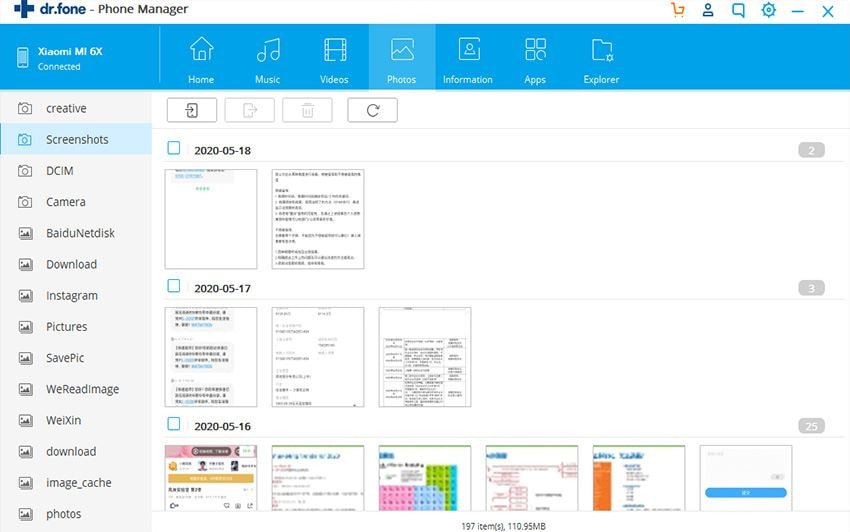
Option 2: Transfer Selected Photos from iPhone to Mac
Click the "Photos" tab in the main window, then you can see that photo album or folder on your iPhone. Click to open the album or folder in the left sidebar, then you can select photos and click "Export" to save them on your Mac.
Solution 2: Transfer "Camera Roll" Photos to Mac with iPhoto (Photos Taken with iPhone)
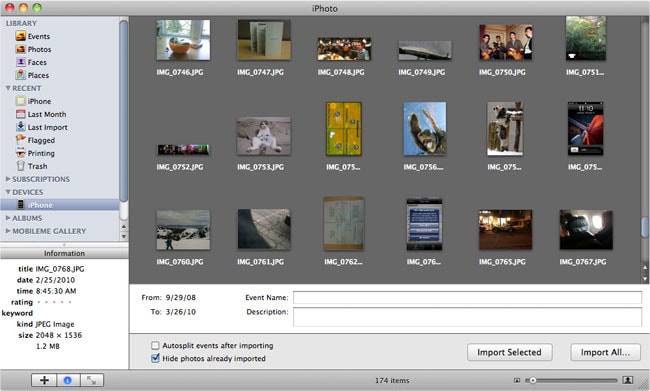
After connecting your iPhone to your Mac. iPhoto will automatically launch and open to the Import window, listing your iPhone's images and videos under "Camera Roll".
Note: With iPhoto, Preview or Image capture, you can only sync photos from your iPhone camera roll—in other words, only photos taken by your iPhone. If you want to sync all your Photo Library images, go to Solution 1.
Select the images you want to import into iPhoto, then select the "Import Selected" option—or just drag the photos directly from the Camera Roll folder into iPhoto.
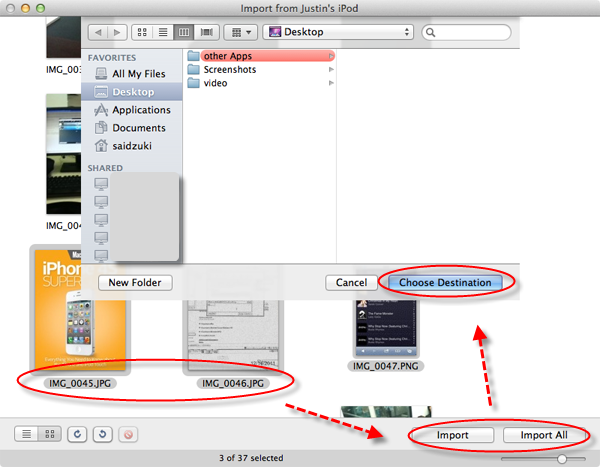
Solution 3: Transfer "Camera Roll" Photos to Mac with Preview
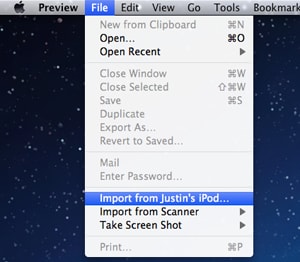
When you have connected your iPhone to your Mac, launch your Preview. Now go to the "File" menu and choose "Import from (your iPhone's name)..."
Solution 4: Transfer "Camera Roll" Photos to Mac with Image Capture
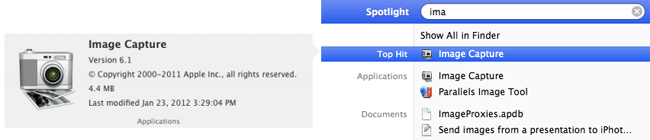
After connecting iPhone to Mac, open Image Capture application. When all photos load and are available, select the photos you want to import/delete. If you want to delete them all, simply hold command and "a" and you'll see they will all be highlighted.

Part 5. What Makes dr.fone Outstanding on Transferring Photos from iPhone to Mac
| iPhone Photos | iPhoto | Preview | Image Capture |
|
|---|---|---|---|---|
Camera Roll PhotosPhotos taken with your iPhone |
√ | √ | √ | √ |
Photo Stream PhotosPhotos shared from other devices |
--- | --- | --- | √ |
Photo Library PhotosPhotos synced from your computer to your phone |
--- | --- | --- | √ |
Photo AlbumBuild photo albums on iPhone and transfer photo albums from iPhone to Mac |
--- | --- | --- | √ |
Part 6. Common Issues and Troubleshooting on iPhone Photos Transfer
Q: When importing iPhone photos, iPhoto locked up?
Quit iPhoto and launch it again. To do so, go to Apple menu > force quit.
Q: How to delete photos from iPhoto?
For deleting photos from an Event, select the photos and press Delete key. Then go to iPhoto > Empty iPhoto Trash. To delete photos from an album, select the photos and press "Command+Options+Delete". Then empty iPhoto trash like above.
Q: Cannot see photos in my Photo Stream?
First tap Settings on your phone to check whether the Wi-Fi is connected. Then go to Settings > iCloud > Photos to see whether Photo Stream is turned on. Make sure the Camera app on your phone is closed. And ensure your phone battery power is higher than 20%.
Q: How to transfer photos sent from others iPhone by message to Mac?
If the photos are sent via iMessage, the photos will be on your Mac iMessage. Or you can try to transfer photos to Photo Stream.
Q: iPhoto keep crashing on Mavericks/Yosemite?
If you have updated to Mavericks, you can try to reinstall iPhoto. Just press Command + R to boot into the Recovery Volume to repair permissions and the disk. Then reinstall iPhoto on your Mac.
