These days, when we have all in one solution for storing music, videos, contacts, photos and more which is our precious iPhone or any other device, their backup is also significant in order to avoid any loss in the future. Since iOS 11 is used by many iOS device users nowadays, this article will show the tutorials to those users. We are of the same opinion that your data is more important to you than anything else, therefore we are here to explain you how to backup data from iOS 11 to Mac or Windows PC.
Part 1: The Best Way to Backup Data to Computer for iOS 11 Devices
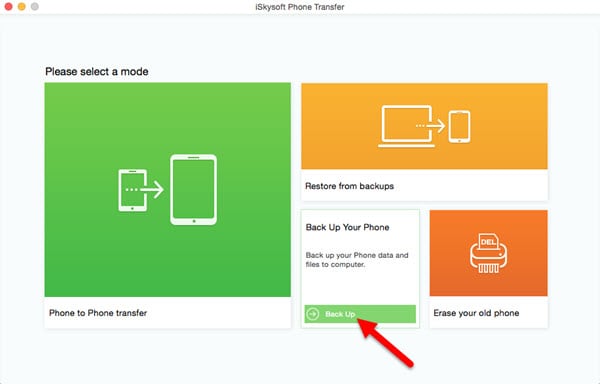
The best way to backup data from iOS 11 to Mac or Windows is to try MobileTrans for Windows that is intended to transfer and backup almost all of your precious data. The tool can be used for Windows PC as well as a Mac since it is available in both versions giving ease to both users. The best thing about this tool is it is thoroughly safe and secure and doesn’t take any technical mastery.

- This software enables you to transfer or backup different types of data like contacts, music, images etc.
- It can transfer data between Android, iOS, Symbian or Blackberry devices as well.
- You can backup with much ease for it contains a very easy interface.
- Also, it provides ease in restoring the backup. Just in one click, you can restore your backup.
- It also allows users to retrieve from iTunes as well as iCloud backup.
- Plus, it gives users the option to refund the money within 30 days if the customer is not satisfied.
How to Backup Data from iOS 11 to Mac or Windows PC via MobileTrans
Step 1. Download MobileTrans
Firstly, make sure to get the correct software for your PC. Choose Mac version or Windows if you’re using Mac or Windows respectively. Install it afterwards and launch it.
Step 2: Connect iOS 11 Device to the PC
Now, initially click on “Back Up Your Phone” tab and with the help of a USB cable, plug your iOS 11 device to the Mac/Windows. The device will be read by the software and will present your data on the computer screen.
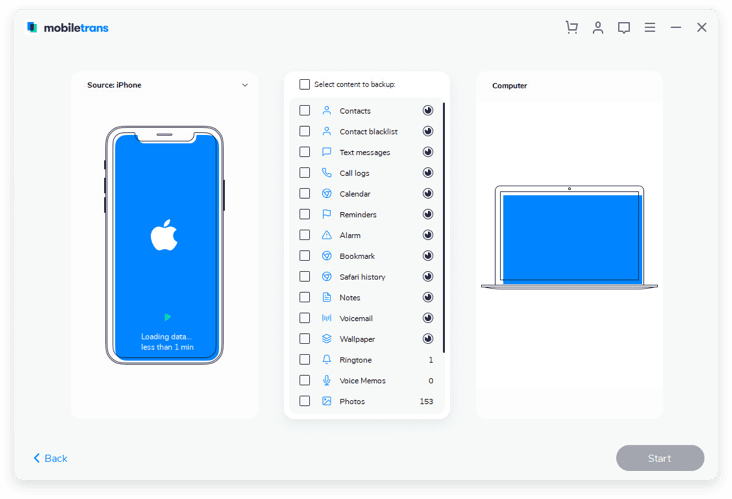
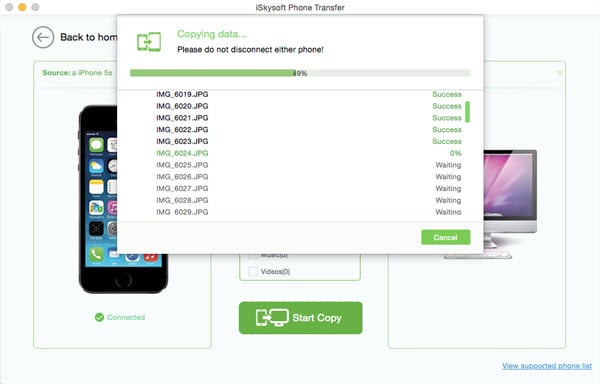
Step 3: Backup Data from iOS 11 to Computer
Last of all, start backing up by selecting the data types you want to save and hit on “Start Copy”. Now wait for the completion.
Part 2: Backup Data Using iTunes
iTunes is the standard way to transfer your data and files like music, videos, photos, documents and apps etc from your device to your PC (be it Mac or Windows) or vice versa. Despite being the default iDevice Manager developed by Apple, operating iTunes can sometimes become a little tough for its users. Also, it works quite slowly on a Windows powered computer as compared to a Mac powered computer. Anyways, let’s get to how one can backup data from iOS 11 to Mac or Windows PC.
Step 1 – Launch the latest version of iTunes in your computer. Note: Make sure you have the latest version of iTunes installed on your computer.
Step 2 – Now, get your iDevice connected to your PC with the help of the USB cord supplied with your iDevice.
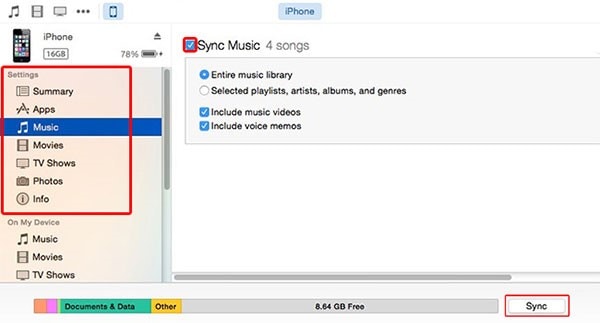
Step 3 – On the iTunes window, locate and click on the iPhone icon. Under the “Settings” section on the left side panel of iTunes interface, tabs named as Music, Movies, Photos, info and more will get visible.
Step 4 – Push on each tab you wish to backup files from and check the box adjoining Sync.
Step 5 – Lastly, hit the button “Sync” visible at the bottom right corner of the iTunes window to initiate the backup process. Now sit back and relax!
Part 3: Backup Data Using iCloud
Next on the list is Apple’s iCloud service and is yet another conventional way to backup data from iOS 11 to computer. iCloud is a cloud storage on which you can sign in with your Apple ID and password to store and retrieve data to or from iOS devices anywhere, anytime. Please make sure you have a stable and working internet connection on the devices from which you are going to backup data to your iCloud account and then download it your computer. Follow the steps provided below to get this done.
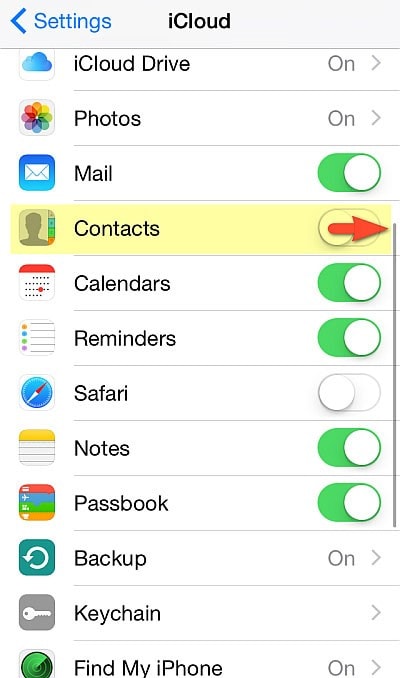
Step 1 – Grab your iPhone and head to “Settings”, tap on “iCloud” and punch in your Apple ID and password to sign in to your iCloud account.
Step 2 – Ensure that all the sliders are toggled on which you wish to backup to your iCloud account. All your selected data will then be backed up successfully to iCloud in a short while.
Step 3 – Now, open the web browser on your PC to visit “iCloud.com” and then using the same credentials that you used on your iPhone, sign in to the Apple ID.
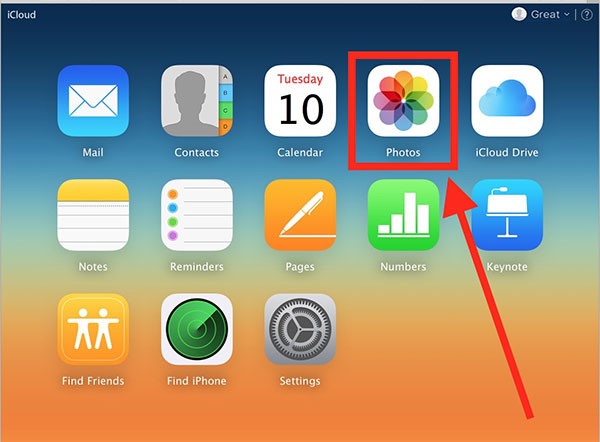
Step 4 – Locate and choose the files you wish to download to your computer by opening them and then hit the “download icon” available on the top right of the iCloud interface.

Repeat the last step for all other data types and your guide to Backup Data from iOS 11 to computer via iCloud is now complete.
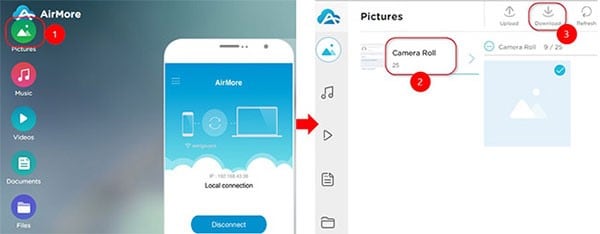
Part 4: Backup Data Using AirMore
This one is last but not the least option on today’s list. AirMore is further effective and easy to use web based iDevice Management tool and is available at no extra cost. This tool work for both Mac and Windows powered computers.
Step 1 – To get this rolling, ensure to connect both iPhone and Mac to the same Wifi Network.
Step 2 – Now, search for AirMore app on App Store and subsequently, download & install it on your iPhone.
Step 3 – Next, launch the web browser on your PC (Mac or Windows) and visit the AirMore Web page by opening “airmore.net” to load up a QR code on your browser window.

Step 4 – On your iPhone, launch the AirMore app and hit “Scan to Connect”. This will scan the QR code shown at the browser window.
Step 5 – Once connected, your device’s information will come up on the screen. Locate the files you wish to download and hit the “download icon” available on the top panel of the interface to retrieve them on your PC.