


As an iOS (iOS 10 & iOS 9) user, you might have noticed that it's quite complex to connect your iPhone (including iPhone 7 and iPhone 6S) to iPad so you can share video, music, photo, book etc. Here you can get some tips on how to connect iPhone to iPad without any hassle:
- Part 1: Connect iPhone to iPad and Share Contents in 1 Click
- Part 2: How to Connect iPhone to iPad via Bluetooth
- Part 3: How to Connect iPhone to iPad via iCloud
- Part 4: How to Connect iPhone to iPad via iTunes
- Part 5: How to Connect iPad to iPhone via Internet
- Part 6: How to Connect iPhone to iPad via Cord
- Part 7: Why We Need to Connect iPhone to iPad
Part 1: How to Connect iPhone (iPhone 7) to iPad and Share Contents in 1 Click
- Transfer any data between iOS (iOS 10 and iOS 9), Android, Symbian and BlackBerry OS.
- Support more than 3500 devices and network.
- Backup your phone data to Mac or Windows PC.
- Restore phone data from iCloud backup, iTunes backup and phone transfer backup.
- Erase existing or deleted phone data permanently.
To find an easy and safe way to connect iPhone 7 to iPad and share files between the device, you need to get help from MobileTrans for Mac ( or MobileTrans for Windows). When you get this application on your computer, you can simply connect your iPhone 7 and iPhone 6S and iPad or connect iPad to iPhone to your computer with USB cables and safely transfer music, videos, photos, contacts, messages, call logs, and more files in just a single click. It is a great phone manager that comes with many wonderful features:
Easy steps to transfer data between iPhone and iPad
iSkysoft Phone Transfer allows you to transfer any data between iPhone 7, iPhone 6s, iPhone 6 and iPad with zero losing. And the steps are as easy as a breeze.
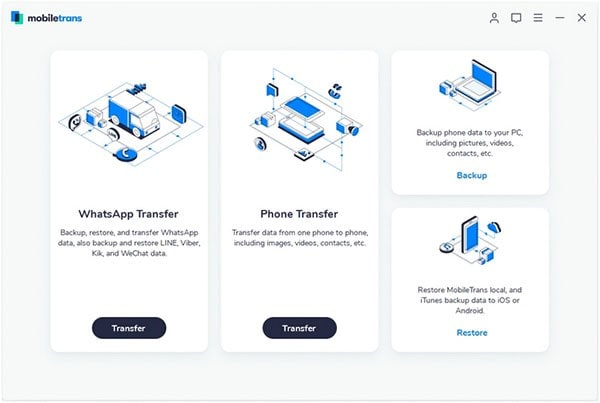
Step 1. Install and launch iPhone to iPad transfer tool
First, you can install the phone transfer tool on your Mac or PC according to the on screen installation instruction. And then launch the program and go to the main interface.
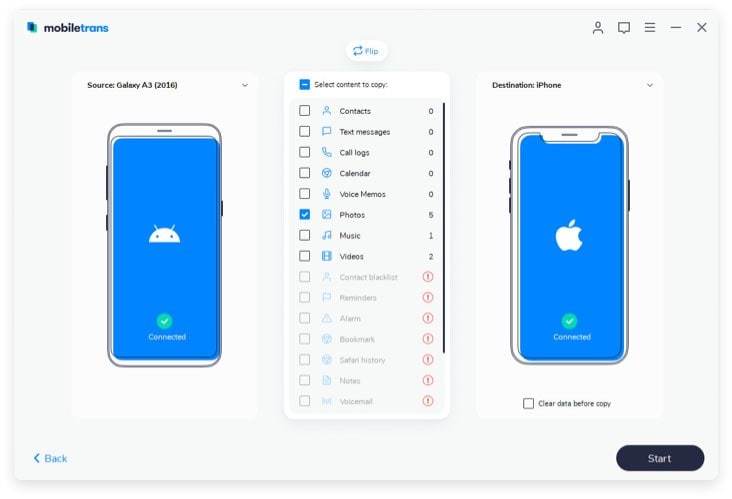
Step 2: Connecting iPhone and iPad to computer
Now connect your iPhone and iPad to the computer. And click the "Phone to Phone Transfer" tab in the program main interface. You will go to the transfer window. There you can view your two devices with the data of source devices.
Click "Flip", you are able to switch the device so that you can share data from iPhone (iPhone 7 Plus included) to iPad or from iPad to iPhone.
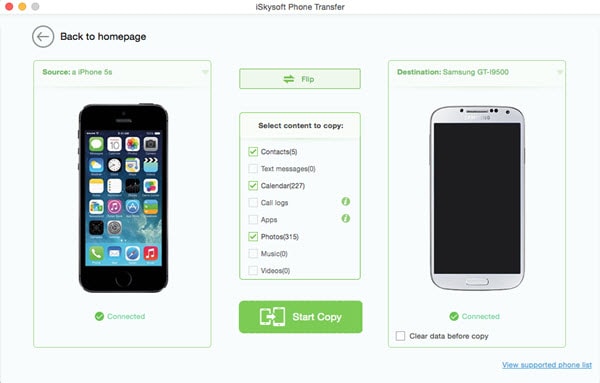
Step 3: Transfer data between iPhone and iPad.
The last step is to select the files from the source device, and then click "Start Copy" to start transferring.
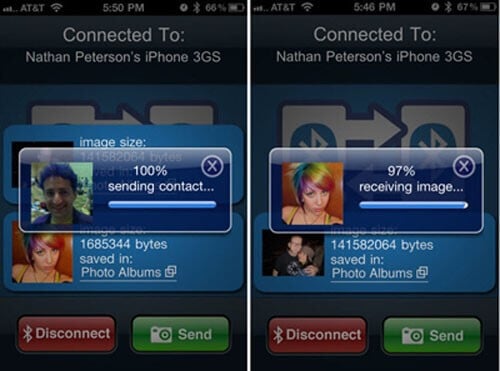
Part 2: How to Connect iPhone to iPad via Bluetooth
Bluetooth? Well, it's not actually possible for you to connect iPad to iPhone via Bluetooth (unless you do something more). But Apple released a chart detailing iOS Supported Bluetooth profiles which says it's can indeed connect iPhone to iPad - though millions of iOS users have failed. Anyway, if you really wanna connect iPhone to iPad through Bluetooth, there's a solution which is faster and more efficient: photoshare, but this is only for sharing pictures and contacts between the two devices. (Some users said that it works for sharing text/documents if you paste your text into the 'notes' section of a contact then share it just like sharing pictures and contacts.)
On the downside this application occasionally drops which may annoy you a bit. And someone also pointed out that it's easy to transfer photos between iPhone and iPad, but it's tedious for transferring contacts: only one contact can be transferred at a time. On the plus side, the application is free.
Part 3: How to Connect iPhone to iPad via iCloud
Maybe Apple's most exciting breakthrough so far, iCloud gives you:
"...access to your music, apps, latest photos, and more from whatever device you happen to be using. And it keeps your email, contacts, and calendars up to date across all your devices."
iCloud is built into every new iOS device and every new Mac, which is the easiest way to manage your iPhone or iPad contents and lets you easily access to your contents like contacts, documents, photos and more. When set up iCloud to your iPhone, you have to make sure your device is running the latest iOS version:
Note: You are required to use the same Apple ID to set up the iCoud on iPhone and iPad.
- Set up iCloud on your iPhone and iPad After completing the update to new version iOS on your iPhone or iPad, follow up prompts to activate your device and set up iCloud. If you have got the new version iOS, go to "Settings" on the main screen and tap iCloud, then enter your Apple account to turn on iCloud.
- Customize your settings for sharing contents between your iPhone and iPad Tap "Settings" on the main screen and select iCloud. Turn On your contents like Contacts, Calendars, Photos, etc. You are able to activate iCloud Backup. To do so, tap "Storage & Backup" option, turn on iCloud Backup.
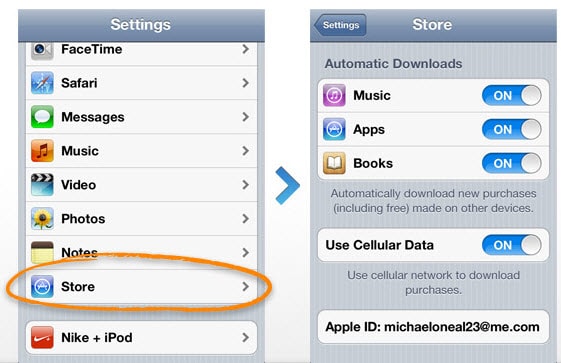
- Enable your iCloud automatic downloads Tap "Settings" and select iTunes & App Store option, then turn on Music, Apps and Books to enable iCloud automatic downloads.
Part 4: How to Connect iPhone to iPad via iTunes
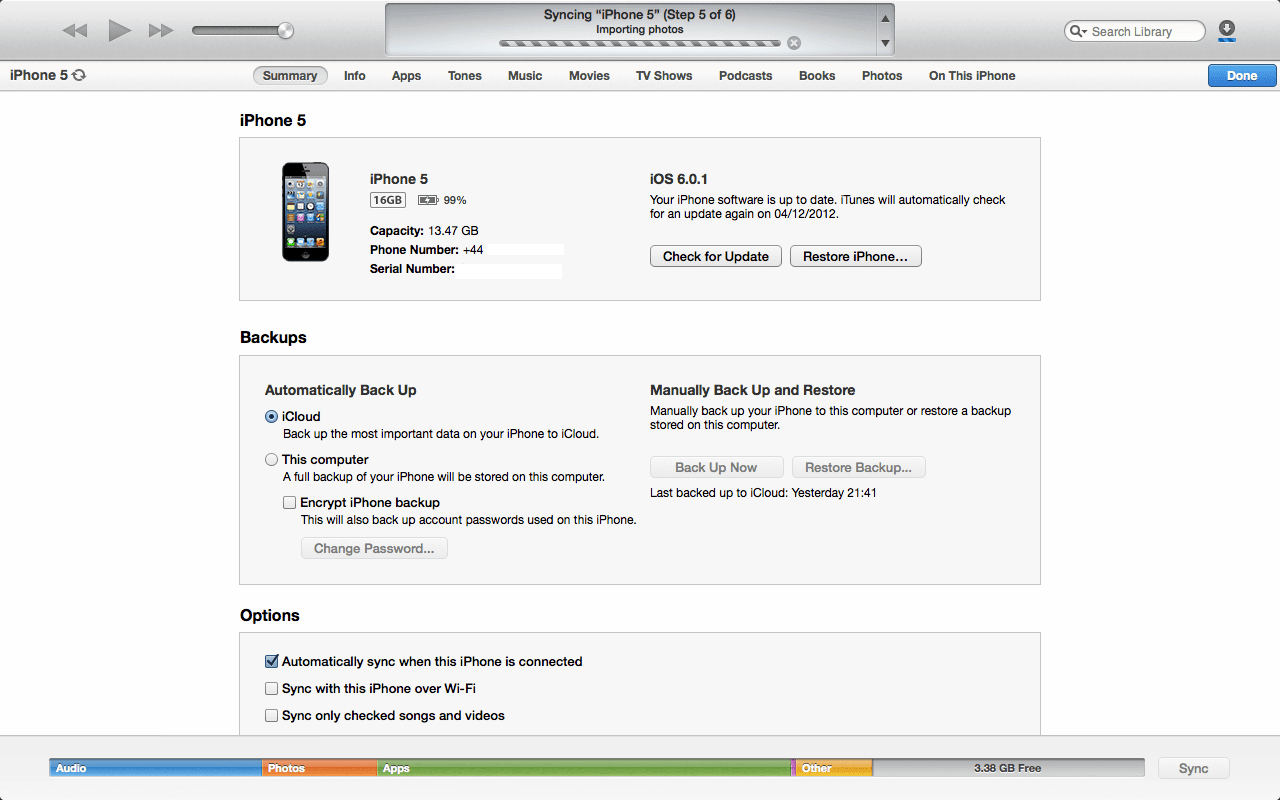
- Connect your iPhone and iPad to the computer First of all, get your iPhone and iPad connected to the computer using digital USB cables. Then run iTunes and you'll see that it detects your iPhone and iPad at the same time.
- Backup your iPhone Now, you can backup your iPhone with iTunes by clicking "Back Up Now".
- Restore your iPad from the iPhone backup file Once the backup is done, you can switch to your iPad, and click on the "Restore Backup..." to get the iPhone backup content to your iPad.
Part 5: How to Connect iPad to iPhone via Internet
Using iPhone as a hotspot is an idea that is easy to implement and follow. It also means that the user needs not to worry about the overall phenomenon that is associated to it. There are several ways to get the work done. If the iPhone is used as a Wi-Fi hotspot then it means that it is being used as a modem to get the work done easily. The steps that are to be followed are mentioned as under. Each and every step has been embedded with screenshot to make sure that the work is done easily without any problem and trouble:
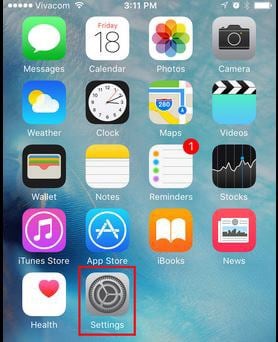
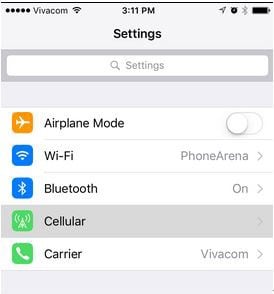
1. The settings on the iPhone are to be accessed to begin the process.
2. The cellular option is then to be selected moving forward.
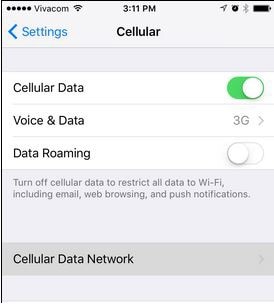
3. The cellular data network is then to be accessed.
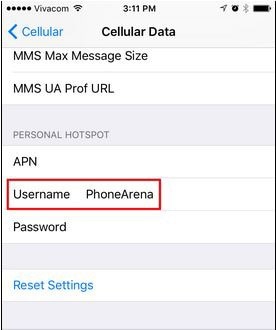
4. In the personal hotspot section the username and the password are then to be selected to proceed with the process.
5. The personal hotspot section will appear once the user goes to the settings.
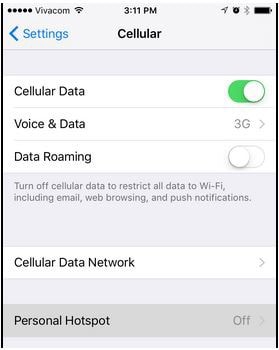
6. This hotspot is then to be turned moving forward with the process.
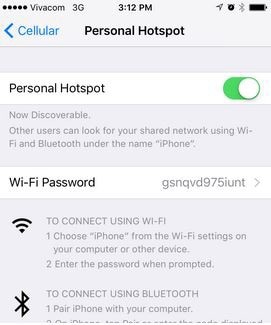
7. The Wi-Fi password is then to be clicked to proceed with the process.
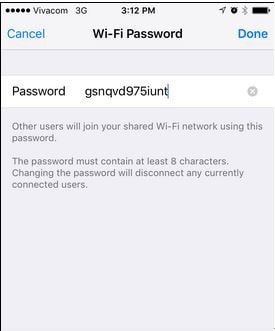
8. The iPad wireless networks are then to be accessed. The user can see the iPhone tab there. Once the connection is made the password is to be entered from the previous step. The connection will be established and this also completes the work in full.
Part 6: How to Connect iPhone to iPad via Cord
It is yet another process that can be followed to get the work done easily. It also means that the user needs not to go through the process mentioned previously. The guided connection that is established is also known to be the most reliable one. It allows the user to get the work done without any trouble and therefore the data transfer rate is also fast. The process that is to be followed in this regard has been mentioned as follows:
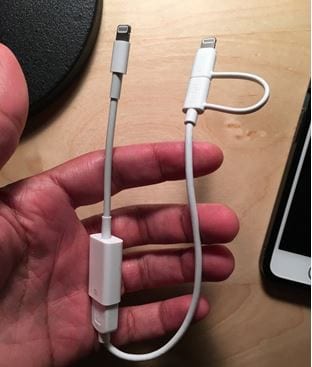
1. The dual sided lightening cable is then idea that is to be used to get the work done. It is a cable that can be easily found at the Amazon web store. It is also known as Apple lightening USB Camera Adapter. The cable looks exactly like in the screenshot below.
2. The respective ports are then to be connected to the respective devices. It also means that the user needs to ensure that the correct side is inserted to the correct device. Once it has been done the setup looks like something as under.
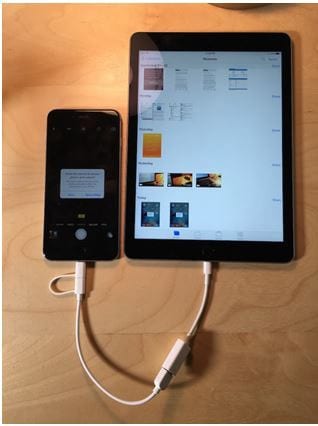
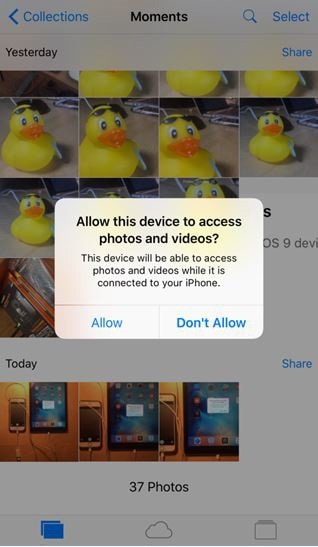
3. The device is then to be trusted so that the photos, videos and other content is accessed. The allow option is then to be clicked to get the work done.
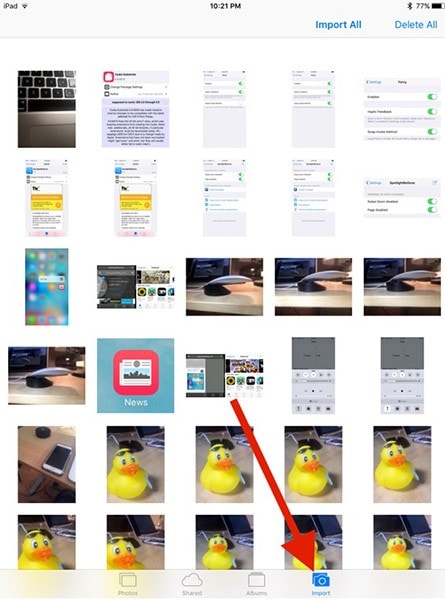
4. The import button is then to be pressed to ensure that the photos and videos are imported from iPhone to iPad. This also completes the process in full.
Part 7: Why We Need to Connect iPhone to iPad (iOS 9 Included)
Apple's iOS devices have been around for less than a decade now but they still managed to change our lives tremendously in this short period of time. From checking mail on our phone to managing entire companies on a single tablet, these devices offer a lot of processing power and numerous feature that surely make it very useful for us both at the office of at home.
There are numerous reasons behind the idea to connect an iPhone 6 Plus/6/5s/5c/5/4s/4) to an iPad (iOS 9 included).
#1. These devices can interconnect with each other, which means that you can easily share the important data you have on your iPhone with your iPad, something that can be very useful during a presentation for example, or when you want to improve productivity.
#2. Each of these devices can be used as a hotspot so the other device can access the internet even if there are some connection problems. This is really useful usually at all times, as you can create a new Wi-Fi connection with ease, whenever you need one.
#3. You can share videos and music from one device to another without any hassle after you connect them. This will help you store the same content on both devices, useful in those situations when you don't have both devices with you but need access to that data.
#4. You might also want to connect your iPhone to iPad in order to correctly diagnose any problem and making sure that everything works correctly. There are a lot of applications that can help you do that with ease, you just need to connect the two devices.
#5. Sharing books is also very important, especially in those cases when you want to prepare for an exam and want access to your books on devices.
Which way is the best one for you to connect your iPhone to iPad?
| Connect iPhone to iPad | Pros | Cons |
|---|---|---|
| Via iSkysoft Phone Transfer | Allows you to create the connection between the two devices, transfer data freely. | Do not support transferring apps between iPhone and iPad |
| Via Bluetooth | The connection can be created whenever you want, even when you are on the go. | There will be times in which you won't be able to successfully create a connection or the connection won't work. |
| Via iCloud | Once you create the connection, it will last forever, until you stop it by yourself. | There are too many steps to follow and that can be confusing for inexperienced users. |
| Via iTunes | The connection you create is very stable. | You can only connect the iPad and iPhone via backup and restore. |
