


As to QuickTime, most of people use it only as a player to watch movie or listen music. As a matter of fact, it also provides you with wonderful recording functions to record screen, video and audio. What's more, you can add subtitles and create playlist by yourself when there is such a need. Next, let's check how to use them easily and troubleshoot issues happened during the process.
- Part 1: QuickTime Video Recording and Troubleshooting
- Part 2: QuickTime Audio Recording and Troubleshooting
- Part 3: QuickTime Screen Recording and Troubleshooting
- Part 4: More Tips: Subtitle Adding and Playlist Creating
Part 1: QuickTime Video Recording and Troubleshooting
With there being so many sub categories and options under recording, it is definitely more than just a notion. It is of course helpful when attempting to relay information, audio, and or video for an almost infinite number of reasons. Whether you are addressing a meeting or gathering at work, presenting to co-workers, lecturing to a class, or simply preparing a home video, recording will without a doubt come in handy. In this section we will cover the various steps of efficient recording. Specifically we'll be dealing with video recording using QuickTime.
How to record videos with QuickTime in Steps
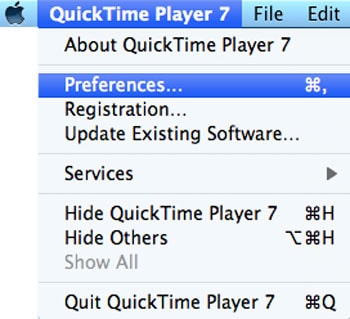
1. The most rudimentary of all software is to of course actually open the program that is going to be in use. Open QuickTime Preferences on the top of the window to view or alter recording settings. Afterwards, go to "Preferences".
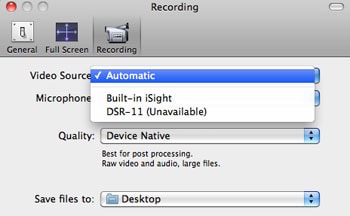
2. Once you're here, simply click "Recording". This is where you can select the specific camera you need, as well as the input microphone. After you have determined which equipment will be in use, select what quality you wish your video to be, and select a location to save.
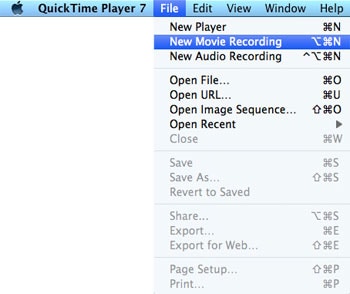
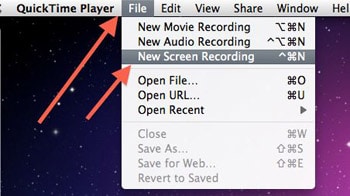
3. Once you proceed to exit the previous page, the changes and selection should be successfully saved. Now go to "File" and locate "New Movie Recording", as image shown above. Then you've prepared for video recording now.
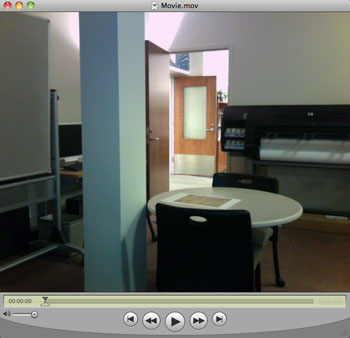
4. You can now press the Record button to officially start your video. The stop button should be across, and is used to cease the recording. A playback window should also make itself available so that you have the option of successfully playing back video/audio.
How to trim video clips
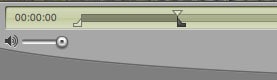
1. Utilize the sliders to select the section or sections of the video you wish to preserve. All of the footage that will fall between the two sliders will be saved. In contrast, any footage outside of these markers will be deleted.
2. Once you find that you are satisfied with whatever alterations or changes go to what is labeled Edit, and then Trim to Selection. This will immediately reduce your recording to your specifications. Everything inside the dark grey area will remain, and rest shall be removed.
How to flip or rotate QuickTime video
For whatever reason, your video may get flipped too far in any direction or you may simply have a reason for altering how one would normally view it. Whatever the case may be, it's important to understand how to perform basic tasks such as this.
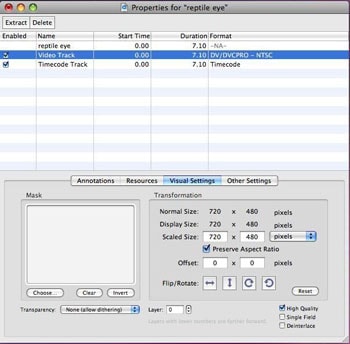
With the QuickTime screen open, click on the heading option that says "Window". Scroll down to the option "Show Movie Properties", and then proceed to click "Video Track". If you have followed these steps correctly you should come across the following screen. From this menu, choose which direction you would like your video to turn.
How to save video to your computer
1. Proceed to File and then word Save. This is a basic safeguard, and will keep whatever you currently have on screen in case of emergency.
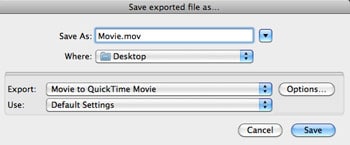
2. Go to File and then the word labeled Export. An Export dialogue box should then appear. Afterwards, the rest is relatively simple. All you have to do is choose a filename, a save destination for this file (preferably somewhere you'll remember), and select the format you desire. It should look like the image below:
3. All that is left is to click the Save button when you feel you are done
How to export video to the web
1. Once again, we'll be visiting File for this function. Go to File and click Export for Web.
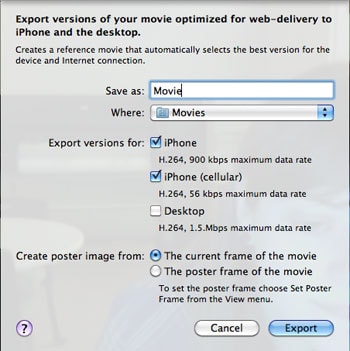
2. After this has been done successfully a dialogue box should open up on your screen. Remember to name the file, save it somewhere convenient, and choose the devices you plan on using within your video. The screen should look like the image below:
3. Remember to click Save when you are done.
Part 2: QuickTime Audio Recording and Troubleshooting
There can be several reasons for wanting to record just audio. This section will provide basics on how to do such.
How to record audio with QuickTime
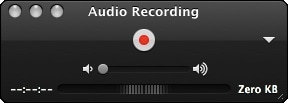
To record audio only simply choose "File" and then select "New Audio Recording". Afterwards, all you have to do is click on the red button symbolizing record.
Clicking the displayed triangle allows you additional options, such as to utilize built in microphones, an external one hooked up, and adjust the quality. The total file size of the selected audio is displayed in the bottom right corner where it currently says zero KB. This is generally used to alter the entire time allotment for the audio clip. The sound meter can be found at the bottom of the controls, and this is utilized for keeping the volume balanced and consistent.
Adding a soundtrack and trimming audio
The process of editing and ultimately trimming clips in video and audio is the same. This will allow you to add audio to whatever scene or collection of clips you have already edited. Proceed to open your music file while in QuickTime and simply copy the audio in the same manner you would copy the video.
Exporting Audio
This too is a quite similar process to exporting clips or a video. Proceed to open your video in QuickTime and choose Export from the file menu. Afterwards simply select what you are exporting it as, it'll say, "Exporting As…" Afterwards within the Format menu select Audio only.
Troubleshooting
1. Depending on what you are attempting to do with the audio make sure it is compatible with what you may be transferring it to. For example, if something is saved as a MOV it is not possible to transfer these successfully to items such as an Iphone or Ipad. This would require an MP4 file, double check that everything is compatible.
2. If you are having issues, QuickTime can extract audio from a MOV file. You can use VLC to export.
Part 3: QuickTime Screen Recording and Troubleshooting
How to make screen recording with QuickTime
As with video and audio, it is possible to record just whatever is currently on your computer screen. You can utilize QuickTime to record your screen following relatively simple steps similar to the aforementioned ones.
Step 1. When using QuickTime make sure to choose "File", and then "New Screen Recording". You can choose various options for your recording from the arrow pop up menu provided.
These are some of the following possibilities regarding Screen Recording
- If you want to record yourself speaking while you're in front of the computer, then select audio input source listed below Microphone in the menu that pops up.
- Remember to select whether you want medium or high quality.
- If you are particular, and for whatever need the mouse included click on the "Show Mouse Clicks in Recording."
- If you happen to want to switch the saved location of the recording select "Choose", and then pick a new location.
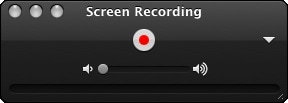
Step 2. Proceed to choose "File" on your screen and then select "New Screen Recording". Afterwards, it's very much straightforward, to start the recording press the red record button.
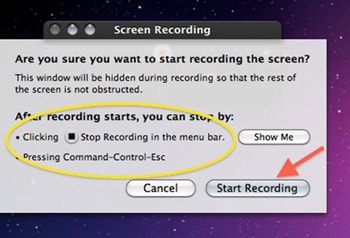
Step 3. The following information is relative to what you are attempting to record. If you wish to record the whole screen you are free to click anywhere on the screen to begin. To record a smaller section in particular, drag your mouse over the area you want recorded and simply hit the recording button.
- To record a small portion of the selected screen you're recording you must drag the pointer to select the portion of the screen you want to record, and then click record.
- To adjust the portion of the screen you selected, you can easily drag the small gray circles along the perimeters of the screen recording rectangle. As a second option, you can drag the entire screen recording rectangle to another location on the screen.
- If at any point you need to stop the recording simply click the "Stop" icon or you have the option of pressing "Command-Control-Escape".
Afterwards, once you press the "Stop" button, the Screen Recording will immediately take you to the QuickTime Player window. After this, you can check it and proceed to close the window.

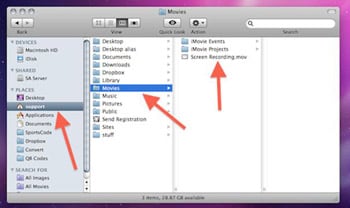
If you're operating a mac, you can find the recently recorded movie in the movie folder. Click on your Home folder on the Mac, proceed to movies and you will see the screen recording.mov file there.
All basic maneuvering such as exporting and trimming after you have a desired recording have not changed, and are the same regardless of whether you are recording video, audio, or your screen.
Part 4: More Tips about Subtitle Adding and Playlist Creating
How to add subtitles with QuickTime Pro
This is utilized for adding additional information perhaps not mentioned in a clip. It is also used descriptive and labeling purposes. Regardless of the reason you may have, for using subtitles, this section will explain how to use them and manipulate them.
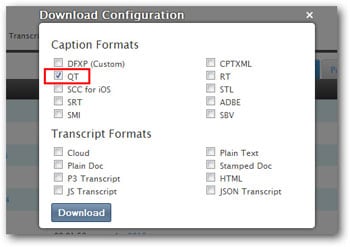
1. Go ahead and log into your 3Play Media account first, proceed to My Files and click the downloadable link next to the correct file and select QuickTime. After the download is complete go ahead and unzip the file.
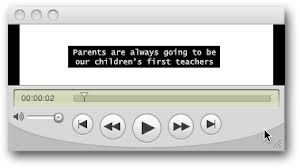
2. Open the previous video file in QuickTime. Proceed to open the captions file you downloaded. If done correctly, this should open a completely separate window that will show captions without audio. Simply copy the captions to the clipboard via "Edit > Select All > Edit > Copy".
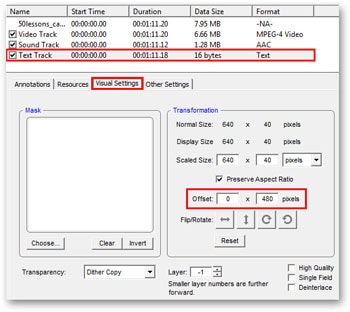
3. Here your focus is the positioning and styling of the captions. You'll find that the default position for these captions will be above the video. Go to "Windows > Show Move Properties > Text Track > Visual Settings". Now you can alter how the subtitles are lined up.
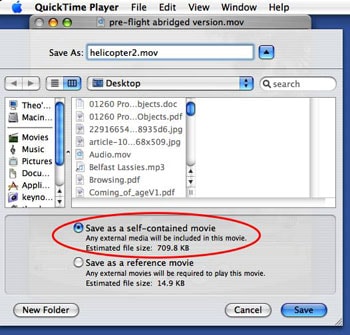
4. Afterwards, you can close the properties page and save the movie under "File" as a self-contained movie.
The following information will be necessary:
1. The Pixel dimensions of the video (You can access this by selecting Video Track and then Visual Settings.)
2. If you are attempting to shift the subtitles beneath the clip or video, then you have to make the vertical offset equivalent to the current video's height. Example: If your current video or clip's dimensions were 640x480 then the offset should be 0x480.
Troubleshooting:
1. Checking your video preferences are compatible with what you are attempting to do would be the initial suggestion.
2. If switching preferences does seem to solve the issue, it is best and most efficient to refer to the QuickTime Pro Support page or Community Forum
How to create playlists with QuickTime
According to the official QuickTime forum while there is no specific function for playlists, if you create your own individual movie player in QuickTime it is in fact possible to add whatever function you would want. For example, a simple movie player that utilizes QuickTime Framework can play a particular group, however, in regards to actually viewing these you would have to utilize something along the lines of iTunes.
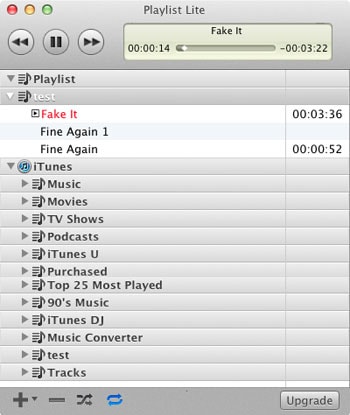
A possible solution would be to install Playlist Lite.
Step 1. Once this is downloaded and installed, you will see that the top portion actually resembles itunes. The bottom portion will be made of two lists: the Playlist area will be empty and all the Playlist you've made through QuickTime will be listed. There will also be a second list revealing all the playlist you have constructed on itunes. The images should resemble the one below.
Step 2. Towards the bottom you should see the option of adding and deleting.
• Plus sign- add songs to a ready playlist or create a new one
• Minus sign- deletes songs or a whole playlist
Select the Add Files options to add songs, but be selective, as the maximum amount is 10. If you're hoping to create a playlist then select the Playlist option choose Add to Playlist.

Troubleshooting:
1. If the download should fail or result in an error attempt again.
2. Make sure there are no other programs running that may interfere.


