


Keyframing is the process of indicating a specific animation's start and end points and allowing your editing program to fill in the transition between these two points. Final Cut Pro calculates the value of the setting between keyframes, resulting in a smooth motion as the setting changes. Keyframing in Final Cut Pro is an amazing feature that editors use to enhance their videos.
Although keyframing in Final Cut Pro may appear daunting, learning how to use these editing tools to your advantage is simple. Once you understand the fundamentals of keyframes, add keyframe final cut pro, fcp keyframe, fcpx keyframe, video keyframing, and adding keyframe audio final cut pro, you can use these techniques to quickly create custom animations and transitions.
In this article
Part 1: How to Use Video Keyframing in Final Cut Pro
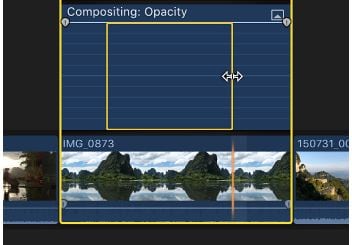
You can use Final Cut Pro to make simple changes to video over time, such as fading the video from invisible to visible at the start of a movie. Alternatively, you can make sophisticated and precise adjustments to many individual parameters of video effects, transitions, motion paths, and so on over time.
Adding Video Keyframe
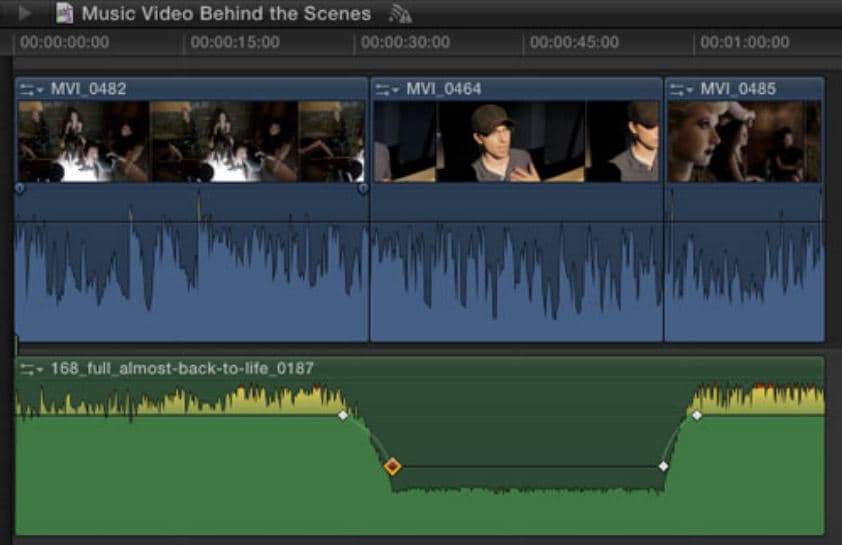
Keyframing is important in video editing, especially in smoothly transitioning between clips. Follow the steps below to successfully add a video keyframe.
Step1 Select a clip and press Ctrl + V
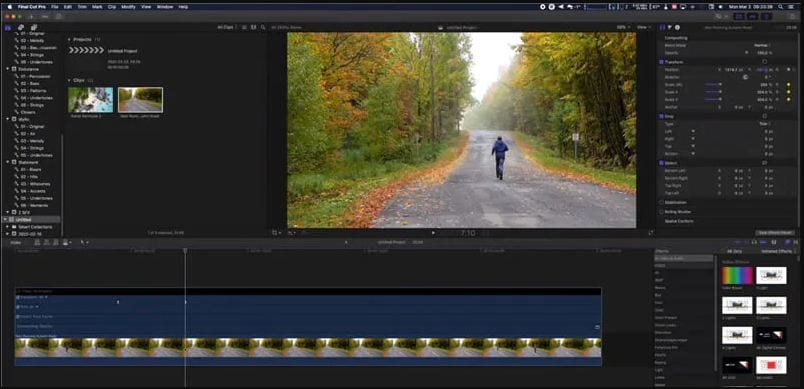
Navigate to Clip > Show Video Animation after selecting a clip in the timeline (or press Control-V). Then choose the effect or parameter to which you want to add keyframes.

Step2 Add the keyframe
For each effect, perform one of the following:
For Video Animation Editor:
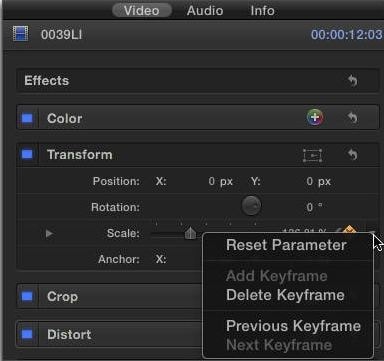
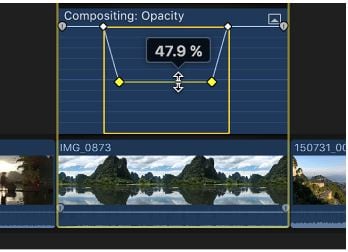
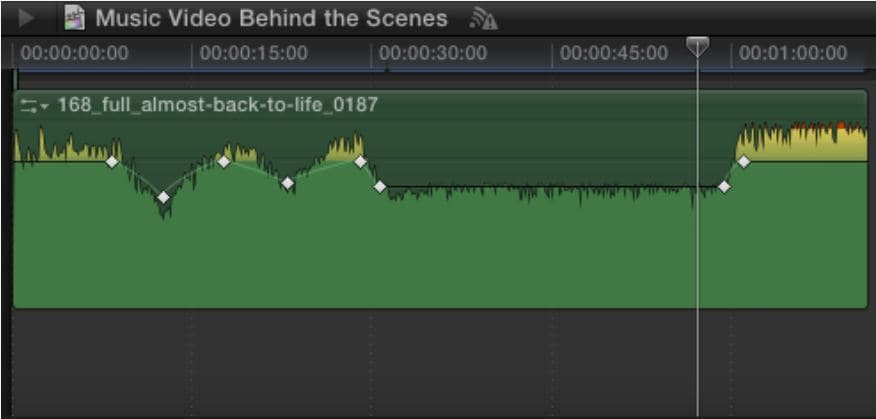
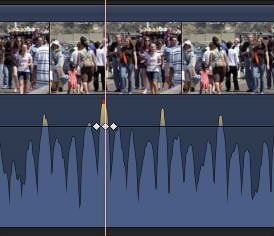
Option-click (or press Option-K) on the horizontal effect control at the point where you want to add the keyframe. Keyframes for the parameter you selected are displayed as white diamonds, while keyframes for other effect parameters are displayed as gray.
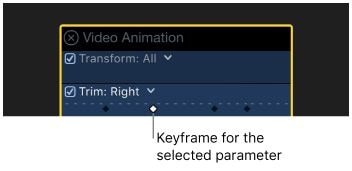
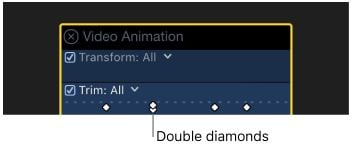
View the new keyframe. Double diamonds indicate that you added a keyframe for more than one parameter at that point.
For Video Inspector:
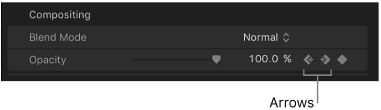
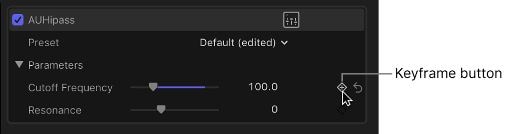
Place the playhead in the timeline at the desired keyframe location, then click the Keyframe button (or press Option-K).

Look at the newly added keyframe. The Keyframe button turns solid, indicating that the playhead has moved to this keyframe.

Navigate through the newly added keyframes. Click the left arrow to return to the previous keyframe. Click the right arrow to move to the next keyframe.
Step3 Add more keyframes if necessary
You can add another keyframe automatically after you've added one by moving the playhead in the timeline and then adjusting the effect parameter value in the Video inspector.
Adding Video Keyframe In Selected Area
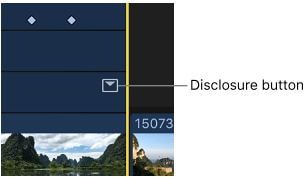
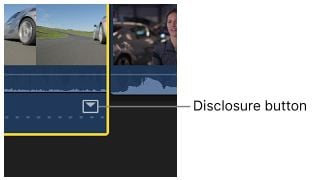
If an effect with a disclosure button appears in the Video Animation editor, you can use the Select or Range Selection tool to add keyframes automatically across a selected area.
Step1 Add clip and effect
Select a clip in the timeline, then choose Clip > Show Video Animation (or press Control-V). Select an effect, then click the disclosure button in the Video Animation editor to expand it.
Step2 Select Range or Select Option
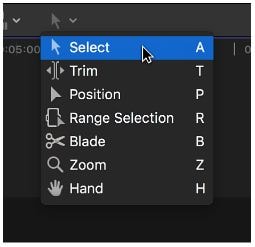
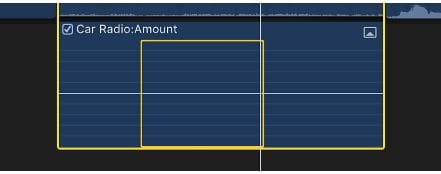
Click the Tools pop-up menu in the timeline's top-left corner, then select either Select or Range Selection (or press A for Select or R for Range Selection).
Step3 Select the area for effect
Drag the effect to the desired location in the Video Animation editor.
Step4 Adjust the effect
Drag the horizontal control of the effect up or down to adjust the effect within the range.
Step5 View the keyframes
Keyframes are generated automatically along the adjustment points within the range.
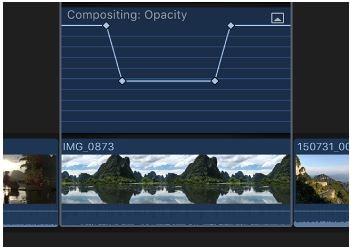
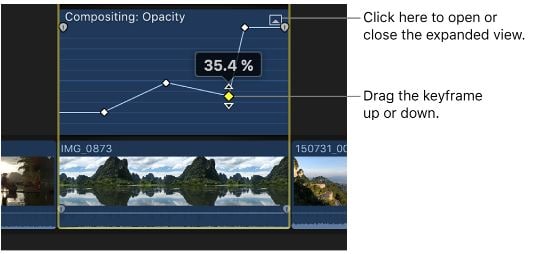
Adjusting Video Keyframe in Video Animation Editor
When you select a keyframe in the Final Cut Pro Video Animation editor, you can do the following:
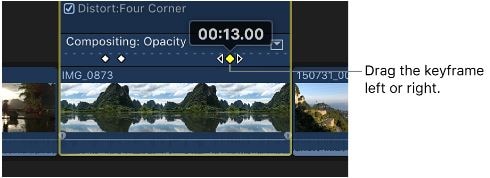
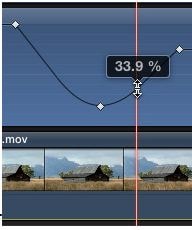
Step1 Change the time position of the keyframe
Move a keyframe to the left or right. The timecode value appears as you drag.
Step2 Drag the keyframe up or down to change the parameter value
If a disclosure button appears next to an effect, click it (or double-click the effect) to expand it.
Step3 Insert another keyframe
Option-click (or press Option-K) on the effect control at the point where you want to add the keyframe.
Step4 Add the keyframe and effect's parameter value
Option-click the effect control while dragging it up or down.
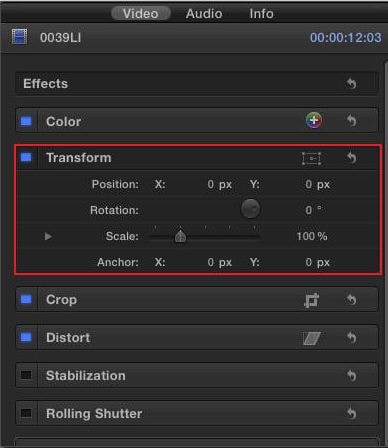
Adjusting Video Keyframe In Video Inspector
There is another way to adjust the video keyframe in Final Cut Pro. Here’s how to adjust the keyframe using FCP Video Inspector:
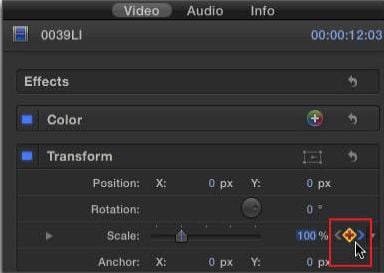
Step1 Launch the video inspector
Select Window > Show in Workspace > Inspector from the menu (or press Command-4).

Step2 Select the video button
At the top of the inspector, click the Video button.

Step3 Select and adjust the parameter
Adjust the parameter value in the Video inspector after selecting a keyframe or positioning the playhead on a keyframe.
Step4 Adjust necessary keyframes
Go to the next keyframe to change the value, then adjust the value in the Video inspector.
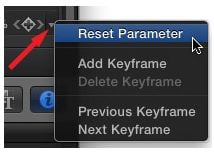
Deleting Video Keyframe
Below are the ways how you can delete a video keyframe.
In Video Animation Editor:
Select a keyframe and then press Option-Shift-Delete.
In Video Inspector:
Navigate to a keyframe and then click the Keyframe button.

Hiding Video Keyframe
You can hide the video keyframe in Final Cut Pro. Here are the steps that you should do:
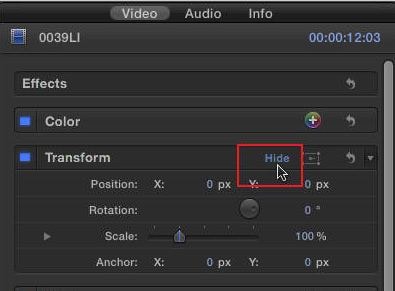
1. Ctrl + V
Choose Clip > Hide Video Animation after selecting the clip in the timeline (or press Ctrl-V). Then click the hide button.
Part 2: How to Use Audio Keyframing in Final Cut Pro
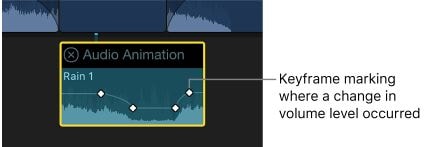
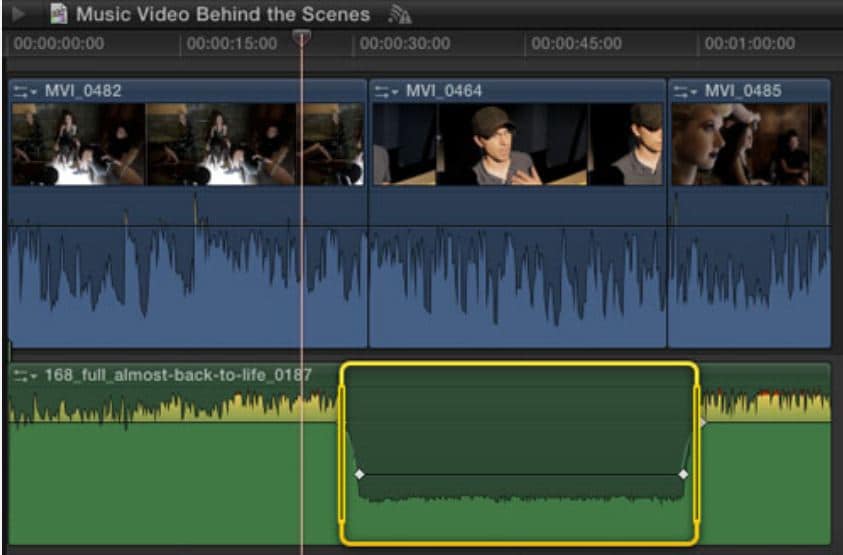
Voiceover work needs to use audio keyframes to adjust the volume of your music. It will make any recorded speech stand out from the musical background, allowing it to be heard more clearly. The technique is also useful for creating fades at the beginning and end of music tracks, and it can be extremely useful when more precise editing is required. Using the Final Cut Pro audio keyframe, you can add sophistry to your audio work.
Adding Audio Keyframe
Adding audio effects to a clip is essential to create outstanding media. Below are the steps for adding an audio keyframe using Final Cut Pro.
Step1 Select clip and press Ctrl + A
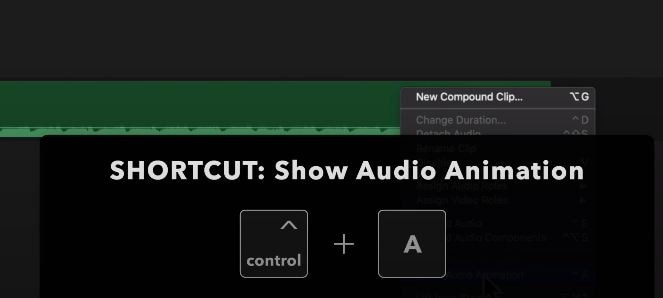
Navigate in Clip > Show Audio Animation after selecting a clip in the timeline (or press Control-A). Then choose the effect or parameter to which you want to add keyframes.

Step2 Add the keyframe
For each effect, perform one of the following:
For Audio Animation Editor:
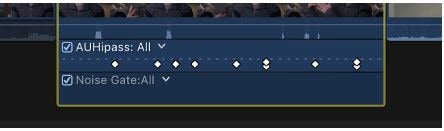
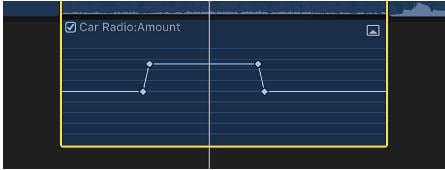
Option-click (or press Option-K) on the horizontal effect control at the point where you want to add the keyframe. Keyframes for the parameter you selected are displayed as white diamonds, while keyframes for other effect parameters are displayed as gray.
View the new keyframe. Double diamonds indicate that you added a keyframe at that point for more than one parameter.
For Audio Inspector:
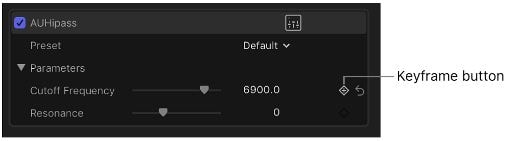
Place the playhead in the timeline at the desired keyframe location, then click the Keyframe button (or press Option-K).
Look at the newly added keyframe. The Keyframe button turns solid, indicating that the playhead has moved to this keyframe.
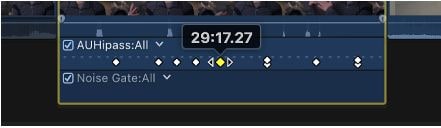
Navigate through the newly added keyframes. Click the left arrow to return to the previous keyframe. Click the right arrow to move to the next keyframe.

Step3 Add more keyframes if necessary
You can add another keyframe automatically after you've added one by moving the playhead in the timeline and then adjusting the effect parameter value in the Audio inspector.
Adding Audio Keyframe In Selected Area
If an effect with a disclosure button appears in the Video Animation editor, you can use the Select or Range Selection tool to add keyframes automatically across a selected area.
Step1 Add clip and effect
Select a clip in the timeline, then choose Clip > Show Audio Animation (or press Control-A). Select an effect, then click the disclosure button in the Audio Animation editor to expand it.
Step2 Select Range or Select Option
Click the Tools pop-up menu in the timeline's top-left corner, then select Select or Range Selection (or press A for Select or R for Range Selection).

Step3 Select the area for effect
Drag the effect to the desired location in the Audio Animation editor.
Step4 Adjust the effect
Drag the horizontal control of the effect up or down to adjust the effect within the range.
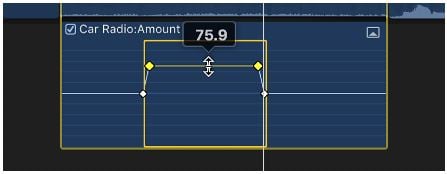
Step5 View the keyframes
Keyframes are generated automatically along the adjustment points within the range.
Adjusting Audio Keyframe In Audio Animation Editor
When you select a keyframe in the Final Cut Pro Audio Animation editor, you can do the following:
Step1 Change the time position of the keyframe
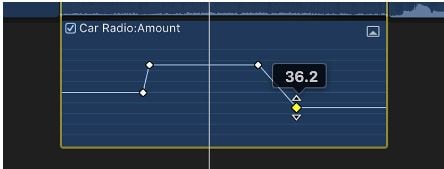
Move a keyframe to the left or right. The timecode value appears as you drag.
Step2 Drag the keyframe up or down to change the parameter value
If a disclosure button appears next to an effect, click it (or double-click the effect) to expand it.
Step3 Insert another keyframe.
Option-click (or press Option-K) on the effect control at the point where you want to add the keyframe.
Step4 Add the keyframe and effect's parameter value
Option-click the effect control while dragging it up or down.
Adjusting Audio Keyframe In Audio Inspector
Here’s how to adjust the audio keyframe using Audio Inspector:
Step1 Adjusting the parameter
Adjust the parameter value in the Audio inspector after selecting a keyframe or positioning the playhead on a keyframe.
Step2 Adjust the keyframe value
Go to the next keyframe and adjust the value again to change the value at the next keyframe.
Deleting Audio Keyframe
There are two ways how you can delete the audio keyframe. Find below what method best fits you:
In Audio Animation Editor
Select a keyframe and then press Option-Shift-Delete.
In Audio Inspector
In the Audio inspector, navigate to a keyframe and click the Keyframe button.
Hiding Audio Keyframe
1. Ctrl + A
Choose Clip > Hide Audio Animation after selecting the clip in the timeline (or press Control-A). Then click the hide button.
Part 3: Wondershare Filmora: The Best Alternative for Keyframing For All-level Creators
You may be a beginner willing to pay a reasonable price for video editing software. In this case, Filmora is a good fit. The software is incredible and widely used in the professional video editing market and is regarded as one of the most important alternatives to Final Cut Pro. Additionally, Final Cut Pro is only compatible with Apple computers that run Mac OS. In contrast, Filmora runs on various operating systems, including Mac OS, Windows, and Linux.
Wondershare Filmora is ideal for anyone looking for medium-advanced video editing software without the time and money required to learn advanced editing software such as Final Cut Pro. It is an excellent choice for professional video editors looking for a lighter, faster, and more enjoyable program for editing smaller projects such as social media and video ads.
How To Use Keyframes With Filmora?
Even though keyframing is challenging, Wondershare Filmora makes it a breeze. Even inexperienced users can create stunning videos with keyframe animation. Furthermore, the keyframe templates are a bonus. If you're short on time and need a quick fix, the Animation tab's Presets are your best bet.
Below are the steps on how to use keyframing with Wondershare Filmora:
Adding Keyframes
Here are the steps for adding keyframes in Wondershare Filmora.
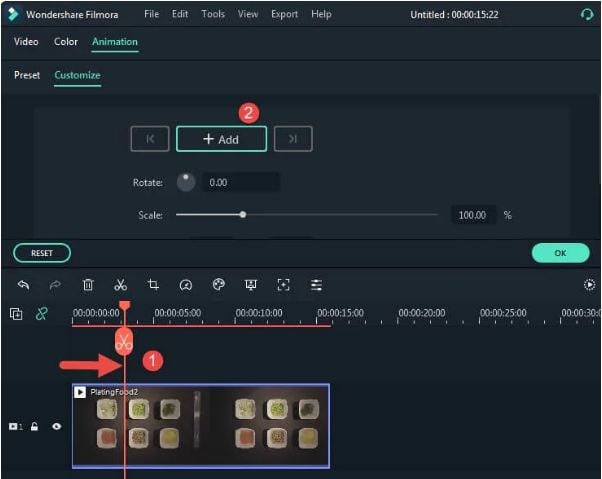
Step1 Add animation
Add a video clip, image, or motion element to your timeline. Then, from the context menu, choose Add Animation.

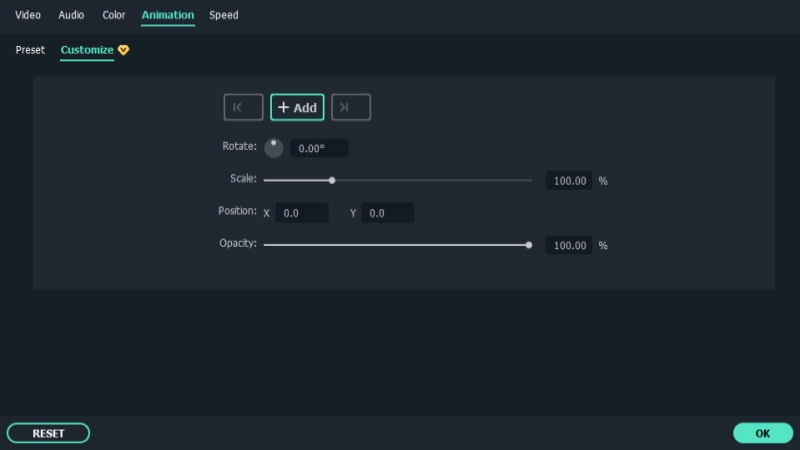
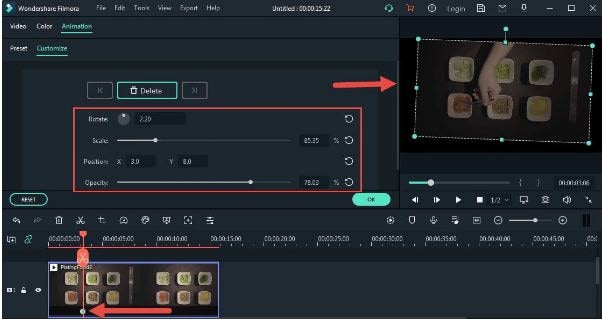
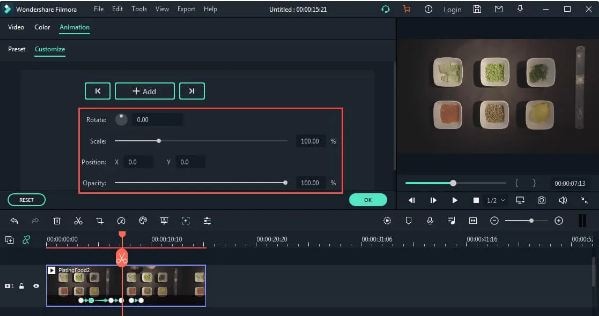
Step2 Customize
Select Customize from the Animation tab in the menu that appears.
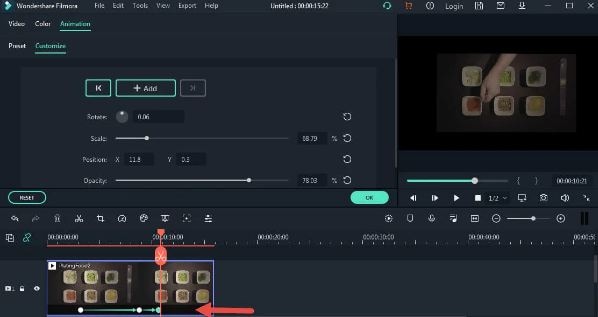
Step3 Check the timestamp
Click Add after dragging the indicator to the timestamp where you want to create a keyframe.
Step4 Set the parameter values
The keyframe you added to the video clip will then be visible. You can also change the keyframe size, placement, and rotation by dragging the media in the preview or setting values in the keyframing menu.
Step5 Add necessary keyframes
After selecting the specific timestamp, you may now add keyframes.
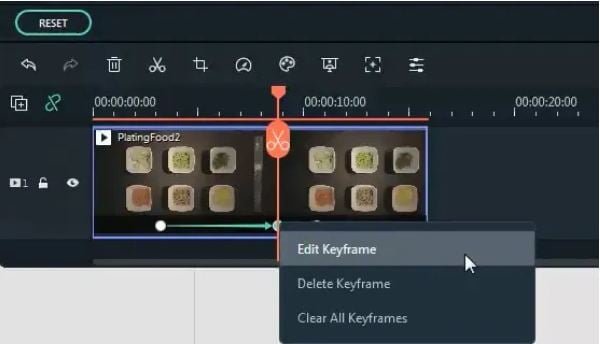
Step6 Review the animation
Check the animation you created by playing back your video on the timeline. You can edit, delete, or clear the keyframes you created by right-clicking the keyframe on the video clip.
Preset Animations
In addition to creating custom animations, you can save time by animating with presets. Presets are animation settings that have been designed and saved in advance. Here’s how to add a preset in your video using Wondershare Filmora.
Step1 Select "Preset"
Double-click on a clip, image, or element in your timeline to open the editing menu. Then, go to the animation tab and select Preset.
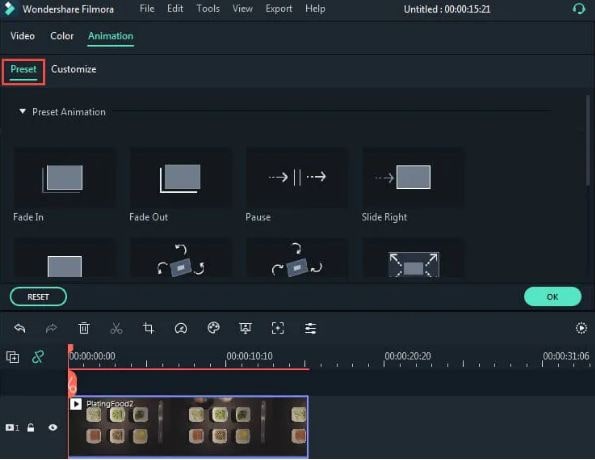
Step2 Choose your preferred preset
Find a Preset you like and drag it into the timeline, double-click it, or right-click it to apply it.
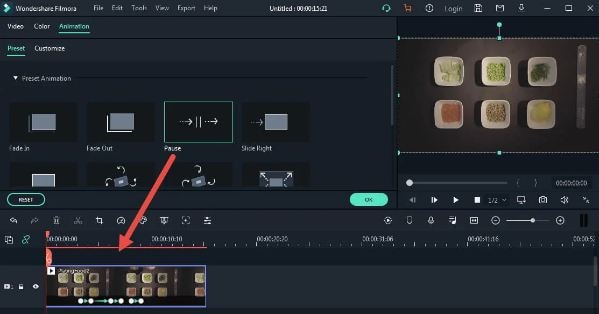
Step3 Edit the preset
You can edit or delete the preset animation and customize the rotate, scale, position, and opacity values by clicking the keyframe on the video clip.
Conclusion
Keyframes are the beginning and end points of video animation. With Keyframes, you have infinite animation and transition options for your video. They are used to animate objects, texts, audio, and videos in Final Cut Pro. You can reposition them, accelerate them, and even smooth the transition between multiple keyframes. Wondershare Filmora is a viable alternative. Filmora has you covered for everything from basic to complex keyframing. The customization feature allows you to express your creativity and take your editing to the next level.


