


Contents
- 3. Backup iPad to Computer
Nowadays iPads are becoming more and more common, and nearly every household has them. With this increased usage grows the requirement to keep the safe data that is stored on them. Most of us lose our data unknowingly or by mistake. Just a single click on the button and everything are gone. To avoid this from happening, we need to keep a backup of our iPads and make sure that we do not lose our important data that is stored on it. The most commonly known way to backup is to back up iPad to iTunes which is provided by its parent company. In this guide, we will take you through the procedure of backing up iPad with iTunes and then restoring it as well as a way to view the iPad backup created by iTunes.
Part 1. How to Backup iPad Using iTunes
Now we will proceed with the iTunes backup guide. To backup iPad on iTunes you need to make sure you follow these steps properly:
Step 1. Launch iTunes
First make sure that you have the latest iTunes software installed on your computer. Although there are older versions available on the internet, but the current latest stable release is version 12.1.1. Now after you've installed the iTunes on your computer now, you should launch it.
Now you have to make sure that your iPad is properly connected to the computer. You can connect the device using the USB cable. When you will connect the device, the iPad will show in the hardware.
Step 2. Backup iPad in iTunes
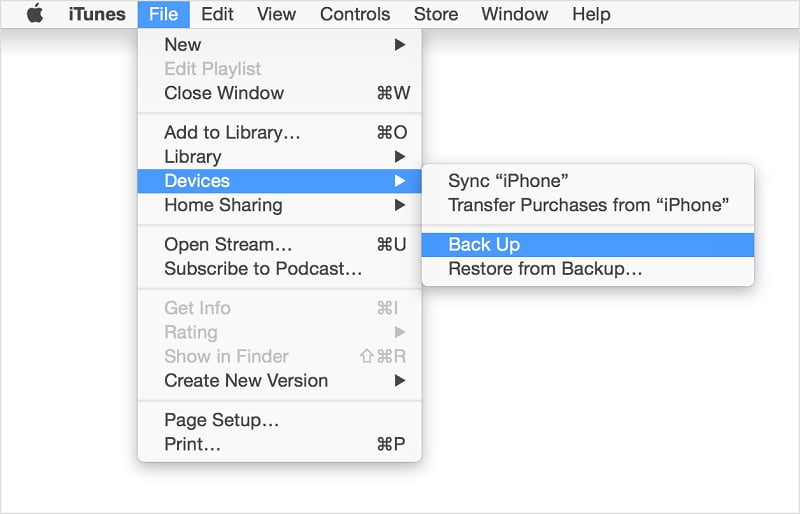
To backup, your iPad go to the top menu bar of iTunes and drop the "File" menu. Now, in this menu you move your mouse over the "Devices" and a sub menu will drop open. In this menu select "Backup" option. Now click on it and iTunes will start the backup process. It can take a few minutes as it requires reading the device properly to make the complete backup of the iPad.
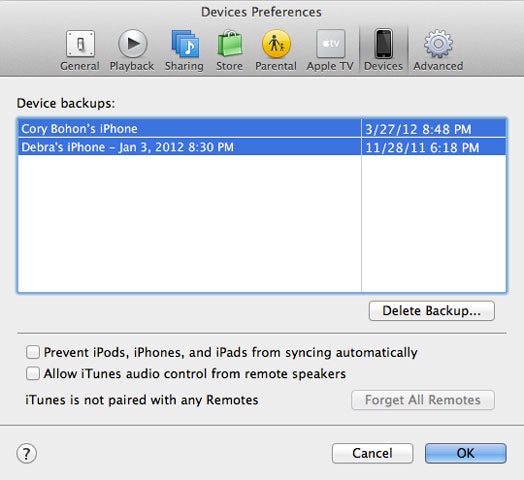
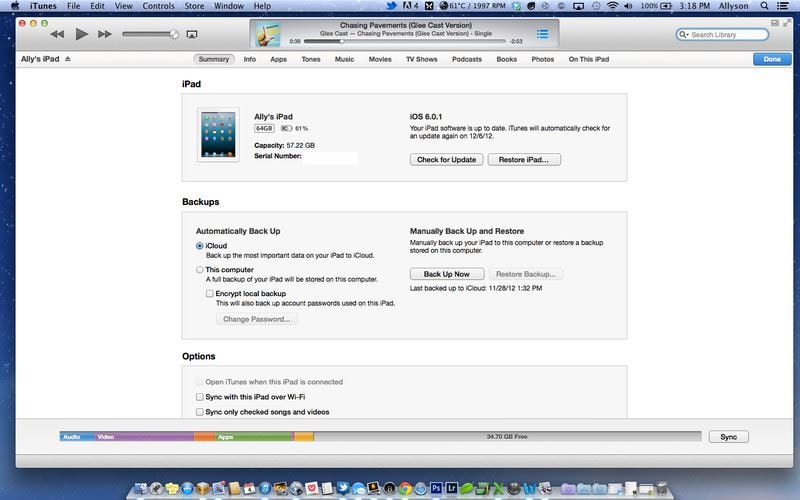
Step 3. Check the Backup on iTunes
Now after the completion you can check if the backup it completed successfully. You can check out the backup you've made in the "Preferences". There you have to select "Devices" to show you backup. It will show the backup with the time and date stamp.
Part 2. How to Restore iPad from Backup Create by iTunes
Now that we have completely understood the method to make a backup of iPad to the computer using iTunes, we will take a look on how to restore iPad from the backup we made. To do this, follow these steps:
Step 1. Connect iPad with iTunes
First of all confirm that you have connected you iPad to the computer. Along with this, you should make sure that you have the iTunes latest software installed on your computer and launch the program.
Step 2. Restore from iTunes Backup
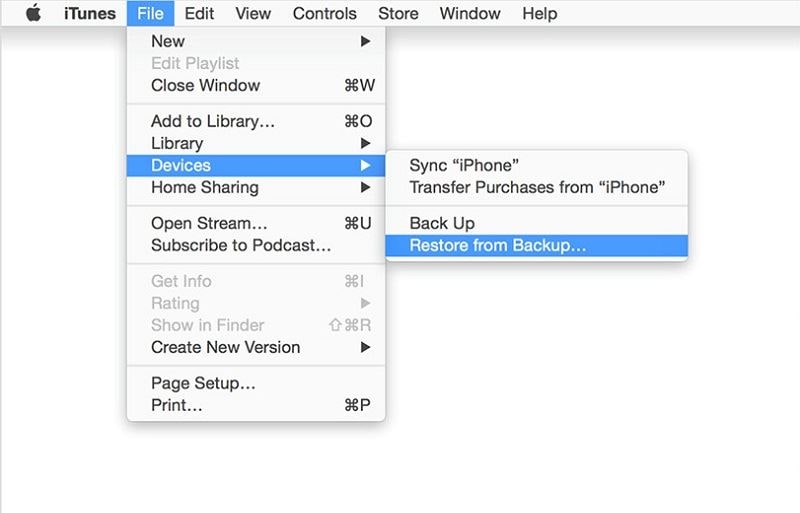
Select the "File" menu and then go to "Devices" menu. There will be a secondary menu open. In that menu select and click on the "Restore from Backup" option.
Part 3. How to View and Extract iPad Backup File Created by iTunes
With iSkysoft iPhone Data Recovery for Mac, you can view and extract the backup you just made using iTunes. This fabulous program has various different functionalities that the iTunes software does not provide.

- 3 Recovery Modes - It not only allows you to recover data you have lost on your iPhone but also extract the iCloud and the iTunes backup files.
- 18 Supported File Formats - It supports up to 18 different file types, and it can restore your messages, picture, contacts, etc.
- Lost Data Recovery - It offers you to recover your lost files along with the jailbreak failure or factory setting restore.
- Preview Recovered Files - You are able to preview your files before recovering them.
- Selective Recovery - It allows selective recovery, and you can easily select only the files you want to recover and leave the rest of them.
To restore and view the backup from you iPad using iSkysoft iPhone Data Recovery for Mac you need to follow the below steps:
What You Will Need:
A Computer;
iSkysoft iPhone Data Recovery for Mac
Time Required:
Times will vary according to the file's size
Difficulty:
Easy
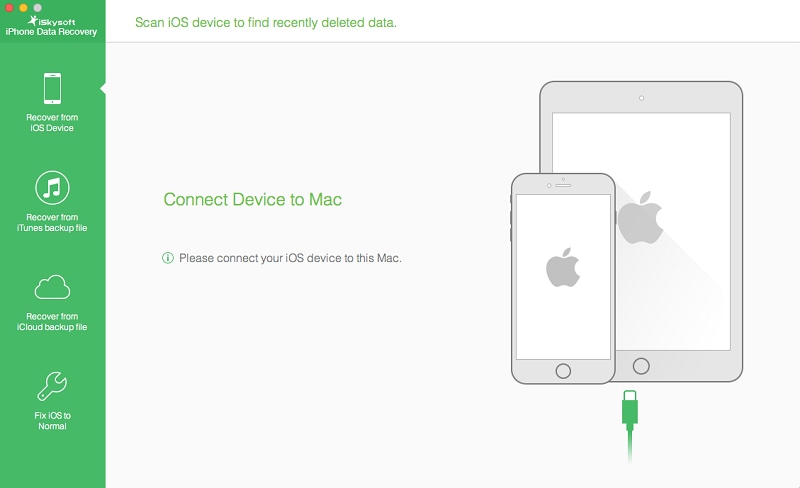
Step 1. Connect Your iPad
After the downloading, install iSkysoft iPhone Data Recovery on your computer. Once again confirm the device is connected to the computer properly and is showing discovered by the computer.
Then start the program, and there will be four options on the screen. Choose the required option, which, in this case, will be "Recover from iTunes Backup File".
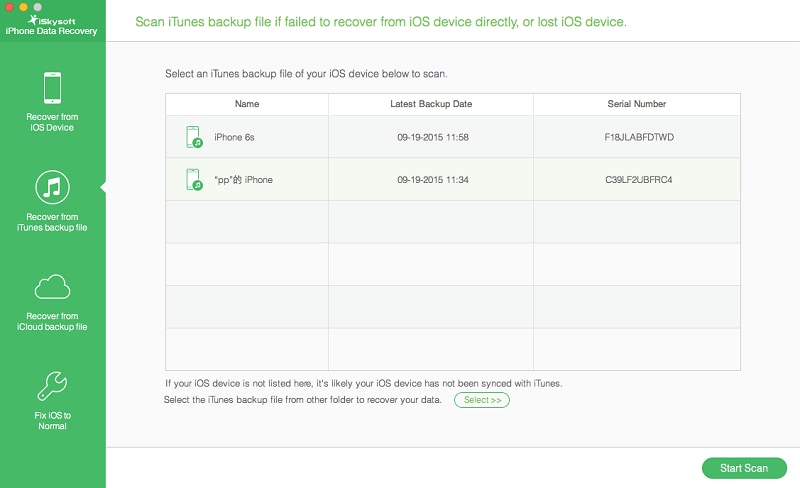
Step 2. Scan the Backup File
After you've chose the option, the program will detect your backup file automatically and then present you the list of backup files that you have created recently. Select the required backup file. After selection, click on the "Start Scan" button to progress with the restoration.

Step 3. Extract the Backup File
After the scan is completed, you will be able to view a complete list of files that can be restored. To restore the files or the group of files, you can check in the check boxes along the list. Once you have selected the required file, you can click on "Recover". The recovery process will start, and the selected files will be recovered.


