


Apple released its beta version of Yosemite in June. This time, Apple not only made it available for developers, it made it available for everybody. The aim of the release is of course for the users to identify some problems with the OS and report such problems so that they can be fixed before the official version is released.
Apple expects that it is only the people who are ready to experience and report these problems that should download Yosemite. The problem of most people is that they cannot stand the many problems associated with Yosemite and want to revert back to Mavericks but they don’t know how. If you have problems with the Yosemite OS, you can either decide to wait for the launch of the official version or downgrade to Mavericks from Yosemite. If your choice is to do the latter then you do not need to fret as there is a simple guideline you can follow to have your Mavericks back.
In order to successfully downgrade, there are some tools that are necessary:
You Will Need:
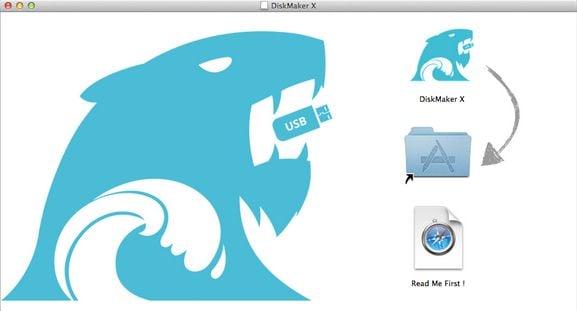
- 8GB USB thumb drive
- DiskMaker X
- An external HD which is not less than 500GB
- OS X Mavericks from App Store
Note: Before downgrading to Mavericks from Yosemite, you first need to back up your Mac using Time Machine. This is much easier and effective than copying your files manually to an external USB.
Steps for Time Machine Backup
Step 1
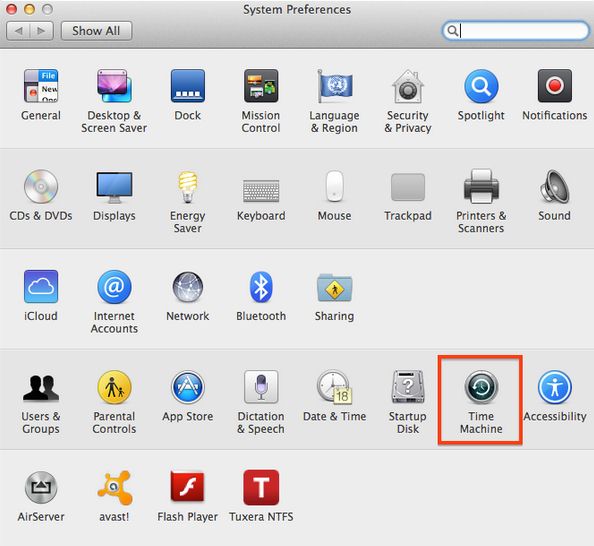
Plug in your external hard drive into your USB port. And locate System Preferences from the drop down menu that comes by clicking the apple logo and select Time Machine.
Step 2
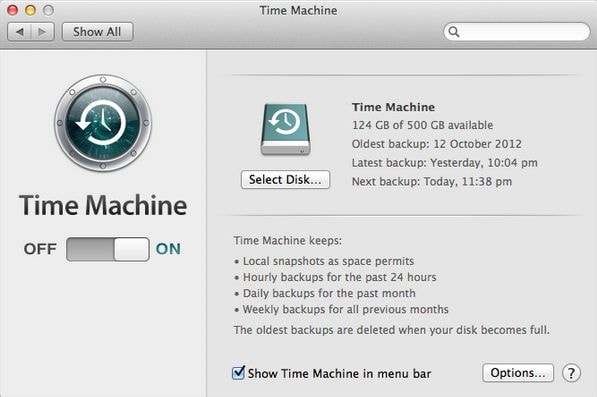
Turn the Time Machine on by moving the slider to the ON side. Using the “Select Disk” option, select your External hard drive and check the option of the “Show Time Machine in menu bar” below.
Step 3
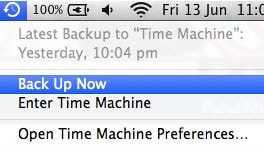
Select the “Back Up Now” option from the menu bar that will be seen when you left-click on the time machine icon. This will create a backup of all your files and may take some time so you have to exercise patience.
Steps to Downgrade to Mavericks from Yosemite
Step 1
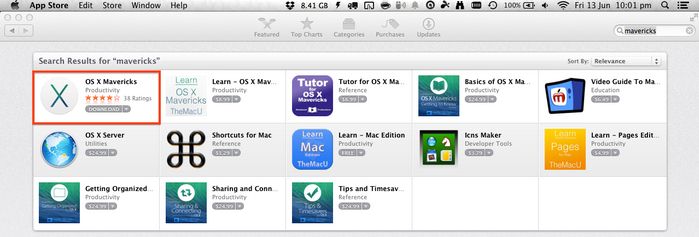
Go to Mac App Store and download OS X Mavericks. You can easily find it by using the search bar on the top right corner in the Mac App Store and download the file. This may take a little while depending on the rate of your internet download.
Step 2
In the meantime, while downloading Mavericks, go to www.liondiskmaker.com and download DiskMaker X. This is for you to be able to create a Mavericks bootable thumb drive.
After downloading Mavericks and DiskMaker, open DiskMaker X and drag its icon to your Application folder.
Step 3
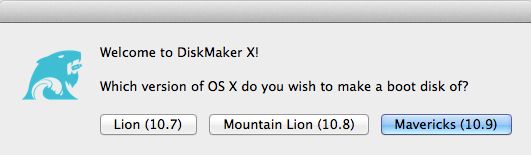
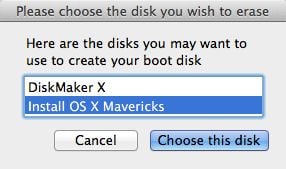
Insert the USB thumb drive and open DiskMaker X. Select the option for Mavericks 10.9.
Step 4
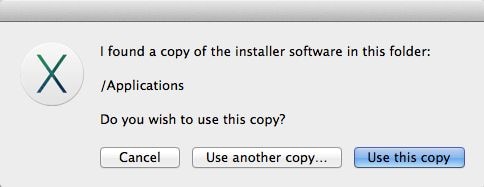
DiskMaker X should automatically find your Mavericks OS. If it doesn’t, you can manually locate and select it yourself. After locating it, select “Use this copy”.
Step 5
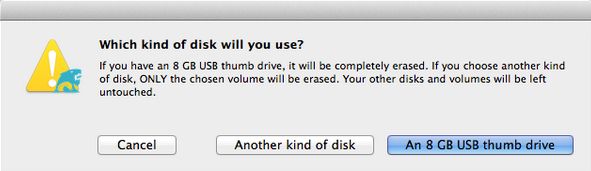
Select your thumb drive which is preferably an 8GB thumb drive. The next thing is to select and install the OS X Mavericks.
Step 6
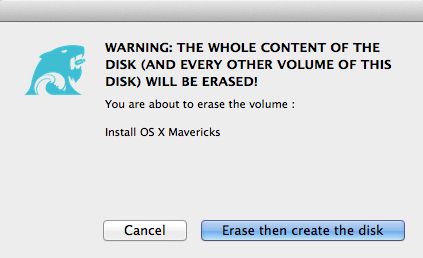
Erase the disk and enter your administrator password.
Step 7
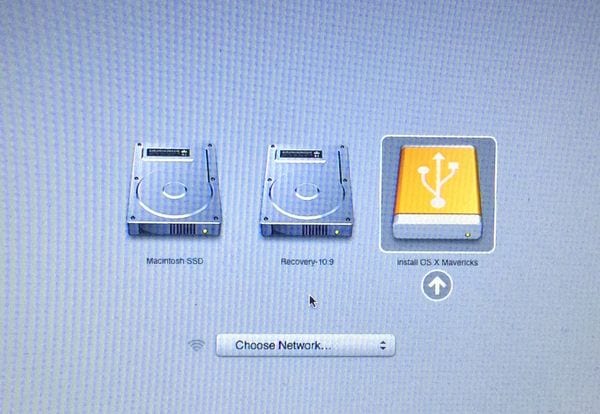
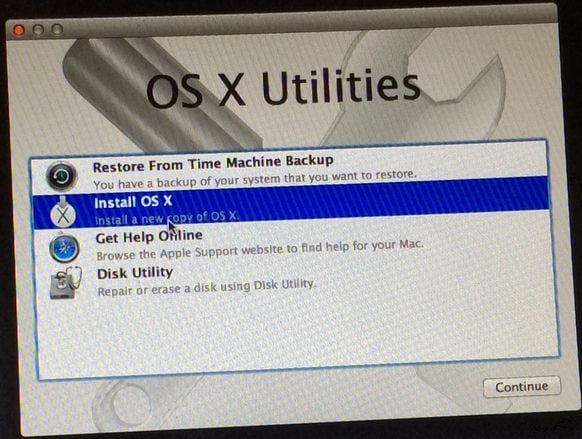
After your thumb drive has been erased, the next thing is to restart your computer. While it boots, hold down the option key and select the “Install OS X Mavericks” option.
Step 8
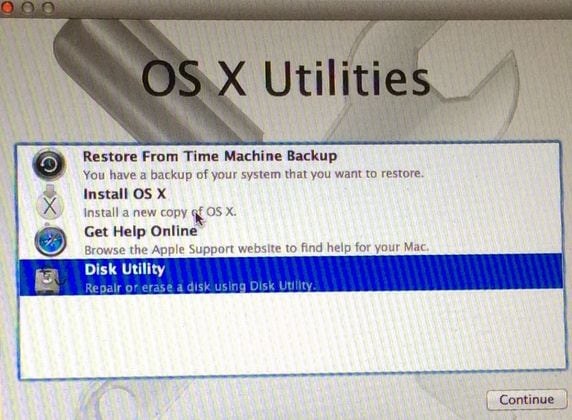
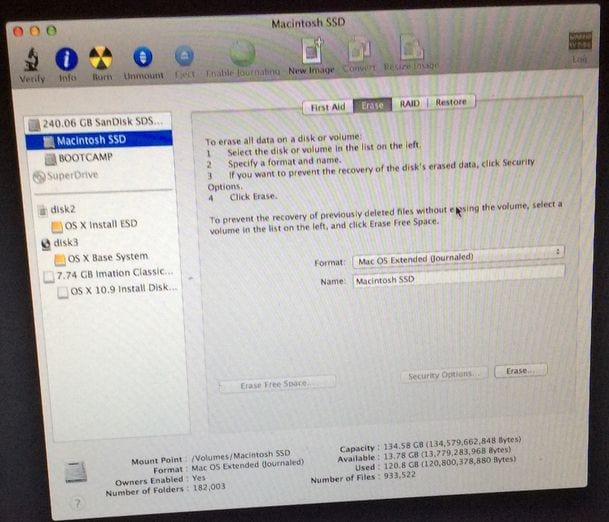
After booting is complete, choose Disk Utility and select your Hard Drive from the available options. Your Hard Drive should be named Macintosh HDD. Hit erase.
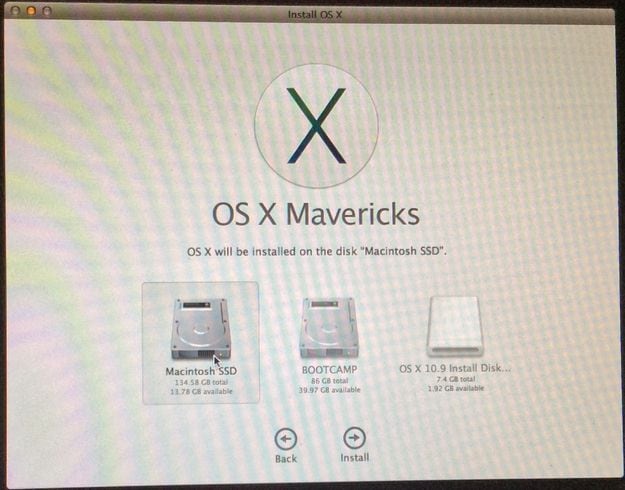
Step 9
Go back your main options and choose “Install OS X”. Select continue and choose your hard drive that has just been formatted. Wait until OS Mavericks is installed.
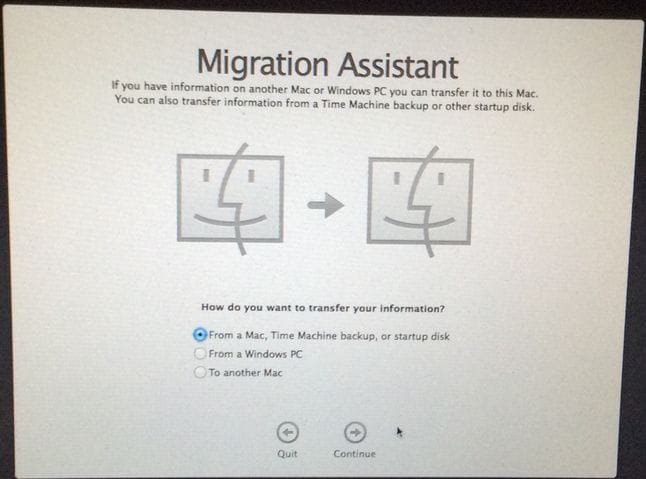
Step 10
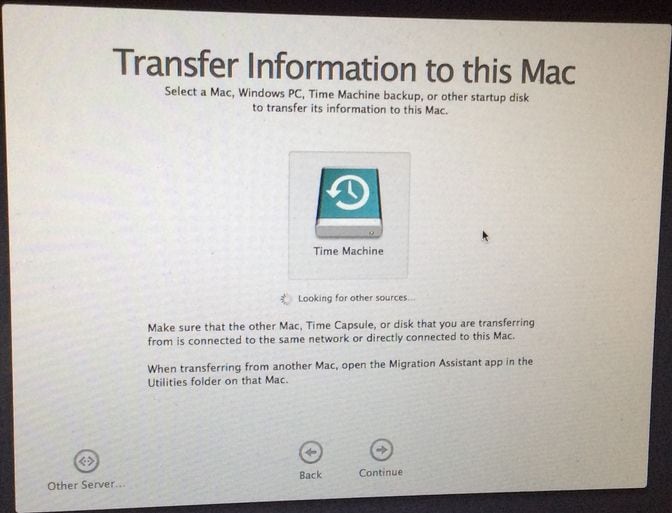
In the “Migration Assistance” window, choose the appropriate option shown below and select your Time Machine back up drive.
Step 11
Exercise patience until your Mac is fully restored.
If you have followed all this steps carefully, then you should have your Mavericks back.
In case you have installed the Yosemite beta on the only volume on your Mac, it may be difficult for you to find the Mavericks OS on your Mac App Store. The solution is to find a friend who has not installed the Yosemite OS. Use his/her Mac to download a copy of the Mavericks OS from the Mac App Store from your own account.
Also, if your Mac is a newer version and you have made this same mistake of not creating a backup that has the Mavericks installer, you will also have to depend on a friend or colleague that did not make the same mistake so you can download it into your account using your friend’s Mac.
Any other problem you may face will most likely be due to an error on your part in following the steps listed above. It is therefore important that you master each step before carrying them out so that you do not find yourself in an unfamiliar terrain.


