When you save a file to a hard drive, its record is kept in the Master File Table (MFT) and the data is written to physical hard drive addresses which are labeled as "occupied". However, when you accidentally delete the same file from the hard disk, the record in the Master File Table (MFT) indicates that the file has been deleted, and the physical hard drive addresses are labeled as "unoccupied", but the data is not removed. You can perform a recovery operation with any data recovery software such as Active File Recovery and restore your files. But you should act fast before the files can be overwritten and rewritten with new data.
Part 1: How Does ActiveFile File Recovery Work
ActiveFile Recovery is a powerful program designed to detect and restore the accidentally deleted, formatted, damaged or lost files and directories from floppy or USB drives and hard drives. The software allows you to recover almost all “data types” including videos, music, photos, documents, file system metadata and more.
Steps to Use ActiveFile File Recovery
Step 1 Download and Launch the Software
Use "ANOTHER" PC to go to its official website to download the program. Install and run the program from USB disk or DVD/CD to minimize the risk of overwriting your data.
Step 2 Scan for Deleted Files
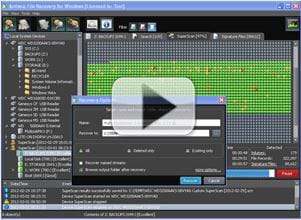
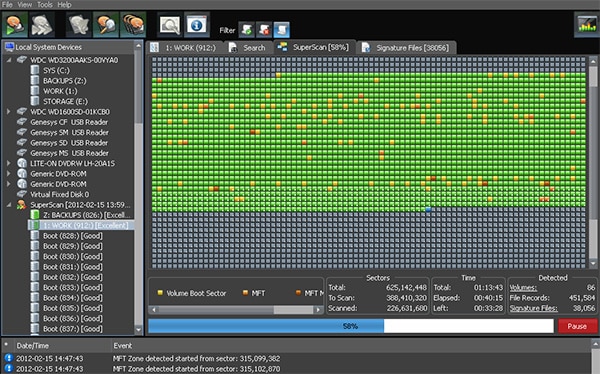
Select the specific drive you want to recover data from and then click either the "Quick Scan" or "SuperScan" buttons from the toolbar options, and the program will start the scanning process.
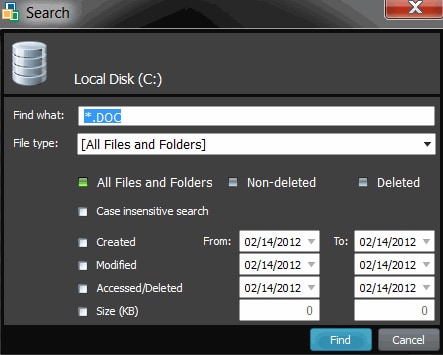
Step 3 Search for Deleted Files
Try any of the following options:
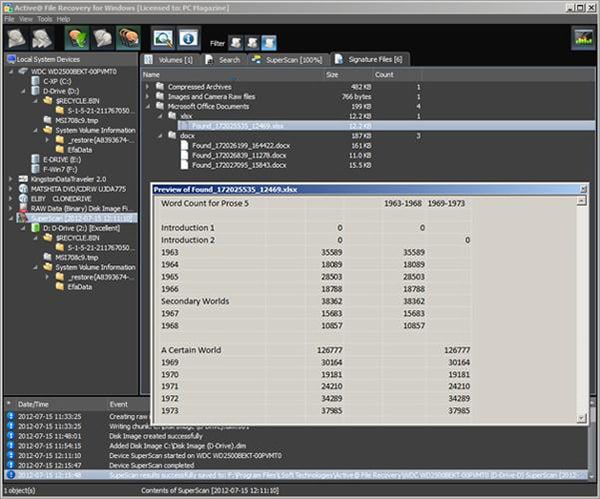
- Direct Listing: After the scanning process is complete, manually navigate to the folder path. If you can’t find what you are looking for, open the tree node named "Lost & Found".
- Filtering: Set up a filter to display only the deleted files/folder or only the existing files by right clicking the volume and choosing "Deleted Files/Folders only" or "Existing Files/Folders only" from the context menu.

- Search Mode: Select a folder or drive and click the "Search" located on the toolbar. Enter the keywords based on the files names of the data you want to recover.
Step 4 Verify File Integrity with "File Preview"
Launch the "Preview" module by clicking the "Preview" toolbar button. A preview window will then appear with the first page of your documents.
Step 5 Restore Deleted Files
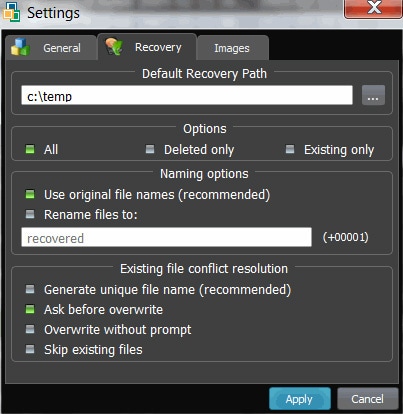
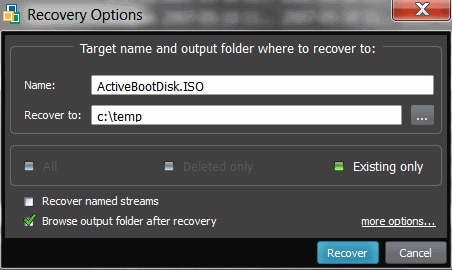
Access the "Recovery Options" dialog by selecting the "Recover" button on the toolbar. If you selected several files, filter them for recovery by checking the "All", "Deleted only" or "Existing only" files. Mark the "Browse output folder after recovery" to view the file after recovery is complete. You can access additional recovery configuration options by clicking "more options" from the "Recovery Options" dialog.
To exit the "Extended recovery options," click the "Apply" button, and then you will be directed back to the "Recovery Options" dialog. Click the "Recover" button to restore your files.
Note: ActiveFile Recovery comes with most of the top-notch features found in comprehensive data recovery programs. However, "SuperScan" takes an awful lot of time. If you are an average PC user, you'll realize that some of the interface features are hard to find. A few ActiveFile Recovery users have also complained that the software doesn’t display track names of restored music files. Moreover, the free version allows recovery of up to only 64kb file.
Part 2: The Best ActiveFile File Recovery Alternative Software for Windows
iSkysoft Data Recovery for Mac (or iSkysoft Data Recovery for Windows) solves your data loss problems quickly and painlessly. It's a complete and capable data recovery tool for rescuing lost files due to almost any scenario, including accidental deletion, virus infection, corruption, accidental hard drive formatting and more. As a user, you’ll be able to retrieve your data with just a few easy clicks. The program supports data recovery from multiple devices including Mac/Windows PC/laptops drive, players, memory cards, external disks, USB flash drive, digital camera and more.
Key Features of Recoverit (IS):
- It is designed with all users in mind, and everyone can use it without facing any challenges.

- Scanned data are displayed with original file structure and name.
- The software recovers data from FAT32, FAT16, NTFS and exFAT file systems.
- You'll have the opportunity to preview your documents, emails, photos and archive files, and distinguish the quality (valid or invalid) before recovery.
- The program recovers all kinds of data including, videos, image, audio, documents, email archive files and more.
Step-by-Step Guide to Recover Lost File
Note: After discovering that your files are missing, either on your Windows-based drives or external drives, you should stop using the specific drive to avoid overwriting your files, which can result in permanent data loss. Therefore, if your lost files were saved on your computer's drive, you should not use your PC to browse for Recoverit (IS), download, install or run it.
Step 1 Download and Launch the Program
To make sure your lost data don't be overwritten, please look for "ANOTHER" Windows PC, get online and download the program. Install the software to a USB flash drive and then perform data recovery with Recoverit (IS) installed on the USB flash drive. When you launch the program, you'll be able to see the supported file types displayed on the main interface.

Step 2 Start the Scanning Process
A new window will appear showing the logical drives with their sizes and file systems. Select the hard drive where you have lost your files and click the "Start" option to start the scanning process.

Step 3 Recover Files
When scanning is over, a new window that looks like the one shown below will open. This is where you can preview your files before you can recover data. To recover the lost files, check the scan search result list and then click the "Recover" button located on top of your screen. Save your files to the selected path, and not to the hard drive where you have lost files. External drives are highly preferred as the selected path.
If you don't find your wanted files, please perform the "Deep Scan" mode, which will look deep into your drive and recover much more files for you.