"I think my C drive has virus/malware as it tends to show error and a few programs do not run even though I installed them again and again. I cannot format the drive and lose all the information. Is there a way out to do C Drive recovery and then format only the C drive?" --- From a C Drive user
C Drive in a computer has a major role to play. It consists of the software files and executing files of several programs that you install on your PC. These files are necessary to boot your PC or in conventional terms – start the computer. Now we will tell you how to solve the problem if have the same question with this user.
Part 1. How to Recover C Drive Easily on Mac
Recovering C drive on a Mac is a simple task and in fact, requires you to follow a three-step procedure. Yes, with the help of iSkysoft Data Recovery for Mac, you just need three steps to get back your Mac up and running within no time.
Why Choose This C Drive Recovery Software:
- New recovery approaches with pre-settings.
- Identification of several file formats and devices.
- Supports different versions of OS.
- Preview ability and customizable settings.

Step-by-Step Guide to Recover C Drive on Mac
Step 1. The software is available at official website. Download and install on a functional Mac. Run the program and connect the troubled Mac or HDD through a cable. Now please mark the file types to be recover.

Step 2. iSkysoft C Drive Recovery will show the logical drives along with size and file systems in a new window. You can choose the C drive and press "Start" at the top to begin the scan. You can select between all the files or specific file formats such as MP3, MOV, or documents. It will reduce the scanning time substantially.

If you cannot find data, then re-scan using deep scan technology. Remember that this procedure will consume a litter more time and you need to be patient.
Step 3. A new screen pops up after completion of the scan. You will view all the retrievable files in this window. You can choose a file to see its content in the preview screen. Use the "Recover" button from the menu bar to save the files. Use a different location to save them and on a different Mac.

Part 2. How to Recover C Drive on Windows in 3 Clicks
Windows by far is the easiest operating system and offers complete flexibility for both the user and developer. However, there are instances when we lose data on the C drive, which puts us in grave danger, as we do not want to format because of the information present in it. A better way to tackle such a situation is by using recovery software. We also recommend iSkysoft Data Recovery for Windows because of its success rate. It can easily get more than 90% of the erased data in three simple steps! Now, that is something that nobody can imagine, but that is true. Let us see how. Recoverit (IS) uses up-to-date technologies for file recognition, data retrieval, and user settings. It even has preview ability for selective marking of files.

Step-by-Step Guide to Recover C Drive on Windows
Step 1. Install the software on a working computer. Upon starting the program, the product screen will show you the supported file types. Click the one you want to recover and hit "Next".

Step 2. A new window opens, displaying the HDDs. You can have to opt for the HDD that has the problem. You can directly choose the C drive from the list and click the "Start" button. It will begin scanning and give iSkysoft the chance to look for data that has good attributes for recovery. You can choose between the files missing from the drive or all the files from the C drive.
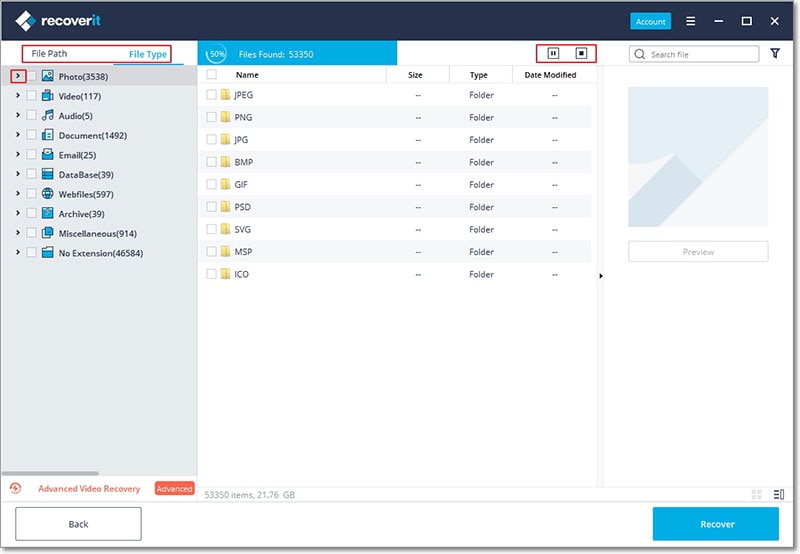
Step 3. As the program uses a logical structure in scanning the files, it takes a litter longer time in recovering data. You will view the files according to the file signatures in a new window arranged in order. You can click a particular file and view its content in the preview screen. Mark the files that are important and use the saving path to specify a folder or location to save the files. Click "Recover", and wait for iSkysoft C Drive Recovery software to complete the process. The time taken depends on the size of the data selected. After the conclusion, you can survey the folder to check for the retrieved content.

Part 3. How to Recover C Drive with Recovery Console
A recovery console is a bootup procedure that will be helpful in fixing problems that usually prevent Windows operating system boot smoothly. You can utilize this mode to enable or disable assistance, access files, and format drives.
Step-by-Step Guide to Recover C Drive with Recovery Console
Installing the recovery console:
if you do not have the recovery console, proceed with the following steps:
- Insert the Windows installation CD into the CD-ROM drive.
- Click the Start button.
- Open the Run menu option.
- Key in the following in the open field: "x\i386\winnt32.exe/cmdcons" where x denotes the drive allocated to the optical reader.
- Press the okay button to begin the setup process.
- Continue with the installation procedure by pressing the yes button once again in the new window. The program will check for dynamic update and ensure that all the files are up-to-date.
C Drive Recovery Procedure:
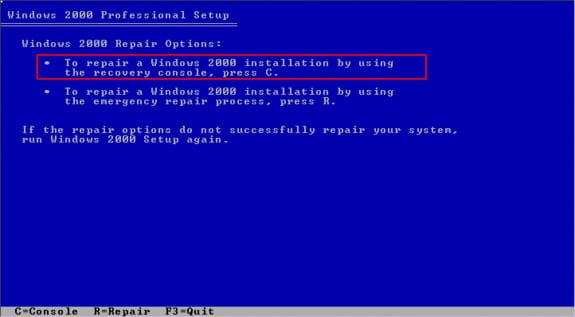
Step 1. From the setup menu of Windows installation CD in the CD-ROM drive. 2000 professional, choose R for repair. In the next screen, press C to use the Recovery Console.
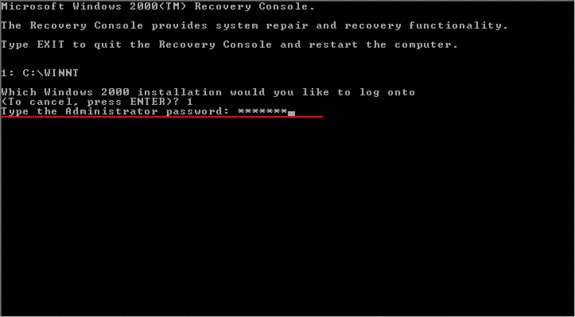
Step 2. In the next screen, Windows will prompt you to choose the Windows installation for repair. Enter the administrator password. Type help to get the overview of available commands.
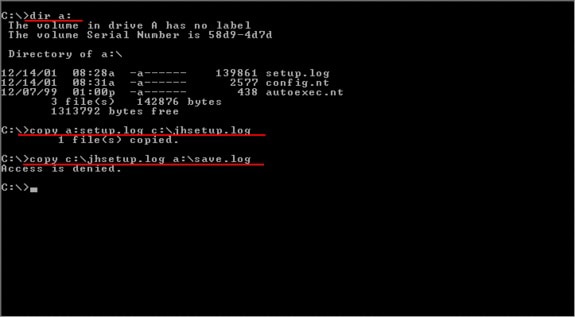
Step 3. You will gain access to the root directory of all the disks along with Windows system directory. You can now begin copying files that you can access. Remember that you cannot copy files from a floppy disk to the disk. You can now restart the system.