Email, the short form of electronic mail, refers to a protocol for sending, receiving and storing electronic messages. It has become an indispensable part of everyone's life, especially to individuals who are entrepreneurs. When you accidentally delete your emails on your Mac or Windows PC, the chance of retrieving them is big since they can be directly found in the Recycle Bin/ Trash bin. But there are instances where you might have emptied the Recycle Bin/ Trash bin. Of course, you can still retrieve emails. Don't know how to? Then read the full article. We provide you with 5-different ways on how to retrieve your missing, lost or deleted emails on Mac and Windows, starting with the easiest, fastest and safest method.
- Part 1. The All in One Way to Retrieve Email on Mac and Windows
- Part 2. How to Retrieve Email from the Deleted Folder or Recycle Bin
- Part 3. How to Retrieve Email from the Mail Database
- Part 4. How to Retrieve Email by Checking the Back Up Server
- Part 5. How to Retrieve Email Using Email File Extensions
Part 1. The All in One Way to Retrieve Email on Mac and Windows
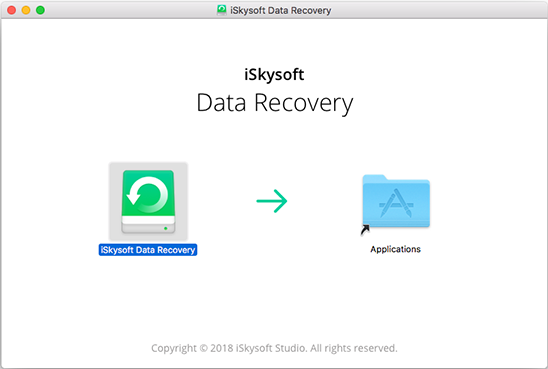
iSkysoft Data Recovery for Mac (or iSkysoft Data Recovery for Windows) is the best tool for recovering not only deleted or lost emails, but also videos, images, audios, documents, archives, etc. This powerful software provides you with the most effective way to recover your missing files whether you lost them by formatting, accidental deletion, virus infection, improper operation or any other reason you can think of. Note that the program retrieves your files in original quality and with original file names and file folders.
Why Choose This Tool to Retrieve Email on Mac and Windows:

- This software uses the latest powerful scanning algorithms to scan your hard drives without destroying any data.
- The software supports all devices including Mac computers, players, USB Flash drive, digital cameras, etc.
- Deep scan greatly increases your data recovery success by scanning data in the entire file system.
- You can preview data quality and distinguish valid and invalid files before recovery
- It supports one-click pause and restart of the scanning process, and you can save scan results to resume recovery later.
Step-by-Step Guide to Retrieve Email on Mac Using Recoverit (IS)
Step 1 Download, Install and Launch the Software
Note: You can't download or install Recoverit (IS) for Mac on the original drive from where you lost your emails. This is the only way to avoid permanent loss of your emails and other data due to the data being overwritten.
Just get another Mac computer and then use any browser to go to iSkysoft Official website. Download the software, install it on a USB flash drive and retrieve your emails with the software installed on the USB flash drive. Alternatively, you can download & install the software on your computer, but on a different disk instead. Once you've installed Recoverit (IS) for Mac, you can launch it.
Step 2 Select "File Types" to Recover
The main software's interface includes six tabs, representing file types that you can recover - "Photo", "Audio", "Video", "Email", "Document" and "Others" tabs. Select the "Email" tab and click the "Next" button. If you would like to retrieve all your lost data, you can check the "All File Types" box.
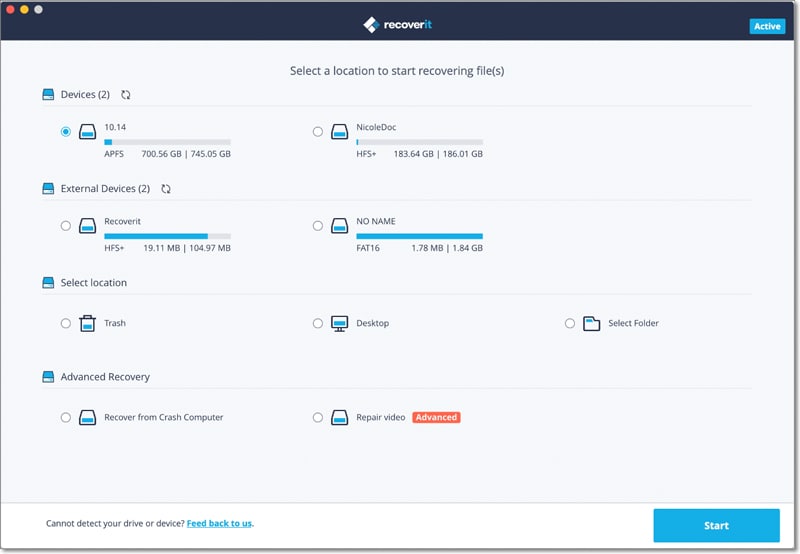
Step 3 Select the Target Location
In the next window, you’ll see locations to be scanned, which are categorized into 4 parts, "Common Location", "External Removable Device", "Hard Disk" and "I Can't Find My Partition". Choose the target location that you want to scan and then select the "Start" button to begin scanning.

Step 4 Scan & Retrieve Your Emails
When the "Quick Scan" process is completed, the found files are displayed on your screen. On the same window, from the left, you should be able to see the "Files View", and "Tree View", option. "Files View" displays the scanned files by file types, and "Tree View" arranges them based on their exact location. Click on any of the two options to preview your files before recovery.
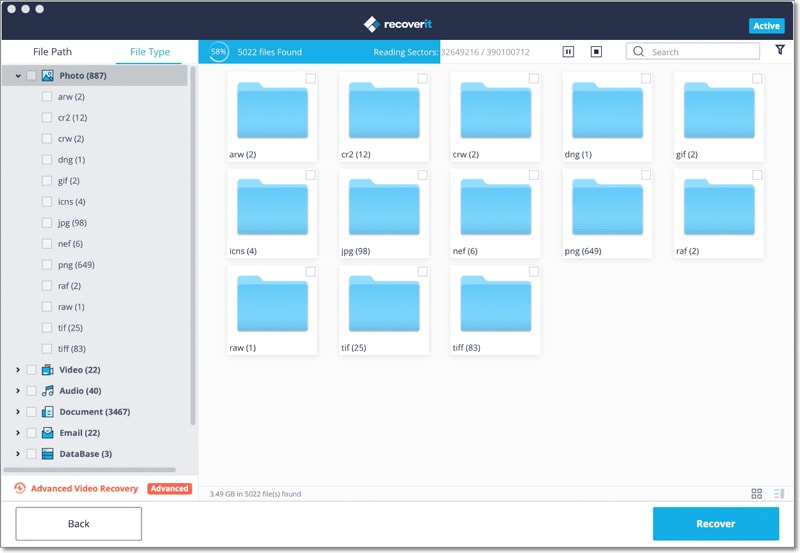
If you have used "Quick Scan" and still can't find the emails you wanted to retrieve in the scanning results, you are free to use "Deep Scan", which is a scan mode that searches for your target files deeper.
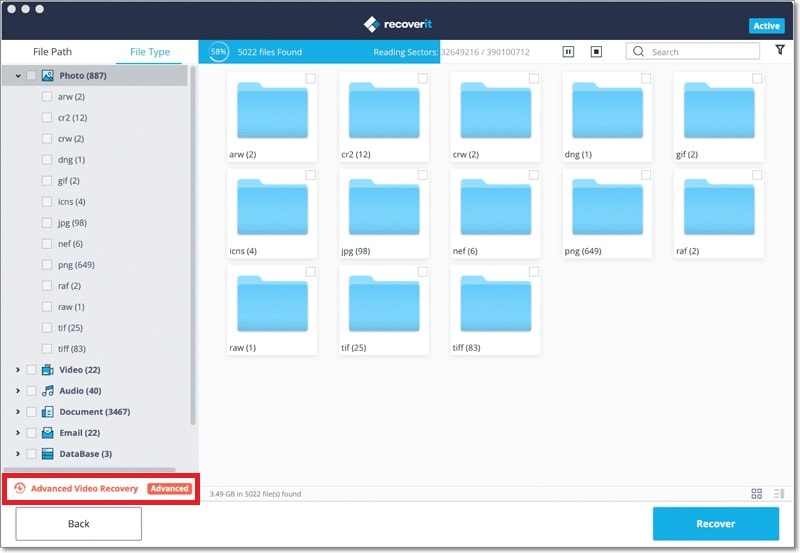
When "Deep Scan" is completed, select the file to be retrieved, and then click the "Recover" button to retrieve emails easily.

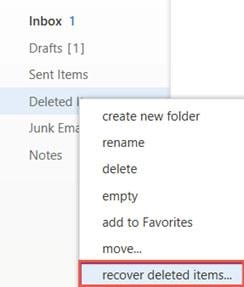
Part 2. How to Retrieve Email from the Deleted Folder or Recycle Bin
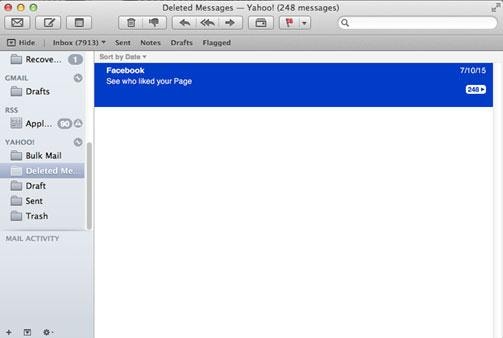
Emails deleted from your account are stored in the Deleted Folder/Trash for about one month. This makes it easy to recover any important email that you may still need. You should note that email retrieval from the "Deleted Folder" is only possible if you haven't yet emptied your Trash/ Deleted Folder.
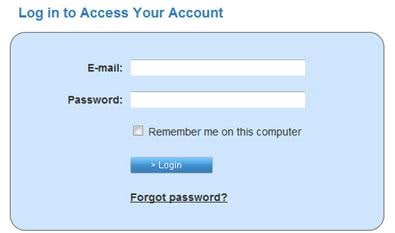
Step 1. Log in to your email account by typing your username (Email) and password.
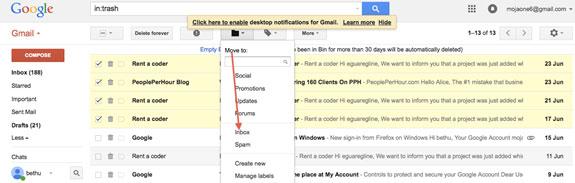
Step 2. Once you are logged in, you'll see an email Window. Go through it and click the "Trash" icon. It often appears at the left side of the Email Window.

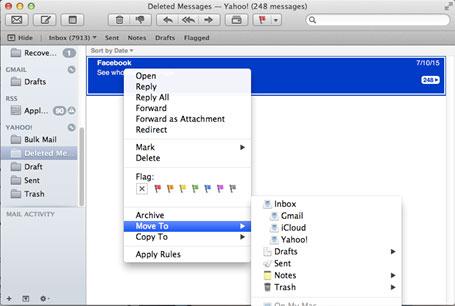
Step 3. All your deleted emails are displayed on the Trash window. Mark the ones you would like to recover. Click on "Move to" located at the top of the window and then select the location that you want to do email retrieval. For example, you can select "Inbox", and the emails will be retrieved to the "Inbox" folder.
Part 3. How to Retrieve Email from the Mail Database
You can use email database like Outlook Express, Vista window to retrieve deleted emails that haven't been compacted- made smaller for easy access.
Part 4. How to Retrieve Email by Checking the Back Up Server
Outlook Web App can help you retrieve email by checking the backup server. It's an email service that allows you to access and retrieve deleted emails. The app acts as a web browser and retrieves recently deleted emails as well as the permanently deleted emails.
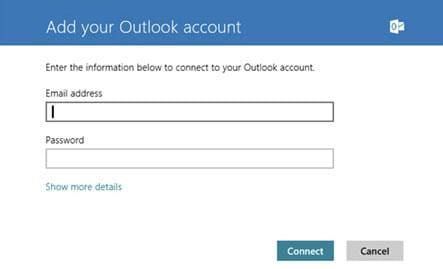
Step 1. Search for Outlook web app and then sign in using your account details.
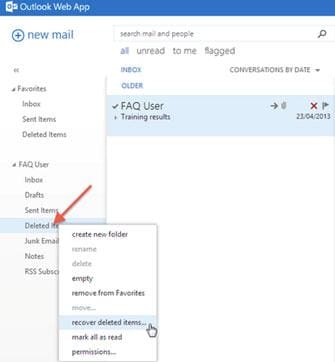
Step 2. Select the deleted items folder and click the "recover deleted items" option.
Step 3. Check the emails to be retrieved, click the "Move" button and then choose a location folder such as "Inbox". If the email was deleted permanently, click on the "Recover Deleted files".
Part 5. How to Retrieve Email Using Email File Extensions
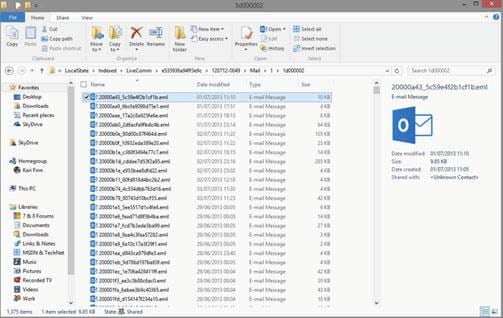
Deleted emails can also be retrieved from Email File Extension, abbreviated as EML. EML is the location where saved emails are stored. EML file format is a product of Microsoft Outlook process. These files always contain a header, which has two email addresses for the recipient and sender, body attachments and hyperlinks of the emails.
EML file format is standardized to concur with NIME RFC 822, meaning that you can always open them with email databases such as Apple Mail, Outlook, Outlook Express, Microsoft Entourage, Thunderbird, and IncrediMail. Examples of EML file extension include pmx, Mailhost., Mozemail., Tnf., P10., Boe., Tbb., Sbd., Mlm., Oas., Mbox., Mht., Mso., Vcard., Pst., eml., wdseml., Emlx., Vcf., etc.
In case you deleted your email messages and they were saved on the internet, you can always log in to your email database and retrieve them.
Step 1. Log in to your Apple Mail, Outlook Express or Outlook and search for the emails.
Step 2. If the step above doesn't work, just open file explorer.
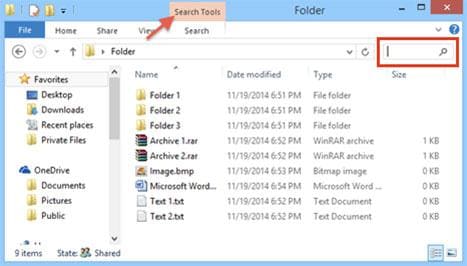
Step 3. Select the "Search" option and type the file format of your emails such as .eml. All your emails in the specified format will be displayed on your screen in no time. Then you can retrieve emails easily.