


If you use an Iomega external hard drive and have experienced a data loss in this storage device, it is extremely necessary that you use an outstanding data recovery program. Only a feature-rich and easy-to-use Iomega data recovery tool has the potential to retrieve all the partitions and files lost on this hard drive.
Part 1. The Best Way to Perform Iomega Data Recovery on Mac and Windows
There are numerous reasons that can result in the deletion or loss of data from your Iomega hard drive. Some of these reasons are power surge, using a faulty third party application, formatting of the drive, improper defragmentation and more. So, in any case, it is recommended to use the best Iomega data recovery software: iSkysoft Data Recovery for Mac (or iSkysoft Data Recovery for Windows). The software has powerful recovery engine for restoring various types of files easily.
This program has advanced functions like Preview and Deep Scan that make sure you recover the file you have been looking for. From images to videos and archive files to documents, it is highly efficient in retrieving a wide variety of data without any problem. The tool also has another wizard recovery option in case you are a beginner and want to rely on the software completely.
Why Choose This Iomega Data Recovery Software:

- The tool works exceptionally well with memory cards, USB drives, hard drives and all other external storage media.
- The user interface of the program is simple, attractive and in-built with various advanced features.
- The tool allows you to preview your files before recovering them so that you know you are retrieving accurate files.
- Because of the read-only process performed by the tool, the retrieved data is flawless and without any unwanted changes.
Step-by-Step Guide to Recover Data By Using Iomega Data Recovery Software
Step 1 Launch Iomega Data Recovery Software
Download and install this remarkable Iomega data recovery tool from its official website. Launch the tool on your Mac for recovering data. On the user interface of the program, please select the file types that you are going to recover. If you are not sure what files you want to recover, you can just select the "All File Types" option and let the program takes care of the left. Then click the "Next" button.

Step 2 Scan the Hard Drive
Now a new list of all the hard drives will come up on your screen. Here, you can select any of the drive for scanning where you know your data is lost. In case the preferred hard drive isn't there, click on "Refresh Drives". Select your drive and click the "Start" button on the bottum of the windown, letting the software do the "Quick Scan" on your chosen drive.

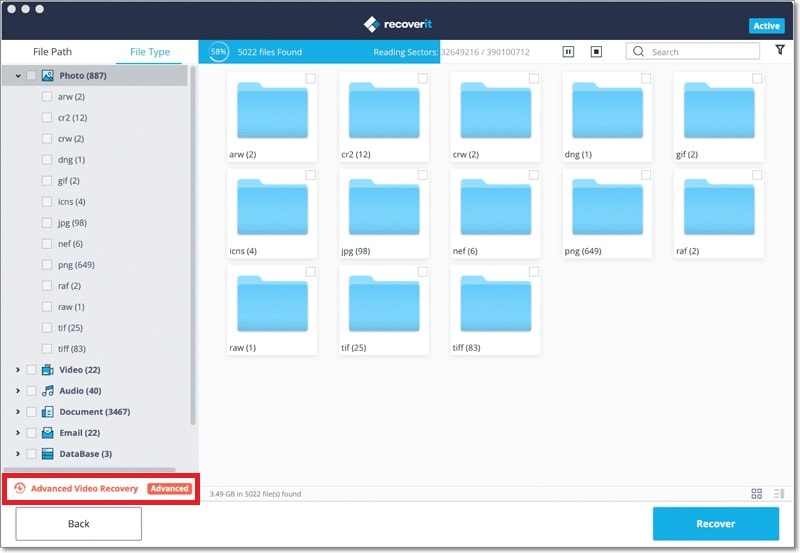
Step 3 Lost Data Recovery
After the completion of the scanning, all the items that were ever lost on the drive will sum up. You can preview them before restoring them back. When you have selected the files you want to restore, click on "Recover" button. The "Deep Scan" may be a bit time-consuming but it is more effective and thorough than the "Quick Scan" mode.
The tool may take varying time depending on the size of your files. Make sure you save restored files on another external device and not on the same drive again.

So, Recoverit (IS) is the picture-perfect tool for Iomega hard drive users. It enables them to recover all the lost files powerfully and efficiently.
Part 2. Troubleshooting on Iomega Data Recovery
Because the Iomega external hard drive connects directly to the system using a USB cable, there could be many reasons if it doesn't function properly. These are the few checks you can do for troubleshooting on Iomega data recovery.
- If the computer is not detecting the Iomega drive, it is very likely that the power switch located on the back of the drive is not turned on. Check the power and turn it on.
- Thoroughly check the entire USB cable extending from the drive to the system. Make sure it is inserted properly and both the ports are intact on their positions.
- Use a drive installation CD and install the drivers on your computer. You will be prompted for further steps as soon as you insert the CD on older Windows XP systems. After this, restart your computer.
- If you can avoid the USB cable, then it will be best to directly hook the drive to the computer. USB cable is very likely to be the most prominent reason your computer is not detecting the drive.
- If all other things are properly installed and the drive is still not detected, restart your computer once again.


