Losing data on Nexus 7 is not a new thing, all of us have been through this problem at some point in our interaction with technology. You might have lost data due to accidental deletion, formatting of the device, virus attack or even due to improper operation of the device. It becomes a very frustrating situation because data, of any kind, holds certain importance and losing it can cause unexpected problems. However, don't worry, now there are various ways for Nexus 7 data recovery, read on to know more.
- Part 1. How to Recover Deleted Photos and Videos from Nexus 7
- Part 2. Recover Deleted Files from Nexus 7 on Windows PC
Part 1. How to Recover Deleted Photos and Videos from Nexus 7

You can recover your lost photos and videos from your Nexus 7 to your Mac by simply using a software or tool. Recoverit for Mac (or Recoverit for Windows) software is one of the most trusted in this field because it guarantees confidentiality of your data as it simply reads available data and doesn't store any of your data.
Why Choose This Nexus 7 Data Recovery Software:
- It supports recovery of more than 550+ formats of data.
- It allows you to preview all found data before recovery.
- It is fully compatible with all the latest Mac OS and Windows system.
- Provides two scanning options – standard and deep scan.
- It recovers data with original quality and details as well.
Steps to Recover Deleted Photos and Videos from Nexus 7
Step 1. Connect the Device to the PC and Select File Types
After you have downloaded and installed the iSkysoft Nexus 7 Data Recovery software, launch it. Now, connect the SD card/memory card of your Nexus 7 phone with your PC. You can use any method you like, you can use a card reader or simply connect your phone with the PC. Then, select the required file types and click "Next".

Step 2. Select Target Location
You will be shown the different types of locations from where data can be recovered, click on the "Memory Card" option and then click "Start".

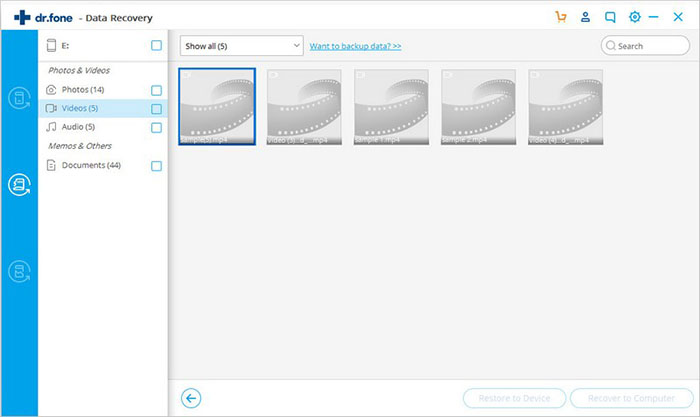
Step 3. Preview and Recover Data
After scanning, the software will display the files it could locate. You can select the files you want and click on the "Recover" option. If you are not able to see the files you wanted, then select the "Deep Scan" option.
Part 2. How to Recover Deleted Files from Nexus 7 on Windows Computer
Nexus 7 data recovery, including photos and videos, is not as hard as it might seem. There are certain available tools and software that can help you recovering your deleted photos and videos from your Nexus 7 phone on your Windows PC; one of the best and most user-friendly software is the iSkysoft Toolbox – Android Data Recovery software. It can help you in Nexus 7 data recovery.
What Make This Nexus 7 Data Recovery Software Outstanding:
- It is one of the quickest solutions and can recover data within minutes.
- It is certified virus-free software and, thus, a risk-free option for you to use.
- It helps in recovering data from your SD card as well as internal storage.
- It supports numerous file types for recovery like photos, videos, messages etc.
- It is one of the few software that also recovers Whatsapp messages and call history.
Step-by-step Guide on Nexus 7 Data Recovery
Step 1. Install and Launch the Nexus 7 Data Recovery Software
Once you launch the software on your Windows PC, a display window will pop-up, click on "Data Recovery" and then click on the option of "Android SD Card Data Recovery".
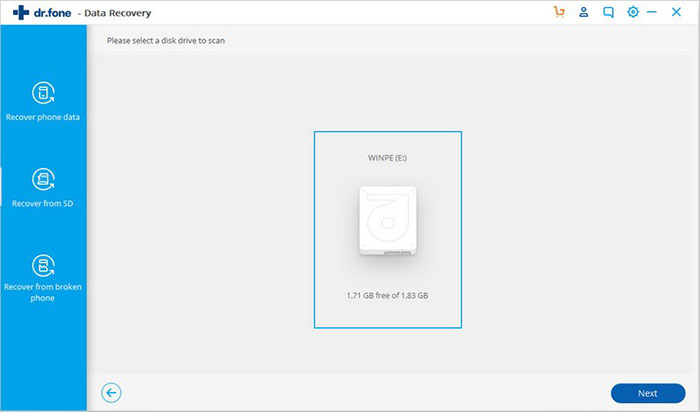
Step 2. Connect Nexus 7 to Computer
You can opt-for any way, whichever is easier for you. Either you can connect your phone as an external device with your PC or you can simply insert your SD card into a card reader and then connect it with your PC. Once done the card will be displayed on screen as soon as it is read, select it and click on "next".
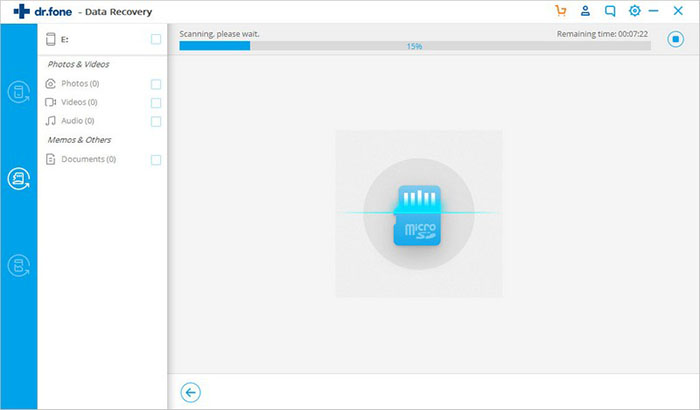
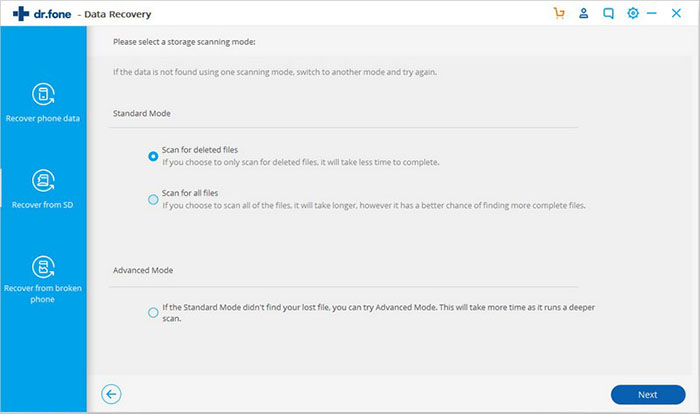
Step 3. Select Scanning Mode
You will be shown two scanning options – standard and advanced. Go ahead with the standard option, in case, it is not able to locate and recover your required files then later you can select the advanced scanning option. Click "Next".
Step 4. Complete Nexus 7 Data Recovery
The software will automatically display (within some time) the files that it was able to locate and you can preview these files. If they are the ones you required then simply select them by clicking on them (a tick-mark will appear on selected one) and then click on "Recover".