The article will ensemble you with the fundamental information to recover lost videos. The explanations for the loss of video data from a hard drive or external storage devices could be a result of physical or programming corruption. Discovering the condition is essential to pick the best measure that will help to restore video. Regardless, the headway in innovation has allowed to programming to introduce stringent parameters that are fit for checking a hard drive division-by-division. We would furnish with the vital data to restore videos from a hard drive and external storing units.
Part 1. How to Restore Video on Mac or Windows Computer
The utility device that we will speak about today is iSkysoft Data Recovery for Mac (or iSkysoft Data Recovery for Windows). It uses the latest improvements that aid the recuperation of information without conveying on extra damage to the drive. The essential point of view of the program is getting back the lost recordings utilizing four unique procedures that it uses as a piece of recouping data. The one-stop solution regarding recovery of data, Recoverit (IS) is like a well-prepared soldier for retrieval of various documents and different video extensions. In this way, you will have the opportunity to get a good position in recovering data autonomous of the file.

Step-by-Step Guide to Restore Video on Mac
Step 1. Users can get Recoverit (IS) for Mac from the iSkysoft site. Installing of the program is like different applications on a Mac – by relocating the .exe document to the Applications folder. Start the product by tapping the iSkysoft symbol that shows up on the desktop. Recoverit (IS) will open the essential window displaying the supported file types. Choose the file types that you want to recover. Then click on the "Next" button.

Step 2. The program will open another screen where you will see the partitions of the hard drive. On the plausibility that there are no noticeable allotments, use the refresh icon to refresh the screen and get back the listing. From the available partitions, pick a reasonable drive that contains the eradicated videos. Choose "Start" from the menu bar to allow iSkysoft to look for the records.

Step 3. After completion, the program will open another window demonstrating the recoverable records. It will, in a manner, show record health status, which gives the likelihood of picking the necessary files that have great success without any further data loss. You can tick the videos that require recuperation against the checkboxes, and press "Recover" from the menu bar to begin the retrieval of data. Pick the path where you wish to save the documents. The prescribed alternative is to select an outside storage gadget. Allow Recoverit (IS) for Mac to complete the method after which you can open the destination folder to view the recuperated video records.

Note:
- You can constrain the search using the "Search File Type" feature and pick Videos as the interested parameter.
- Activate "Deep Scan" to build the odds of discovering more files from a designed/erased segment
Part 2. Video Thumbnails Missing: How to Restore Video Thumbnails
The process requires the use of a shell extension package to restore video thumbnails. The guide will help you with the process necessary to get back thumbnail preview of videos rather than the application icon that plays the media.
Step-by-Step Guide to Restore Video Thumbnails
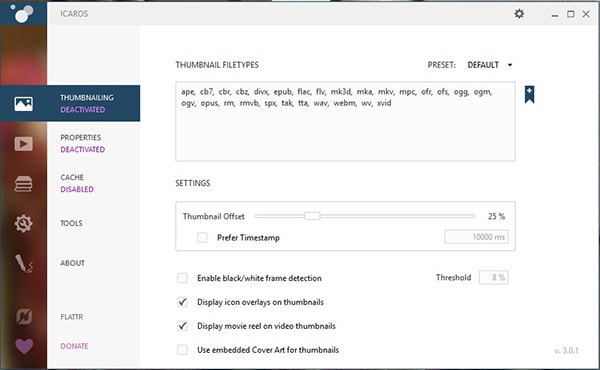
Step 1. You can download the file extension package ICAROS, which is a freeware from the internet. The latest version supports different file formats of the most recent video extensions making it easy to fix the files. Install the software by clicking the executable file. After completion, launch the program, where you will see the primary screen of the tool containing different options. By default, the page displays the thumbnail file types related to the pictures as shown in the image below.
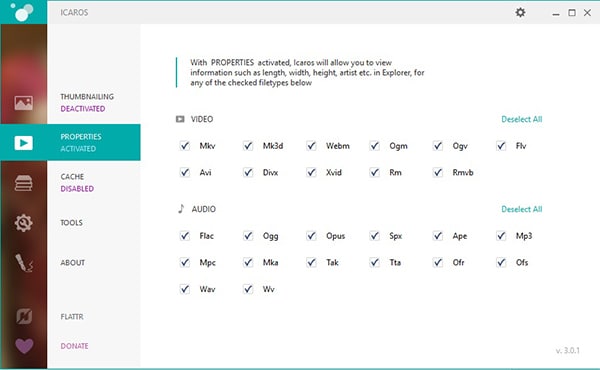
Step 2. From the left side, navigate to the video icon. You will notice that the “Properties” is in “Deactivated” mode. Additionally, you will notice all the file formats that the software supports. Depending on the requirement, choose the selection of the file extensions, and click the Deactivated text.

Step 3. Upon activation, the window changes the Properties definition to active mode. At the same time, the software refreshes operating system, making the necessary changes. As the software makes the necessary shell extension modifications, you can now easily check for the thumbnail preview of video files in the selected folder.
Part 3. How to Restore Video from YouTube If You Delete It Carelessly
Step-by-Step Guide to Restore Video from YouTube
Step 1. Before commencing the process, ensure that you have Download YouTube Videos extension for your Firefox web browser. You can download it from the Mozilla store. Login to your YouTube account and navigate to My Videos. In the next screen, choose Insight from the menu bar as shown in the figure.

Step 2. From the screen, you will see the total views of the videos posted. You will also see the removed videos. Among them, look for a particular video that you like to recover. YouTube will open the details of the video in a new screen. Mark the video against the checkbox provided. YouTube will open the file, and you can notice the following screen displayed.

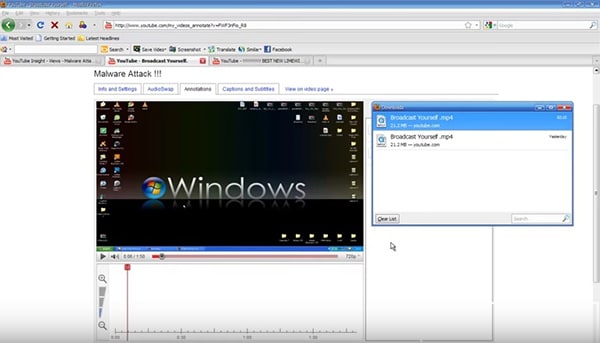
Step 3. Now, from the address bar, copy the annotation or the last identification number after the "=" as displayed in the figure below. Now, head back to My Videos to view the list of the files uploaded. From it, choose any video and opt for Annotations button as shown in the figure below.
YouTube will play the selected video in new window. Pause the video, and in the address bar, delete the identification number of the video after "=" mark. Delete it and paste the copied identification of the deleted video. Press enter key to allow YouTube to play the video. From the menu bar of Firefox, you can use the Save Video option to begin downloading the deleted video from YouTube. The Save Video option is embedded because of the extension downloaded from the add-on store. Pressing the button will allow you to save the file in different options. After selecting the option, the extension will begin downloading the file. You can view the file from its stored path after completion with ease. However, the time consumed is dependent on the internet speed and after the video in YouTube completes full buffering.