Reasons to transfer iPhone music to Mac:
1. Limited iPhone storage space: iPhone has limited storage. If you have too many songs on iPhone, then you may can't install more apps, take pictures or store more documents;
2. For security: it is inevitable for iPhone users to encounter errors that’ll need your phone to be wiped out before being restored to its factory settings. To avoid loss of your music files in such situations, it is highly recommended to keep copies of your iPhone’s music on your Mac.
3. Getting your iPhone and Mac in sync: if you have downloaded songs directly from our iPhone, you should rip music from iPhone to Mac for future sync. If you fail to do so, then the next time when you sync your iPhone with your Mac, all songs on your iPhone will be erased.
IMPORTANT: if all the songs on your iPhone were purchased from iTunes store, then you can use iTunes to copy them back to iTunes library on your mac (steps are in part 2). If songs on your iPhone are non purchased onces, you shold try dr.fone to copy these songs from iPhone to Mac, because iTunes can't do it (check part 1).
To copy music from iPhone to Mac, dr.fone for Mac, is strongly recommended to you. Without it, you will fail to do the task unless you try another this kind of tool.
- 1 click to download music from to Mac without duplicate;
- Rip music from iPhone to Mac selectively;
- Export playlists from iPhone to Mac intelligently;
- Copy playlists with rating and play counts to iTunes;
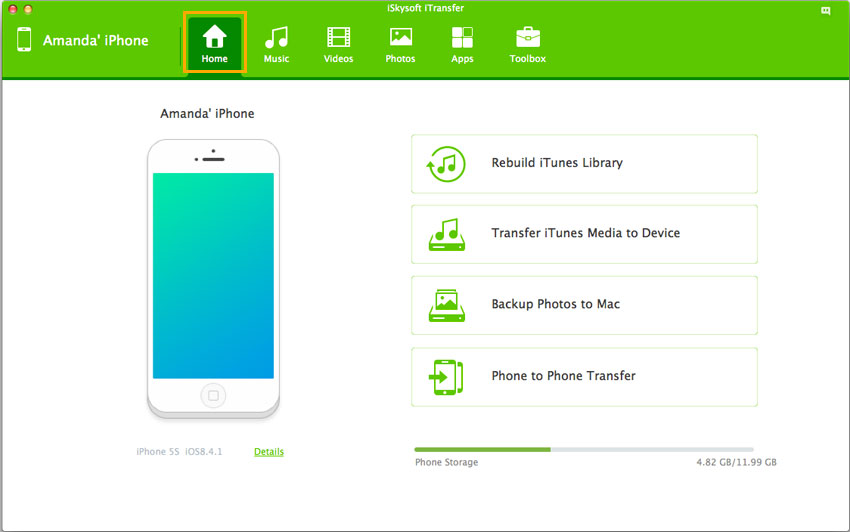
Step 1. Connect your iPhone to your Mac and launch dr.fone. dr.fone will display your phone’s information once it’s detected.
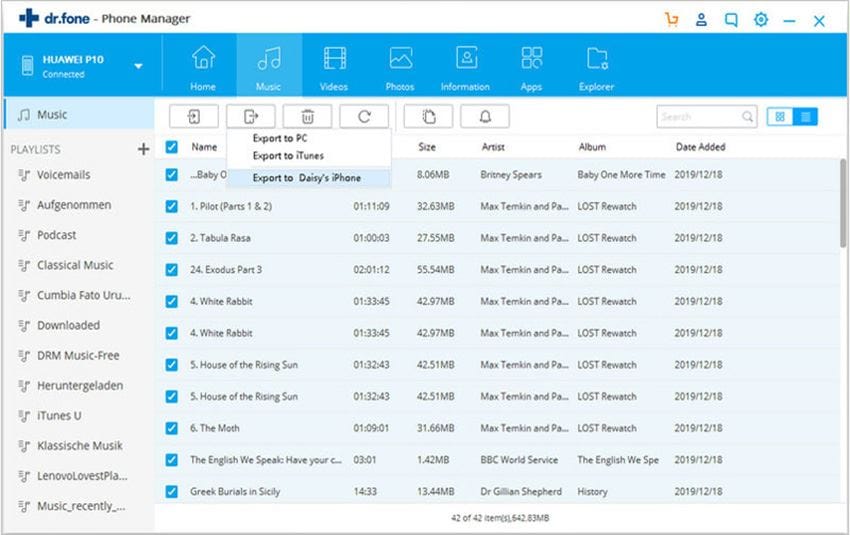
Step 2. From the main window, you can see the smart access to transferring music from iPhone to Mac and iTunes for you. Tick the songs you want to transfer to your Mac, and then click "Export">"Export to Mac". The songs will be saved in a local folder on your Mac.
Part 2: How to transfer music from iPhone to Mac via iTunes
You can also use iTunes to transfer your music from your iPhone to your Mac. Take note that while iTunes offers an efficient way to do the trick, only music purchased from the iTunes store will be carried over to your Mac. You’ll have to manually transfer or use a third-party app such as dr.fone for non-purchased music.
Anyways, here’s how you do it with iTunes:
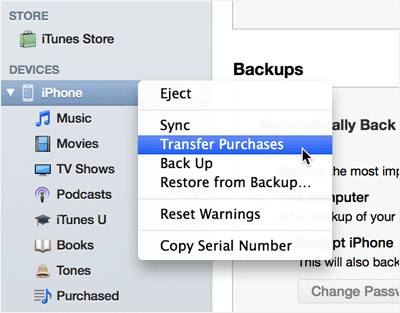
Step 1. Have your iPhone connected via a USB cable. Open iTunes if it doesn’t launch automatically. Then go to File, Devices, then to Transfer Purchases. On the other hand, you can press Command+S on your keyboard if iTunes’ left pane isn’t visible as it is on the screenshot below. Right-click on your iPhone’s name and hit Transfer Purchases afterwards.
Step 2. iTunes will then start transferring the music you’ve purchased using your iPhone and you’ll have the work finished in a little while.