


Photos are not mere images. These are actually the precious moments that are to be collected to make up the memories. It is therefore advent that these are to be saved so that there is never an issue to lose them at all. In this tutorial the top ways to make auto backup Android happen will be discussed in great detail. The processes that are mentioned here are the ones which are embedded with screenshots. It will therefore allow the users to follow the processes with great ease and satisfaction. It will also allow the users to overcome the issue that is related to normal or third party backup apps.
Part 1: How to Auto Backup Pictures on Android
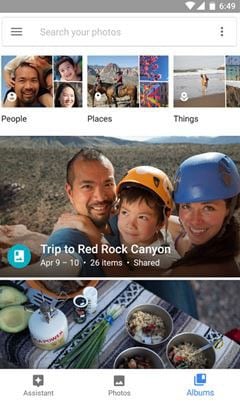
For Android auto backup photos phenomenon it is advised to use the Picasa application that will get the work done with ease. One of the most important points in this regard is to understand that Google has discontinued Picasa, it has been replaced by Google Photos. In order to use the Picasa it is advised to all the users to relate the processes to Google photos as Picasa upload is not possible through android devices that are launched recently. The process that is to be followed to use auto backup Picasa Android has been listed as below.
Step-by-Step Guide on How to Auto Backup Pictures on Android
Step 1. Open the Google photos app that was formerly known as Picasa.
Step 2. At the top left corner the menu is to be pressed.
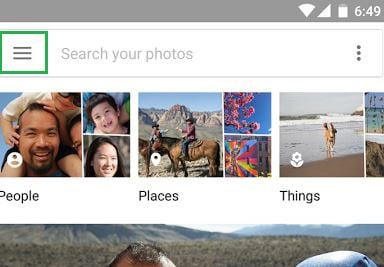
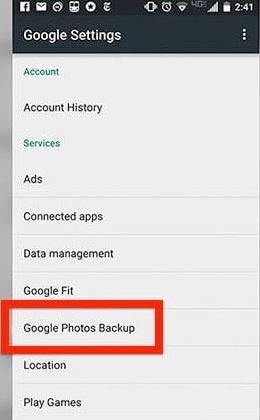
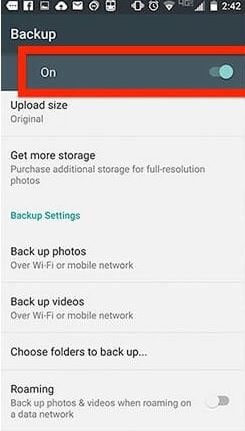
Step 3. Within the menu press the Settings tab, within the Settings there is an option of backup. Click it, alternatively it can also be accessed from the Google Settings once the app has been installed.
Part 2: How to Use Google to Auto Backup Android
Simply Google refers to the Google drive app that can be used to backup photos. In this section the complete process of uploading or in other words creating backup of the photos present on the android device will be mentioned with complete details. Each and every step is embedded with screenshots to make the process clear to the users who are novice. It will also allow them to apply the same process if there is a next time.
Step-by-Step Guide on How to Use Google to Auto Backup Android
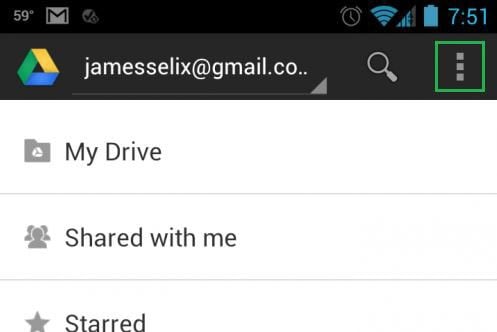
Step 1. After installing the Google drive app, the icon showing "… " at the right top corner is to be pressed to begin the process.
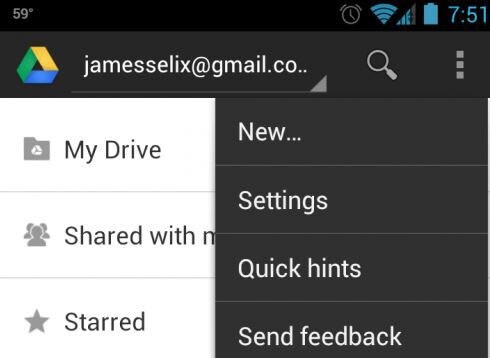
Step 2. Choose the new option to proceed in this regard.
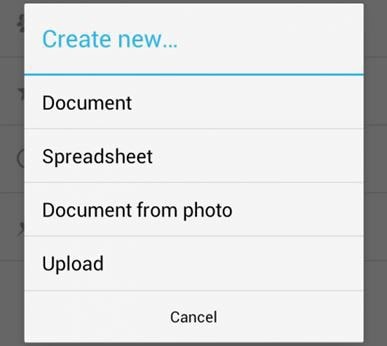
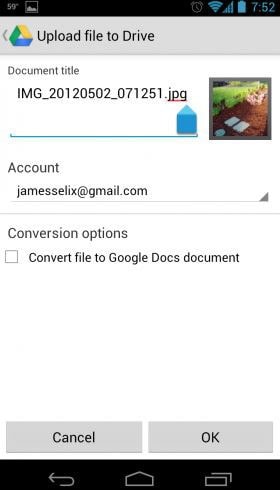
Step 3. Choose upload from the interface that appears next.
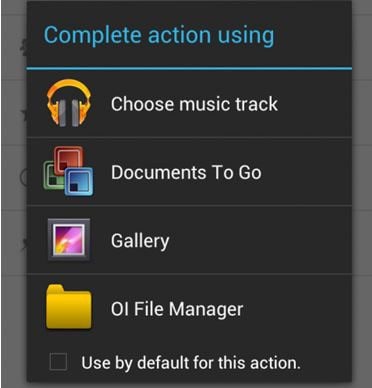
Step 4. Choose the gallery as the photos are mostly placed there by default.
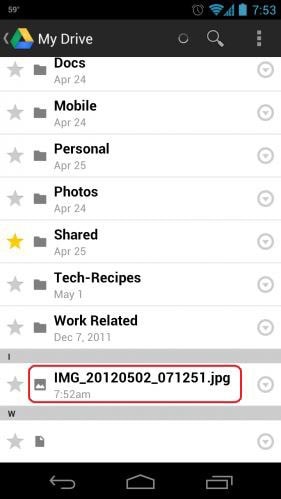
Step 5. The file can be seen in the basic or the root drive.
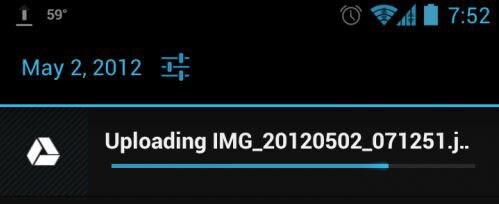
Step 6. In the notification area the user can see the uploading process.
Step 7. Once the process has been completed the user can see the picture in the drive app. This also completes the process in full.
Download MobileTrans to Transfer, Backup and Restore Phone Data
MobileTrans - Cross Platform Transfer, Risk-free and without Losing Quality
- The user can transfer the files to any other mobile platform including the Symbian, Android and even iOS.
- The data can be backup to the PC with this program. It means that now the user needs not to worry about device loss or theft.
- With this program the data that has been backup is 100% safe. This program has been thoroughly tested for the data integrity checks.
- The data which has been stored using this program can be retrieved with just one click. It shows that the program has been developed for the novice users for easy use.


