


With the current advances in technology especially the ever increasing processing capabilities of smart phones, there is a dire necessity for these devices to allow information sharing. It is not a secret that Android operating systems run on most portable/mobile devices nowadays. The mail support capabilities of these Android devices make them marketable and preferred by many people. If you own one android device or you are just interested on how you can transfer contacts from Outlook to Android devices, here is how to easily transfer contacts.
- Part 1: Transfer Outlook Contacts to Android without Tool
- Part 2: Transfer Outlook Contacts to Android via Desktop Tool
- Part 3: Transfer Contacts between Android Phones without Using Outlook
Part 1: Transfer Outlook Contacts to Android Directly on Your Computer
This is an easy method to transfer contacts from Outlook to Android with the help of Gmail Account.
Step 1: Export Outlook Contacts
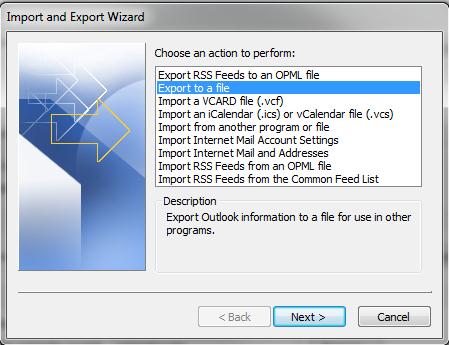
First open Outlook and go to Contact. Then click on the "File" menu and choose "Option" > "Advanced". Click on the "Export" option. And then in the "Import and Export Wizard", click "Export to a file" > "Next".
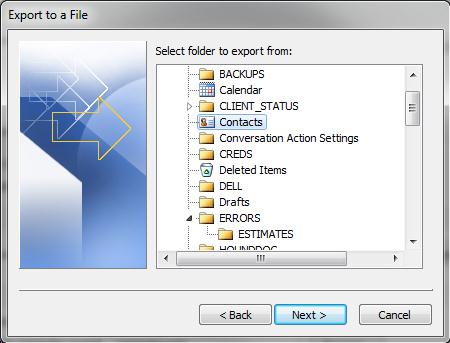
Now you will go to a new window. There click "Comma Separated Values" > "Next". Then choose "Contacts" and click "Next". And you need to name the file and choose a destination to save the file.
Step 2: Import Contacts to Gmail
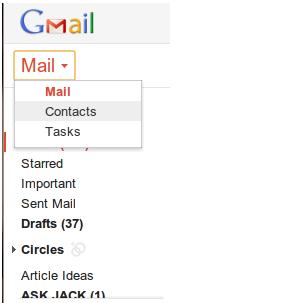
Log in your Gmail account. And go to "Mail" > "Contacts". Then move your mouse to the contacts pane to show the list. And select "Import Contacts". Now you can click the "Choose File" option and select the contacts file you have just exported from Outlook, and then import to Gmail.
Step 3: Sync Outlook Contacts to Android
On your Android phone, run the Sync. And it will do the auto sync to get the Outlook contacts. Or you can go to "Contacts" > "Menu" > "Account". Then tap "Google Account" > "Menu" > "Sync". You will have the Outlook contacts on your Android device.
Part 2: Transfer Outlook Contacts to Android via Desktop Tool
You can also transfer Outlook contacts to any Android devices with the help of a third-party software like MobileGo. Just follow the below 3 steps to do so.

Step 1: Connect to your computer
The first step is to get your tools ready. Download MobileGo to your computer and install the program. Launch the program and then connect your phone to the PC following the onscreen instructions. You will be prompted to scan the QR code with the mobileGo app to connect. Alternatively, you can use a USB to connect.
Step 2: Exporting Contacts to Android from Outlook
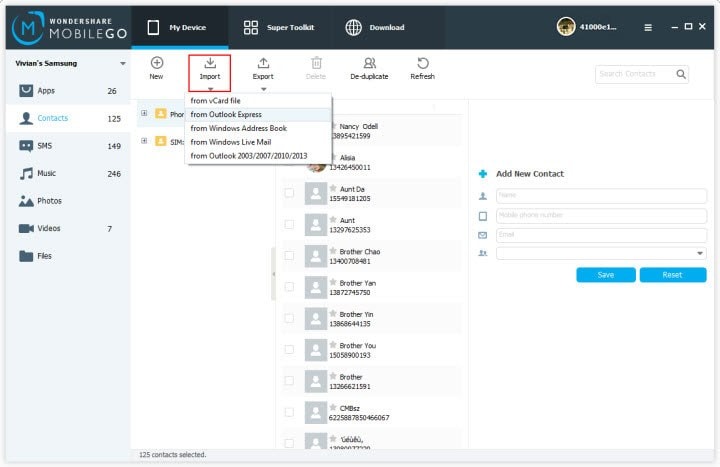
On the screen, you will see a window with a blue navigation panel. Tapping on the “Contact” submenu displays all the contacts in your Outlook account. Depending on the contacts that you want to transfer to your Android device, make a selection.
Click on Import/Export contacts to get the drop-down list. From the list, select Import contacts from computer to get another side menu. Finally, choose to import contacts from Outlook Express. This is as shown on the below screenshot. Click on the save option and wait for contact importation to finish.
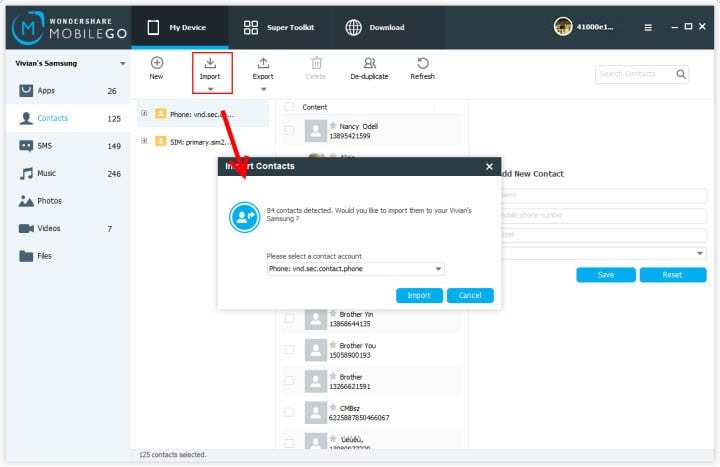
Step 3: Saving the Contact list
A pop-up window appears on the screen prompting you to choose your contact account to save to. On choosing your preferred, just follow the simple onscreen instructions until you hit on the “import” button. That’s it!
Part 3: How to Transfer Contacts between Android Phones without Using Outlook
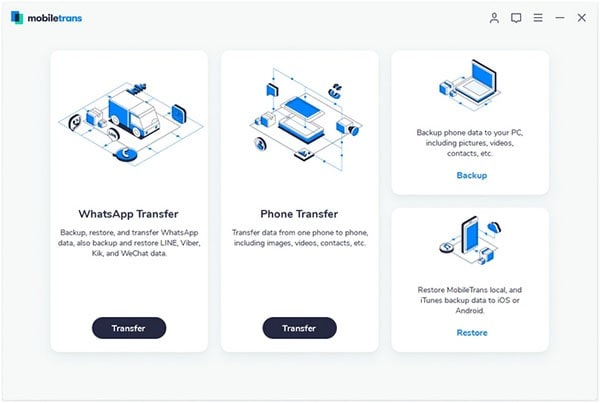
If you got a new Android device and you want to transfer contacts between the two devices, don’t freak out. It is easy to do this with the help of MobileTrans for Mac (for Windows users, you can use MobileTrans for Windows). Apart from the obvious file transfer (contacts, texts, music, photos, videos, and other files), MobileTrans also has the following features:
- Data backup: It is a highly efficient tool that allows users to safely backup their information.
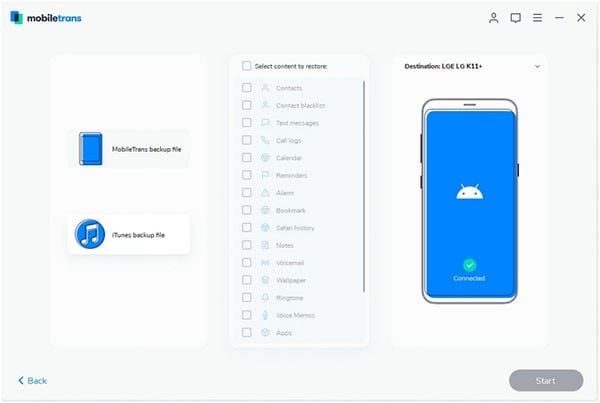
- Data Restoration: The software supports restorations from various platforms like Samsung Kies, iCloud, and iTunes backup. This backup data can be restored with a single mouse click.
- Personal Data Protection: This software offers a more effective method to delete completely files and clear residue files that lie in the phone memory.
- Supports a vast number of phones and Networks.
Steps to Transfer Contacts from/to Android
Step 1:
Start Phone Transfer on Mac or Windows. And click "Phone to Phone Transfer" to go to the transfer window.
Step 2:
Connect to the required device and Select files for transfer. This is done using USB cables, authorization is required so as to continue the process.
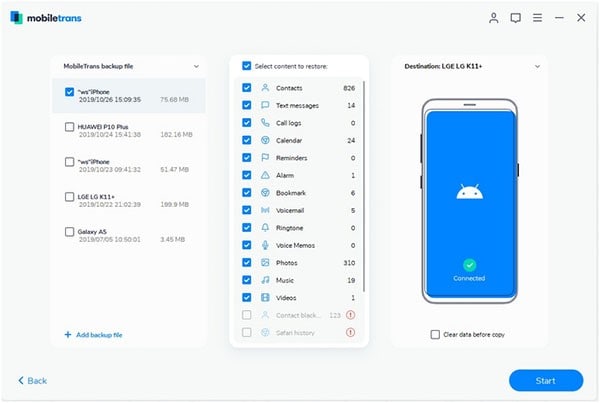
Step 3:
Once connected, start phone to phone transfer. Check on the files to transfer (in this case Contacts) and click on the “Start Copy” options. Your phone will start transferring the files.
Transfer Contacts from and to Android for Free
1. Using SIM management to move contacts
On your home screen, there is contacts icon, click on it and then tap on the Menu key on the left side of your phone. From the options that appear, choose “More” from the options ant then tap SIM management. From the options select Copy Contacts to SIM and press OK. A message “Processing” will be displayed and you will need to be patient.
2. Using Contacts Import/Export Function
On your old Android device, go to contacts. Tap on the Menu button/key and select Import/Export contacts. A number of options are displayed including “Export to SD card” and “Export to SIM card”. Depending on the number of contacts you want to transfer, you can choose any. If the contacts are more than 255, it is good to use the SD option since you con export them all at once.
3. Using Bluetooth
This entails turning on Bluetooth in both devices, selecting contacts that you want to transfer from your old phone and clicking on the menu to choose the option to share. Choose Bluetooth and identify the device to send to.


