


I tried to use Apowersoft Screen Recorder record my PC screen, but failed, who can help?
If you fail to record screen with Apowersoft Screen Recorder, look through your firewall and create an exception for the API. The API is trusted and you should have no fear of malware being installed on your computer. The tool comes with advanced security features on the Apowersoft servers, so there is nothing to worry about. You may also check that you have great Internet connectivity at all times, so as to have uninterrupted recording sessions. Here are the steps that you need to follow to ensure that you work well with this advanced screen recording tool.
- Part 1: How to Record Screen with Apowersoft Desktop Screen Recorder
- Part 2: Apowersoft Screen Recorder Alternative - Filmora Video Editor
Part 1: How to Record Screen with Apowersoft Desktop Screen Recorder
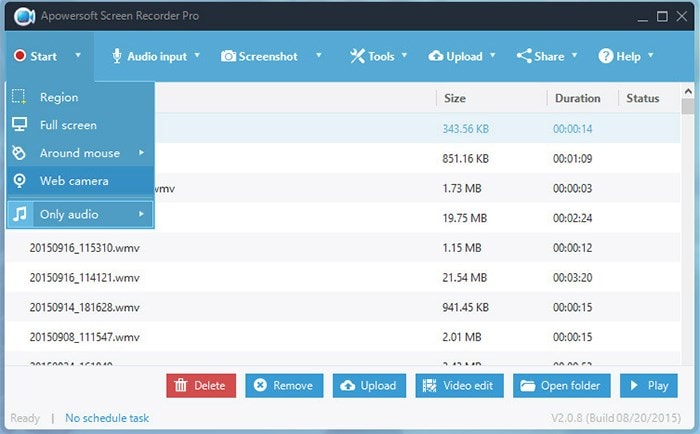
Step 1) Download the software. Download the software first. Once it is installed, click on the "Record" button to begin recording unlimited videos in your account.
Step 2) Customize your recording area. Using your mouse, drag to set the region that you want to record. Your recording will start as soon as you confirm the region. You can drag it to fit your screen for a full-screen recording. You can add a webcam overlay if you want to create instructional videos where your audience can see you.
Step 3) Edit your video in real-time. You can add annotations, call-outs, notes and other items in your video as you continue recording. This will add more interactivity and your audience will love watching your videos more.
Step 4) Stop recording and save your video. Click on the “Stop” button to end your recording session. You have the option of downloading the video and saving it to your local drive, or you can save it to the cloud. You can also send the video to your YouTube or Vimeo channels. Send to Google Drive, DropBox and many other online storage facilities.
Part 2: Apowersoft Screen Recorder Alternative - Filmora Video Editor
Filmora Video Editor can also be used to record your screen in the same manner as Apowersoft. The only disadvantage is that you cannot encode or edit your video using Filmora. The video is created in the Windows .WMV format, and you will have to use another video editing tool to edit your videos. However, one cannot downplay the features that Filmora offers, and these may be worth the effort, when you see how great your finished product will be.
Key Features of Filmora Video Editor
- Create custom region recording areas – Whether you want to record your full screen or just a small region, Filmora’s flexibility lets you author your video according to your needs.
- Clean video recording – With the ability to output high resolution 1080p video, you can create fantastic, clean videos for your audience.
- Recording from several sources Whether you are recording streaming video from your favorite online movie site, or recording your webcam, Filmora does a lot more than just record your screen. Adding webcam overlays is easy when using this tool.
- Record audio from your microphone and system – This versatile tool allows you to use either the system audio or the microphone to record audio over your video. As an added feature, you can also use both, such as when you are recording a video chat on Skype, or teaching people how to play a game, and you need to add your narration over the game’s sound effects.
How to record screen using Apowersoft Screen Recorder Alternative
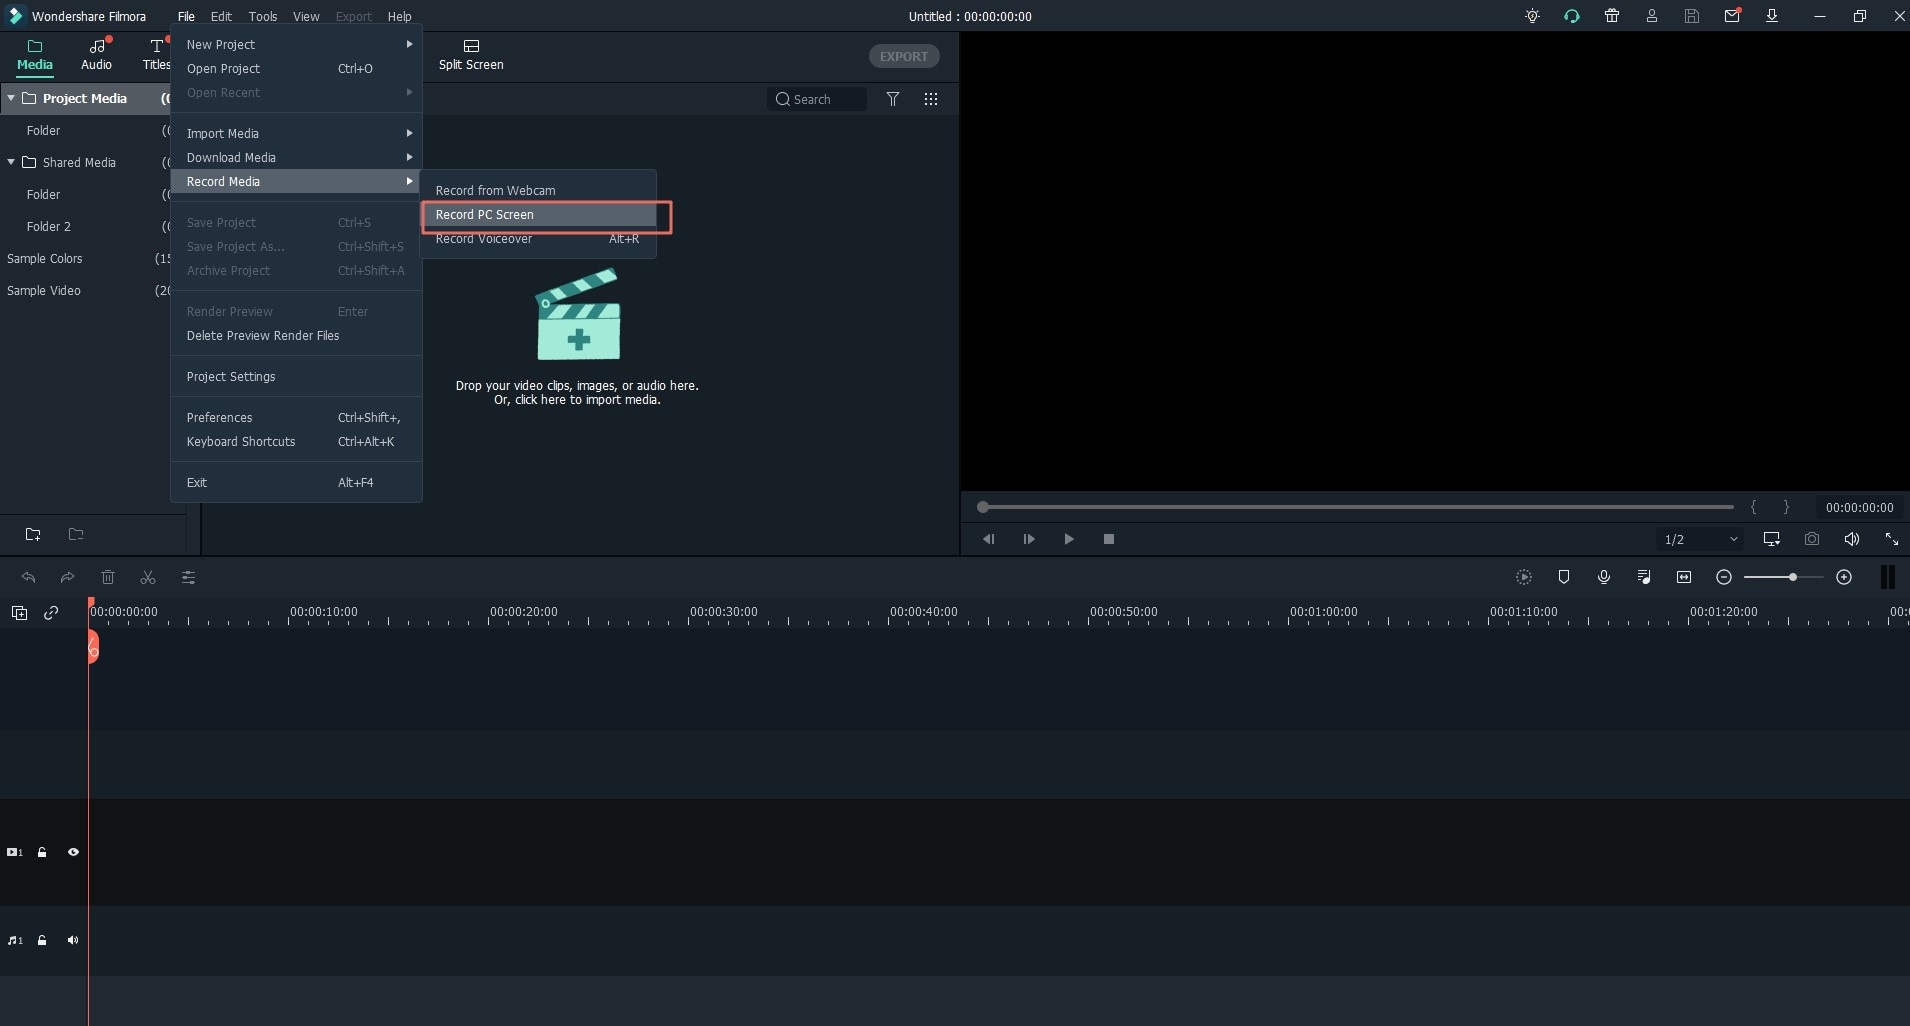
Step 1) Install and launch Filmora
Get the installer here and then install the recorder. When the installation is complete, it will, automatically launch your recording interface.
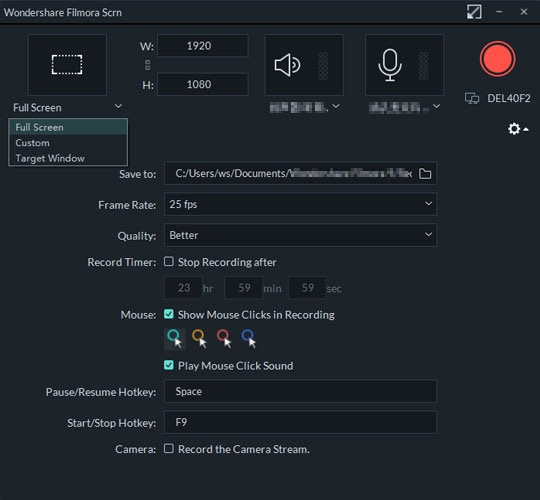
Step 2) Select the recording region
Decide whether you want a full screen recording or you want to define a certain area. Use the mouse to create your recording zone.
Step 3) Make your audio settings
Depending on the type of video you want to create, decide whether it would be best to use the system audio or microphone. You may also use both as mentioned earlier. The purpose of the video is paramount in determining what mode of audio recording you will use.
Step 4) Record your Screencast
Once you are satisfied with your video region and the audio settings, hit the “Record” button to start your recording.
Click on the “Stop” button when you are done with your session. Filmora does not encode the video and will only output the video in Windows .WMV format. The raw footage that you have just saved may be too large to send over the Internet. Get a good converter to save your video as .MP4 and then upload to your favorite video channel or your personal website.


