


There are several screen recorders that can be used to record a Minecraft game. However, not all will give you the quality that you need. The best screen recorder for Minecraft should produce video in high resolution. This will enable the players to enjoy the demonstration as if they were actually playing the game on their own machines. The recorder must also have the capacity to overlay your webcam on the screen; you need your audience to see how you play the game.
- Part 1: Best Screen Recorder for Minecraft - Filmora Video Editor
- Part 2: Recommend another Screen Recorder for Minecraft - Apowersoft Screen Recorder
Best Screen Recorder for Minecraft - Filmora Video Editor
Filmora Video Editor is one of the best Minecraft screen recording tools that you can find. It has powerful features and is easy to use. The only downside is the fact that you can only save the video in .WMV format – you will have to edit the video in another tool so as to encode it in .MP4 format for easy dissemination over the Internet.
Key Features of Filmora Video Editor
- Record any area of the Minecraft game – You can choose to record the full screen, or concentrate on a particular region that you want to emphasize.
- Clear game replays – Since the tool record in high-resolution, the resultant video will be very clear for your audience to enjoy.
- Record from multiple sources – If you want to record streaming video from other Minecraft sites, you can easily do so. You will be able to create an overlay of your webcam on your screencast. This gives you a wide range of choices on how you will present your demonstration.
- Recording from both system audio and microphone – If you simply want to record the game sound effects, you can use the system audio alone. However, if you want to add your vocal instructions to the video, you can use both the microphone and system audio.
Step-by-step guide to record Minecraft screen on Windows PC using Filmora Video Editor
Step 1) Install and launch Filmora
Download the installer here and install the tool on your computer. It will launch once the installation is complete. If you already have it, you can launch it from your Windows Start Menu.
Step 3) Make your audio settings
Step 2) Select the recording region
The best option would be to record your full screen, but if you want to record a certain region, you can use the mouse to define the area.
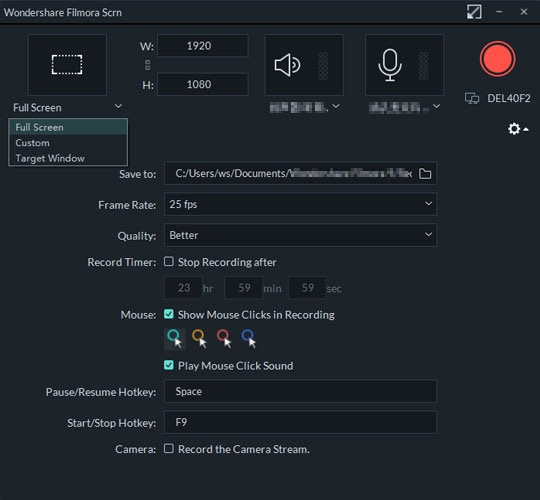
Step 3) Make your audio settings
Once again, you must be clear about how you want your audio to be set. If you will be giving instructions over the game sound effects, use both the microphone and system audio. This setting is also great when you have a webcam overlay on your video. If you simply want to use the game effects, use the system audio alone.
Step 4) Record the Minecraft Screencast
After setting the video region and the sound, hit the “Record” button and begin showing off your prowess at playing Minecraft.
When you are done with playing the session, click the “Stop” button to end the recording. You will save the video as a .WMV.
Recommend another Screen Recorder for Minecraft - Apowersoft Screen Recorder
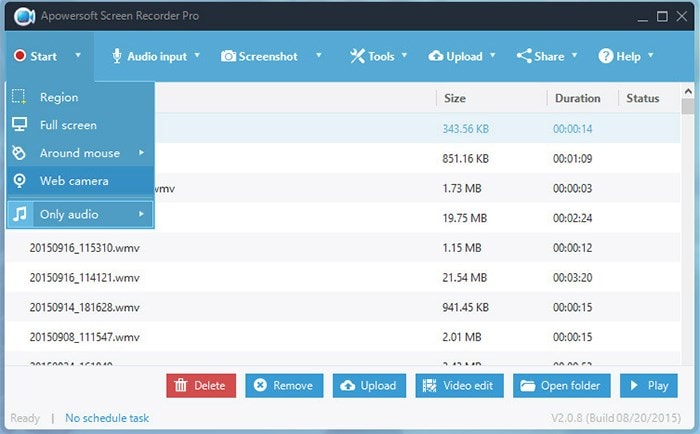
Apowersoft is another tool that can be used to record Minecraft. The tool is web-based so you will have to do your recording and editing online. Some of the features that set it aside include the ability to edit your video in real time. If you want to add text and other objects to your video, to further illustrate your game play, you can easily do so using Apowersoft.
Key Features of Apowersoft Screen Recorder
- Powerful recording features – You can record both audio and video simultaneously. You may also overlay your webcam on the video without experiencing any lag. You must have a good Internet connection for uninterrupted recording.
- Edit your video in real-time – You do not have to wait till the end of your recoding to edit the video. You can do so even as you are recording. Add annotations, notes and other items to make your video as interactive and interesting as possible; your fans will love your Minecraft recording more.
- Save to several formats – Unlike Filmora which can only save to .WMV, you can save your video to several formats when using Apowersoft. This allows you to send your video to several sites and users, irrespective of the formats that they are using on their video players.


