


Finally, it's Christmas again, the time for people to get together to share their happiness. There are many different ways to keep the good memories with your family members and friends. You can take photos, record videos, write or play some beautiful songs to others. All these things will join to form a perfect memory for a person, yes, joining different photos, videos and Christmas songs to make one beautiful and perfect video. In the following, I'm going to introduce you how to make a video with Christmas photos and songs.
A perfect Christmas videos should have beautiful elements, filters, amazing transitions, and Christmas photos and last but not the least, it should have a beautiful Christmas song such as Jingle bells. A perfect present to give someone close is the memories which will not cost you a single dime but will have the perfect emotions which no gift in the world can buy. In order to join different photos and songs into one video, you will need a perfect video editor which covers all these areas in a great way. Here, I suggest you try Filmora Video Editor.
- Part 1. Best Way to Make a Video with Christmas Photos and Songs
- Part 2. How to Share Christmas Video with Your Friends and Family
Part 1. Best Way to Make a Video with Christmas Photos and Songs
Filmora Video Editor for Windows (or Filmora Video Editor for Mac) doesn't only join the photos but will also add songs to your videos. The interface of this software is developed in such a great way that even the new users will not have to go to the deep tutorials to understand it. Most of the tools and options in Filmora Video Editor are present right on the screen and are one simple click away.

Why Choose This Christmas Video Maker:
- It provides a wide range of options to import the media, you can import the photos, videos and music from the computer, a folder, iTunes, Facebook and even from the Instagram.
- There are tons of beautiful transitions available in the software to join these Christmas photos
- The developers have also included the split screen feature which will let users to add on the same screen in a stylish way.
- Apart from these feature, you can either import the songs from a folder on computer or iTunes or can use the already present songs in the music library of Filmora Video Editor.
Easy Steps to Make a Christmas Video with Photos and Songs
Apart from these amazing features, it also has cool christams effects and great Christmas elements which are specifically related with the Christmas and can be added with just one click. Christmas motion elements include the Santa Clause's socks, beard, Christmas trees, bells and much more. You can set these elements in motion without a single problem. Once you have joined all these Christmas photos and songs to from one perfect video, you can easily export it from the software with one click. You can either export the videos in an appropriate format or can upload them directly on the YouTube and Vimeo or can burn them on DVD.
Step 1. Download Christmas Video Maker Software
Get the latest version of the Filmora Video Editor or update the previous version to the latest version. The latest version includes beautiful Christmas motion elements, effects, and Christmas songs. After installation click on Full Featured Version which will show all the options on the screen.

Step 2. Import Christmas Video Clips
Click on "Import Media Files Here" button to Import all the Christmas photos, songs and videos to the Filmora Video Editor, you can import the photos from a mobile phone, folder, Facebook, Instagram and even flicker. Select the files that you want to and click on Load to import the files.

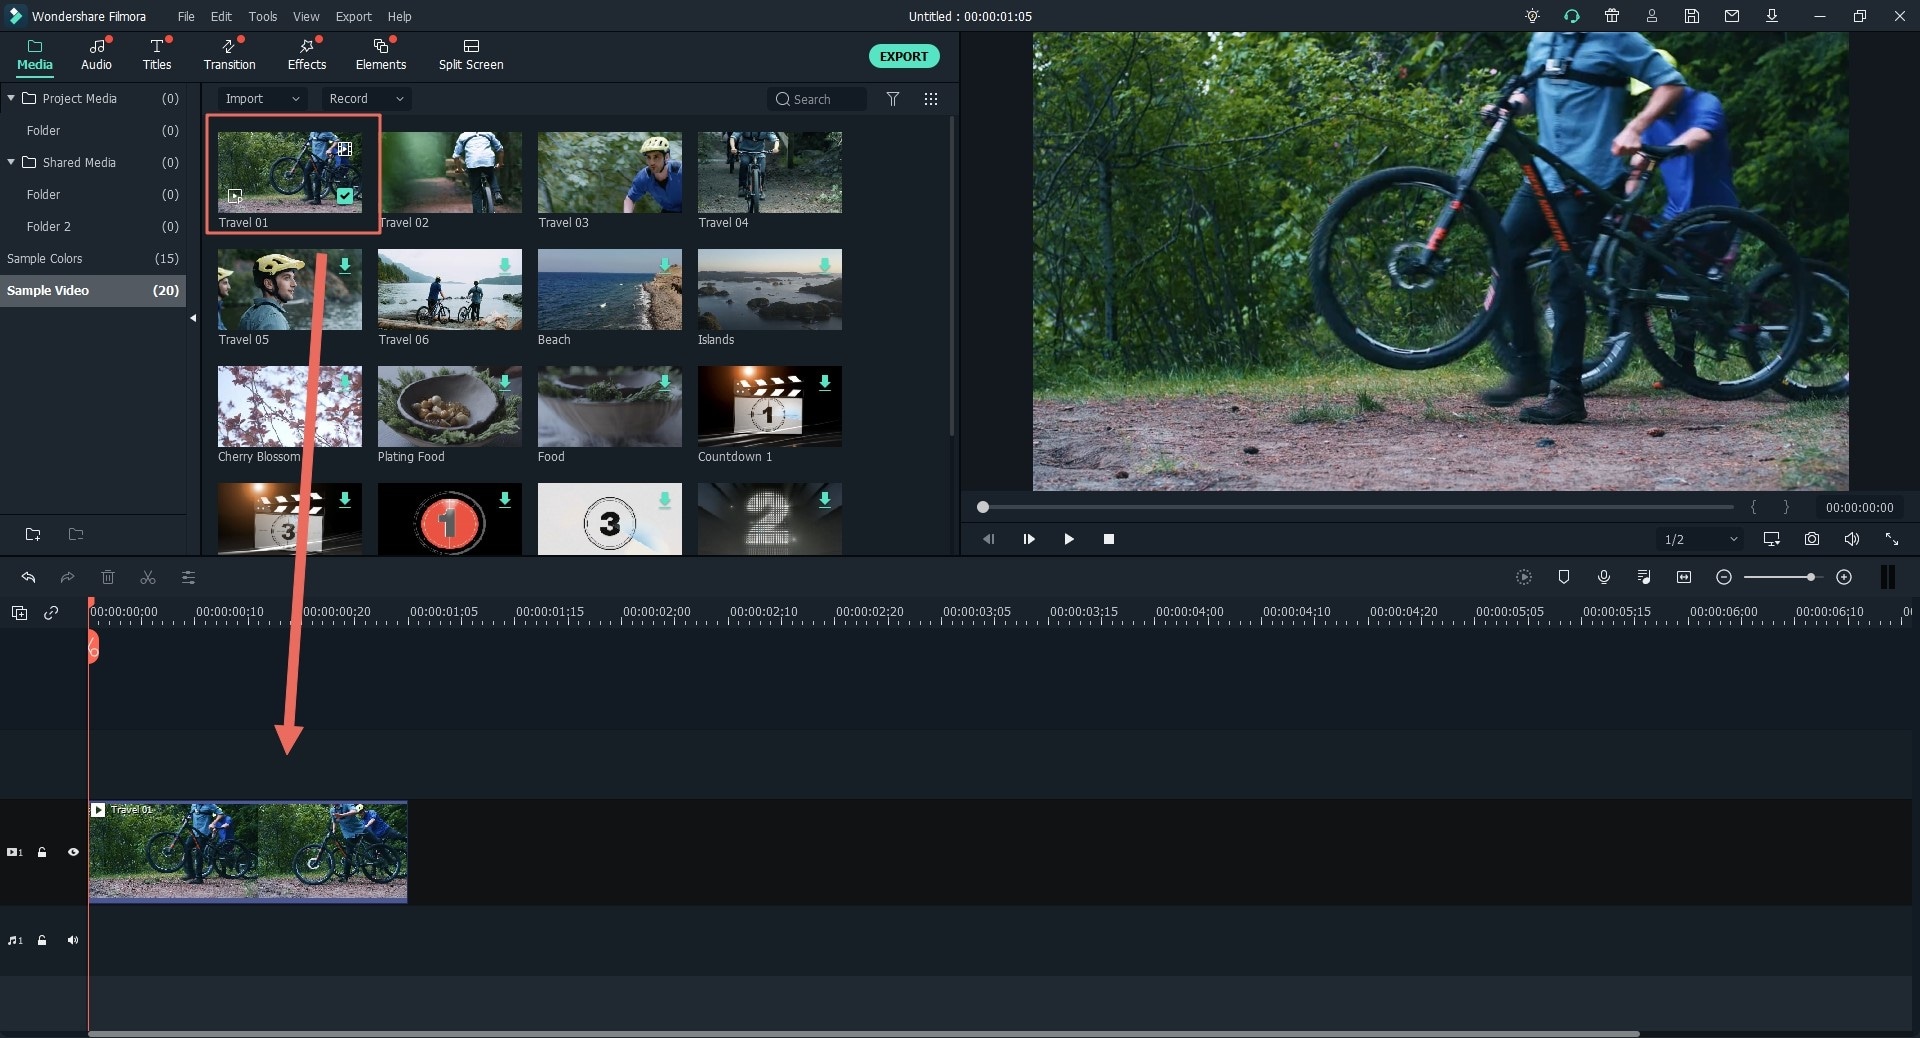
Step 3. Drag Files to Timeline to Combine Them
Now, move the images one by one to the timeline of Filmora Video Editor, simply drag and drop the image to the work station. You can also select different images and click on the little "+" button to move them to the editing area as shown in the screenshot below.
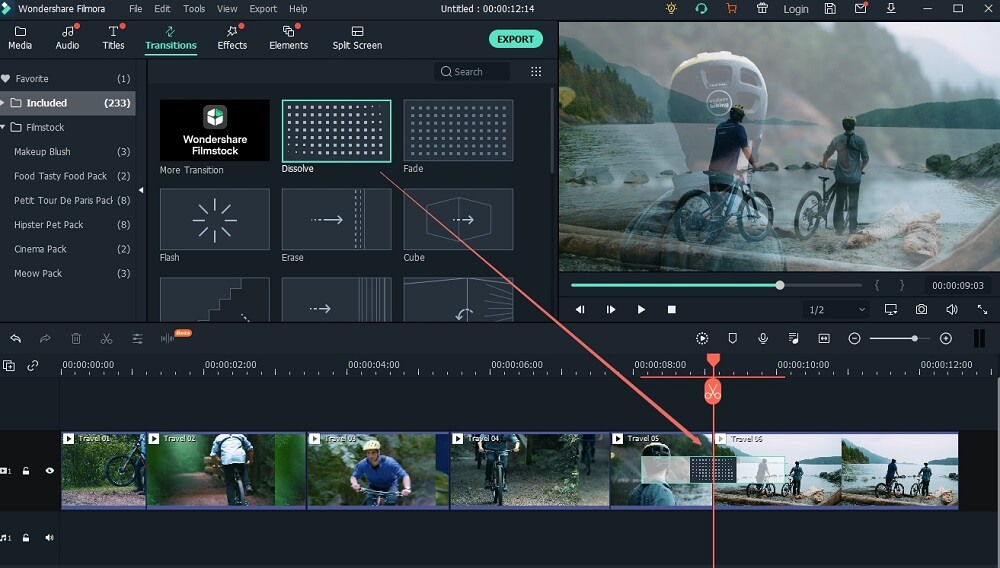
Step 4. Add Transition Effects
Once you have the photos in the editing area, you can move them to the right or left side. Beautiful transitions can be added between the images by clicking on the Transitions icon and selecting a transition. Now, move this transition between two images.
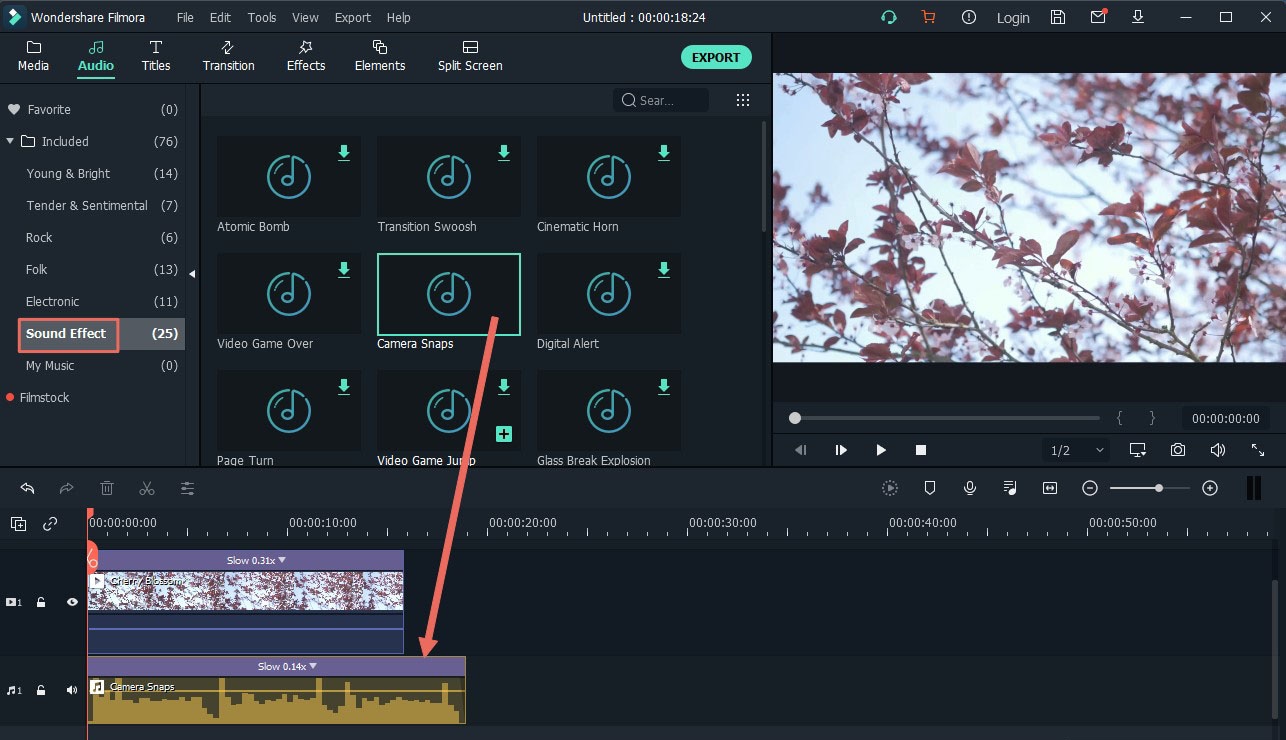
Step 5. Add Background Music to Christmas Video
Once the Christmas photos are in line, you can add Christmas songs to them, import the music from iTunes library and simply drag it to the editing area. You can also click on the music icon to unveil the music library of the Filmora Video Editor, double click on a track to preview the track. Now, click on the "+" button to add the track to your videos.
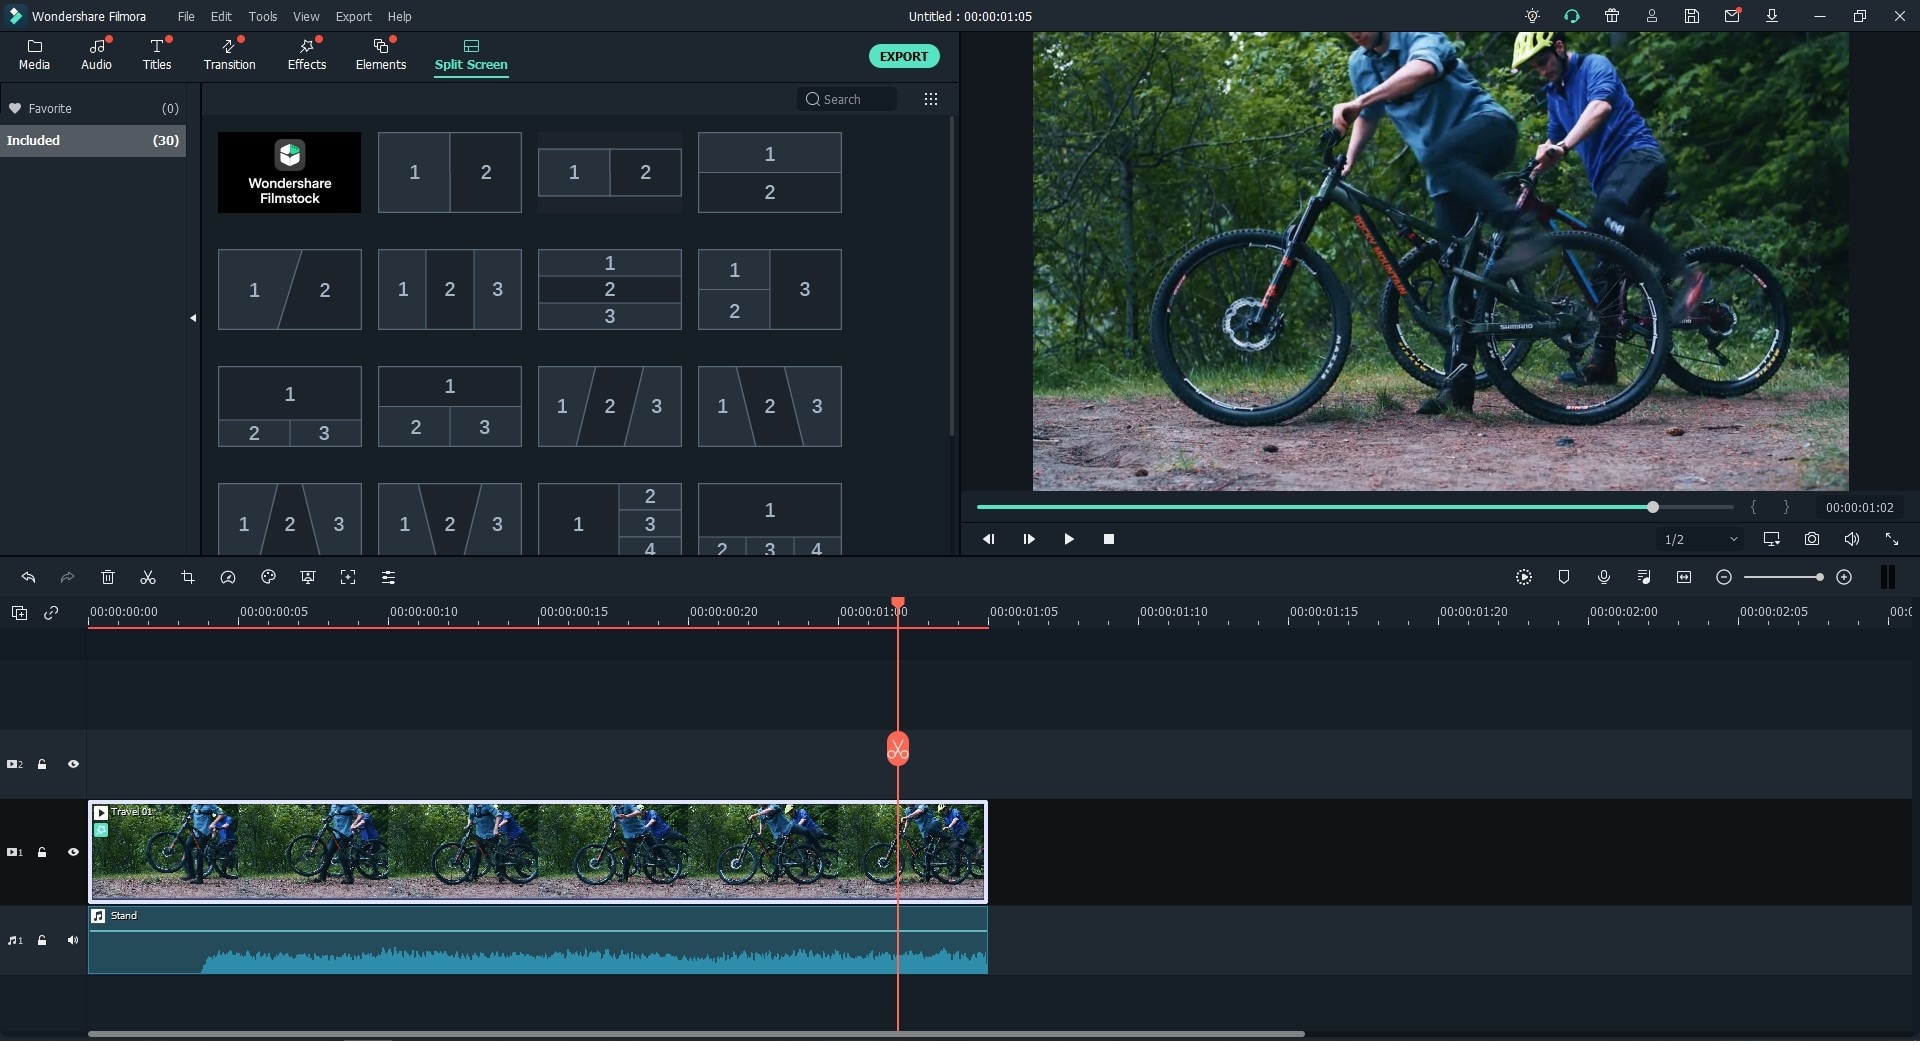
Step 6. Add Split Screen
This step is for those users who want to add split screen effect (adding two photos in one screen). Click on Split screen, select a style for your photos and add different photos in different regions. There will be a drop 1 zone, drop 2 zone and drop 3 zone depending upon the style that you selected. Select the photos and click on OK to apply the split screen effect.
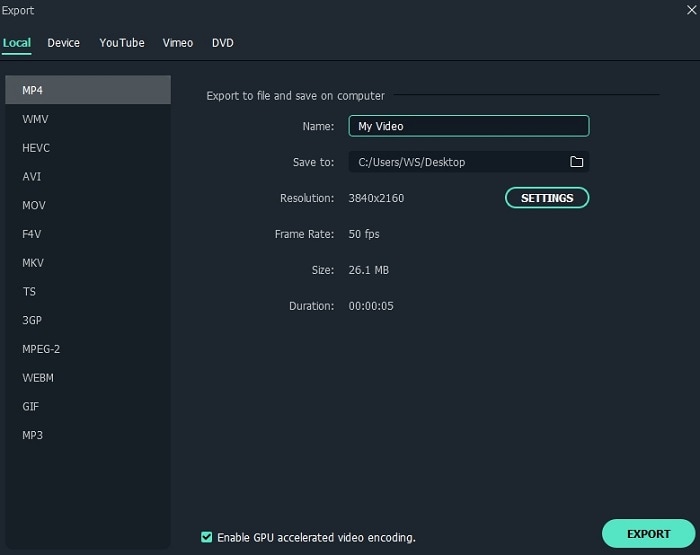
Step 7. Export the Christmas Video
This is the last step to export the perfect video from Filmora Video Editor, Click on "Export" button and here you can select the output format from a list of given formats. The best part is that you can select a device and Filmora Video Editor will automatically set particular settings for that device. Moreover, you can also upload your videos directly to the YouTube and Vimeo with one simple click from the export options.
Part 2. How to Share Christmas Video with Your Friends and Family
If you captured photos, videos or audio of past Christmas celebrations, you can use the media to keep the memories alive by sharing them with friends and family. In the past photos were stored in physical albums and people had to either visit you or you had to take the album to them for them to see the photos. This is not the case anymore, with the advent of social media, sharing of captured memories has never been easy. It does not matter which social media your friends and family prefer, you can share audio, photos, and videos in simple steps. In this part, we will show you how to make Christmas video and share Christmas video on Facebook, Twitter, YouTube and Instagram easily.
1. Share Christmas Video on Facebook
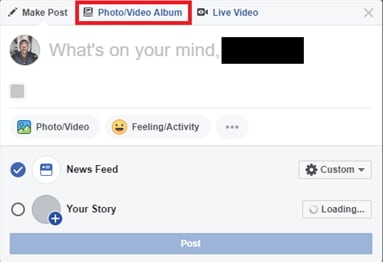
Step 1. Login to Facebook
Head over to Facebook offcial website and log in or sign up if you don't have an account. Click on Photo/Video album to display an "Open" dialog where you can select all the media file you want to share with friends.
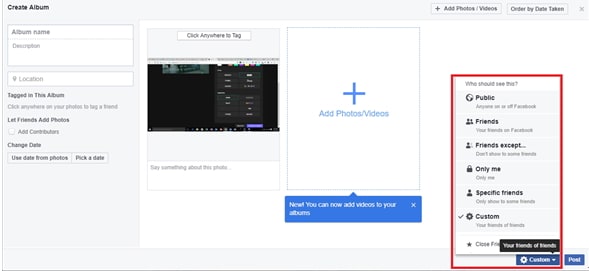
Step 2. Set Who Can See the Video
On the resulting "Create Album" dialog, you can edit who can see the album and other options. Using these options, you can set only your friends to see this album, you can also exclude some specific friends.
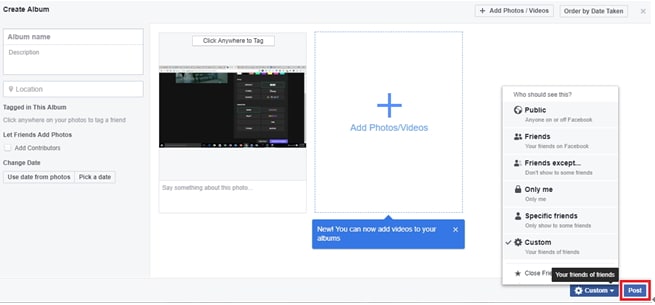
Step 3. Post Christmas Video on Facebook
Click on "Post" to post your album to family and friends.
2. Share Christmas Video on Twitter
Step 1. When you are on the twitter homepage, and you are logged in to your account, click on "Tweet" button on the far right. Click on "Gallery" icon and select the images and videos you want to share. You can also type a short tweet describing what the media is about.
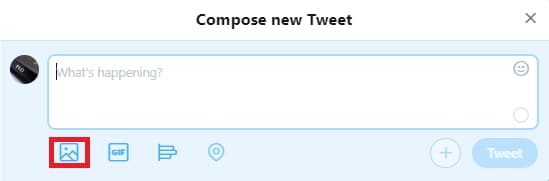
Step 2. Click on "Tweet" button to post images to friends and family.
3. Share Christmas Video on YouTube
(Or you can export edited Christmas video to YouTube directly in Filmora Video Editor)
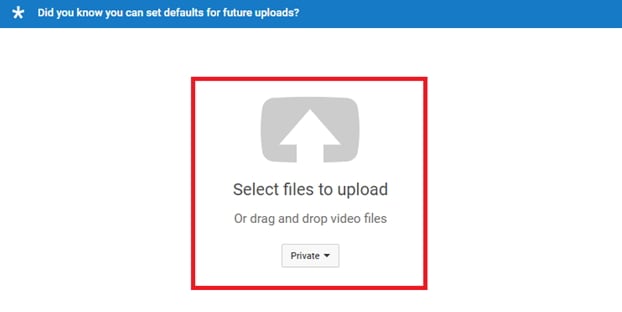
Step 1. Visit the YouTube Homepage
While already being logged in to your google account, head over to YouTube using your favorite web browser. You should use an updated version of your browser to ensure no compatibility issues arise.
Step 2. Create A Post
Click on "Create a video or Post" icon and select upload video.

On the resulting upload page, click on the upload button to select video files you want to select.
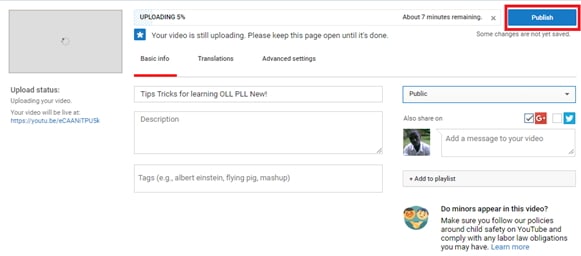
Step 3. Customize and Publish
As the video is uploading, you can customize a few options including Title, Descriptions, and Tags. You can also filter who can see the video. After the upload is finished publish the video by clicking the "Publish" button.
4. Share Christmas Video on Instagram
Step 1. Login to Instagram
Head over to your App Store and download or update Instagram to its latest version. Tap on the "Home" button in the bottom navigation bar. Scroll to the very top of your timeline and click the "Direct" button on the top right of the Instagram app screen.

Step 2. Add Contacts
On the resulting screen, click on the plus icon and select your family and friends who you want to share the media with.

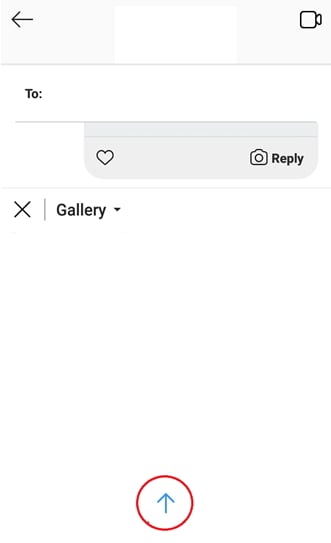
Step 3. Add Media from the Gallery
Click on the gallery icon to select media from your galley. If you want to capture the picture directly, press the button with "Camera" icon. This will open the camera app where you can capture the image or record video.
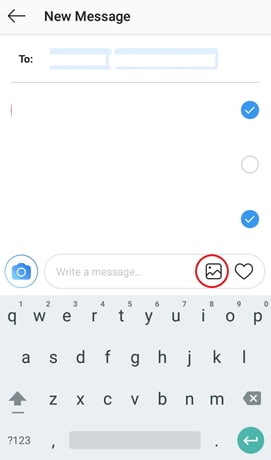
Step 4. Send A Message to the Selected Family and Friends
The last step is simple. After selecting the image(s) click the "Up arrow" to send message.
Conclusion
We have looked at the easiest way on how to make a video with Christmas photos / songs and share them on social medie platforms. With Filmora Video Editor, you can do this in one step and one tool, Filmora Video Editor also supports posting to YouTube and Vimeo directly. The best thing is Filmora Video Editor, is a powerful video editing software hence you can do much more than what you can do with a template. You can add images, combine videos, trim and crop videos. You can even add Christmas songs to your creations and export your video. These functions cannot be achieved using online templates.


