Does Final Cut Pro support adding transition to video?
This question has an easy answer: Yes, it does! Final Cut Pro supports a wide range of transitions, to give your clips a smooth, professional look and feel, and help you go from filming clips to making movies. You can also make one transition a default, saving you time and giving your moves a consistent vibe.
- Part 1: 5 Hottest Transitions of Final Cut Pro
- Part 2: How to Add Transitions Using Final Cut Pro
- Part 3: How to Add Transition to Video with Filmora Video Editor
Part 1: 5 Hottest Transitions of Final Cut Pro
Pan left: Star Wars fans will be familiar with the pan transition, George Lucas' favourite method for cutting from Dagobah to Bespin and back. Be like a less beardy, less crazy Lucas with your home videos!
Cross dissolve: Simple. Classy. Maybe a little boring. A cliché because it works!
Bloom: Turns up the saturation on one clip before fading into the next. A classic from dream sequences and flashbacks that spices up a transition without being too in-your-face about it.
Fade to colour: A gradual fade which inserts colour inbetween each shot instead of fading simply from one to the next. Usually the colour's black or white but feel free to experiment and see what happens!
Light noise: Transition from one shot to another in a flash of light. You can choose the centre of the flash and the colour to customise this effect to get it just the way you want.
Part 2: How to Add Transitions Using Final Cut Pro
Step 1. Choose your clips. Add two or more scenes to the editing timeline.
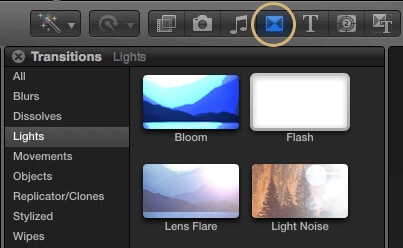
Step 2. Click the effects tab or the effects button, then click "Video Transitions".
Step 3. Select a transition from one of the many on offer in Final Cut Pro.
To make a certain transition the default for an entire move, repeat Steps 1-2 above then right click "Set As Default".
Part 3: How to Add Transition to Video with Filmora Video Editor
Filmora Video Editor is an excellent top-rated tool that can be used to add transitions to videos with ease. The program is enriched with a bunch of useful editing tools making it a stand-alone tool of its kind. If you have been wandering hunting for the best software to add transition to your video, then cease the worry and give this tool a try. Filmora video editor boosts an overwhelming number of users across the globe and they are definitely not on the wrong end making it an indispensable tinker tool.

- This tool comes with several effects, elements, motions, layouts, texts and titles.
- With this software you will not only perform basic editing to your videos but also audios and images. The controls are well placed on the program.
- This program has a recorder that can record your desktop activities, voice over and webcam.
- It comes with advanced features that allow you to: split screen, edit GIFS, stabilize videos, play videos in reverse and do advanced colour tuning.
How to Add Transition to video with Filmora Video Editor:
Step 1. Import video files
Launch the Filmora Video Editor in your computer and navigate to the main program’s window. Go to the “Import” button and subsequently select the “Import Media Files” option.
Alternatively, click on “File” menu then “Import Media” sub-menu then “Import Media Files”. From the file explorer, select the videos you would like to add transitions and click “Open

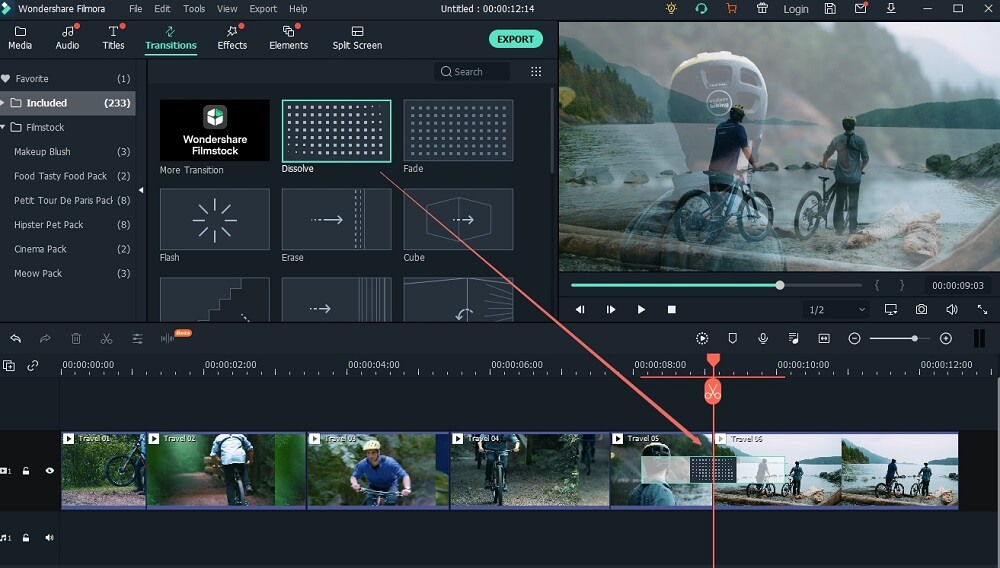
Step 2. Add transition
Hit the “TRANSITIONS” button at the Timeline to get into the transition library. In the library pick your favorite transition type and drag it into the beginning or end of the video. If you have several videos, just arrange them in your desired order and add these transitions at the beginning or end of every video. To view the transition, just select and play the preview window. once you have added the transitions select to play the videos and see the real time effect of the selected transitions.
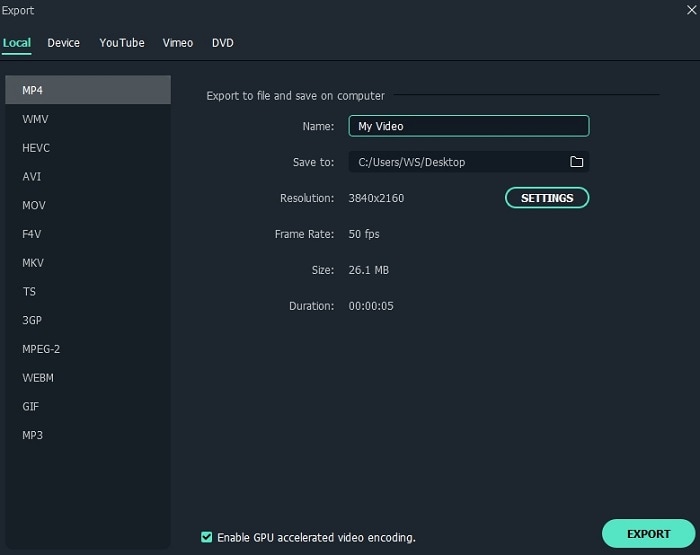
Step 3. Add your videos
Click “Export Button” to display the “Output Window”. choose the desired output format for your videos, provide the convenient save path, give the name to your video and click “Export” button at the bottom right of the very same window. The program would automatically commence the movie creation/ processing of video. Wait until the “Mission Complete” status message is displayed meaning the movie is successfully created. Click “Find Target” to locate the project in the save path you provided.