


There’s not a single doubt that iCloud is currently a BG things for all Apple device users. This is mostly due to its "Find My Phone" feature which allows you to remotely control all your Apple devices and even know exactly where they’re at any time (by tracking them).
But unknown to many of you, this feature continues with its job of tracking your device even after you’ve lost it, given it away, or have simply stopped using it. It is for this reason that you’re always advised to completely delete your device from iCloud account the moment you stop using it. To fully erase your iOS device and all its contents from the iCloud account, you’ve to manually access the account and turn off “Find My Phone” feature for that device. Otherwise, it will keep reappearing.
Part 1. How to Delete a Device from an iCloud Account
Following is a complete, step-by-step guide on how you can easily and quickly delete your device from iCloud account.
Note: It’s only possible to delete your devices when they’re offline.
Step-by-step guide on deleting a device from an iCloud account:
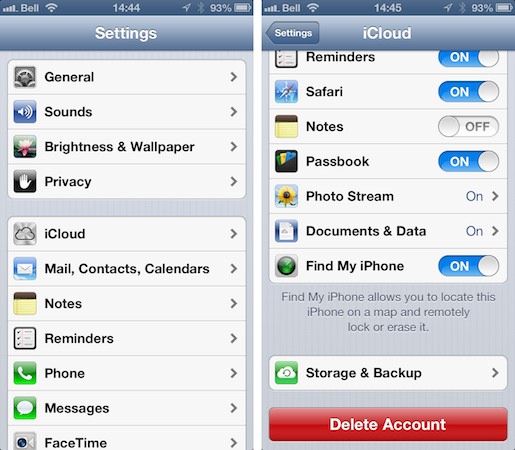
Step 1. Sign into your iCloud account. Here, you’ll be required to provide our iCloud password to continue.
Step 2. Once you’re signed in, click on the Devices tab. This prompts the application to start syncing with the device you'd like to delete.If the process is successful, a Delete icon will be displayed next to your device name. If it connects successful you’ve to disconnect this device from any internet connection so that its status appears as offline.
Step 3. Now, click the Delete icon to successfully erase the device from iCloud. Tap on the Settings option on the Device menu and select iCloud.
Step 4. Finally, move the “Find My Phone” slider to the OFF position. Now you’ve erased your device from the iCloud account and it’s safe to donate or sell. Even if it gets lost no need to panic over illegal access your data.
Part 2. How to Delete Your Device Data Completely
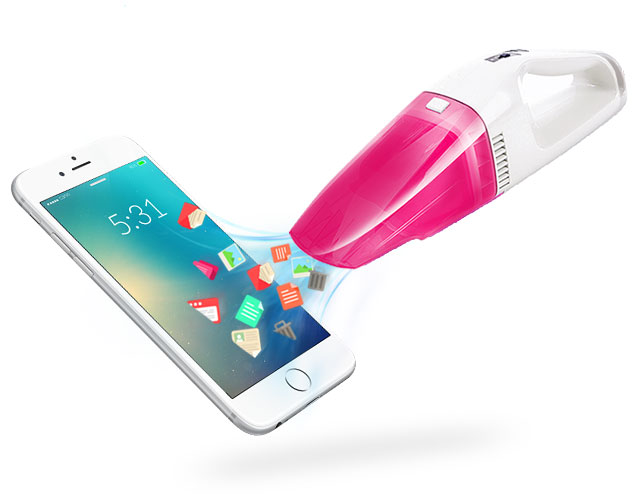
If you’ve just lost your iPhone, given it away or simply sold it, the first step you need to take is deleting all your data permanently to keep it immune to illegal access. How to do this? Simply follow our professional guide below for more information. What you need: dr.fone (Mac) - Data Eraser (IS) (or dr.fone - Data Eraser (IS)). So, what exactly is iSkysoft Date Eraser for Mac? Well, this is world’s NO.1 data eraser program for iPhone, iPod, Android, and iPad. The program securely erases all your messages, login details, music, videos, photos, browser history, cache data, and any other file stored in your iPhone with 100% Unrecoverable. With this program, you can donate or sell your iPhone without fear of your private information falling in the wrong hands.
Key Features of dr.fone - Data Eraser (IS):
- Permanently deletes all your device data with 100% unrecoverable.
- Secures your personal information such as banking data, email, browsing history and so on, from being revealed to others.
- Clears junk files and, thus, speeds up the overall performance of your phone.
- The program permanently overwrites all the files you've deleted from your device such that they can NEVER be recovered.
Step-by-step guide on deleting data from your iPhone device using dr.fone - Data Eraser (IS):
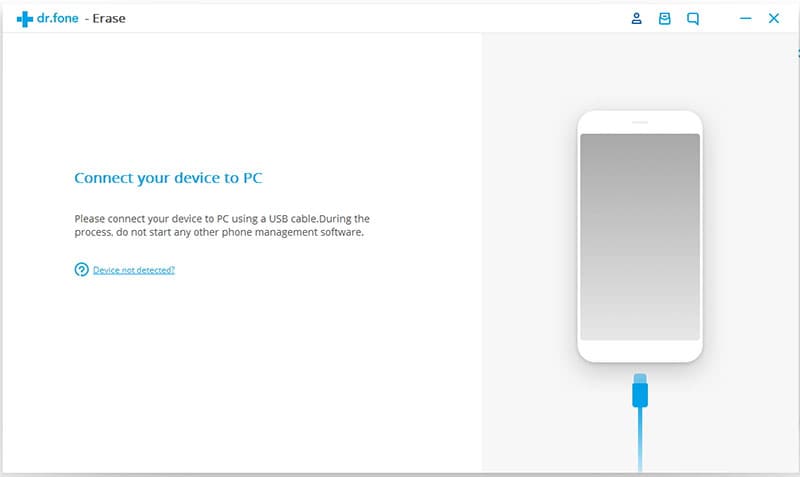
Step 1 Download and Install dr.fone (Mac) - Data Eraser (IS)
The first step involves downloading and installing the program on your iMac, MacBook Pro, or MacBook Air. After the installation is over, connect your iPhone to your Mac via the USB cable. This program will automatically detect your iPhone and then present you with all the device information on its main interface.
Step 2 Select Erase All Data
On the left-hand side of the above window, click on the "Erase All Data" option to start deleting all the data stored on your iPhone for good. This takes you to another window where you’re to click Erase Now icon at the bottom to confirm that you truly want to permanently delete all the data n your device.
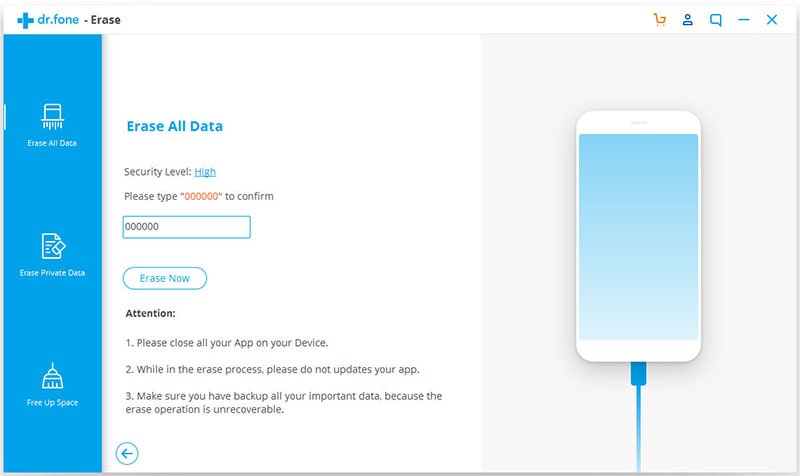
Step 3 Delete Data of Your Device
On clicking the "Erase Now" button, the program now promotes you to toe the word "delete" to fully confirm that you would like to erase your device data. Type this word on the space provided and click "Erase Now" to initiate permanent erasure of all the data stored on your iPhone. Sit back and relax. After the erasure process is over, this program will now present you with a confirmation window for the same.

With dr.fone - Data Eraser (IS), all your personal data that you don’t wish others to access will be permanently be deleted and can NOT be recovered afterwards, under any circumstances. That’s how effective the program is!


