


Deleting old photos from your device is one of the ways you can create space on the phone to store some newer photos. It is also one way to improve your phone's performance. You could also want to erase some of the photos on your device to keep the content of the said photos from unwanted attention. Whatever the reason you want to know how to delete photos from phone, this article will act as a guide for how you can do so quickly and easily for both iPhone and Android devices. Let's begin with the easiest and most reliable method.
Part 1. 3 Tips on How to Delete Photos from iPhone
How to Delete Photos from iPhone in One Click
One of if not the easiest way to delete photos from your iPhone is dr.fone (Mac) - Data Eraser (IS) (or dr.fone - Data Eraser (IS)). This data eraser program is designed to help you erase almost all types of files on your device including messages, call history, videos, music, apps, app data and many other file types. It comes with a whole host of other features that further improve its efficiency.
Key Features of dr.fone - Data Eraser (IS):
- It is very easy to use and works very fast. All functions will take no more than 5 minutes out of your busy day.
- It can be used to secure private data such as browsing history, banking information and even login details by erasing them completely.
- It can also scan your iPhone for junk files and erase them thereby creating more storage space on your device and improve its performance.
- It is compatible with all iOS devices including iPhone 6s and iPhone 6s plus.
Step-By-Step Guide to Delete Photos from iPhone
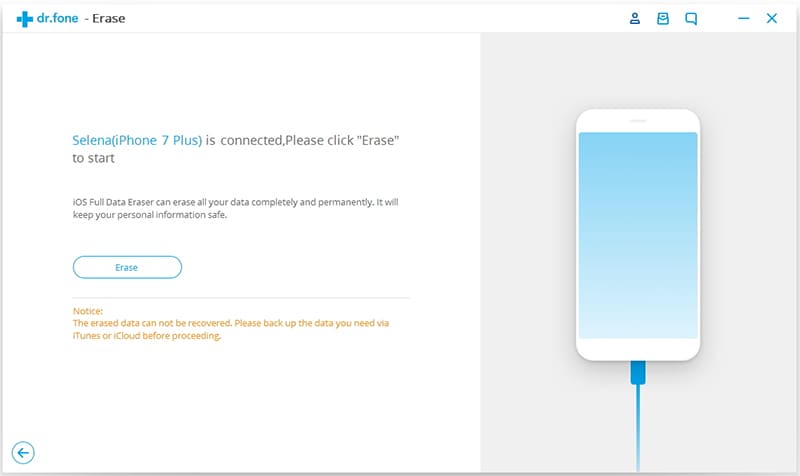
Step 1. Begin by downloading and installing the program in to your computer. Once successfully installed, launch the program and then connect your device using USB cables. The program should recognize the iPhone, displaying information about the device.
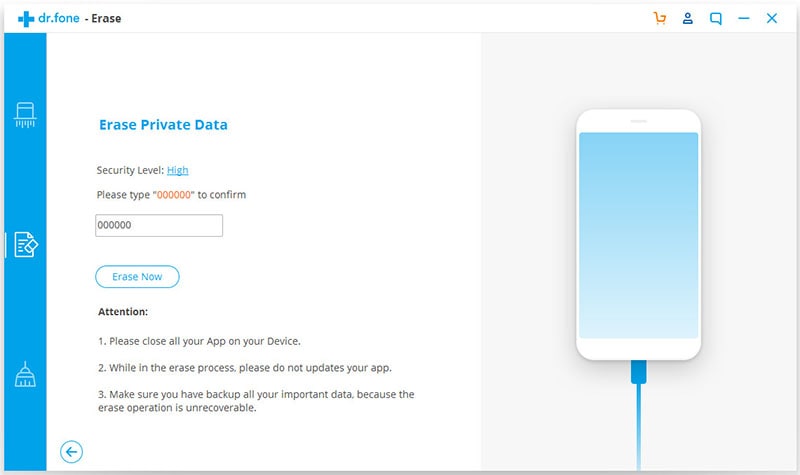
Step 2. In this main interface of the program, you should also see a number of options on the left side of the window. From these options select "Erase Private Data" and you will see the file types that can be erased.
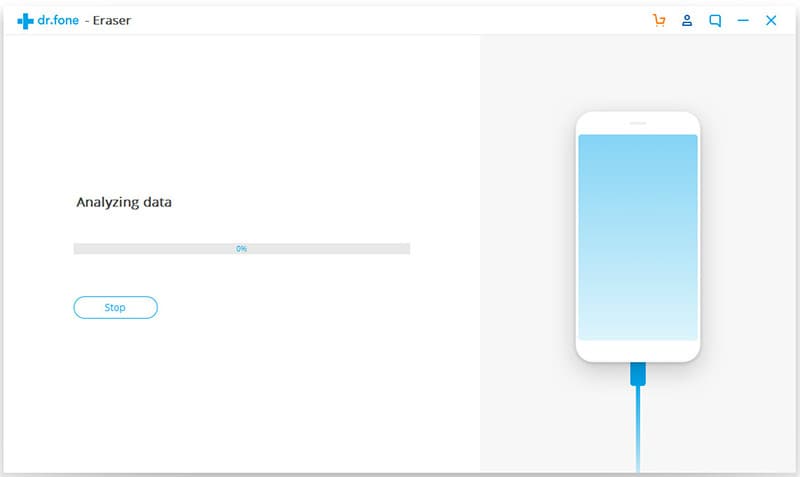
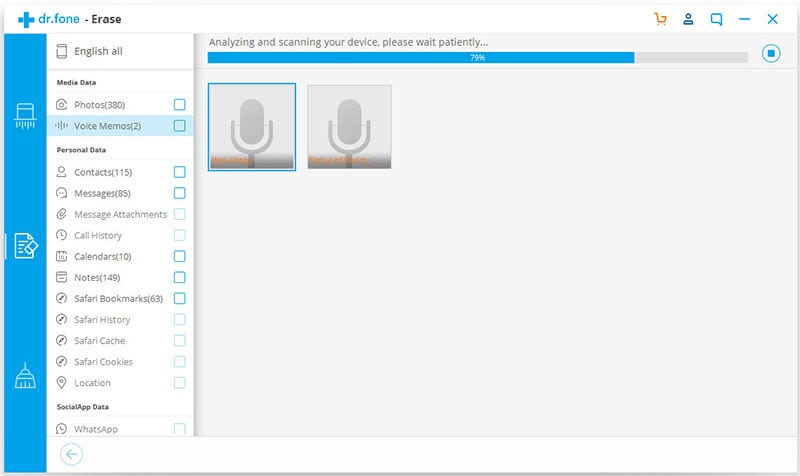
Step 3. Click on "Start" to allow the program to analyse the device. You can stop this process at any time by clicking on "Stop" next to the progress bar.
Step 4. Once the scan is complete, you should see all the files on your iPhone displayed in the next window. You can simply click on any data file to view details.
Step 5. Since we want to delete photos from your phone, select the photos from the data displayed and then click "Erase Now" to delete them. In the popup window that appears, type in the word "delete" to confirm and then click "Erase Now" again.
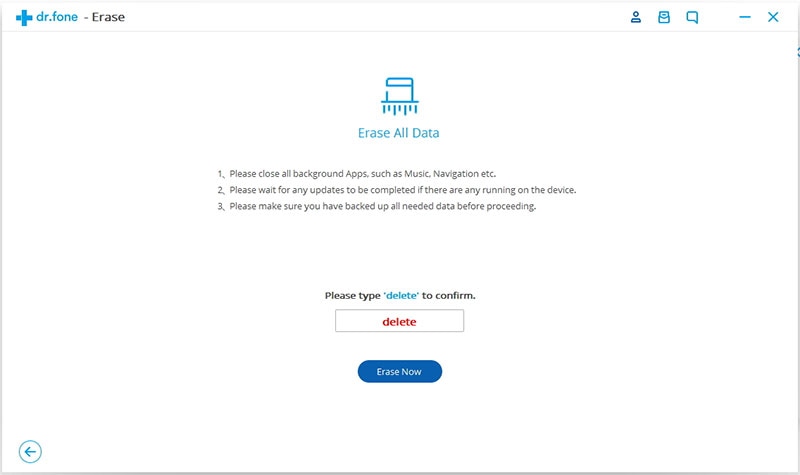
You should see a confirmation message once all the photos have been erased from your device.
How to Delete Synced Photos from iPhone
Step-By-Step Guide to Delete Synced Photos from iPhone
There is currently no way to delete synced photos directly from your iPhone. You can however do it via iTunes.
Step 1. Launch the latest version of iTunes on your computer and then connect the iPhone to your computer. Click on "Device".
Step 2. Under photos choose "Sync Photos" and then select "Copy photo from Photos". Check "Selected albums" but do not select any albums and then click on "Apply".
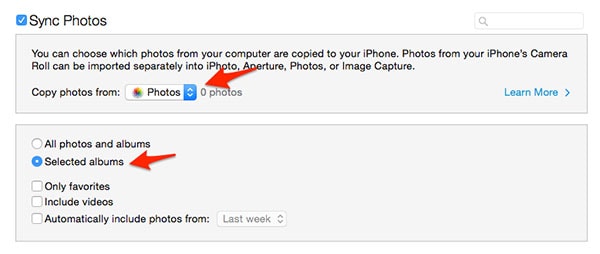
This should work since you will be syncing no photos.
How to Delete Old Photos from iPhone
Step-By-Step Guide to Delete Old Photos from iPhone
Alternatively you can also decide to delete old photos from your iPhone itself. This is a great way to free-up some storage on your device.
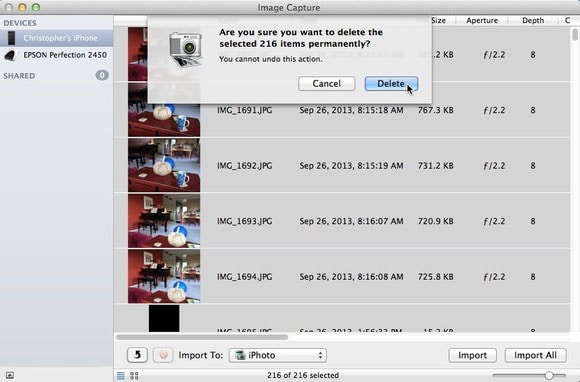
Step 1. If you have a Mac, the easiest way is to connect your iPhone using the syncing cable and then launch the Image Capture. Select the iPhone within image capture's devices column and below that choose a destination for your photos. Click on the "Import All" button and all the photos in your camera roll will be imported into your folder of choice.
Step 2. Once this is done simply press "Command- A" to select the photos and then click the "Delete" button. Confirm that you want to delete the images.
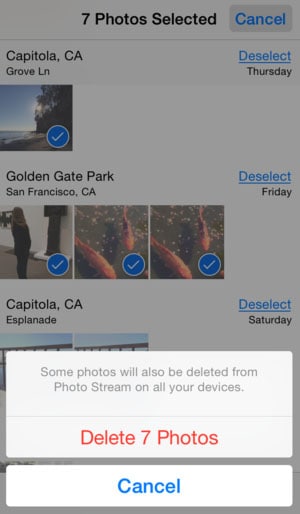
Step 3. Alternatively, you can also delete the photos in batches on your iPhone once you have successfully backed them up. To do this launch the photos app and then navigate to the Moments screen. Tap "Select" at the Top corner of the screen and tap the select link next to the images you want to delete. Finally tap on the trash icon in the bottom right corner to remove the images and they will be deleted.
Part 2. 2 Tips on How to Delete Photos from Android
How to Delete Old Photos from Android
Step-By-Step Guide to Delete Old Photos from Android
For Android users with photos that have been backed up in Google. You can simply delete the photos in the following way.
Step 1. Open the Google Photos App on your device. At the bottom tap "Photos".
Step 2. Touch and hold a photo or video that you want to delete and then move the selected photos and videos to the bin.
These items will appear in the trash bin on all your devices and will remain there for up to 60 days. Within these 60 days you have the option of restoring these old photos. After the 60 day period has elapsed, all the photos will be permanently deleted.
How to Delete Picasa Photos from Android
Step-By-Step Guide to Delete Picasa Photos from Android
Sometimes when you add a Gmail account to you android device, you will notice that photos from Picasa will be automatically synced with the device and appear in the gallery. So every time you open your gallery, you will see these Picasa photos.
If you want to get rid of these Picasa images from your Android device you need to disable sync photos from your Google Account. This action will delete all the Picasa photos from your Gallery but will not affect the other images on your device.
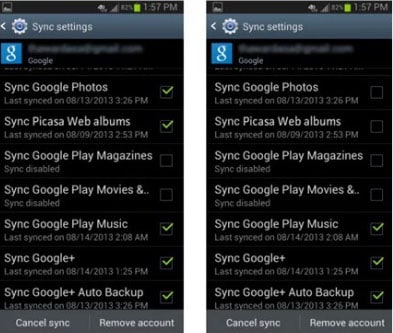
Step 1. Go to your device's sync settings and select the Google account you have linked the device to.
Step 2. You will see that all or almost all options have been checked. Uncheck Sync Picasa web albums and sync Google Photos. This will stop Google from syncing your photos with your Google account and effectively delete the Picasa images.
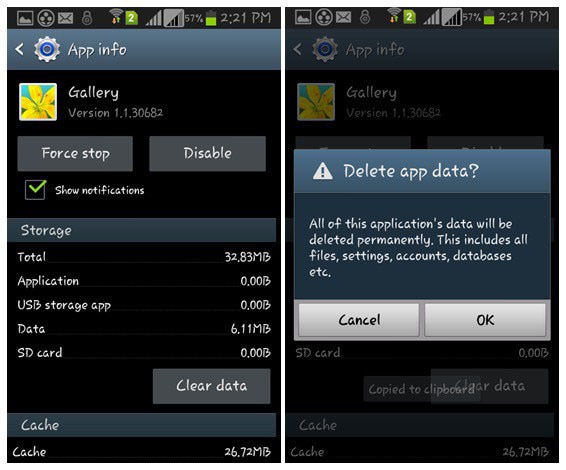
Step 3. If this doesn't work for you try clearing the app data on the Gallery app. To do this go to Settings > Applications Manager and then select the Gallery App. Tap on the Clear Data option and all the Gallery App's data will be permanently erased. This should remove the Picasa Images from your device.
Now all you have to do is refresh the device with a good old fashioned reboot. Once the device has successfully restarted, open the gallery and all your images and videos will be available in thumbnail form.


