


Partitioning is the division of hard drive storage space into various parts. You can partition the drive in any file system such as NTFS, FAT, or HFFS+ depends on your requirements. Generally, people create partition of the hard drive to organize the data. There are many other benefits if hard drive partition on the computer. One of the main benefits of partition is that it protects your data from the virus. If your data in one place then the chances of infection is very high. In case, you are storing all your data in one partition then, it times to create more partitions.
- Part 1. How to Create Partition on Windows 10
- Part 2. How to Create Partition on Windows 8
- Part 3. How to Create Partition on Windows 7
- Part 4. How to Create Partition on Windows XP
- Part 5. Perform Partition Recovery on Windows Computer
Part 1. How to Create Partition on Windows 10
In case, your computer is running slower then, maybe you have only one big partition. Normally, Windows operating system will work smoother if your system has more than 2 partitions of small chunks rather than one big partition. Here below, we will provide steps to create partition in Windows 10.
Step to Create Partition in Windows 10
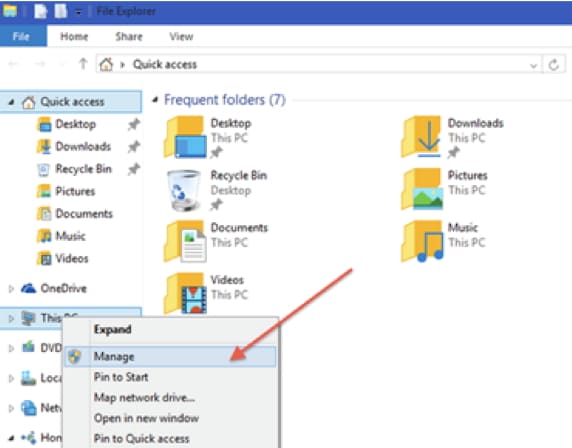
Step 1: At the first step, you have to click on "File Explorer" and right-click on the "This PC" icon in the left pane. Choose "Manage" and click "Yes" to grant permission.
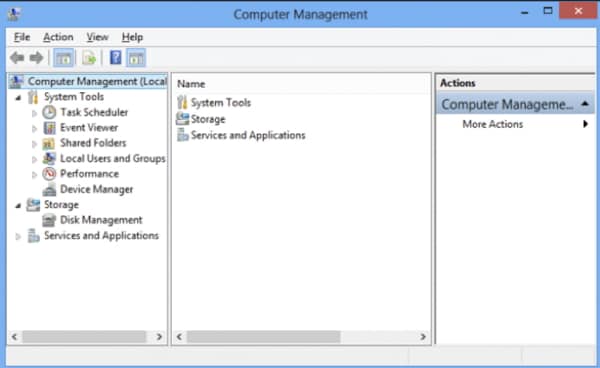
Step 2: Computer management window will appear will loads of options. You have click on "Storage" on the left side of Window.
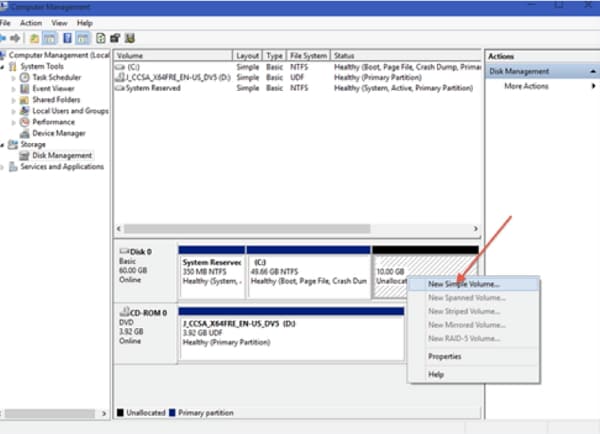
Step 3: After that, hit on "Disk Management" and double click on the Drive C to shrink.
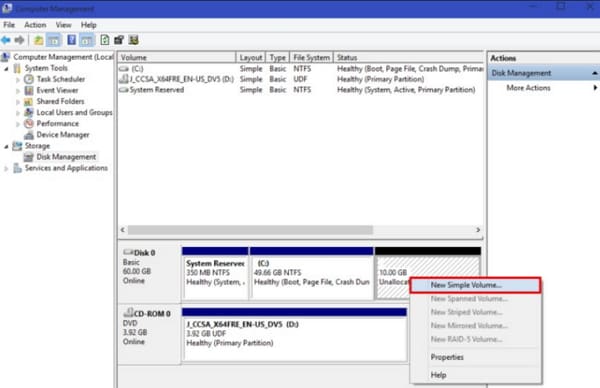
Step 4: Now, under disk 0, you have to click on "unallocated" partition. Choose "New Simple Volume" from the menu.
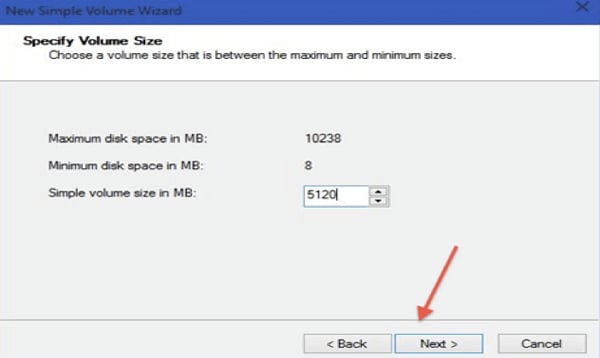
Step 5: New Simple Wizard will appear; you have to enter the Simple volume size in MB and click on "Next" button.
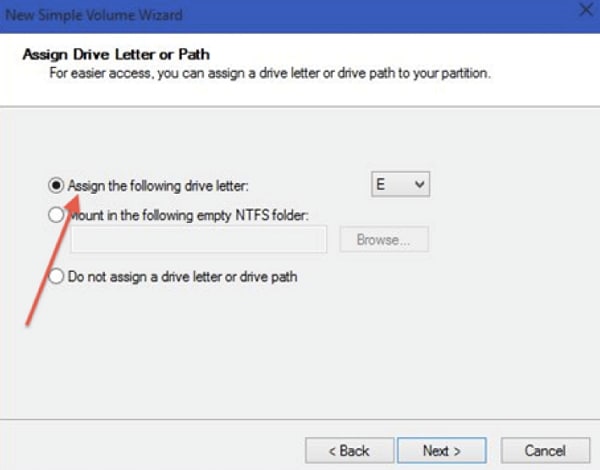
Step 6: Once the above process completed, Assign Drive Letter or Path. You can assign the letter that you would like. Then, click on "Next" button.
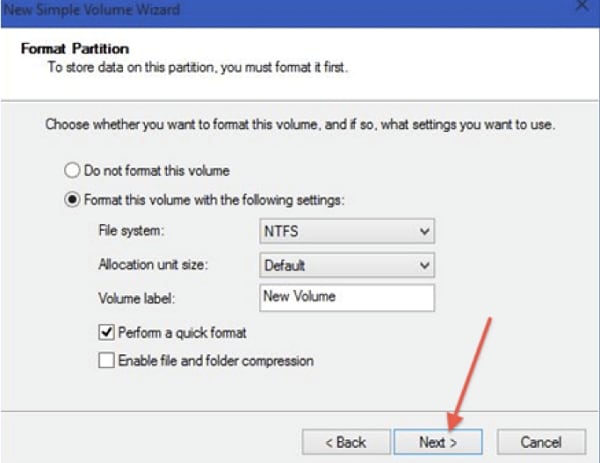
Step 7: Here, it will ask you to choose a File system, Allocation unit size, Volume label, and other options. You can choose as per your needs and hit on "Next" button.
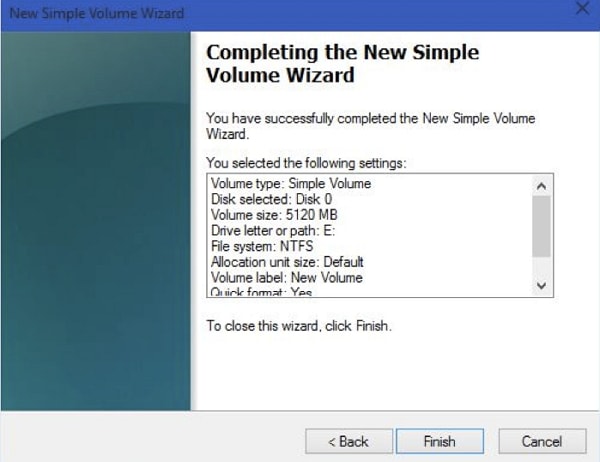
Step 8: At the last step, completing the new simple volume wizard will appear will all details about new hard drive partition. You have to click on "Finish" button to apply changes.
Part 2. How to Create Partition on Windows 8
Steps to Create Partition on Windows 8
Step 1: At the first step, you have to hit on "Start" button and type "Disk management" and press "Enter" button.
Step 2: Now, you have to review your drives and shrink the volume where your windows or system files are placed. One has to choose the drive where more than 20 percent storage is available.
Step 3: Choose the amount of hard drive space to shrink and hit on Shrink.
Step 4: Once the above process successfully completed, you have to right-click on "New Volume" create partition.
Step 5: Then, enter the amount of space for the new partition. If you want maximum space then, hold down the down arrow icon.
Step 6: Now, the user has to assign the drive letter to the new partition and hit on "Next" button.
Step 7: It will ask you to select the volume label, file system, and allocation unit size. Simply, click on "OK" to quick format.
Step 8: Finally, hit on "Finish" button. you can now see the new partition in disk management.
Part 3. How to Create Partition on Windows 7
The process of creating a new partition in Windows 7 is similar to other windows but some minor changes. You can read these below steps to create partition on Windows 7.
Steps to Create Partition on Windows 7
Step 1: At the first step, the user has to press "Windows" key + "R" button to open Run program.
Step 2: Now, type "diskmgmt.msc" without quotes and press "Enter" button or click on "OK" button.
Step 3: Computer management window will appear, right-click on the unallocated partition and click "New Simple Volume".
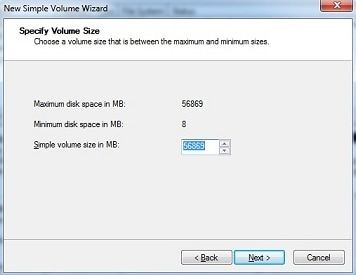
Step 4: On New Simple Partition Wizard, you have to choose volume size that is between the maximum and minimum sizes. Type the value and click on "Next" button.
Step 5: Now, you have to assign a drive letter, and mount path.
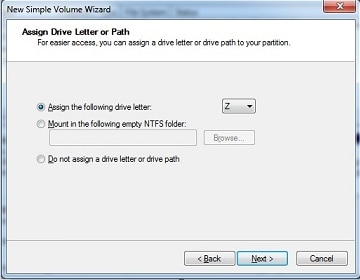
Assign the following Drive letter: Here, you have type the drive letter for the new partition. By default in windows, the lowest available drive letter is assigned to the new partition.
Mount in the following empty NTFS Folder: In this, one has to mount the partition in an empty folder.
Do not assign a drive letter or drive path: This option is only useful when you don't want to assign a letter to the new partition.
Step 6: Now, you have to format the partition to store data. Click on "Format this volume with the following settings" and choose the file system, allocation unit size, and volume label.
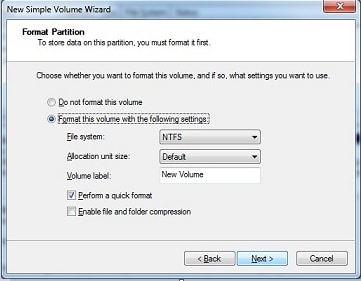
Step 7: Click on "Next" button to format the partition and proceed to next step.
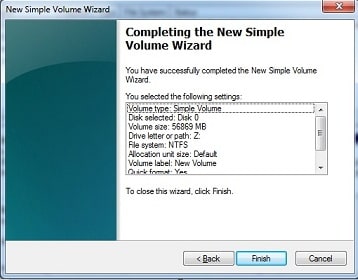
Step 8: Finally, you will see all information about newly created partition. Click "Finish" to start using new partition.
Part 4. How to Create Partition on Windows XP
Steps to Create Partition on Windows XP
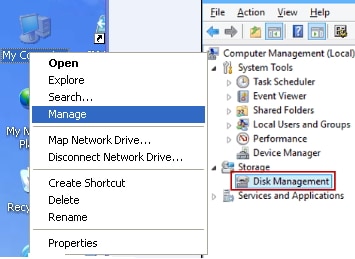
Step 1: Right-click on the computer and choose "Manage".
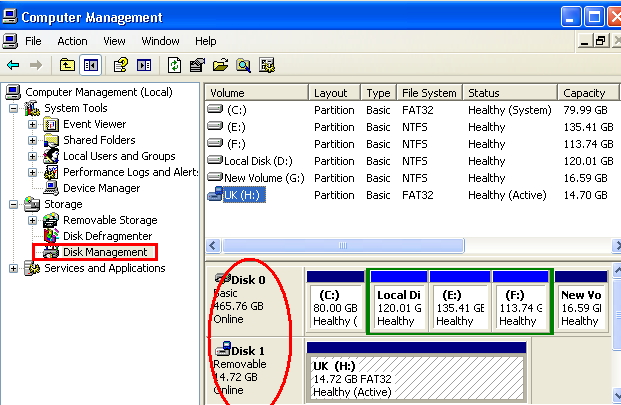
Step 2: Management will appear, click on "Disk Management". Here, you will see all drive partitions that are available.
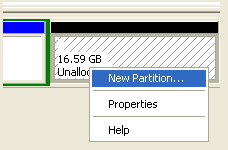
Step 3: Right-click on the unallocated partition and click on "New Partition".
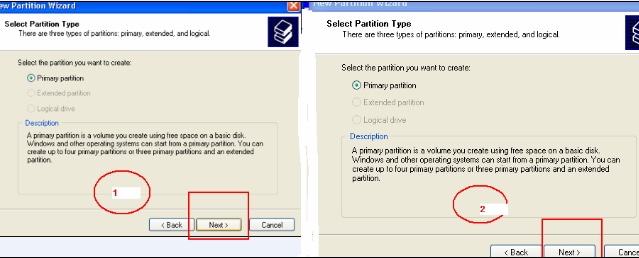
Step 4: New partition wizard will appear, you have to click on "Next" button. Hit on "Next" button again.
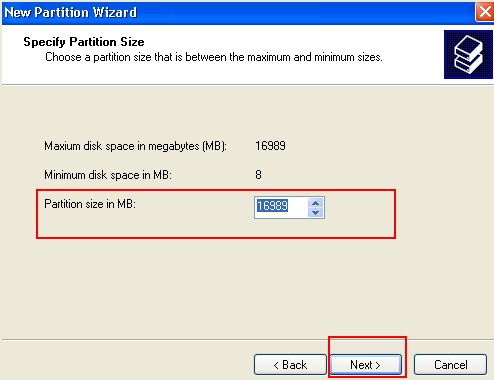
Step 5: Now, enter the partition size between the maximum and minimum disk space shown in the wizard. Click ok “Next” button.
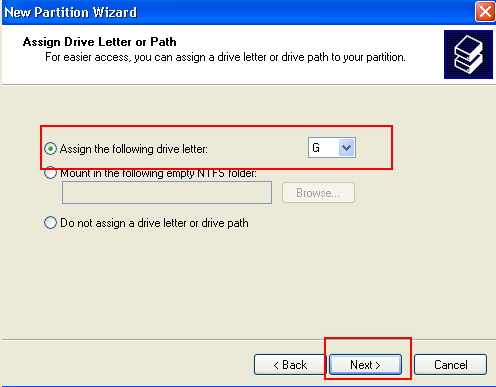
Step 6: Assign the drive letter to the new partition and hit on "Next" again.
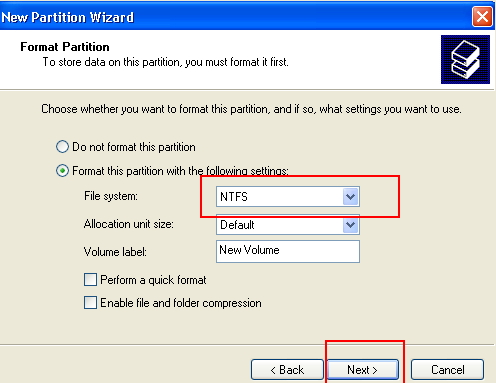
Step 7: Choose the file system and tick Perform a quick format checkbox. Click on the “Next” button to start formatting process.
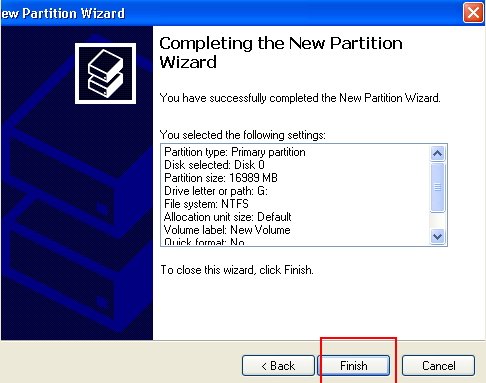
Step 8: Click on "Finish" to start using new partition.
Part 5. How to Perform Partition Recovery on Windows Computer
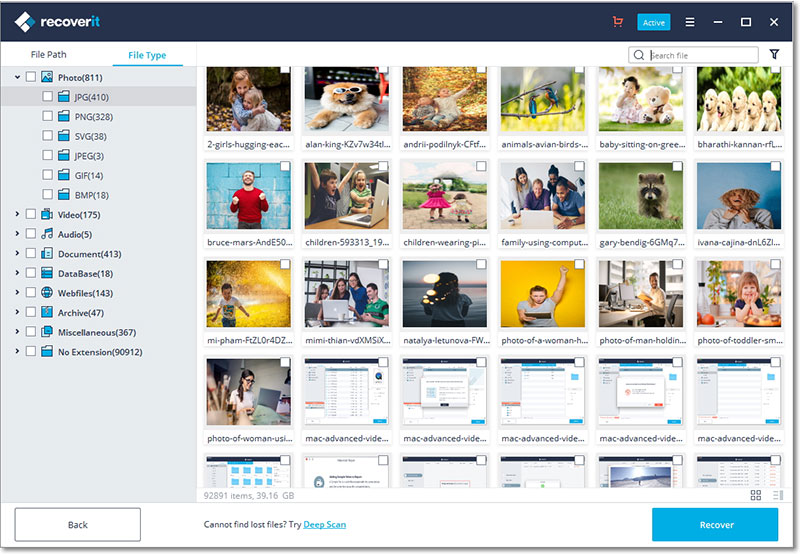
Recoverit for Windows is a tool that enables the user to recover any data lost due to partitioning or formatting the hard drive. If you are suffering from the huge amount of data loss then, it is great option to rescue. This is one of the safest and reliable data recovery tools available on the web. Such data recovery tool is backed by Recoverit that allow the user to recover any kind of file.
Why Choose This Partition Recovery Software:
- Available for both Windows and Macintosh operating system.
- It lossless algorithm helps it to recover file without any quality loss.
- Recoverit support in-depth scanning.
- Using Recoverit is very simple, unlike other tools.
Easy Steps for Partition Recovery on Windows Computer
Step 1. Download Recoverit from the official site and install it on the computer. Open the tool and choose the file that you want to recover and click "Next".

Step 2. Select the storage device where you lost your files and click on "Start". After the default quick scanning process, you can choose "Deep Scan" method.
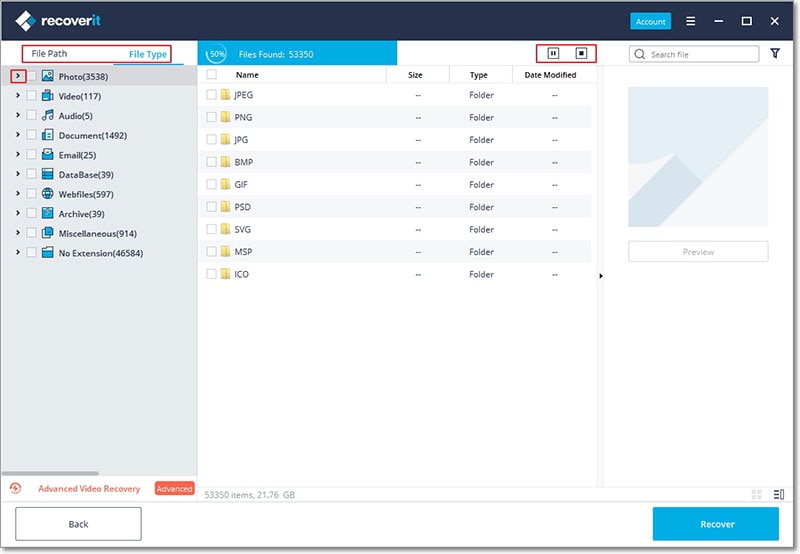
Step 3. Preview the file and click on "Recover".


