


There is a growing concern among the youngsters as well as gadget users because of the increased malicious activity. The spread of a virus not only steals personal information but also crashes the system, which makes us lose all the valuable data. We store photos on the computer because of the massive storage capacity offered by the hard drive. However, power fluctuation, software conflict, or a virus attack results in loss of the same. If you did not create any backup recently, then we feel anxious about how to find deleted photos in any way. The post talks about the procedure that helps in getting back the deleted photos.
Part 1. The Best Way to Restore Deleted Photos on Mac
If you are using a Mac, there is a high probability that the deleted photos will reside in the Trash. Of course, it is only feasible when you removed the images using the delete button. If you remove the content using the shift+delete button, then you have erased the content permanently from the hard disk. Recovering such data would be difficult, and you will be in need of third party assistance. The case is similar when you are using a Windows PC. When you delete a picture from any of your partition or the images folder, they go to the Recycle Bin. If you are lucky, you can easy restore the by heading to the Recycle Bin folder. However, if you deleted the content using the shift+delete button, the content is lost forever. In such incidents, you will need the support of a recovery tool to get back the data.
Part 2. How to Find Deleted Photos on Mac
Finding deleted photos on Mac is no longer a tedious procedure. Several recovery tools are capable of performing the act. However, only iSkysoft Data Recovery for Mac stands apart from other is a leads the race in recovery tool programs. The recovery tool uses unique scanning technologies and robust algorithms in order to retrieve data from bad sectors of the drive. It supports different versions of the Mac operating system and various file systems, which makes it easy for it to run and scan hard disks on any Mac computer. Using this software is the fastest and safest answer to recover data that you lost due to accidental deletion, improper operation, formatting a partition, and other reasons that you can think of.
Why Choose This Software to Find Deleted Photos:
- Convenience settings that allow the user to gain complete control over the software
- A single click to start and stop the scanning process

- Save the results of the scan for future recovery
- Search for records using their name and folder trees for quicker recovery process
- Identify valid and invalid files before recovery
Step-by-Step Guide to Find Deleted Photos on Mac
Step 1. Complete the download Recoverit (IS) from the official website. Install it, and run the program by clicking the symbol appearing on the desktop. The program will open the primary window where you will notice 6 file types . Click the file types to recover in the following process. Then click "Next".

Step 2. A new window opens up displaying the partitions of the Mac hard disk. If you do not see anything, press the refesh icon to refresh the list. From the list, highlight the partition from which you wish to retrieve the deleted photos. Click the "Start" button on the bottom of the window. The program will commence scanning the drive for photos.
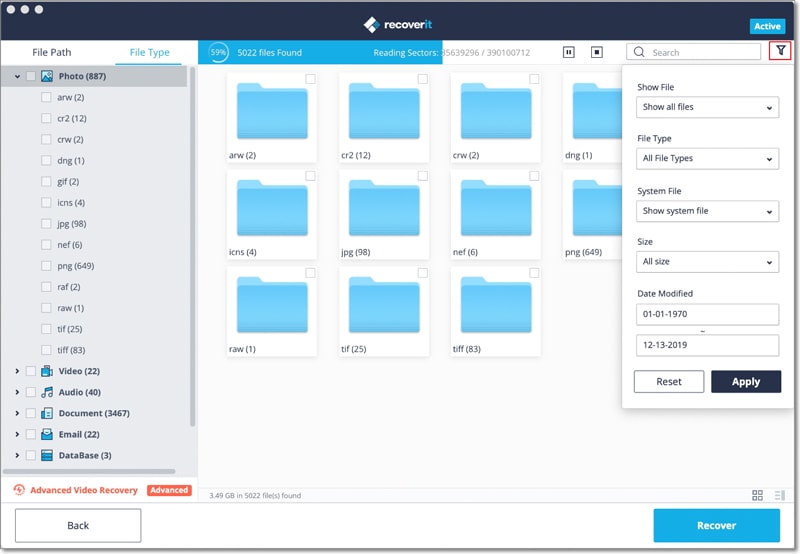
Step 3. After finishing the process, the program will list the photos in an orderly fashion based on the path. You can preview the content in the preview screen, and make use of it in marking the files that you wish to retrieve. Click the "Recover" button, select this saving destination, and wait for the program to complete the recovery process.
Note:
- Use the "Deep Scan" if you have formatted a partition to retrieve additional files.
- Save the scanning information to continue the retrieval process in the future.
- Use the file validity attribute to decide whether it has good or bad sectors before recovery.

Part 3. How to Find Deleted Photos on PC
Like a Mac, it is possible for you to lose data on your Windows PC. You can use iSkysoft Data Recovery for Windows to get back the deleted photos. The program functions efficiently and carries out a similar operation as it does for a Mac. The program features are similar and use the same robust algorithms to retrieve information from bad sectors of a track within the platter of the hard disk.

Step-by-Step Guide to Find Deleted Photos on Windows
Step 1. Complete the download Recoverit (IS) for Windows. Run the program by clicking the icon, and choose "Photo" file type tab from the product window.
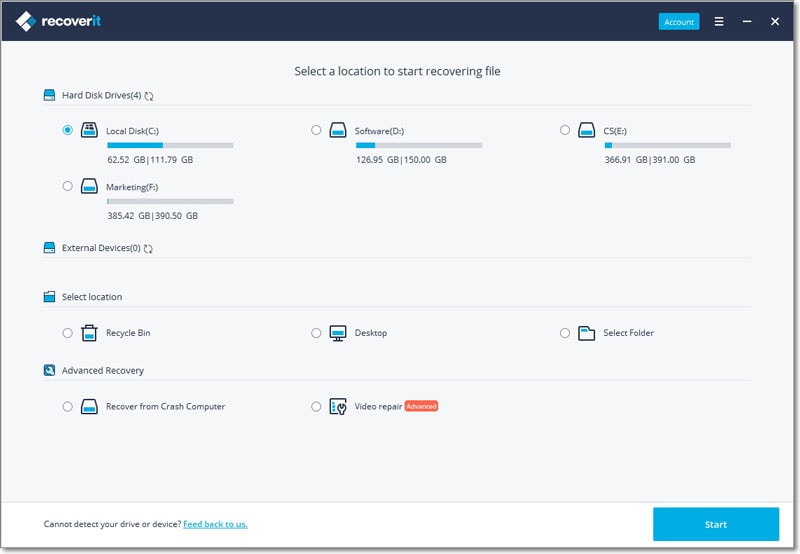
Step 2. The option will open a new window where you will see the partitions of the hard disk. From which you wish to recover the photos, and click "Start".
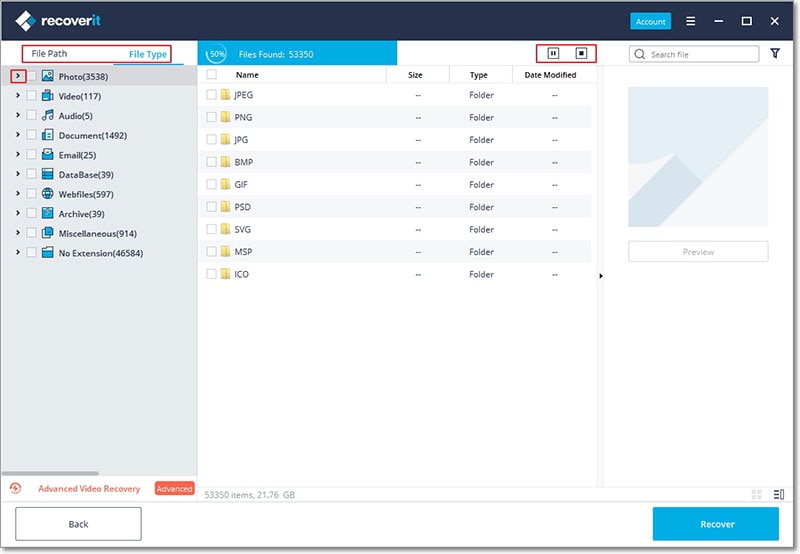
Step 3. Recoverit (IS) for Windows will display the results according to the file format in an orderly fashion. From the list, you can pick up a file to view its content in the preview screen. Make use of the option to mark the files that you want to retrieve in the checkboxes. After marking is complete, press the "Recover" button to save the files.

This software will prompt a new message to pick up this saving folder. Navigate to an external hard disk, click okay, and wait for the program to complete the process.
Note:
- Activate deep scan to extract additional files from a formatted hard disk.
- You can save the scan results to head with the recovery activity in the future directly.
- The preview window supports audio files, video files, documents, and text messages.
Part 4. How to Find Deleted Photos on Facebook
The following measures will be helpful in getting back deleted photos from Facebook.
Step 1. Log into your Facebook account and head to General Account Settings.
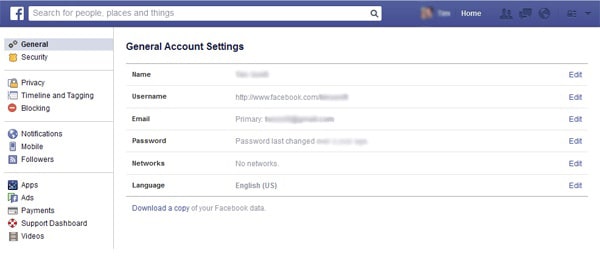
Step 2. In the same screen, you will notice the presence of "download a copy of your Facebook data" at the bottom. Click it. In the subsequent window, you will view a download archive button. You will have to enter your password to continue once you click the button.
Step 3. After submitting the password, Facebook will prompt a message that it will send a link to the content that you can download to the registered e-mail ID. Wait for a few minutes before you browse your e-mail account. Login to your e-mail account, and download the link provided by Facebook. Unzip the contents to a folder on your desktop. The folder will contain messages, videos, photos, friend list, and more. They will be in .HTML format. You can choose your favorite browser to open a file and gain access to your data. Use the procedure to get back the deleted photos in an orderly fashion.


