Pictures are undoubtedly the most precious and irreplaceable memories that we have. Whether you own a smartphone or a digital camera, it is must that you use them very often to snap pictures from your everyday life. But there are numerous reasons that can lead to the irreparable loss of your pictures. Here, we have summed up 2 tips on how to recover deleted pictures on computer.
Part 1. How to Recover Deleted Pictures on Mac and Windows
The best way to restore all the pictures you have lost so far on any of your device is to use a data recovery program. But the program that you pick must be highly efficient in recovering huge amount of pictures in their most accurate and flawless form. Therefore, we recommend users to choose iSkysoft Data Recovery for Mac (or iSkysoft Data Recovery for Windows).
Recoverit (IS) is the best data recovery tool available in the market right now. It can safely recover any type of files from pictures to videos, messages to contact, documents to music files. The interface of the program is extremely simple and even a non-professional can use the tool without any trouble. The outstanding features of this professional data recovery tool allow thorough scanning of the hard drive to recover almost any file type.
Why Choose This Software to Recover Deleted Pictures:
- It enables you to preview the files before you decide to restore them to the computer.

- It runs read-only process and so all the data that is recovered remains unchanged and 100% safe.
- It can recover data in any of the scenarios: accidental deletion, power outages, virus infection, software crashes and more.
Step-by-Step Guide to Recover Deleted Pictures on Mac
Step 1 Download Deleted Pictures Recovery Software
Download and install the program on your computer. Now, launch the program, of the 6 common file type options offered by this tool, "Photo" is the option we will use to recover deleted pictures. Then try to click "Next" button to continue.

Step 2 Scan the Selected Drive
From the resultant window, select the drive where your files are lost and click on "Start" to initiate the scanning process. In case the preferred drive is not in the list, click on "Refresh" icon. You can also set the file type for saving more time. The tool also has another option to enable "Deep Scan" which can take more time but will perform a detailed and thorough scan.

Step 3 Recover Deleted Pictures
After the successful completion of the scanning process, all the missing files on your hard drive will come up on your window. You can select any file you want to recover and also use the preview button to see your files before restoring. Once the files are selected, click on "Recover" and save the restored file on some other external drive.

You can use the trial version of the program for recovering deleted files from both the Windows and Mac systems. It works exceptionally well when it comes to recover files from external devices such as USB drives, SD cards and more.
Part 2. [Tips] Learn How to Backup Pictures to Avoide Picture Loss
Without a proper backup system in place, there is a very high probability for your irreplaceable family photos to get lost in a blink of an eye. But when you have a backup for all the data stored in various devices, you can stay relaxed knowing there is a copy available for you to download whenever the need arises. When all your files are safe, you can enjoy the much wanted peace of mind. Here is how to backup pictures on Mac with an amazing in-built tool called Time Machine.
Step 1. Connect an external hard drive.
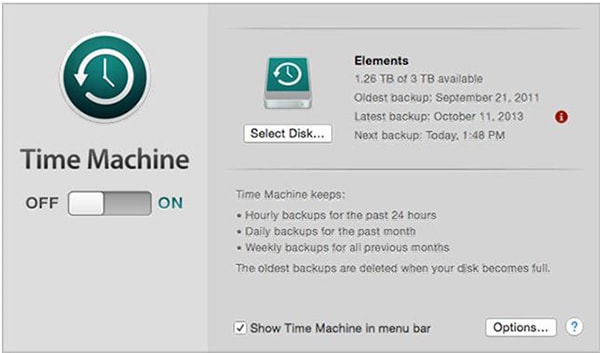
Use a drive similar in size to that of your Mac's internal drive. Plug in your external hard drive using a USB or any other similar device. When you have plugged in your external hard drive, it's time to turn on the tool Time Machine for selecting your backup destination. Go to System Preferences and then choose Time Machine and change the button "Off" to "On".

Step 2. Automatic Backup
Now, the tool will ensure hourly backup of all the files. You can also keep an eye on the process so as to make sure the files are backing up without any trouble.
Similarly, there are numerous backup tools available for different devices. You can get access to any of these tools and religiously take a backup of all your data including your pictures as well.


