


Everyone is proud of the selection of songs that is located on their iPhone, which is a natural thing. You have downloaded songs from your iTunes store, your friends sent you their favorites and you have made an extremely amazing mix. This is something you certainly wouldn’t want to lose, so you should make sure to transfer music from iPhone to iTunes on your Mac in order for your songs library to be safe.
Part 1: How to Transfer Music from iPhone to iTunes by Using iTunes
Apple iTunes might be one of the most reliable tools when it comes to working with Apple devices. However, it has its flaws, and one of the biggest is the limitation when it comes to songs you can transfer from your iPhone to iTunes. You see, you are not only able to move all songs but only songs you’ve purchased in your iTunes store. Here is a guide on how to transfer music from iPhone to iTunes if you are using Mac.
Step 1. You need to download iTunes on your Mac. This can be done easily from the Apple website. If you already have iTunes installed on your Mac, please make sure that you have most recent version of the software.
Step 2. Once you have installed iTunes on your device, launch it and connect your device with a USB cord. It is recommended to use an original USB cord, in order to avoid any issues during the process. When you connect your device, iTunes will recognize it automatically. After it finishes connecting it, you can see your iPhone in the list of devices.
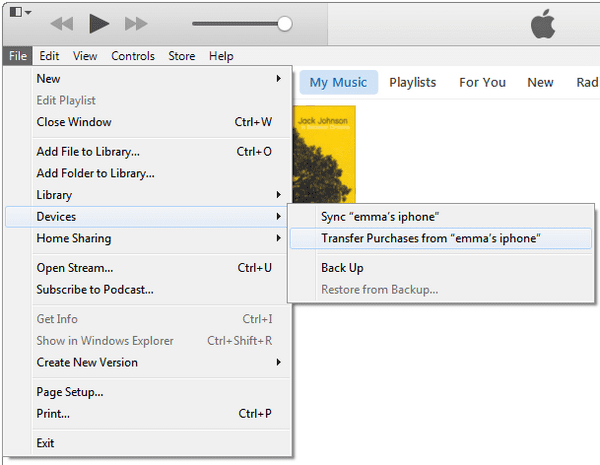
Step 3. If this is your first time using iTunes, you will need to authorize you Mac. You can do this by selecting Store from the top menu, and then choosing the option Authorize this Computer. You will notice a dialog box where you will be asked to enter your Apple ID and password. Make sure that you have entered the same ID you are using on your iPhone.
Step 4. Next thing you need to do is to turn your attention to the File section in the upper part of the screen. Choose Devices listed under it, and then pick Transfer purchases from ‘iPhone’ (or whatever your device name is). This will start the process of copying purchases to iTunes. Once it is finished, you have successfully transferred purchased music from iPhone to iTunes.
Part 2: 1 Click to Transfer Music from iPhone to iTunes (Strongly Recommended)
dr.fone - 1 click to copy iPhone music to iTunes intelligently
The limitations iTunes tool has sooner or later become a problem for any iPhone user. This is due to the fact that you often want to transfer all songs to your iTunes, including the ones you didn’t purchase in the iTunes store, as well as songs that your friends shared with you or the ones you downloaded by using an app. This is why, an experienced team of developers, has created dr.fone for Mac, an extremely useful software that offers you the possibility of transferring all your songs to your iTunes, without any kind of limitations.
Step by step guide on transferring music from iPhone to iTunes on Mac
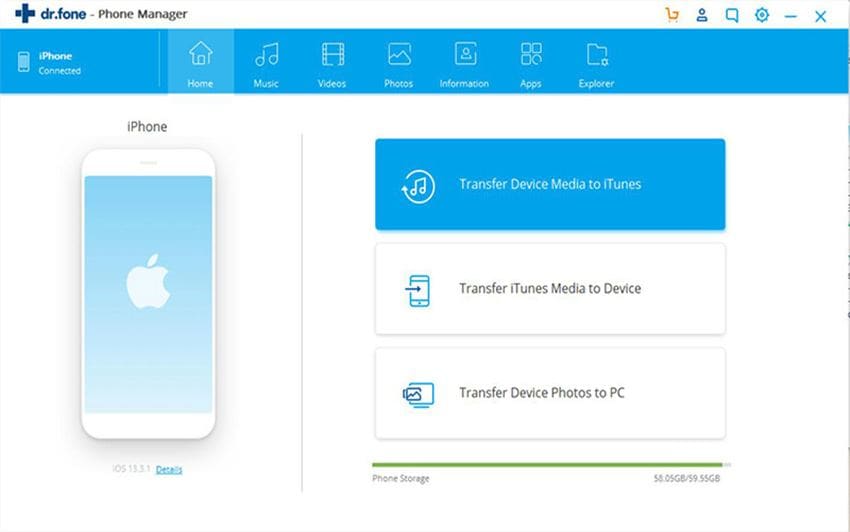
Step 1. Use a digital cable to connect your iPod, iPhone, iPad or Android device with your computer. Next, launch dr.fone for Mac. The software will recognize your device automatically. When connected successfully, it displays your device in the main window. Click “Rebuild iTunes Library” in the main window.
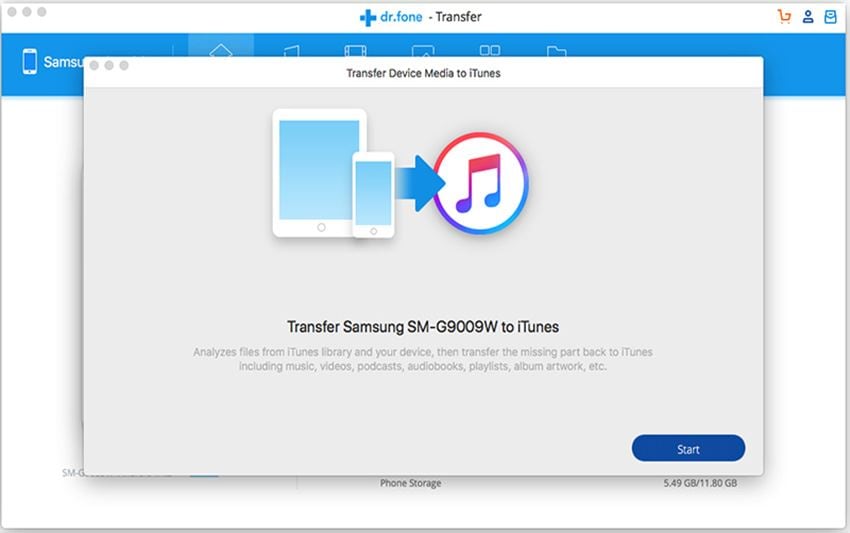
Step 2. In the pop-up window, please confirm the operation by clicking “Start”, letting the software scan media files on your device. It takes a few seconds to finish this process.
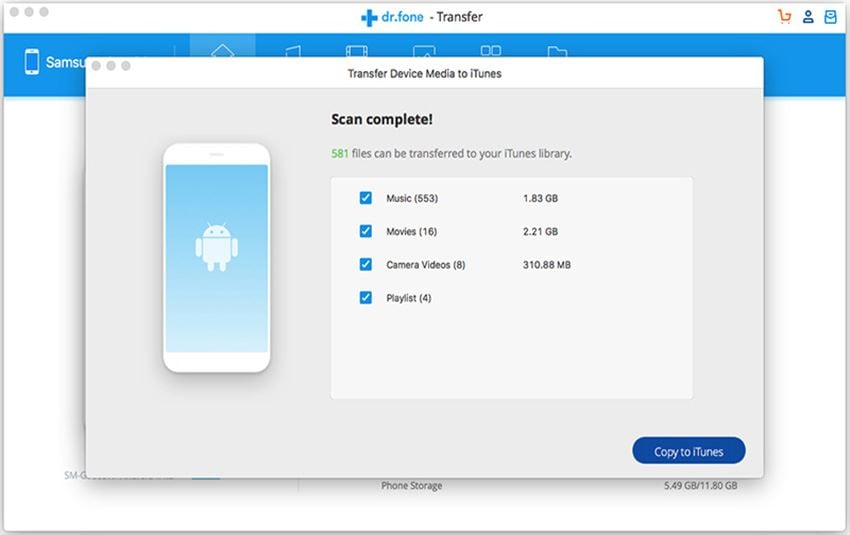
Step 3. Next, choose the file types you want to transfer from your device to your iTunes Library and click “Start”. Please note that media files, including music, movies, device captured videos, playlists, iTunes U, and more will be copied to your iTunes Library instantly. Never worry about any duplicate files generated. dr.fone for Mac will compare the files on your device with these in your iTunes library, transferring iTunes Library missing ones.


