


- Part 1. How to transfer Photos from one iPhoto to iPhone using dr.fone for Mac?
- Part 2. How to transfer Photos from iPhone to iPhone using iTunes?

Transferring photos from iPhoto to iPhone on Mac is not an easy feat. It works perfectly on when you have disabled the iCloud sharing option on your iPhone. But now-a-days, everyone is using the Cloud storage to store the important stuff on cloud, so, in case you damage your iPhone or lost it, all data could easily be downloaded on your iPhone. However, if you have enabled the iCloud Sharing option on your iPhone, you won’t be able to transfer the photos from iPhoto to iPhone.
Don’t worry, we have a solution for this problem, you can transfer photos from iPhoto library to iPhone using dr.fone. dr.fone doesn’t rely on iTunes to transfer photos from iPhoto to iPhone but it work independently. The best part about this software is that you can transfer as many photos as you want from iPhoto to iPhone without disabling the iCloud sharing on iPhone. Moreover, dr.fone doesn’t play with the quality of photos and the amazing quality of your photos will be same on the iPhone. dr.fone is available for both Windows PC and Mac. We have step by step detailed guide for you on how you can transfer the photos from iPhoto to iPhone using dr.fone.
Part 1. How to transfer Photos from one iPhoto to iPhone using dr.fone for Mac?
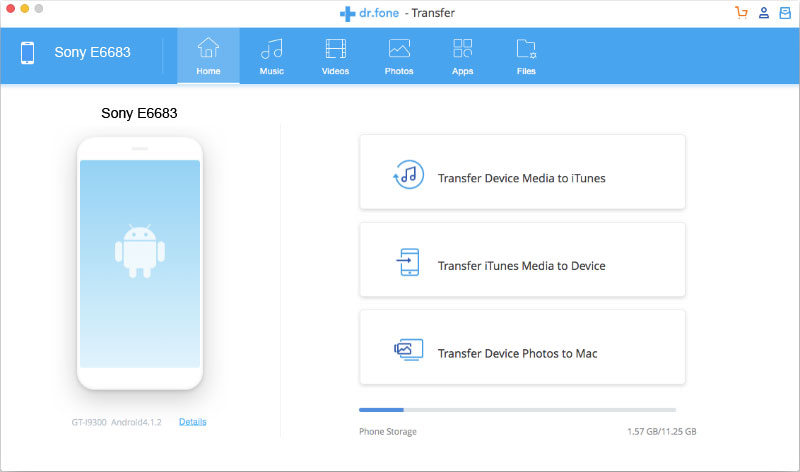
Step 1: Download the latest version of dr.fone for from the links given above. After downloading the application, copy it to the Applications folder and wait for a few second to install it on your Mac. Connect your iPhone with Mac and launch the dr.fone.
Step 2: Once you have connected your iPhone, Click on the “Photos” button at the top of the main window. It will show all photos on your iPhone. The photos on your iPhone will load here but the Albums on your iPhone will be shown on the right side of the iPhone.
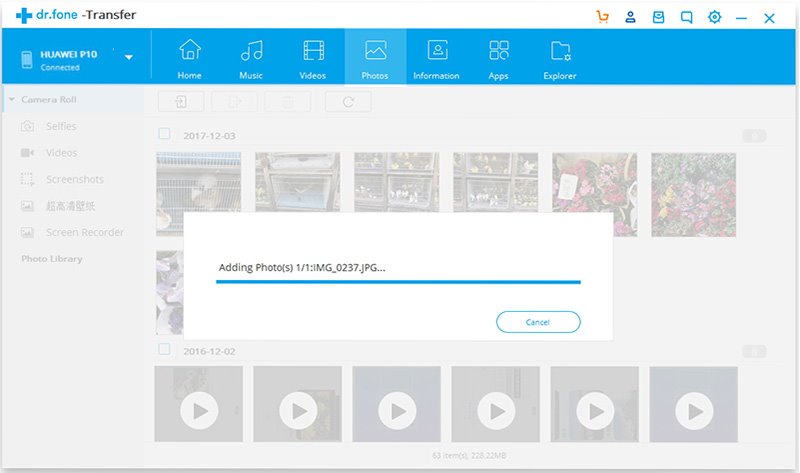
You can also make a new Album on the dr.fone by right clicking on the left side menu “Add Album”. Name the Album as you want and that’s it! You can also transfer as many photos as you want to this album using the method explained above.
Benefits of using dr.fone:
dr.fone works with both Windows and Mac, it does not interfere with the quality of the photos. Thus retaining the photo quality of photos on your iPhone. You don’t have to use iTunes to sync Photo albums with PC, so, in other words, it saves a lot of time. The best part about this software is that you will not have to turn the iCloud “Off” to transfer photos from iPhoto to iPhone. Moreover, it works smoothly on any iPhone running any iOS version up to iOS 10. Using dr.fone, you can’t only transfer photos from Mac to iPhone but you can also use it to manage photo albums and transfer photos from PC to iPhone and vice versa.
Part 2. How to transfer Photos from iPhone to iPhone using iTunes?
Please note that this method will only work if you have disabled the iCloud on your iPhone. However, disabling the iCloud on your iPhone may result in deleting the photo stream from the iPhone. So, you should be very careful while using this process.
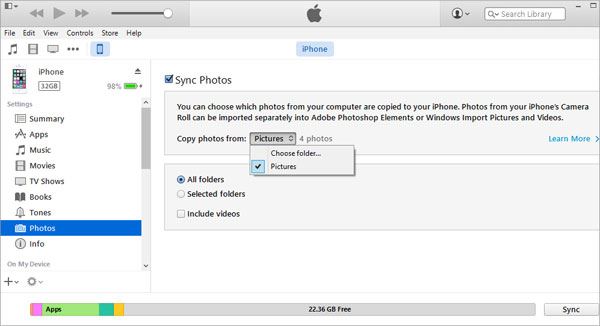
- 1. First of All, Connect your iPhone with the Mac and fire up the iTunes, select the iPhone and Click on “Photos” in the left menu. Once you will click on Photos, you will the “Sync Photos” option
- 2. Now, Select the “Sync Photos” and select the folder from which you want to transfer the photos to the second iPhone. Natively, the Pictures is selected, so tap on it and select the iPhoto, because you want to transfer the photos from iPhoto to iPhone.
- 3. You can either select to transfer all photos from iPhoto on Mac to iPhone or you can select photos based on “Albums, Events and Faces. It will also show you the albums on iPhoto based on the events that you have saved. After selecting it, click on “Sync” or “Apply” button at the end of iTunes.
Advantages and Disadvantages of copying photos from iPhoto to iPhone using iTunes:
Practically, iPhoto will only be beneficial, if you have saved all photos on your Mac and don’t want to use iCloud on your iPhone to store photos or any kind of data on iPhone. If the iCloud is turned on, you will not be able to sync photos from iPhone to another iPhone. Moreover, it is a very lengthy, time consuming and hefty process because you will have to delete all the photo stream on your iPhone to enable it to sync photos from iPhoto to iPhone using iTunes.
In Conclusion, the best way of transferring photos from Mac to another iPhone is by using dr.fone which will not only save the time but it is also a very short process and you can control each and every photo right from dr.fone.


