


Today, people don't need personality tests to check for compatibility - all they need to do is browse through a person's smartphone (with permission of course!) and they'll know all about his/her taste, likes, dislikes and personality. With so many pictures, videos, music and apps stored in them, smartphones have become a telltale of their owner's life. So what happens when you decide to switch your phone - say from an Android to an iPhone with iOS 9? The first thought that boggles your mind is how to transfer photos from your Android to iOS 9 iPhone, right? Well, it might seem like a tedious thing at first, but by the end of this article you'll be a pro at it!
Part 1: Transfer Photos from Android to iOS 9 with Phone Transfer
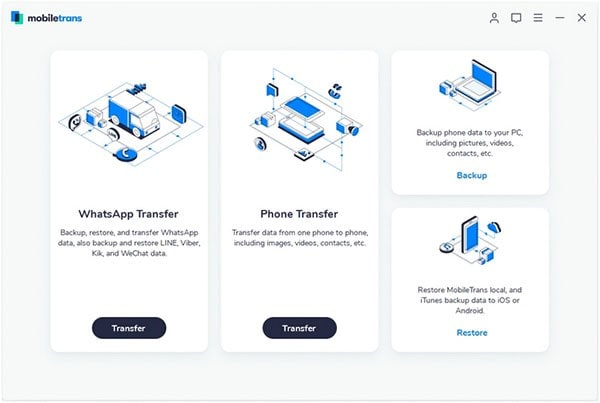
There's a host of software options that make it a breeze for you to transfer photos from Android to iOS 9. The software that we are going to talk about is MobileTrans for Mac ( or MobileTrans for Windows). It is a professional yet easy-to-use phone to phone transfer software that allows quick and easy transfer of photos, videos, music, text messages, apps, contacts, call history and calendar. Whether you are switching to another phone or upgrading to a new one, this 1-click mobile transfer tool will let you safely transfer all your phone data in its original form.

Why Choose This Phone Transfer:
- The full-scale phone transfer allows you to transfer music, contacts, e-mails, apps, and almost everything.
- This powerful phone transfer tool is specially designed for transferring data between mobile phones with Android, iOS, and Nokia Symbian OS. It is compatible with the Android 5.0 Lollipop, iOS 8.1, and iTunes 12.1.
- Phone Transfer not only facilitates data transfer, the tool also allows you to backup your phone data securely to your computer without any risk of loss.
- Sometimes resetting factory settings might not be enough to erase all data from your phone. This Android to iOS 9 transfer helps you scan your phone deeply and erase all old phone data you want to delete.
- If you have temporarily transferred your phone data to another phone, you can use this phone transfer to restore the all data to your existing phone anytime you want.
Step-by-step Guide to Transfer Photos from Android To iOS9
Step 1: Install the program
The first thing you have to do before you can transfer any data is to install and launch Photo Transfer in your computer.
Step 2: Connect the devices
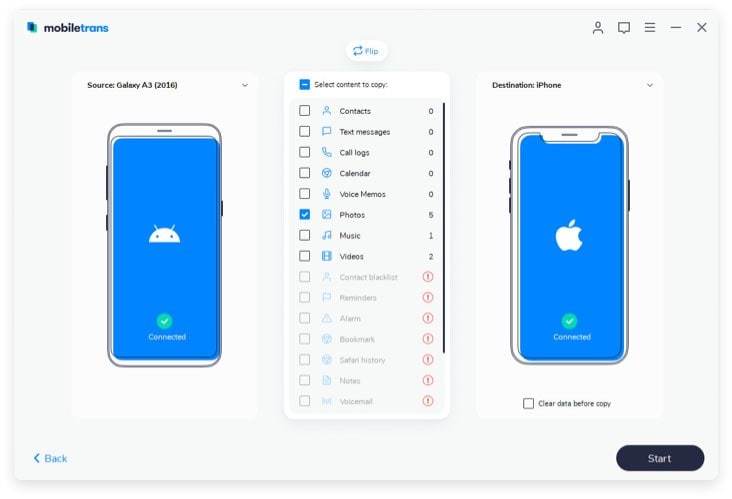
When the "Phone to Phone Transfer" tab shows up, click "Start" to open the transfer window. Then use USB cables to connect your Android and iPhone to the computer. Once the devices are connected successfully, the software will begin scanning them and display the information on the software's interface.
Part 2: Transfer Photos from Android to iOS 9 by Dragging and Dropping
In order to transfer photos from Android to iOS 9 directly on your Windows PC, you'll need a computer with iTunes installed in it. And you can process Android to iOS 9 transfer by dragging photos from Android to PC and then sync photos to your iOS 9 iPhone with iTunes.
Android to Computer Transfer:
Step 1: Make a folder in your computer for the pictures you want to transfer and name it, say "Pictures to Transfer".
Step 2: Connect your Android phone to your computer with a USB cable.
Step 3: Go to My Computer, choose your device and click on DCIM.
Step 4: Choose all the pictures you wish to transfer, and then copy and paste them into "Pictures to Transfer".
Note: Different Android phones may use different terminology for USB mass storage or photo folders.
Computer to iPhone iOS 9 Transfer:
Step 1: Open iTunes in your computer.
Step 2: Connect your iPhone, let it sync, and choose your phone's icon from the devices from the list on the left.
Step 3: Choose the 'Photos' tab from the menu on top.
Step 4: Click on "Sync Photos".
Step 5: From the drop down menu, choose the folder in which you have saved the photos to be transferred.
Step 6: Once you have chosen the pictures, click on 'Sync' on the bottom right corner of the interface and your pictures will transfer from your computer to your iPhone iOS 9.


