


Reliving your past memories can be very refreshing and fulfilling. Although you may have such memories as of a holiday travel experience, a wedding party or any other event in form of photos, storing them safely can be a serious challenge. Luckily, you can create slideshow to save your photos and videos. Below is an easiest way on how to create slideshow on Windows 10, 8, 7.
The Best Tool to Create a Slideshow on Windows
Although you can create a photo slideshow complete with music on Windows via the Media Center, you are likely to face several challenges. Not only do you need a computer with TV connection to improve the functionality of Media Center, the length of your slideshow is also most likely to be limited.
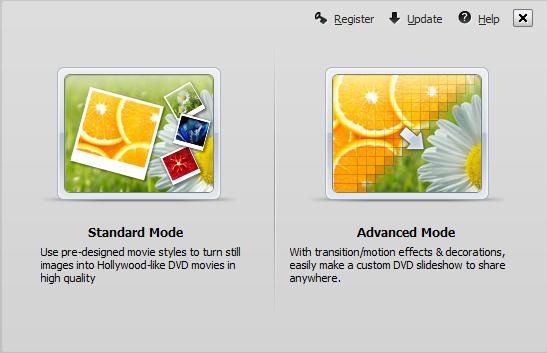
A clever way to overcome such challenges is to use an alternative slideshow creator for Windows 7, 8 and 10. One such valuable alternative is iSkysoft Slideshow Maker for Windows. This is one of the easiest slideshow makers for Windows you will find around. Its user-friendly and appealing interface makes it easy for you to locate everything you need to create a slideshow.
Key Features of iSkysoft Slideshow Maker for Windows:
- Create high quality slideshow with photos and videos. Provide multiple templates to choose from.
- The ability to share your HD or standard video slideshow(s) on TV, online, on mobile devices.
- A built-in trimmer that crops accompanying music to fit in with the slideshow.
- Motion graphics tool that titles, edits and creates all motion graphics in your slideshow.
- A built-in pre-audio that you can use to introduce your slideshow or add fade both to the music and video.
Steps to Create Slideshow on Windows 7, 8, 10
Step 1 Launch the program
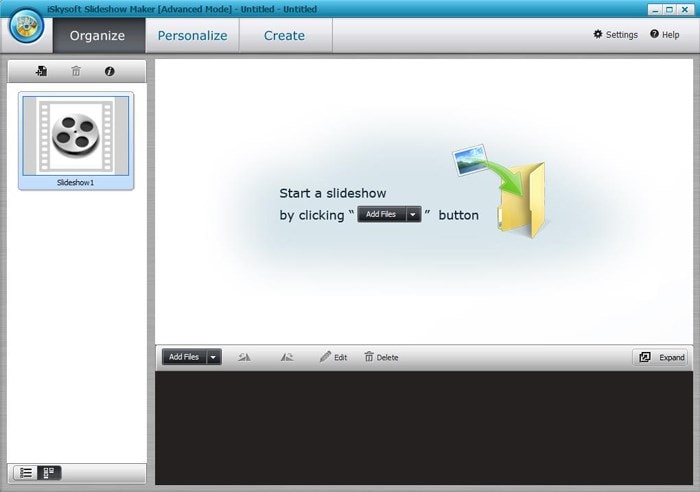
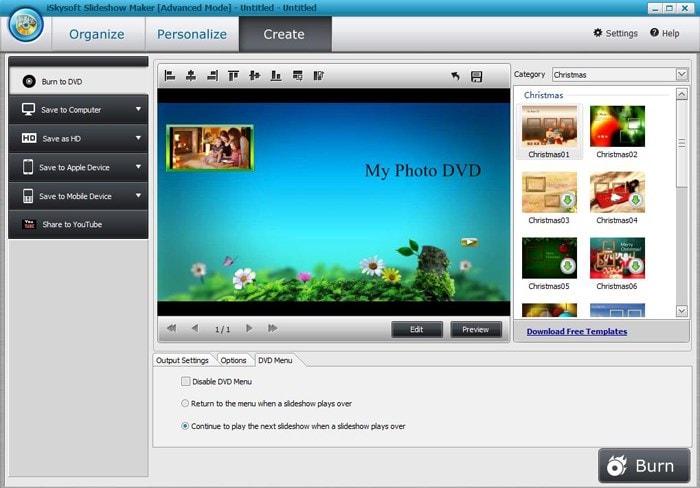
First download and install the program for free. Launch the program in order to open the program window on your computer screen. At the top are the “Organize”, “Personalize” and “Create” tabs. At the center is a “Start Slideshow", "Add Files” button. Below this is the menu tab with several features. Further below at the end of program screen is the area where your pictures or video appear once uploaded.
Step 2 Import pictures or videos
Click on the “Add Files” button just below the “Start Slideshow” to import your pictures or video into the program. Clicking on the button presents to you files on your computer. Select the file containing your pictures or video and click on all pictures or video you need to appear on your slideshow to upload the same into the program.
Step 3 Personalize the slideshow
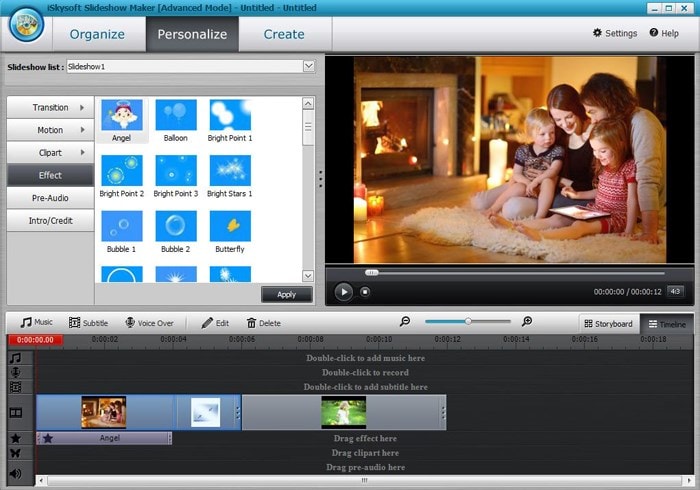
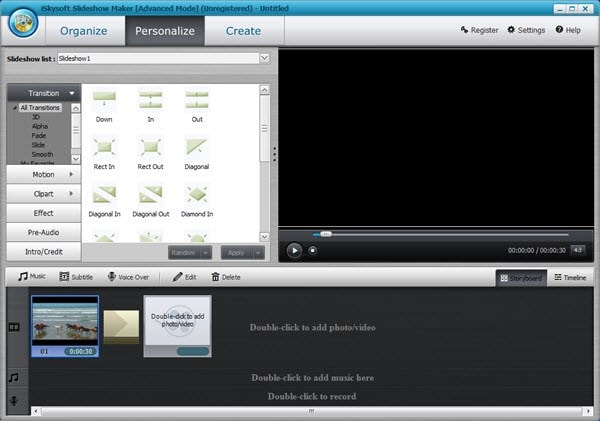
Click on the “Personalize” tab for the opportunity to customize your slideshow. Move to the Menu tab to choose your most preferred slideshow style from the various DVD templates available to you.
And you can choose to add your favorite music to your slideshow. Simply drag and drop the music files to the program and drag it to the part you want it on your slideshow.
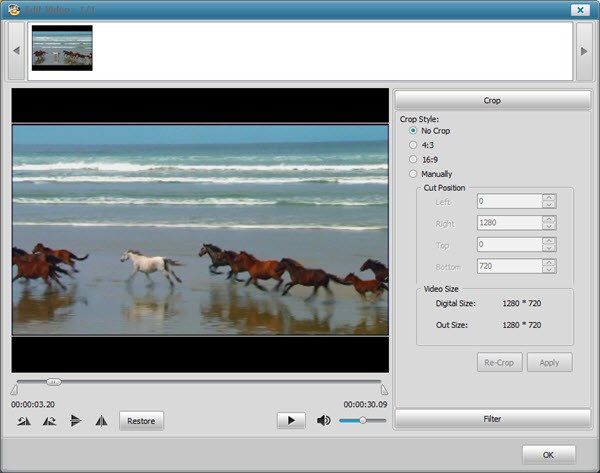
Step 4 Edit slideshow
You have the option of editing your slideshow videos or pictures. You only need to double-click on a picture or video you wish to edit.
Step 5 Create slideshow on Windows
This will be the last step to create slideshow Windows 7. Click on the "Create" tab to automatically create and publish your slideshow.
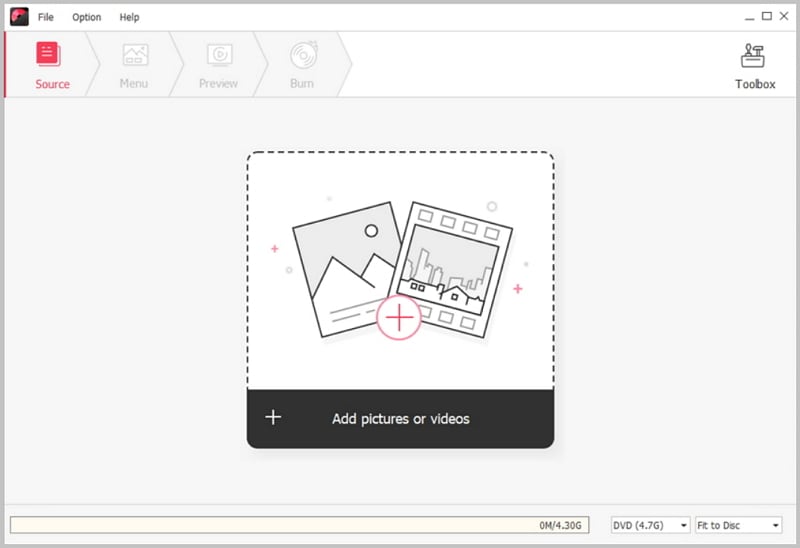
Burn Slideshow to DVD on Windows 7, 8, 10
You have the option of burning the slideshow on DVD. You can download and install the iSkysoft DVD Creator for Windows. This is a powerful DVD burning software that burns high-quality Blu-ray DVD. In addition to a user-friendly interface, the tool burns photos or videos captured with iPad, camcorder, iPhone and iPhone on DVD. It also burns any of such photos or videos downloaded from online sources.
- Burn Blu-ray videos with BD (25G) or BD DL (50G).
- Burn DVD from any format videos in high quality.
- Convert homemade videos, online videos, etc to DVD.
- Provide editing tools and free DVD menu templates.


