


As you may already know, the best moments of our lifetime are captured in photos. To revive these memories, you can always create a photo slideshow. But if you would like to spice up your photo slideshow, you should consider adding your favorite music to a slideshow. A good soundtrack enhances the vibe of a photo slideshow and makes it much more compelling. In this article, we discuss how to add music to a slideshow using the right program.
The Best Tool to Add Music to a Slideshow - Filmora Video Editor
Filmora Video Editor is all you need to create slideshows from images, audio recordings or video clips, add music, personalize them and turn your memorable life stories and favorite moments into a customized digital and alive frame. The program comes with advanced and top-notch features that make it the number 1 program on the web for creating high-quality slideshow movies and adding music to a slideshow.
Why Choose This Slideshow Maker:
- Easily transform your photo and videos to amazing slideshows with music.
- It supports almost all audio, photo, and video formats.
- You can export and share your slideshows on YouTube, Mac, TV, Apple devices and more.
- Despite its limitless features, the program is easy to use.

Steps to Add Music to Slideshow using Filmora
Once you install the software on your PC or Mac, you'll be able to create slideshows by arranging your files based on your preference, rotate, crop, add text, use cliparts, add intro and credit, adjust brightness, access the filter and effect function, use different templates, repair red eyes, edit your videos according to your desires and do so much more.
Step 1. Launch the Slideshow Maker
First, you'll have to download and install the program. You can then run the program once the installation process is complete.
Step 2. Add Picture Files
The software comes with a built-in media browser that allows you to import pictures and videos with ease. Click "Import" icon to activate it. Once the photos and videos are added to the library, drag and drop them in timeline to arrange them.
Note that you can also drag the media files out of the program to delete them. Moreover, the editing buttons, such as rotate, delete, and edit are easy to access.

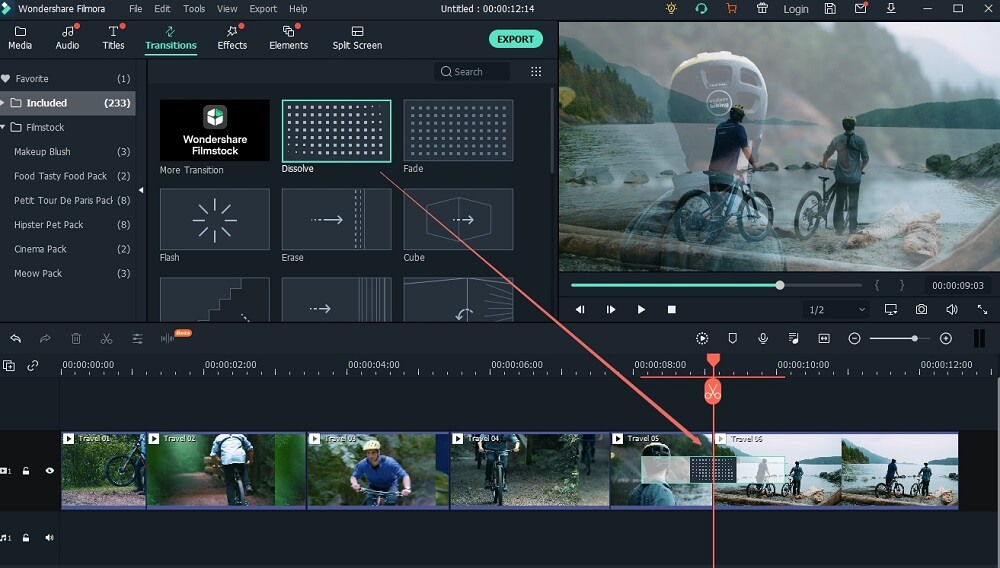
Step 3. Add transitions
When importing pictures and videos to the program, add transitions based on your preference. You should know that over 100 transitions are included. Add a transition to a picture or video slide by dragging and dropping your desired transition.
You can also change the duration of clips as well as the background of any transition. To make all your clips have same lengths, check the "Apply to all clips" option. Note that only the 3D and General styles allow Mac users to change the backgrounds to local images or pre-design papers.
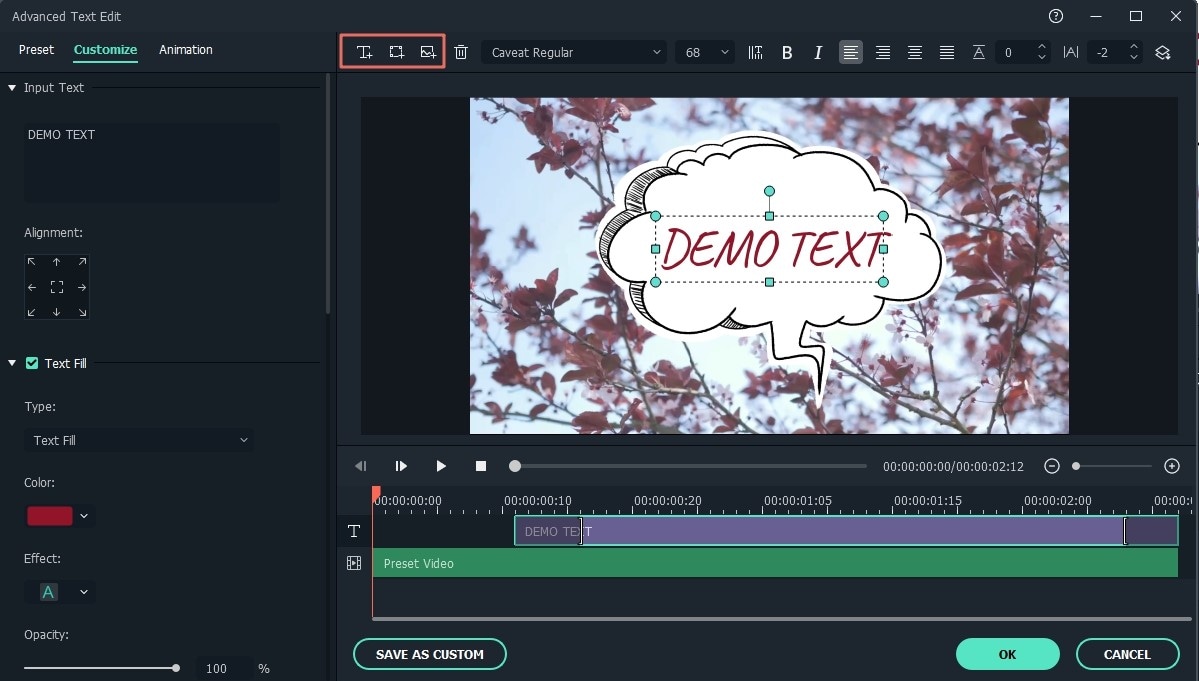
Step 4. Edit Pictures
Double click any picture or video or access the editing dialog by clicking the "Edit" button once you have selected an item. Click the "Return" button to confirm the changes or "Restore" to discard. The "Crop," "Caption" and "Filter" panels can be accessed from photo editing windows.
a. Add Captions: Choose a caption template, which can also be previewed even before you can start editing texts. If you are keen enough, you'll see the caption you added on the screen turn to animated. Click texts to access the editing mode.
b. Crop Pictures: The interesting part of a photo can be easily cropped in 4:3, 16:9 and other aspect ratios. You just need to select the aspect ratio and then adjust it on the "Preview" window. Click "Apply" to confirm changes or "Return" to go back to the main window.
c. Apply Effects: There are over 15 effects that you can choose to enhance your pictures instantly.
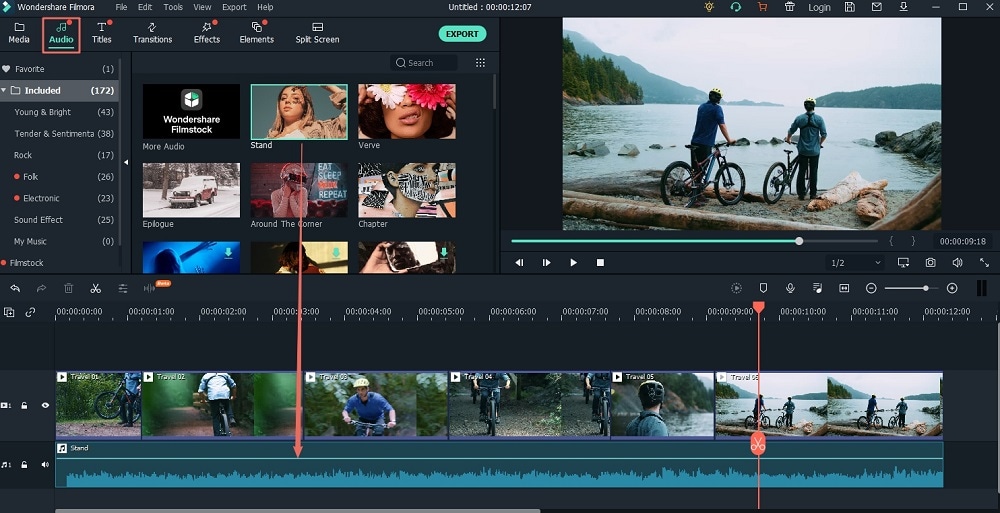
Step 5. Add Music to the Slideshow
Drag and drop the music files to the slideshow, and then you'll see various buttons on the audio bar. Click the "Play" button and preview the music or cut the preferred portion by selecting the scissors button. Furthermore, you can add a voiceover to the slideshow movie by clicking the "Voiceover" button located just under the preview window.
A window that looks like the one shown below will then show up. Set the perfect position to insert a narration and click the red button to start speaking. When done, select the "Stop Recording" button, and then the voiceover will be added, but it will not appear on the music track.
Step 6. Create Slideshow with Music
Preview the slideshow and if you think that it's okay, go to the "Export" menu located at the top of the software's interface and choose how you want to share it with others. You can also select the "Export" button located on the middle-left hand side. All users can always upload their slideshows to YouTube or Facebook, burn to DVD, export to iPhone, iPad, iPod or Apple TV.


