With so many accessible ways to shoot videos and take photos, everyone has multiple media files that should either be preserved for feature reference or shared with relatives and friends. The best way to store or share your videos, photos, and audio files with special memories is to make slideshow movies. In this page, we outline the process on how to make a slideshow movie on Mac using the best slideshow movie maker ever developed.
The Best Tool to Make a Slideshow Movie on Mac
iSkysoft Slideshow Maker for Mac is programmed with great editing features that allow you to make slideshow movies that can impress everyone. It weaves videos and photos into an amazing slideshow movie that can be directly uploaded to YouTube, Facebook, iPhone, Apple TV, iPad or burned to DVD. The process of creating slideshow movies is simple since you simply need to collect your files, customize them based on your desires, and make super personalized DVD slideshows like a professional. (iSkysoft Slideshow Maker for Windows is also available.)
Why Choose This Slideshow Movie Maker:
- You can add photos and videos to make slideshow movies.
- Enable editing tools to personalize your photos and videos.
- You can repair red-eyes on your photos.
- Pictures can be rotated from any angle up to 360 degrees.
- The Pre Audio feature allows you to play an intro in your video and audio files.
- Photos and videos can be extracted in an attractive way by using the filter.
- A built-in trimmer feature enables users to stitch music and audio files as per their needs.

Steps to Make a Slideshow Movie on Mac (macOS Sierra)
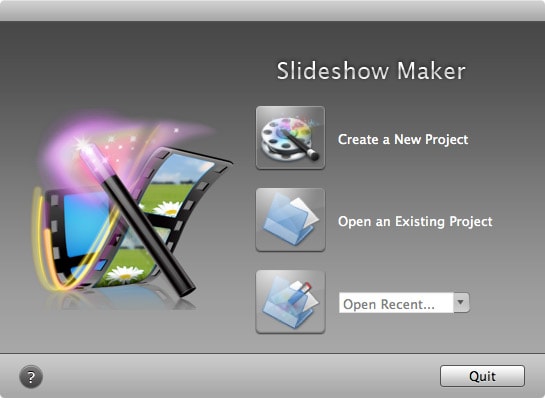
Step 1 Launch the Slideshow Movie Maker
Download the program and drag the set-up file to " Applications" to install the program on your computer. You can then double-click on the software's icon to launch it. The main interface looks like the one shown in the image below.
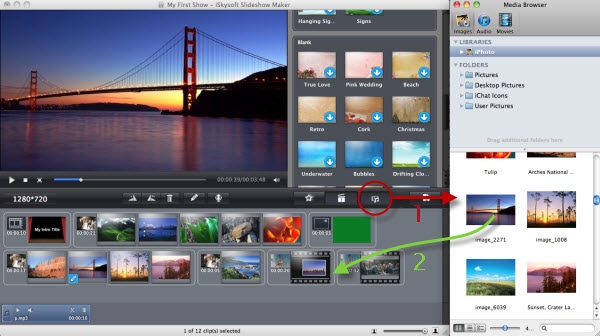
Step 2 Add Picture or Videos
Hit the "Media-Browser" icon to activate it and import videos, audios, and images with ease. When the media files are added on the story-board, drag and then drop particular slides to arrange them. You should know that you can delete a media file in this step by just dragging it out of the program.
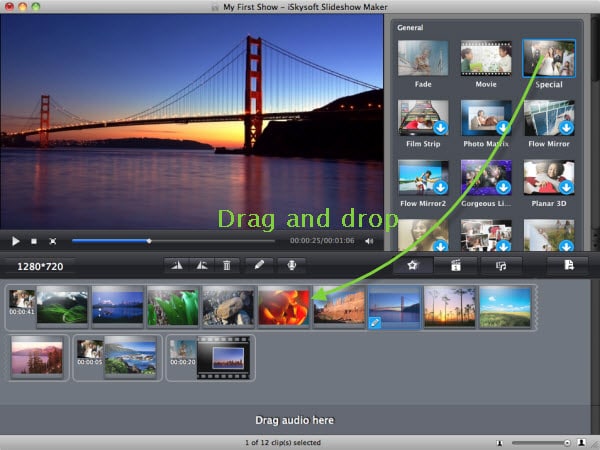
Step 3 Change Styles
When videos/photos are uploaded to the program, random themes are applied automatically. As a user, you can always keep or change them at any time. There are over 30 themes/styles included and to add a new Style or to replace the existing one, you just need to drag and drop the preferred one. You can also drag a video or photo from a style to another. An alternative method involves increasing the clips in a Style as shown in the image below. To activate this dialog, just mouse over any Style and then select the setting icon once it appears.
Right-click any slide to access the menu from where you can select the individual length of your clips by the "Duration" option. Alternatively, you can make all your clips have the same duration by checking the "Apply to all clips" option.
Step 4 Edit Pictures and Videos
Editing tools that this program comes with enables you to customize slideshows effortlessly. Generally, you can double-click a video/photo or click the "Edit" button just after you have selected an item so as to access the editing dialog. Confirm the changes by clicking the "Return" button or discard the changes by selecting the "Restore" button.
Three panels can be accessed from photo editing windows. These includes Filter, Caption, and Crop.
a. Add Captions: Choose a caption template, and then you'll be free to preview it even before you can start editing texts. The caption added to the screen turns to animated immediately. Enter the editing mode by clicking the text.
b. Crop Photos: Choose your desired aspect ratio and then adjust it in the preview window. Crop the interesting part of a photo and click the "Apply" option to save the changes or return to the primary window by selecting the "Return" button.
c. Apply Effects: Choose from over 15 effects and enhance the photos instantly.

Step 5 Add Music to the Movie Sldieshow
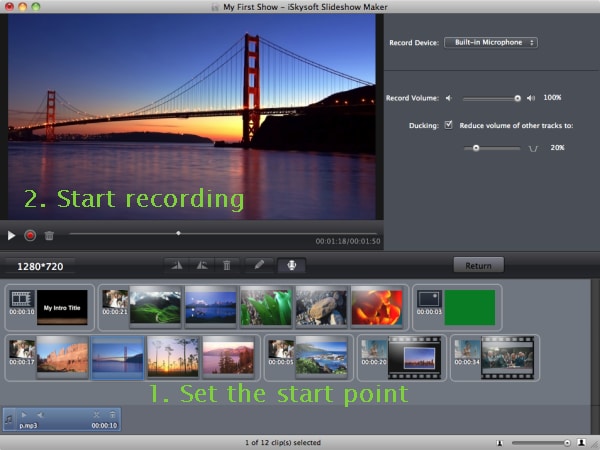
When music files are added, you'll see a number of buttons on the audio-bar. Simply select the "Play" button to preview or cut a desired portion of the music by hitting the "scissors" button. Furthermore, you can also add a voice over by clicking the "Voiceover" button and then record your narration.
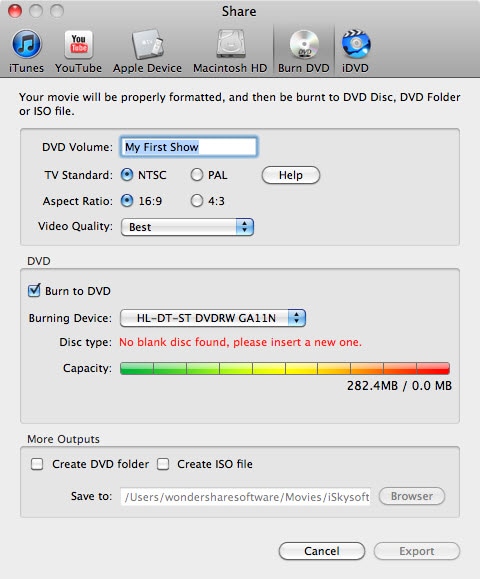
Step 6 Create Slideshow Movie on Mac
Preview the slideshow movie to determine if you can use it as the final output. If you like it, you can either go to the "Share" menu located at the top of the software's interface or select the "Share" button located at the middle left-hand side of the program's interface and select how you would like to share it with others.